2.Spring 环境的搭建
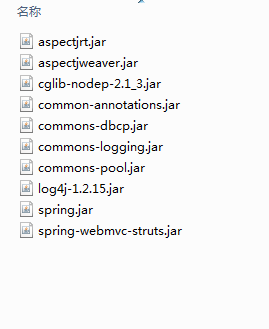
1.Spring的jar:
aspectjweaver.jar和 aspectjrt.jar:切面编程(AOP) 的jar
common-annotations.jar:JSR-250中的注解,如@Resource/@PostConstruct/@PreDestroy
spring-webmvc-struts.jar:Spring对struts 1.x的支持
2.创建配置文件beans.xml:
在类路径src下创建一个beans.xml文件。内容模版如下:
<?xml version="1.0" encoding="UTF-8"?>
<beans
        xmlns="http://www.springframework.org/schema/beans"
        xmlns:xsi="http://www.w3.org/2001/XMLSchema-instance"
        xmlns:context="http://www.springframework.org/schema/context"
        xmlns:aop="http://www.springframework.org/schema/aop"
        xmlns:tx="http://www.springframework.org/schema/tx"
        xsi:schemaLocation="http://www.springframework.org/schema/beans
           http://www.springframework.org/schema/beans/spring-beans-2.5.xsd
           http://www.springframework.org/schema/context
           http://www.springframework.org/schema/context/spring-context-2.5.xsd
           http://www.springframework.org/schema/aop
           http://www.springframework.org/schema/aop/spring-aop-2.5.xsd
           http://www.springframework.org/schema/tx
           http://www.springframework.org/schema/tx/spring-tx-2.5.xsd">


</beans>
提示:该配置模版可以从spring的参考手册或spring的例子中得到。配置文件的取名可以任
意,文件可以存放在任何目录下,但考虑到通用性,一般放在类路径下。
3. 实例化spring容器:
方式一:
在类路径下寻找配置文件来实例化容器
ApplicationContextctx = new ClassPathXmlApplicationContext
(newString[]{"beans.xml"});
方式二:
在文件系统路径下寻找配置文件来实例化容器
ApplicationContextctx = new FileSystemXmlApplicationContext
(new String[]{“X:\工作目录下\src\beans.xml“});
提示:Spring的配置文件可以指定多个,可以通过String数组传入。
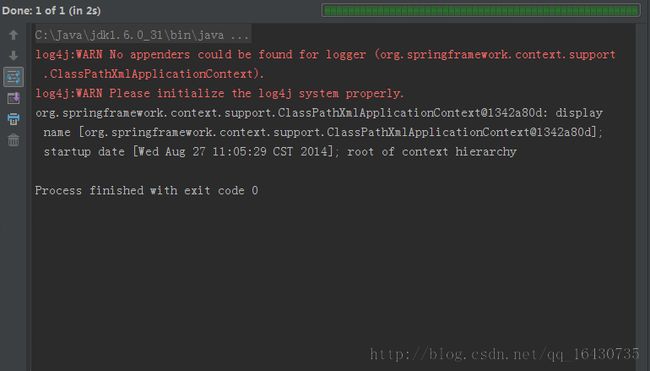
在junit4.4下测试:
    @Test
    public void testInstanceSpring() throws Exception {

        ApplicationContext applicationContext = new ClassPathXmlApplicationContext("beans_model.xml");

        System.out.println(applicationContext);

    }
以上表示Spring环境搭建成功了。
那么让我们来用获取一个Bean:
package com.zyy.service;

/**
 * Created by CaMnter on 2014/8/27.
 */
public interface ISpring_2 {

    void message();

}
package com.zyy.service.impl;

import com.zyy.service.ISpring_2;

/**
 * Created by CaMnter on 2014/8/27.
 */
public class ISpring_2Bean implements ISpring_2 {

    public void message() {

        System.out.println("Hello Spring");

    }
}
在junit4.4下测试:
    @Test
    public void testGetBean() throws Exception {

        ApplicationContext applicationContext = new ClassPathXmlApplicationContext("beans_model.xml");

        ISpring_2 iSpring_2 = (ISpring_2) applicationContext.getBean("iSpring_2");

        iSpring_2.message();

    }
注意:这里值得一提的就是bean节点的属性。我们定义一个bean的时候可以用id或者name指定这个
bean在getBean时的String值,作用的相同的。但是id和name的区别在于id不能有特殊字符比如
(/xxx)之类的。相反,name的值就能有(/xxx),这点很重要,因为spring在和struts1或者
struts2搭建的时候,如果要把action交给spring管理,那么spring配置bean的名字时就要和
action中的path保持一致,这就会出现”/”符号,这样id就难以实现。


