Oracle10.2.0.1 For CentOS6.0 安装文档(三)
安装
解压oracle安装包
zcat 10201_database_linux_x86_64.cpio.gz| cpio –idmv
或者分步
gunzip 10201_database_linux_x86_64.cpio.gz
cpio -idmv < 10201_database_linux_x86_64.cpio
解压完以后查看文件目录
[oracle@localhost DataFiles]$ ls /home/zhaoyj/database/stage/Components/oracle.jdk/1.5.0.17.0/1/DataFiles
all.jar
启动图形界面
核实一下图形界面是否安装,安装了
[root@oracle11gr2 Packages]# rpm -qa |grepxorg-x11-server
xorg-x11-server-common-1.7.7-26.el6.x86_64
xorg-x11-server-utils-7.4-15.el6.x86_64
xorg-x11-server-Xorg-1.7.7-26.el6.x86_64
用xcolck查看图形界面是否安装
[root@oracle11gr2 oracle]# which xclock
/usr/bin/which: no xclock in(/usr/lib64/qt-3.3/bin:/usr/local/sbin:/usr/sbin:/sbin:/usr/local/bin:/usr/bin:/bin:/root/bin:/root/bin)
安装xclock
包:xorg-x11-apps-7.4-10.el6.x86_64
yum install xorg-x11-apps –y
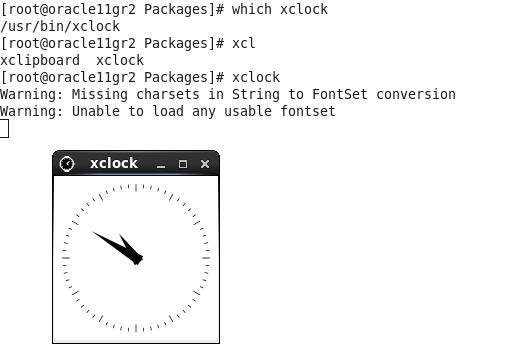
安装完之后,看如下截图
如果没有启动图形界面的话需要运行startx命令启动
[root@oracle10g database]# startx
xauth: creating new authority file /root/.serverauth.4310
xauth: creating new authority file /root/.Xauthority
xauth: creating new authority file /root/.Xauthority
_XSERVTransSocketUNIXCreateListener:...SocketCreateListener() failed
_XSERVTransMakeAllCOTSServerListeners:server already running
Fatal server error:
Cannot establish any listening sockets -Make sure an X server isn't already running
Please consult the Red Hat, Inc. support
at https://www.redhat.com/apps/support/
forhelp.
Please also check the log file at"/var/log/Xorg.0.log" for additional information.
然后查看一下进程
[root@oracle10g database]# ps aux |grep -i-E "xorg|x11"|grep -v grep
root 1893 0.0 3.7 139628 38732 tty1 Ss+ 17:33 0:08 /usr/bin/Xorg :0 -nr-verbose -auth /var/run/gdm/auth-for-gdm-nPMLFM/database -nolisten tcp vt1
root 3260 0.0 0.5 230780 5896 ? S 17:55 0:00 /usr/libexec/ibus-x11 --kill-daemon
设置DISPLAY变量
以下命令以root身份运行
[root@oracle11gr2 home]# /usr/bin/xdpyinfo|head -2
name of display: :0.0
version number: 11.0
[root@oracle11gr2 Packages]# echo $DISPLAY
:0.0
[root@oracle11gr2 Packages]# xhost +
access control disabled, clients canconnect from any host
ps:如果现实上述信息,表示成功
xhost控制什么人可以访问当前主机上的X-Window
切换到oracle用户
su oracle
更改语言环境,否则弹出图形界面的时候会出现乱码
[oracle@localhost ~]$ export LANG=en_US
[oracle@localhost ~]$ echo $LANG
导出DISPLAY变量
[oracle@localhost ~]$ export DISPLAY=:0
运行runinstaller
