Oracle ADF 新手教程(一) JDeveloper IDE
| Purpose | Duration | Application |
|---|---|---|
This tutorial shows you how to work with the JDeveloper IDE. To see the complete application you will create, click the Download button to download a zip of the finished application, and unzip it to your JDeveloper mywork folder. |
105 minutes | |
-
Start JDeveloper by selecting Start > Programs > Oracle Fusion Middleware 11.1.2.0.0 > JDeveloper Studio 11.1.2.0.0

If a dialog box opens asking if you would like to import preferences from a previous JDeveloper installation, click NO.
-
In the Select Role dialog, choose Studio Developer and click OK.
Shaping, which is based on the role of the user, allows the JDeveloper environment to tailor itself. It does this by removing unneeded items from the menus, preferences, new gallery, and even individual fields on dialogs. Read more...
Close the Tip of the Day window.
-
Once loaded, the JDeveloper IDE appears. The very first time you open JDeveloper, the Start Page displays. You can re-invoke the Start Page later by choosingHelp > Start Page.
Notice the various options available to help you learn about JDeveloper. After exploring some of these options, close the Start Page by clicking the X on its tab (the X appears when you mouse over the tab).
-
Click the New Application link in the Application Navigator.
-
In the New Gallery, choose the Custom Application and click OK.
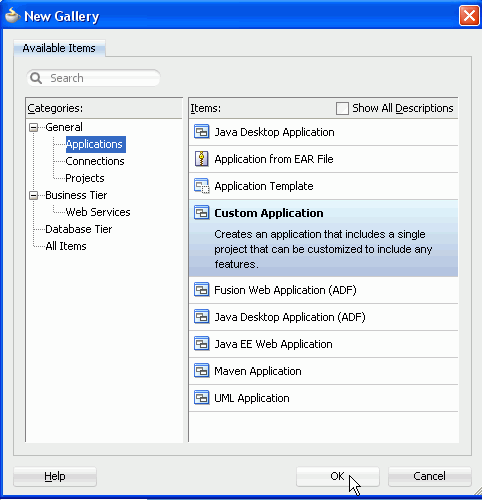
-
In the Name your application page of the Create Custom Application wizard, modify the default application name to MyFirstApplication, and make sure that the Application Package Prefix is empty. Note that the Directory Name changes accordingly. Click Next.
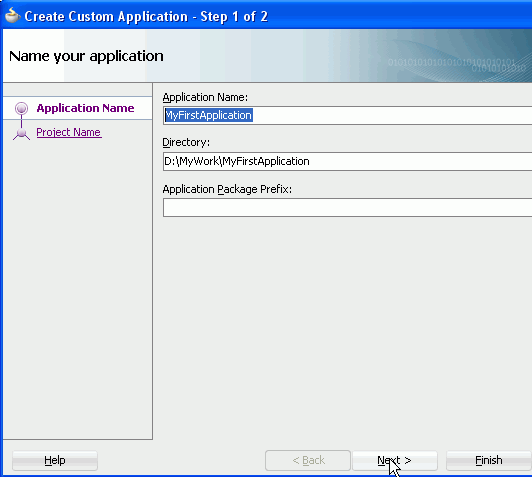
-
In the Name your project page of the wizard, change the default project name to MyProject, and in the list of available project features, select JavaServer Faces (JSF) and click the Add button to move it into the selected pane.
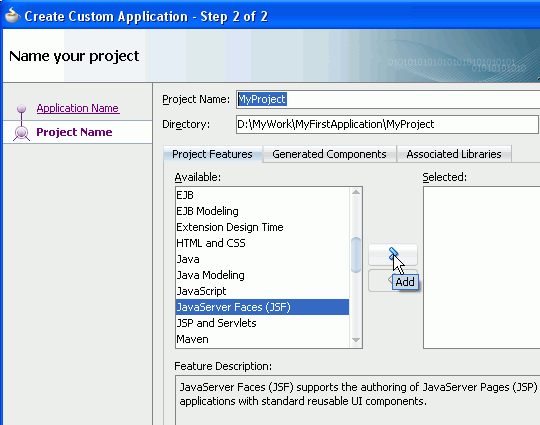
Notice that Java, JSP and Servlets, and XML are also moved into the Selected pane.
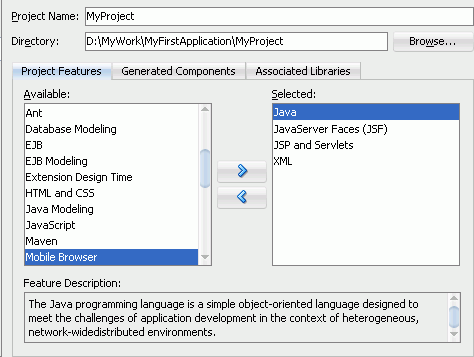
Click Next.
-
In the Configure Java settings page of the wizard, accept all defaults and click Finish.
The application is the highest level in the control structure. It is a view of all the objects you need while you are working. An application keeps track of all your projects while you are developing your Java programs. Read more...
-
In the Application Navigator, projects are displayed as the second level in the hierarchy under the application. The Application Navigator should look like this:
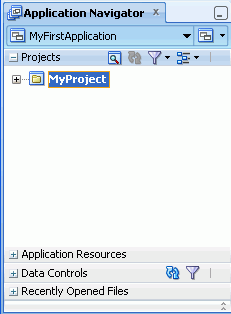
The Application Navigator is the main JDeveloper window from which you access the components of your application. Read more...
Notice that the project folder is a child of the application folder.
-
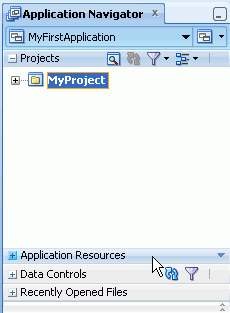
In the Application Navigator, notice the names of three accordion panes
-
Click an accordion name to expand it.
-
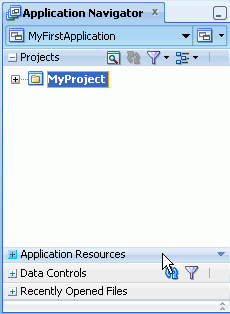
Click the name of an expanded accordion to collapse it.
-
Accordions are also available in other JDeveloper panes, such as the Structure window or Resource Palette.
-
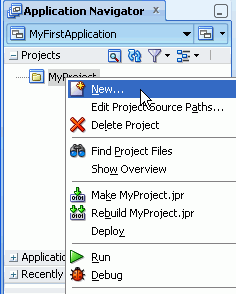
Right-click the MyProject node in the Application Navigator and select New... from the context menu.
-
The New Gallery displays. By default, the first category, General, is highlighted in the Categories list. The other categories enable you to work with other JDeveloper technologies to build the various tiers of an application.
In the Items list in the right-hand pane select Java Class. Then click OK.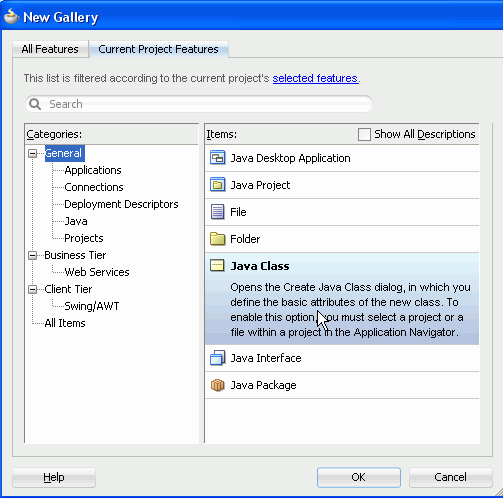
-
In the Create Java Class dialog, change the default class name to Dog.
Accept all other defaults and click OK.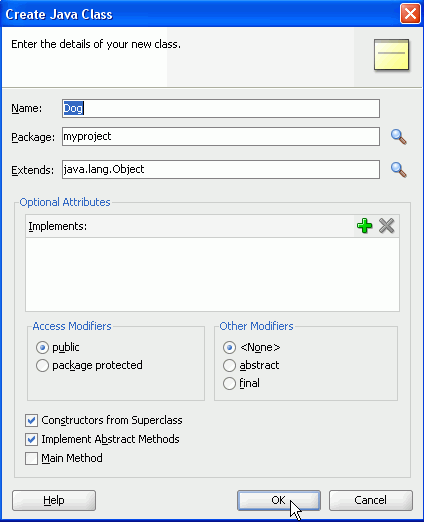
-
The new class opens automatically in the source editor, displaying the skeleton class definition.
Add a method to the class. After the constructor, press [Enter] to create a new line, and type the following code:public String sayHi()
Notice that the line that you just entered has a wavy red line under it, indicating a problem with the syntax. There are also red boxes in the right margin of the source editor. If you mouse over these boxes or over the wavy red line, a tooltip displays information about the error or errors. You see other examples like this in the Working with Code Assist topic later in this tutorial.
-
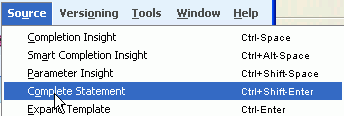
At the end of the line, press [Ctrl] + [Shift] + [Enter] and JDeveloper provides auto-completion of the method structure, and some of the error indicators disappear. However some indicators remain, showing that the syntax is still not complete.
Notice that auto-completion is also accessible from the Source > Complete Statement menu option.
-
Add code to provide the missing return statement.
In the blank line between the two curly braces that were added to the method, add the following code:
return " woof "+ "Kate";

Notice that when you type the first double quote symbol ("), JDeveloper automatically provides you with the second double quote, enclosing the cursor between them, so that you can easily type the literal. Notice also that a green box has appeared in the upper right margin to indicate that there are now no syntax errors.
Code templates are a feature of the Java Source Editor. Code templates assist you in writing code more quickly and efficiently while you are in the source editor. You can edit existing templates or create your own. This step shows you how to use some of the existing code templates in the Dog class.
-
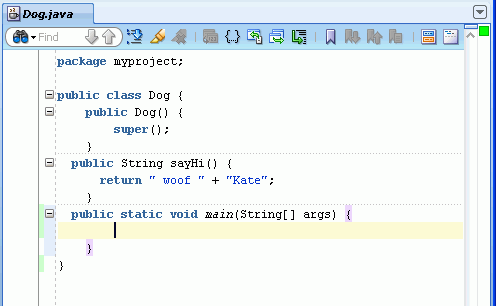
There is a code template for adding a main method to a Java class.
Press [Enter] to create a new line after the sayHi() method. Type the letter m, and press [Ctrl] + [Enter] to invoke code templates.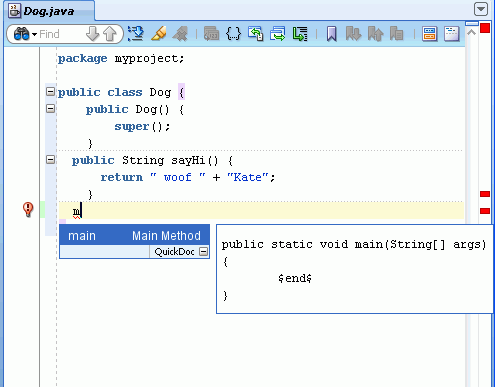
The main method template is suggested.
-
Press [Enter] again to accept the suggestion and incorporate the template.
-
Create a Dog object in the main method by adding the following code:
Dog myDog = new Dog();
If you mouse over the myDog variable, a tooltip displays to tell you that the variable has not been used.
You see other examples like this in Work with Code Assist later in this tutorial.
-
Add a new line and press [Ctrl] + [Enter] to see the list of code templates that are available.

-
You decide to create an integer-based loop using a for type of code template. Type fo to restrict the list.
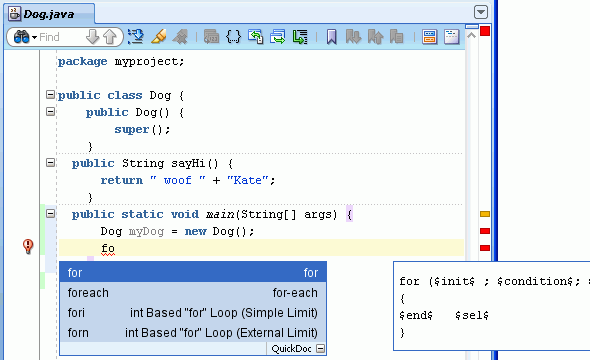
Four templates are suggested.
-
Double-click the third of the four suggestions, the fori intBased "for" Loop (Simple Limit) template, to select it.
The template code is incorporated into the file.

-
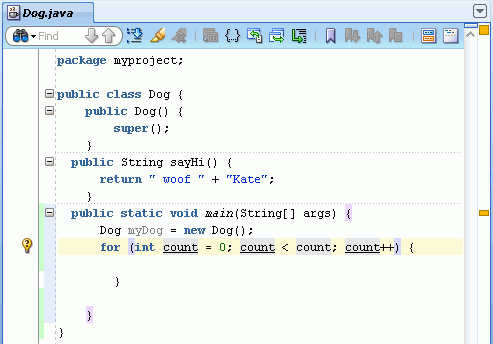
Limit the loop to 3 iterations.
-
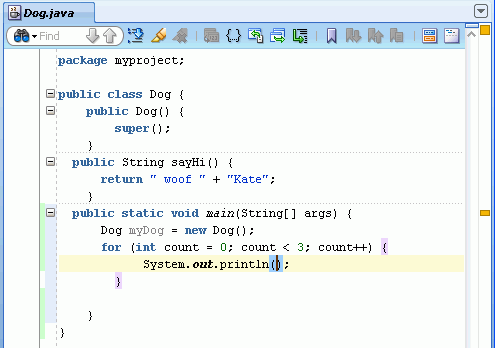
Enter a System.out.println statement.
Place the cursor on the blank line inside the curly braces of the for loop, and type sop.Press [Ctrl] + [Enter] to incorporate the template code.
-
Add code to use the loop to display the sayHi message. Inside the parentheses after println, enter the following code: count + myDog.sayHi(). Start typingcount + myDog.s and JDeveloper completes the sayHi method for you.
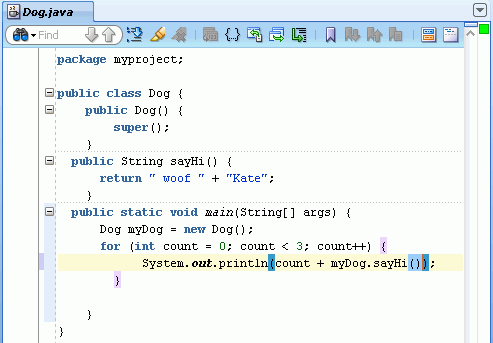
The complete line should read:
System.out.println(count + myDog.sayHi());
-
Right-click in the editor and select Reformat from the menu to have JDeveloper restructure your code.
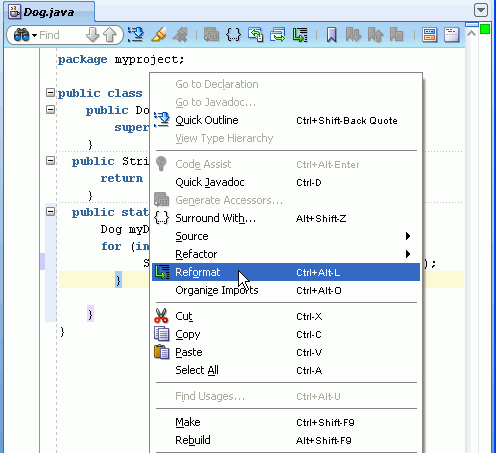
-
Your code should now look like this:
-
Save your work. Go to File > Save All, or click the Save All button in the toolbar.In code and all other cases, the file name will be in italics until it it saved.
-
In the Application Navigator or in the source editor, right-click Dog.java and select Make from the context menu.
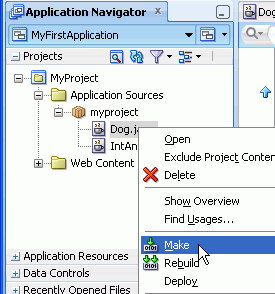
-
At the bottom right of the JDeveloper IDE, the log window should show successful compilation. If the log window does not display, use View > Log to display it ( or press [Ctrl] + [Shift] + [L]).
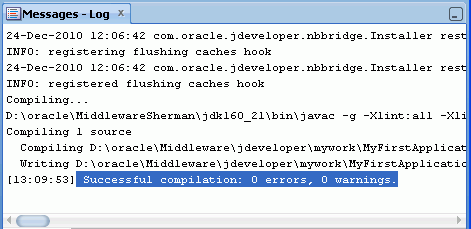 When you successfully compile a .java file, you create a .class file in the \src directory of the project. Compiling a class in JDeveloper automatically saves the .java file as well.
 Read more...
-
In the Application Navigator or in the source editor, right-click Dog.java again, and this time select Run from the context menu.
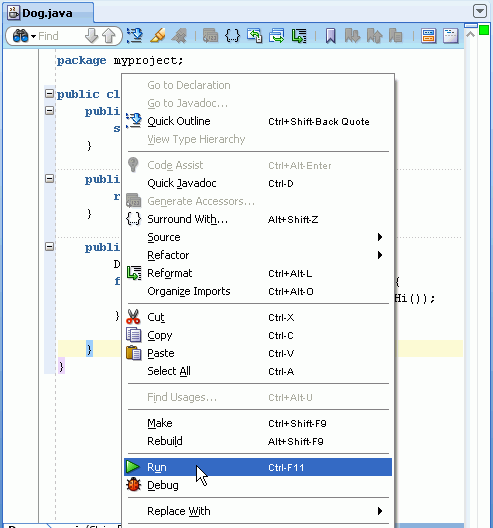
-
The log window displays 3 counts of the 'woof Kate' message.
Code Assist examines your code in the editor and provides assistance to fix common problems. Here you use the Dog class to explore some examples of the suggestions that are offered.
-
Create a Cat object.
At the start of the main method, just after the first curly brace, press [Enter] to create a new line. In the new line, enter the following code:
Cat myCat = new Cat();
-
Notice that the red wavy lines and margin indicators have again appeared. Place the mouse over a margin indicator to see what the problem is.
Notice that the popup box displays the problematic lines as well as telling you what the problem is.
-
Hover your mouse over the light bulb icon in the left hand margin of the 'cat' line. A message tells you that 'quick fixes and code assists' are available for this line.
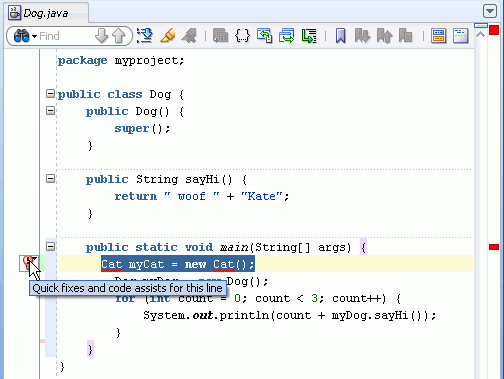
-
Click the icon to see what they are.
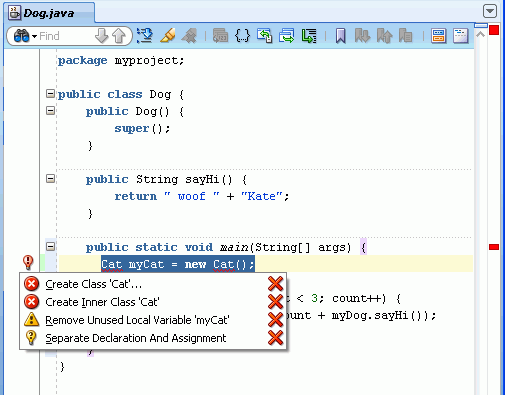
You need a Cat class to instantiate a Cat object. If you click on the first suggestion in the list offered, JDeveloper creates a class called Cat.
On this occasion you don't want to create the Cat class immediately, so you remind yourself to do it later by setting yourself a task: press [Enter] after new Cat(); to open a new line and in the new line enter the following code:
//TODO create a Cat class
-
Select View > Tasks to see a list of tasks that you have created.
-
The Tasks window displays a list of the tasks you have created (in this case, it is your only task).

-
If you double-click a task in the list (create a Cat class in our example), JDeveloper takes you to the relevant task, inserting the cursor at the start of the line.
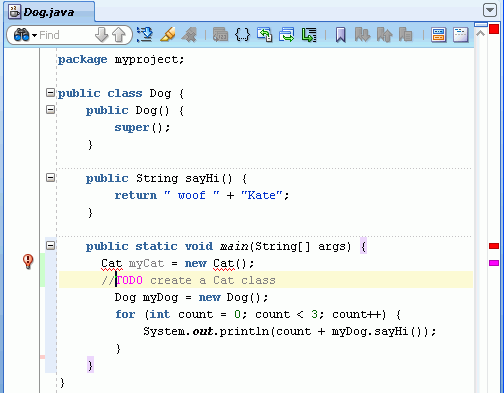
-
Notice the pink marker at the top right margin of the editor. It indicates where you have created a task. Hover over the marker with the mouse to see what the task is.
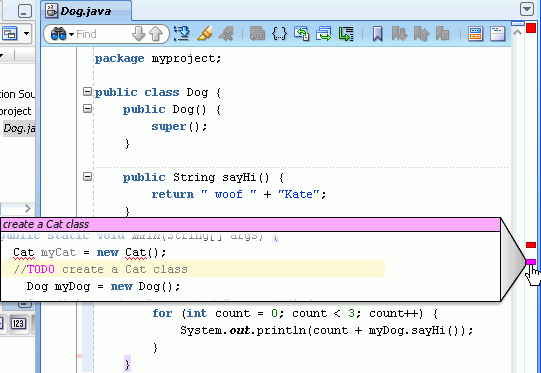
-
Comment out the line that creates the Cat object. Notice that the red markers have now disappeared, to be replaced by a green marker indicating that there are no errors in your code.
-
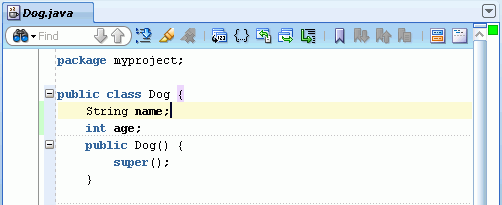
Add two variables to the class. Hit [Enter] to create a new line after the class declaration. Declare two variables as follows:
String name;
int age;
-
In the code editor, right-click and select the Generate Accessors option from the context menu.
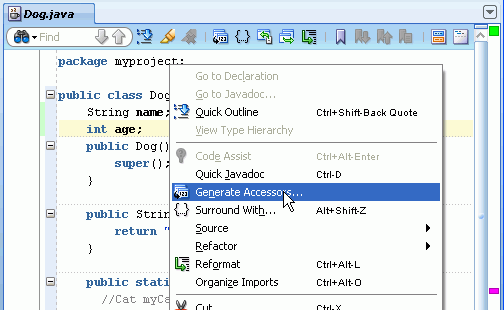
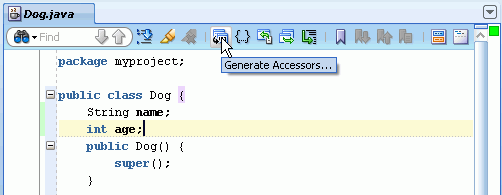
The Generate Accessors option is also available from the code editor toolbar using the Generate Accessors icon.
-
In the Generate Accessors dialog, check the Dog box to generate Getter and Setter methods for both variables.
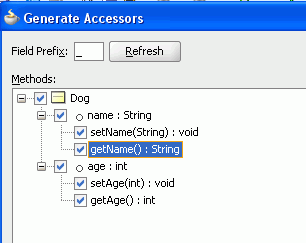
Notice that you can define the scope for the methods, and define other properties to be implemented in the setter methods such as involving listeners and verifying the new value.

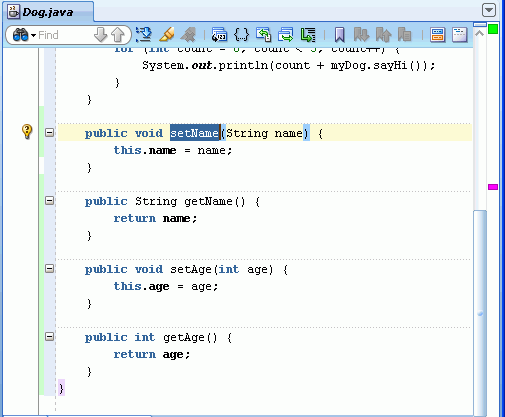
Click OK. Getter and Setter methods are generated into the Dog class
-
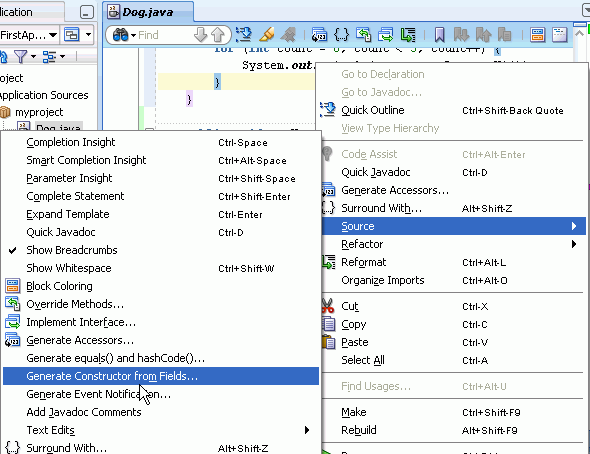
Right-click within the code editor and from the context menu select Source > Generate Constructor from Fields.
-
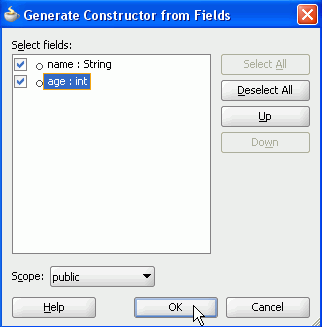
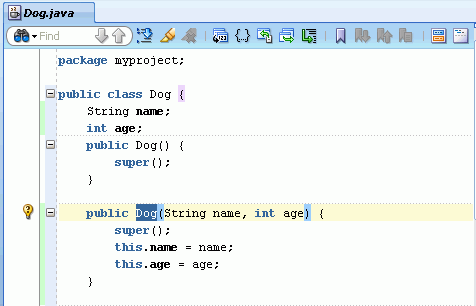
In the Generate Constructor from Fields dialog, check the checkboxes for both fields and click OK.
-
The new constructor method is added to your code.
-
Although you won't use this contructor in this tutorial, you can leave it in place just to have some more interesting code in the class.
Step 7: Use the Search and Code Highlight Feature
Using the code editor, you can search for text and display all occurrences of the specified search criteria. You can also use a highlighting facility that retrieves all occurrences of an object.
-
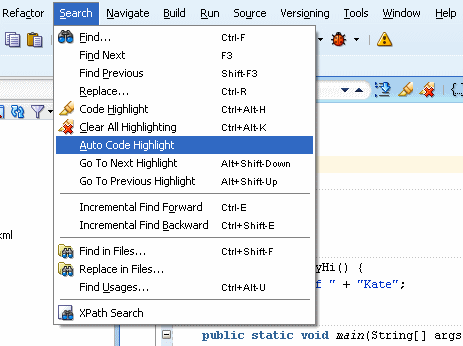
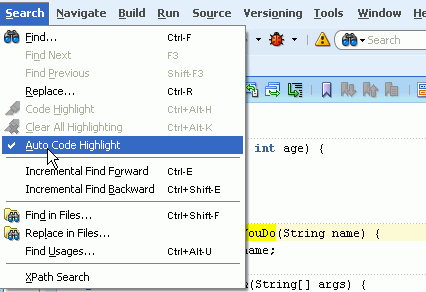
Before you begin, make sure the Search option Auto Code Highlight is not selected. Select Search from the menu, and make sure there is not a check mark beside Auto Code Highlight.
-
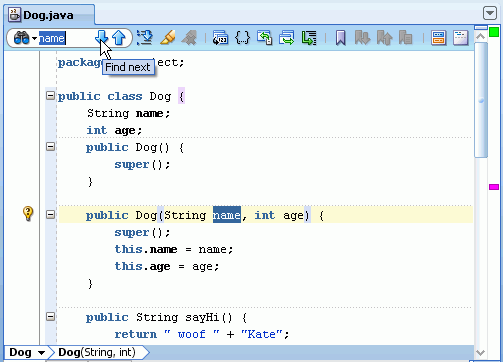
In the Search box on the left of the code editor toolbar, type name. The first instance of name found after your cursor location is highlighted in the code editor.
-
Click the Find next arrow to move to the next occurrence of the string.
-
Click the magnifying glass icon
 to view additional options and check the Highlight Occurrences option. Then, click the Find next arrow to highlight all occurrences.
Notice that the search function highlights all the occurrences of "name" in the code.
-
Click the Clear All Highlighting icon in the editor toolbar.

-
Remove name from the Search field.
-
From the menu, choose Search | Auto Code Highlight.
-
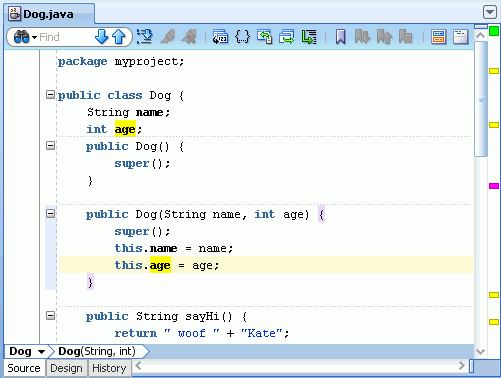
In the code editor click within the age argument of the Dog(String name, int age) constructor. Notice that the highlighted occurrences are then restricted to occurrences of the same semantic object, the age variable being excluded.
-
Now, select the age class variable to highlight all occurrences of that variable.
-
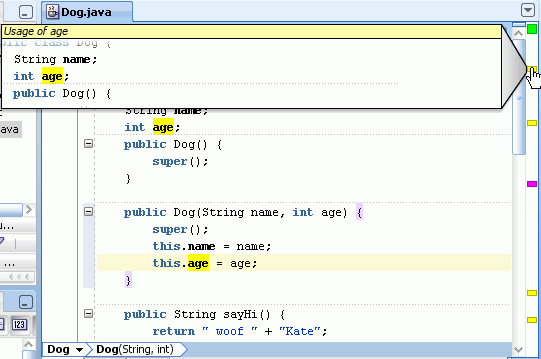
In the right margin, hover over the top yellow marker with the mouse to display the message.
-
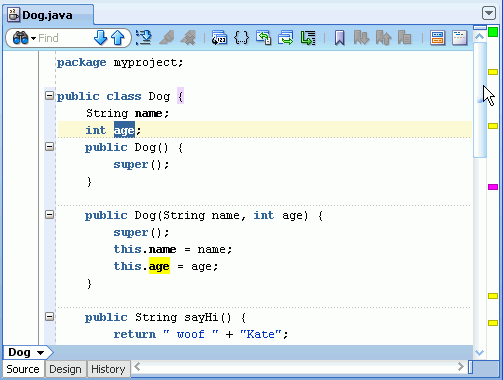
Double-click this yellow marker. This moves you to the corresponding usage in the code.
-
You can determine the way you want code insight to behave (when and how fast).
From the main menu, select Tools > Preferences.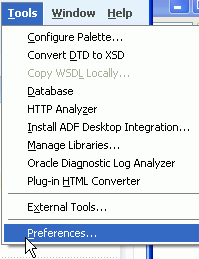
-
In the Preferences dialog, expand the Code Editor node and select Code Insight.
This is just one of the preferences you can set to customize your coding environment.
Click OK.
-
You can view the definition of a variable or method without navigating to a different file or opening a new editor.You can hold down the Shift key and then hover over a variable or method to show its definition in a ghost window. This feature makes it convenient to quickly view code without moving cursor focus from your current code.
In the Structure window, move your mouse over one of the nodes and press the [Shift] key. This way you can also display the code structure within the class structure.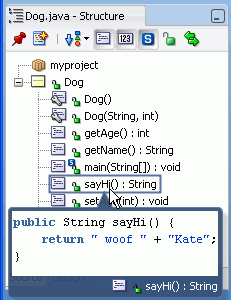
The ghost window closes as you release the shortcut keys.
-
Reformat your code by clicking the Reformat icon in the code editor toolbar.
Step 8: Refactor Your Code
Refactoring is an editing technique that modifies the code structure without altering program behavior. A refactoring operation is a sequence of simple edits that transforms a program's code but keeps it in a state where it compiles and runs correctly. JDeveloper provides a collection of refactoring operations.
-
One example of a refactoring operation is replacing a constant expression in a method body by a parameter for the method. The expression is replaced by the parameter name. The new parameter is added to the method's parameter list and to all invocations of the method.
To do this in the Dog class, right-click the literal, 'Kate' in the sayHi() method code and select Refactor --> Introduce Parameter... from the context menu.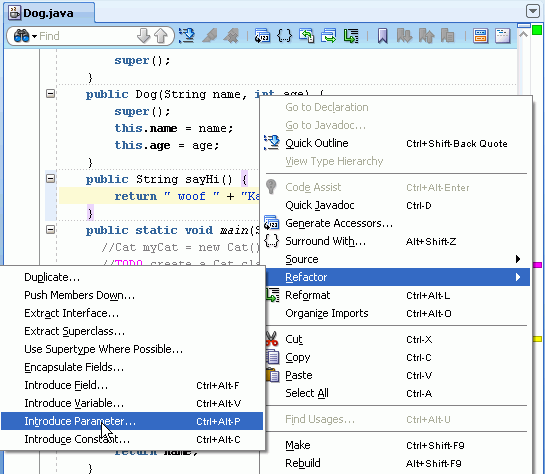
-
In the Introduce Parameter dialog, type name in the Name field, and click OK.
-
Examine the code to see the results of the refactor operation. The method declaration now contains String name in its parameter list; the parameter name has replaced the literal 'Kate' in the method return value, and the literal 'Kate' has been inserted as a parameter in the method call.
-
Another refactoring operation is to derive a new interface from selected methods in an existing class.
To do this in the Dog class, right-click the Dog class declaration method, and from the context menu, choose Refactor > Extract Interface...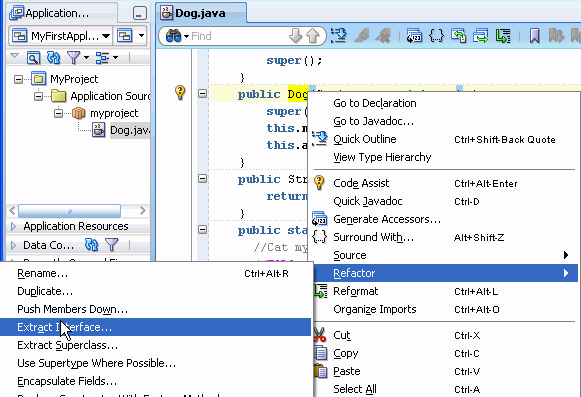
-
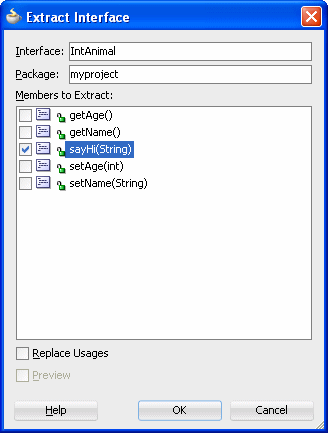
In the Extract Interface dialog, type IntAnimal as the name of the interface, and select the sayHi(String) method in the Extract Interface list. Click OK.
-
The IntAnimal interface is created and opens in the source editor.
-
Another simple refactoring operation is to rename a method, whereby every occurrence of the method name is replaced by the new name.
To do this in the IntAnimal interface, right-click in the sayHi() method, and from the context menu, choose Refactor --> Rename. -
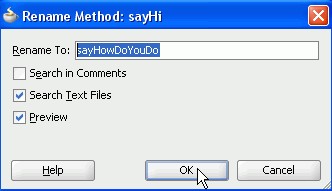
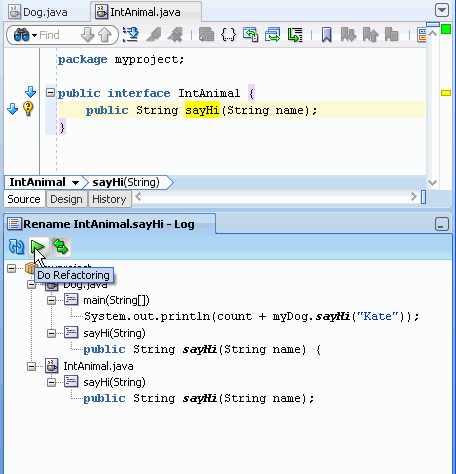
In the Rename Method dialog, change the sayHi() method name to sayHowDoYouDo. Select the Preview check box to see all the usages that are affected by the name change. Click OK.
-
The log window lists all usages of the sayHi() method. You should examine each usage to check that you want each occurrence of sayHi() to be changed tosayHowDoYouDo()If so, click Do Refactoring in the log window toolbar.
-
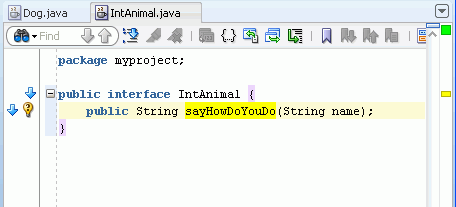
Note that the name change has taken place in the IntAnimal interface...
-
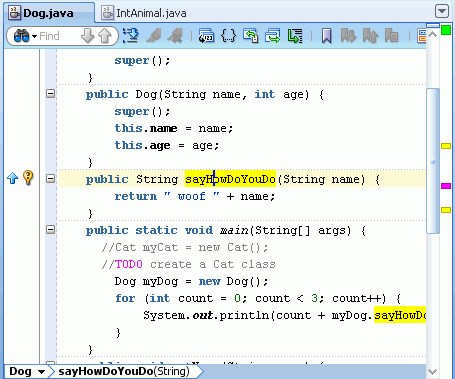
.....and in the Dog class.
-
Click Navigate in the menu bar. The Back menu option allows you to return to the previous location.
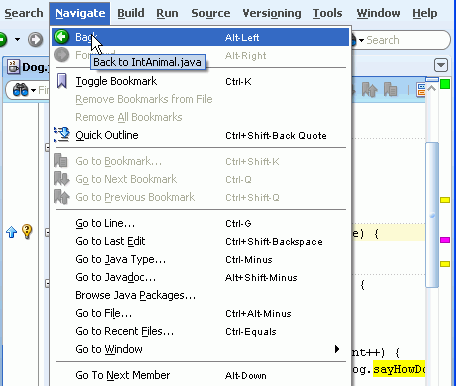
This option is also available from the toolbar, using the Back button. Clicking the down arrow next to the Back button, shows the history of the navigation.
-
From the menu select Search > Auto Code Highlight to turn off the code highlight option. (You can also click the Clear All Highlighting icon in the code editor toolbar.)
JDeveloper has a built-in history feature. This local history does not require a version control system to provide a recent change record and visual "diff" between versions. Versions are automatically created based on user interactions such as Save, Compile, Rename, and so on.
-
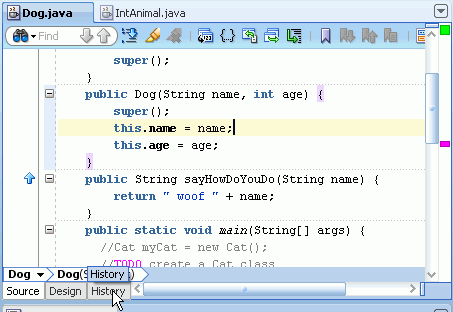
Navigate to the Dog.java editor window. Notice the three tabs at the foot of the code editor window. Click the History tab.
-
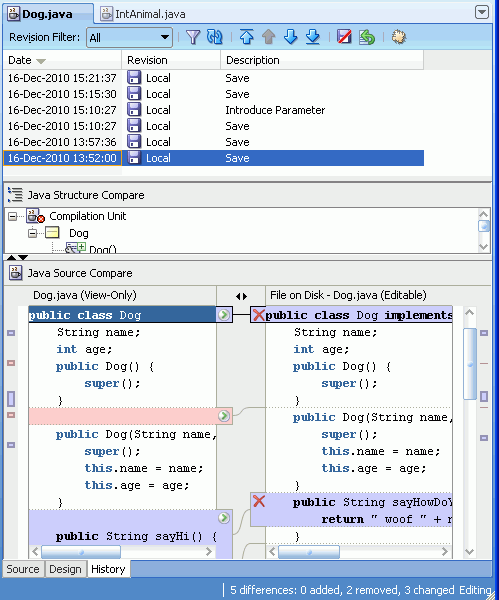
The History window displays. The top part of the window contains a list of revisions and dates, while a list of changes to the code displays in the bottom part of the window. The two windows are synchronized, so that the detail in the bottom part of the window matches the selection in the top part.
-
The lilac-colored boxes indicate changes to the code.
In the top portion of the window, select Introduce Parameter near the top of the list.In the bottom left portion of the editor, position your mouse over the green right-pointing arrow in the lilac box that contains the sayHi() method declaration. Notice that a message displays, indicating that clicking the green arrow enables you to replace the adjacent difference. In this case, clicking the green arrow would revert the sayHowDoYouDo() method to sayHi(). Don't revert now. -
The center part of the History window has an area where changes to the structure of the Java code are recorded. In this example it contains the three methods in the Dog class; the red minus sign next to the sayHi() method indicates that this method has been removed and the green plus sign next to thesayHowDoYouDo() method indicates that this method is an addition. Hovering the mouse over these symbols displays the appropriate message.
Step 10: Navigate through Source Code
-
Click the Source tab for the Dog.java file in the editor. Click the arrow icon next to the sayHowDoYouDo() method in the Dog.java file.
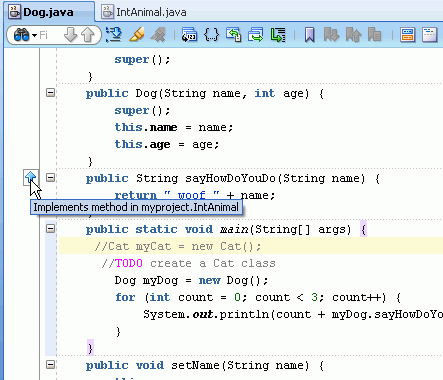
You can navigate from one part of the code to another related part. One example of this is navigating from a method to its declaration in an interface.
 Read more...
 -
JDeveloper takes you to the IntAnimal interface where the method is declared and highlights the appropriate line for you.
-
To return to where you were in the Dog class, click the green Back button in the toolbar.
You can also navigate backwards or forwards using the [Alt] + [left] or [right] arrow key.
-
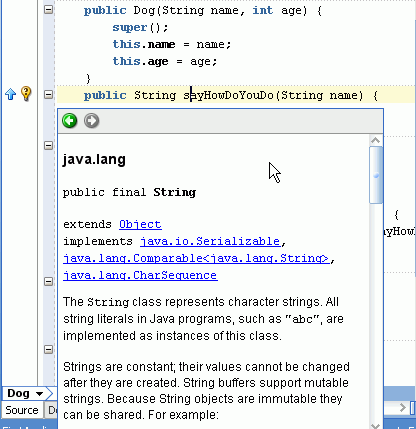
You can also navigate to the Javadoc for a given element. In the Dog.java file in the editor, right-click within the sayHowDoYouDo() method. From the context menu, choose Quick Javadoc.
-
The Javadoc popup window displays additional information about the selected method.
-
Click the String link to get more information about the String class.
-
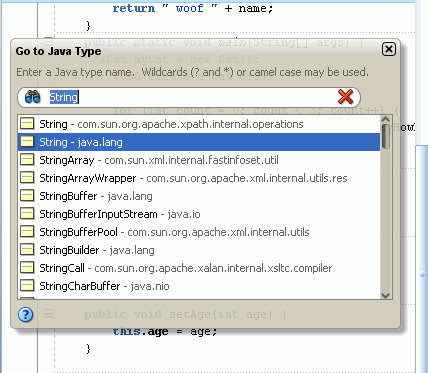
Click [Ctrl] + [-] (minus key) to pop up the Go to Java Type dialog. It allows you to display Source or Javadoc information of the selected class.
In the Name field type String then press Enter on the String - java.lang highlighted suggestion.
-
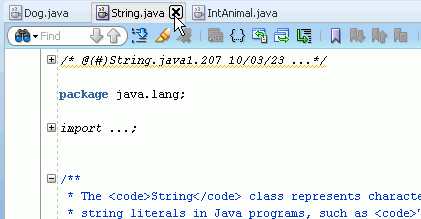
The source code for the String class opens in the editor.
Close the String.java tab.
-
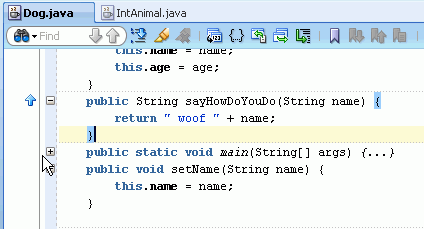
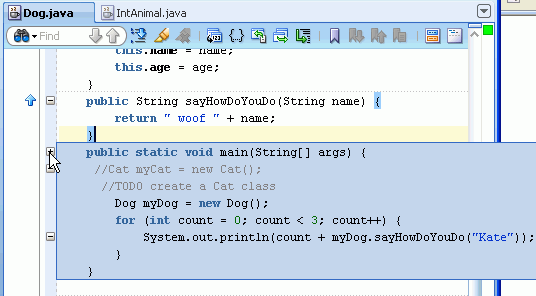
The code folding feature enables you to expand and contract sections of code, making large programs more manageable.
Place your mouse in the space between the dotted and solid lines to the left of the Cat line in the blue margin.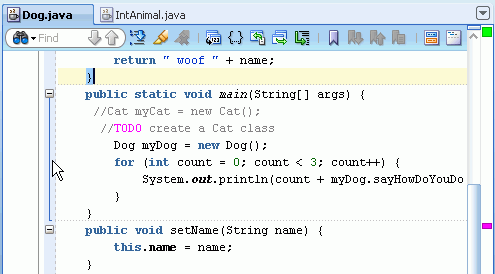
Notice that a blue vertical line displays beside the main method body.
-
Click the minus (-) sign at the top of the vertical blue line to contract this section of code.
-
Hover over the plus (+) sign next to the contracted section of code. The contracted lines of code display in a blue shaded box.
-
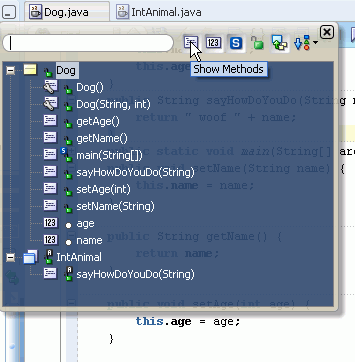
The Quick Outline Navigator enables you to quickly navigate to methods and fields of a class and its super classes.
In the code editor toolbar click the Quick Outline icon.The Quick Outline 'ghost' window displays.
-
Click the Show Methods icon (first icon from the left in the 'ghost' window) to see all the methods in the Dog class.
-
Filter the list by typing ge in the field.
-
Use the down arrow key or your mouse to select the getName() method, then press Enter.
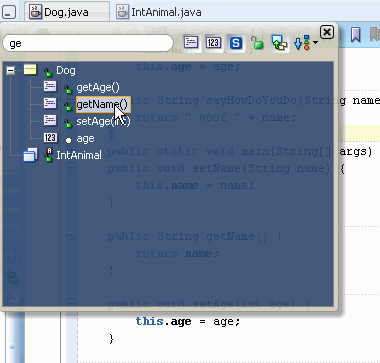
Focus is switched to the getName() method in the source code, and the method is highlighted.
-
Scroll back up to the main() method, and double-click within the ellipses {...} at the end of the line.
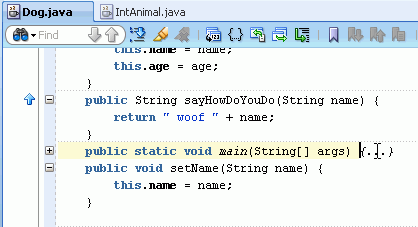
JDeveloper expands the collapsed code.
Step 11: Use the JDeveloper Debugger
The integrated JDeveloper debugger enables you to debug Java programs in the source editor. This step shows you how to control the execution of a program by setting breakpoints. When program execution encounters a breakpoint, the program pauses, and the debugger displays the line containing the breakpoint in the source editor. You can then use the debugger to view the state of the program.
-
Set a breakpoint in the Dog.java file. To do this, click in the margin to the left of this line:
System.out.println(count + myDog.sayHowDoYouDo("Kate"));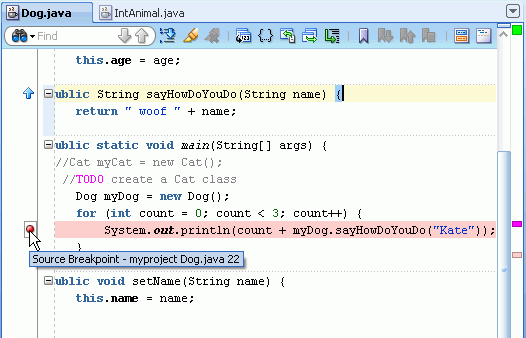
The breakpoint icon, which looks like a red ball, is displayed in the margin.
-
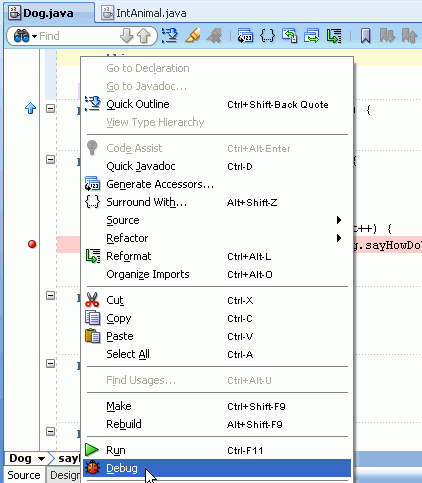
Right-click in the source editor and select Debug from the context menu.
-
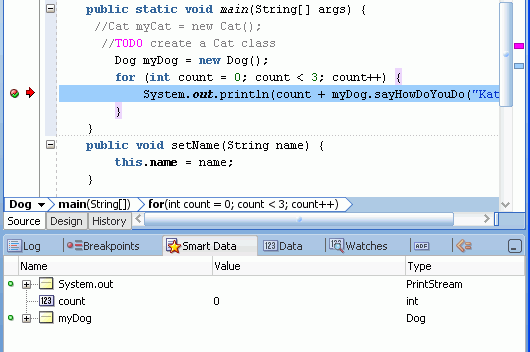
Program execution proceeds up to the breakpoint. The red arrow in the left margin of the source editor indicates where the break is occurring. The debugger window opens and displays the debugging trace.
-
Click the Step Over icon in the toolbar to execute the first iteration of the myDog.sayHowDoYouDo() method.

-
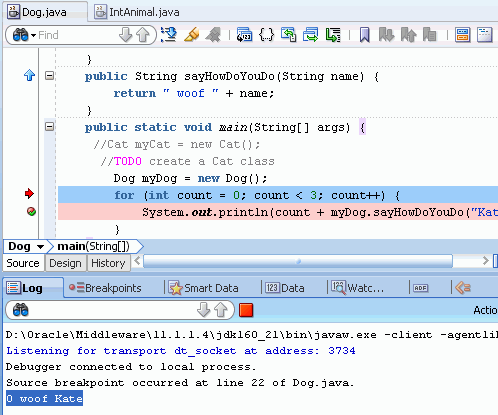
Click the Debugging: MyProject.jpr tab at the bottom of the log window and then click the Log tab in the debugger window. Note that the log window displays the first 0 woof Kate message.
-
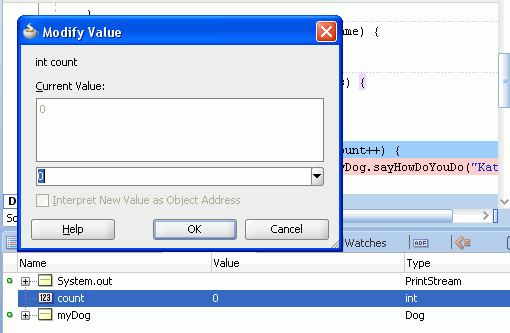
Click the Data window to the right of the Debugging Log tab. Select the count variable, and double-click in the Value column to display the Modify Value dialog.
-
Type 2 as the new value. Click OK.
-
In the toolbar, click Resume to continue program execution.

-
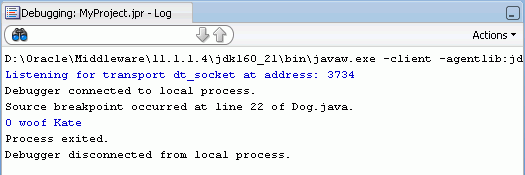
The count variable is incremented and exceeds its limit, so the program terminates, and the debugger disconnects.
JDeveloper enables you to search for files belonging to the current application or across multiple applications.
-
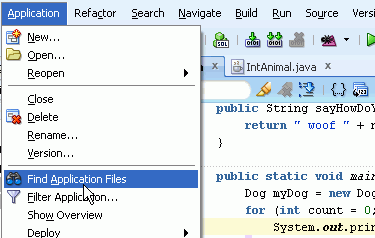
From the menu, select Application > Find Application Files.
-
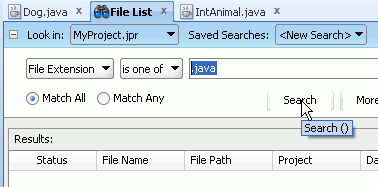
In the File List tab, use the Look in field to define the scope of your search. Select MyProject.jpr.
-
Select File Extension and type .java to retrieve all files of this type, then click Search.
-
The Results window returns the file names that match the search criteria.
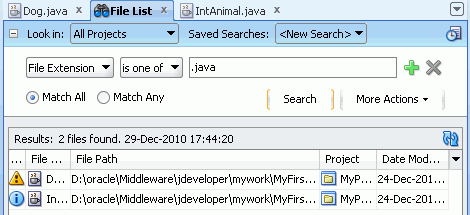
Note that double clicking a file name from the list opens the file in the editor.
-
You can use complex search criteria by clicking the Add icon and choosing from the logical Match operators.

-
You can also retrieve recently-used files in the Application Navigator; click the Recently Opened Files accordion.
-
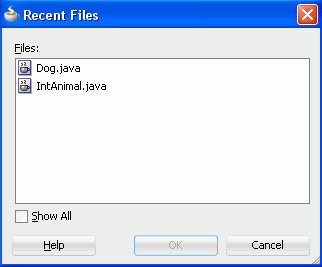
Alternatively you can click [Ctrl] + [=] to open the Recent Files dialog and then make your selection.
-
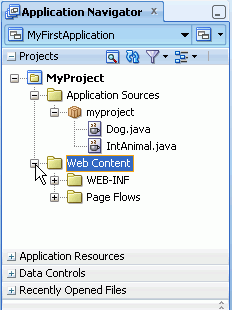
Expand the Web Content node under the MyProject project.
-
Expand the WEB-INF node and double-click faces-config.xml.
The page flow diagrammer opens.

-
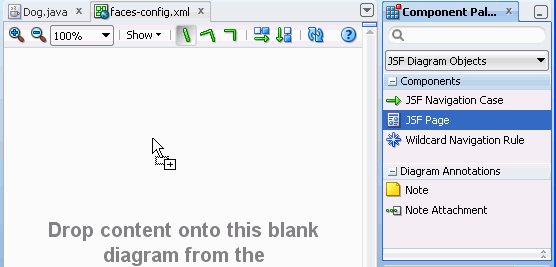
The Component Palette, on the upper right side of the interface, shows the available components in the context of a page flow diagram.
-
Select JSF Page and drag it onto the page flow diagram, in the center of the screen.
-
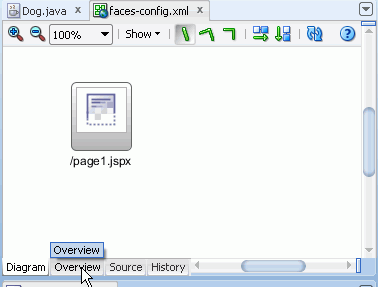
Type page1.jspx as the name of the page.

Save your work.
-
Click the Overview tab of the page flow diagram.
-
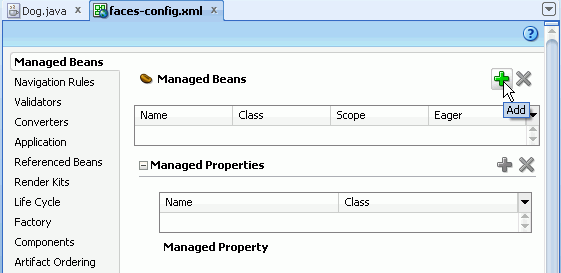
In the overview page, with the Managed Beans tab selected, click the Add button to create a managed bean.
-
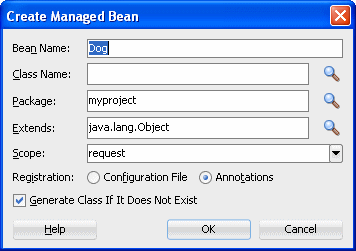
In the Create Managed Bean dialog, type Dog as the Bean Name and click the Browse button next to the Class Name.
-
In the Class Browser, click the Hierarchy tab and, expanding the myproject node, select Dog as the class. Click OK.
Back in the Create Managed Bean dialog, click the Configuration File radio button and then click OK.
-
The managed bean named Dog is added to your page flow, allowing you to use the class in your pages.
-
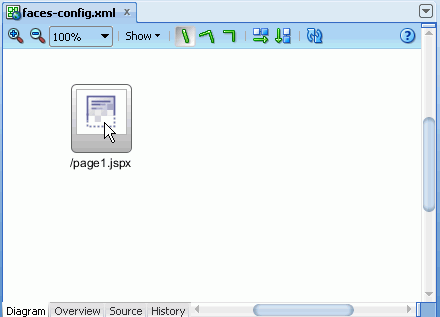
In the faces-config.xml editor, click the Diagram tab and double click the page1.jspx page to create it.
-
In the Create JSF Page dialog, make sure the JSP XML radio button is selected.
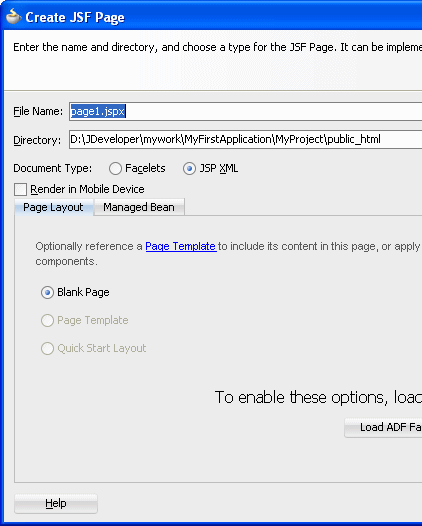
Click OK.
-
A new page design opens.
-
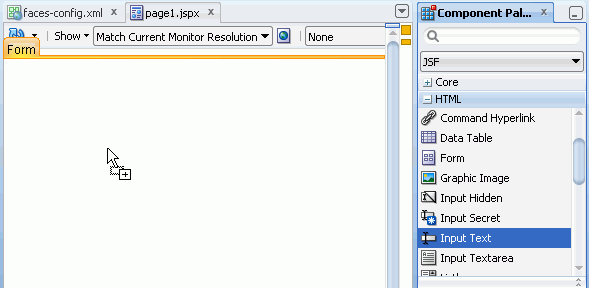
The Component Palette shows the available components for use in a JSF page. Select the Input Text component and drag it onto the page.
-
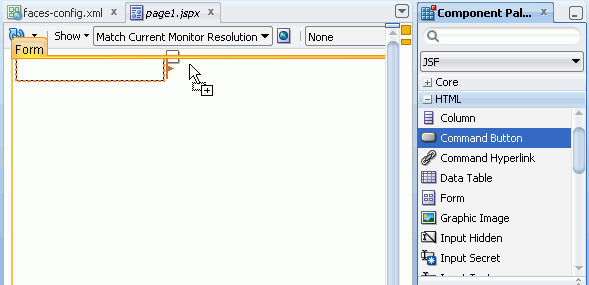
From the Component Palette, select the Command Button component and drop it onto the page next to the Input Text component.
-
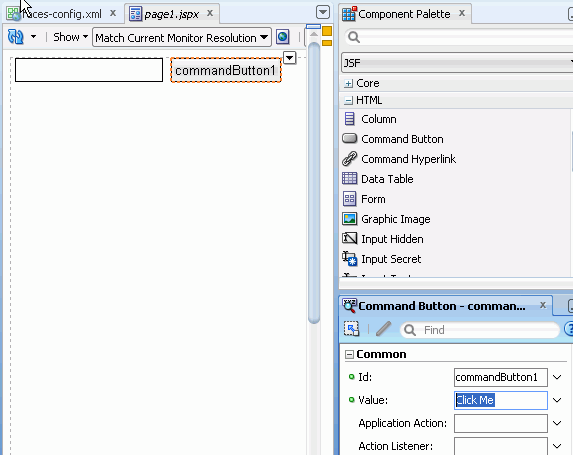
With the button selected, find the Property Inspector and set the Value field for the Command Button property to Click Me.If the Property Inspector is not viewable, press [CTRL] + [Shift] + [I] - or View > Property Inspector to display it.
-
Right-click the page1.jspx tab and select Split Document.
-
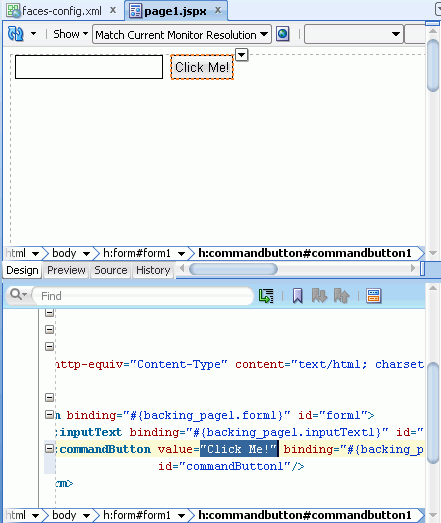
Click the Source tab on one part of the split document so that you can see the Design and the Source view of the page at the same time. In the Source pane, add an exclamation mark at the end of the Click Me string. Notice that both views are updated synchronously.
-
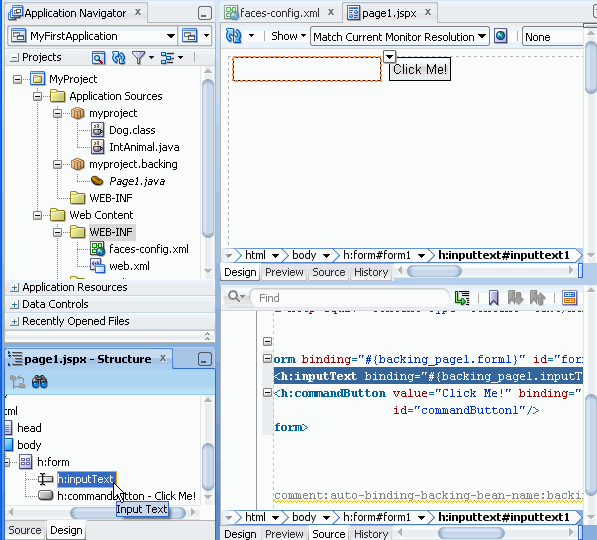
In the Structure window, select the h:inputText component. Notice that the same component is also selected in the Diagram and Source tabs. If the Structure Window is not visable, press [CTRL] + [Shift] + [S] - or View > Structure to display it.
-
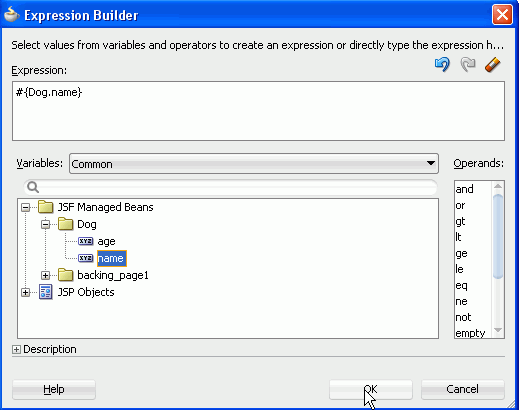
In the Property Inspector for the Input Text component, click the down arrow next to the Value field and select Expression Builder.
-
In the Expression Builder, select JSF Managed Beans > Dog > name. Click OK.
-
In the Dog class enter "Rex" as a static value for the name variable.
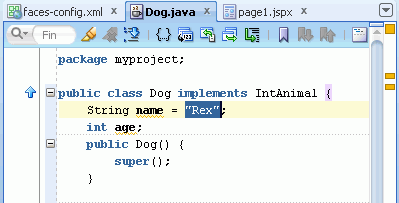
Save your work.
-
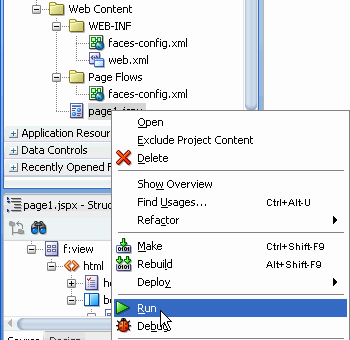
In the Application Navigator, right-click the page1.jspx node and select Run from the context menu.
-
If this is the first time you have run the integrated Weblogic server, it may prompt you for the administrative password. The default password is weblogic1.
-
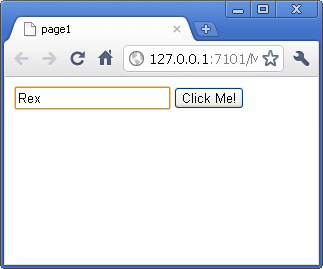
The WebLogic server is started and the page1 page is loaded in your browser, displaying the name value from the managed bean, and the Click Me! command button, defined using components from the Component Palette.
In this tutorial you learned how to find your way around the JDeveloper IDE. You learned how to:
- Create an application and a project
- Create a Java class
- Exploit some of the productivity and code assist features of the Java source editor
- Use the JDeveloper debugger
- Create a managed bean based on your Java class.
- Create a JSF page and use your managed bean in it.