SimpleAdapter源码和VIewBinder浅析
先看下SimpleAdapter的简单用法
public class MainActivity extends Activity {

	private ListView list;
	private SimpleAdapter adapter;
	private List<Map<String, String>> dataList;
	@Override
	protected void onCreate(Bundle savedInstanceState) {
		super.onCreate(savedInstanceState);
		setContentView(R.layout.activity_main);
		init();

	}

	private void init() {
		list = (ListView) findViewById(R.id.list);
		intitData();
		adapter = new SimpleAdapter(MainActivity.this,
				dataList, R.layout.list_item,
				new String[]{"tv", "btn"}, new int[]{R.id.tv, R.id.btn});
		list.setAdapter(adapter);
	}

	private void intitData() {
		dataList = new ArrayList<Map<String, String>>();
	     for (int i = 0; i < 3; i++) {
	    	 Map<String, String> map = new HashMap<String,String>();
	    	 map.put("tv", "data"+i);
	    	 map.put("btn", "btn"+i);
	    	 dataList.add(map);
	     }
	}
}
布局:
activity_main.xml
<RelativeLayout xmlns:android="http://schemas.android.com/apk/res/android"
    xmlns:tools="http://schemas.android.com/tools"
    android:layout_width="match_parent"
    android:layout_height="match_parent"
    android:paddingBottom="@dimen/activity_vertical_margin"
    android:paddingLeft="@dimen/activity_horizontal_margin"
    android:paddingRight="@dimen/activity_horizontal_margin"
    android:paddingTop="@dimen/activity_vertical_margin"
    tools:context=".MainActivity" >

    <ListView
        android:id="@+id/list"
        android:layout_width="wrap_content"
        android:layout_height="wrap_content"
        android:text="@string/hello_world" />

</RelativeLayout>
list_item.xml
<?xml version="1.0" encoding="utf-8"?>
<LinearLayout xmlns:android="http://schemas.android.com/apk/res/android"
    android:layout_width="match_parent"
    android:layout_height="match_parent"
    android:orientation="horizontal" >

<TextView
    android:id="@+id/tv"
    android:layout_width="wrap_content"
    android:layout_height="wrap_content"
    android:text="asdd"
    android:textSize="22sp"
    />
<Button
    android:id="@+id/btn"
    android:layout_width="wrap_content"
    android:layout_height="wrap_content"
    android:text="btn"
    />
</LinearLayout>
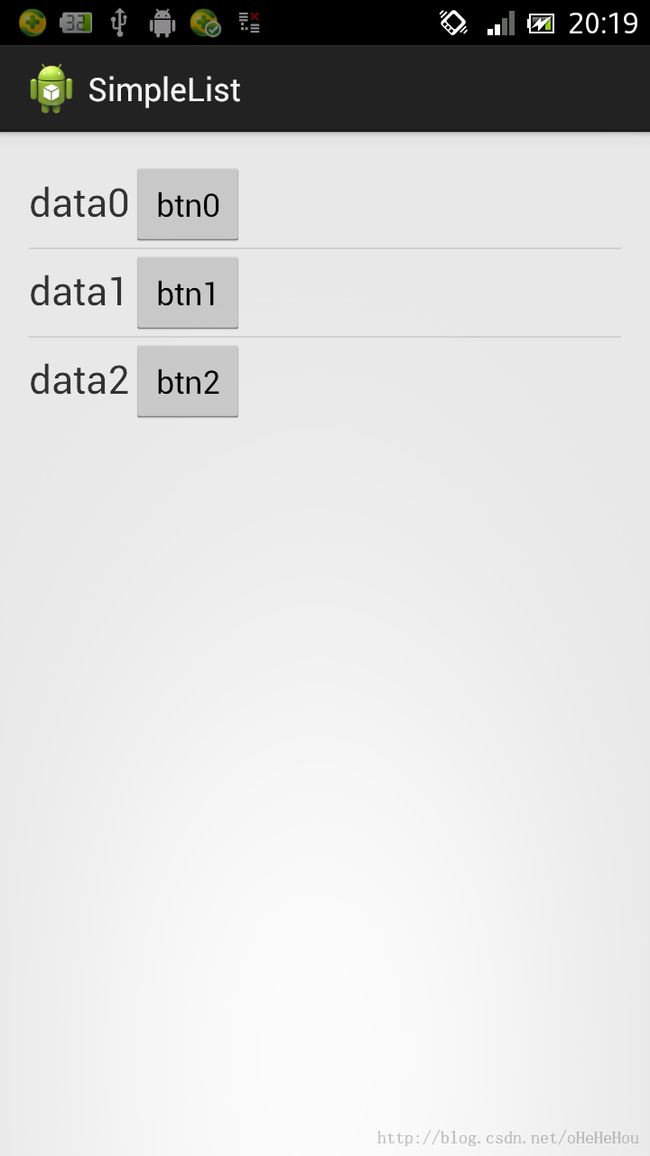
效果:
下面来分析一下SimpleAdapter中关键的代码
getView(),返回listview每行的视图
    private View createViewFromResource(int position, View convertView,
            ViewGroup parent, int resource) {
        View v;
        if (convertView == null) {
            v = mInflater.inflate(resource, parent, false);
        } else {
            v = convertView;
        }

        bindView(position, v);

        return v;
    }
if (convertView == null)不用每次都加载view,提升加载效率bindView(position, v);负责每行中所有view控件的显示
bindView()方法:
    private void bindView(int position, View view) {
        final Map dataSet = mData.get(position);
        if (dataSet == null) {
            return;
        }

        final ViewBinder binder = mViewBinder;
        final String[] from = mFrom;
        final int[] to = mTo;
        final int count = to.length;

        for (int i = 0; i < count; i++) {
            //遍历item中的每个view对象
            final View v = view.findViewById(to[i]);
            if (v != null) {
                /*根据传入的String数组包含的key,去map里取值,toString()返回一个字符串,这个字符串在下面调用setViewValue时当做第三个参数传入
                  setViewValue的第三个参数在API中的描述为:
                  a safe String representation of the supplied data: it is either the result of data.toString()
                   or an empty String but it is never null
                 */
                final Object data = dataSet.get(from[i]);
                String text = data == null ? "" : data.toString();
                if (text == null) {
                    text = "";
                }
                /*bound  这个变量很关键,它依赖于ViewBinder的实例binder.setViewValue的返回值,item中每个view对象如何渲染取决于bound的值
                setViewValue返回true,即bound为true的话,表明item中每个view对象的渲染已经在setViewValue方法中处理完毕了,
                                如果setViewValue返回false,则使用默认的渲染方法
                */
                boolean bound = false;
                if (binder != null) {
                    bound = binder.setViewValue(v, data, text);
                }
                //setViewValue返回false,使用默认的渲染方法
                if (!bound) {
                    //如果类型是CheckBox,RadioButton, ToggleButton等或者是实现了Checkable接口的文本控件,根据map中的值设置选中状态
                    if (v instanceof Checkable) {
                        if (data instanceof Boolean) {
                            ((Checkable) v).setChecked((Boolean) data);
                        } else if (v instanceof TextView) {
                            // Note: keep the instanceof TextView check at the bottom of these
                            // ifs since a lot of views are TextViews (e.g. CheckBoxes).
                            setViewText((TextView) v, text);
                        } else {
                            throw new IllegalStateException(v.getClass().getName() +
                                    " should be bound to a Boolean, not a " +
                                    (data == null ? "<unknown type>" : data.getClass()));
                        }
                    }
                   //如果是TextView
                   else if (v instanceof TextView) {
                        // Note: keep the instanceof TextView check at the bottom of these
                        // ifs since a lot of views are TextViews (e.g. CheckBoxes).
                        setViewText((TextView) v, text);
                    }
                    //如果是图片
                   else if (v instanceof ImageView) {
                        if (data instanceof Integer) {
                            setViewImage((ImageView) v, (Integer) data);
                        } else {
                            setViewImage((ImageView) v, text);
                        }
                    } else {
                        throw new IllegalStateException(v.getClass().getName() + " is not a " +
                                " view that can be bounds by this SimpleAdapter");
                    }
                }
            }
        }
    }
可以看出,SimpleAdapter只能处理简单的view控件的内容的显示,如果要对在item上的button等进行事件监听的话,可以使用ViewBinder,这就是他在存在SimpleAdapter中存在的意义,ViewBinder可以在程序中为listview的item中的控件绑定数据或者事件。
设置ViewBinder:
    public void setViewBinder(ViewBinder viewBinder) {
        mViewBinder = viewBinder;
    }
下面的例子是如何实现自己的ViewBinder,并且在SimpleAdapter中设置以达到自己想要的效果。
给item上的button增加点击事件
改动以上的代码,
1.让MainActivity实现ViewBinder接口
2.重写setViewValue方法
改进后的完整代码:
public class MainActivity extends Activity implements ViewBinder{

	private ListView list;
	private SimpleAdapter adapter;
	private List<Map<String, String>> dataList;
	@Override
	protected void onCreate(Bundle savedInstanceState) {
		super.onCreate(savedInstanceState);
		setContentView(R.layout.activity_main);
		init();

	}

	private void init() {
		list = (ListView) findViewById(R.id.list);
		intitData();
		adapter = new SimpleAdapter(MainActivity.this,
				dataList, R.layout.list_item,
				new String[]{"tv", "btn"}, new int[]{R.id.tv, R.id.btn});

		//设置ViewBinder
		adapter.setViewBinder(this);
		list.setAdapter(adapter);
	}

	private void intitData() {
		dataList = new ArrayList<Map<String, String>>();
	     for (int i = 0; i < 3; i++) {
	    	 Map<String, String> map = new HashMap<String,String>();
	    	 map.put("tv", "data"+i);
	    	 map.put("btn", "btn"+i);
	    	 dataList.add(map);
	     }
	}

	//重写setViewValue方法,设置按钮点击事件
	@Override
	public boolean setViewValue(View view, Object data,
			String textRepresentation) {

		if (view instanceof Button) {
			((Button)view).setOnClickListener(new OnClickListener() {

				@Override
				public void onClick(View v) {
					Toast.makeText(MainActivity.this, "点击", 3000).show();
				}
			});
		}
		//返回值为true
		return true;
	}
}
再次查看效果,发现点击按钮弹出toast。
SimpleAdapter中的ViewBinder还是比较简单的,通过继承BaseAdapter和实现自己的ViewBinder可以实现功能更加强大,更灵活的listview的数据绑定
