Android4.04下载源码图解~解决公网IP不能直接访问问题
转自http://blog.csdn.net/jiangshide/article/details/7529971
之前下的ANDROID4.0.1很顺利下来下来,有很多人问,后来才知道有很多人问关于报以下错误的
上面是链接GOOGLE源码服务器超时,也就是说不能访问到GOOGLE源码服务器,这个问题,没想到在我重新装的机子上不小心发现了,既然发现来就出来解决下吧,刚开始,一开始,我们肯定是先看官方文档,看看情况:
Using authentication
By default, access to the Android source code is anonymous. To protect the servers against excessive usage, each IP address is associated with a quota.
When sharing an IP address with other users (e.g. when accessing the source repositories from beyond a NAT firewall), the quotas can trigger even for regular usage patterns (e.g. if many users sync new clients from the same IP address within a short period).
In that case, it is possible to use authenticated access, which then uses a separate quota for each user, regardless of the IP address.
The first step is to create a password from the password generator and to save it in ~/.netrc according to the instructions on that page.
The second step is to force authenticated access, by using the following manifest URI: https://android.googlesource.com/a/platform/manifest. Notice how the /a/ directory prefix triggers mandatory authentication. You can convert an existing client to use mandatory authentication with the following command:
$ repo init -u https://android.googlesource.com/a/platform/manifest
Troubleshooting network issues
When downloading from behind a proxy (which is common in some corporate environments), it might be necessary to explicitly specify the proxy that is then used by repo:
$ export HTTP_PROXY=http://<proxy_user_id>:<proxy_password>@<proxy_server>:<proxy_port>
$ export HTTPS_PROXY=http://<proxy_user_id>:<proxy_password>@<proxy_server>:<proxy_port>
More rarely, Linux clients experience connectivity issues, getting stuck in the middle of downloads (typically during "Receiving objects"). It has been reported that tweaking the settings of the TCP/IP stack and using non-parallel commands can improve the situation. You need root access to modify the TCP setting:
$ sudo sysctl -w net.ipv4.tcp_window_scaling=0
$ repo sync -j1在这里需要提醒下,先要通过访问:https://android.googlesource.com/new-password来获得相关认证的用户名与密码:
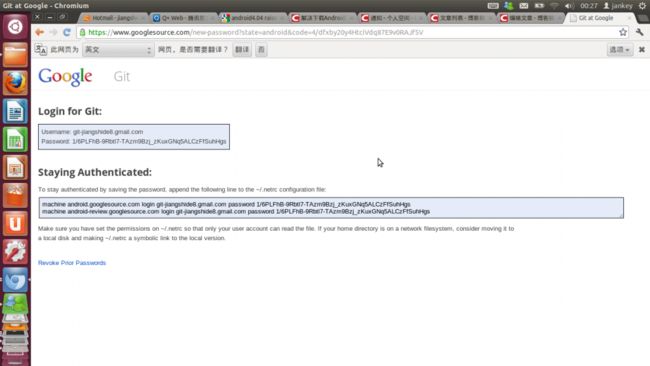
点击允许,进入页面,要求你输入一个邮箱的用户名与密码,然后得出其以下页面显示:
细心点的人就会看到这么一句话:he first step is to create a password from the password generator and to save it in ~/.netrc according to the instructions on that page.
这是需要你去你本系统的~/下新建一个.netrc文件,默认系统下是没有的,然后把其获得的两行:
machine android.googlesource.com login git-jiangshide8.gmail.com password 1/6PLFhB-9Rbtl7-TAzm9Bzj_zKuxGNq5ALCzFfSuhHgs
machine android-review.googlesource.com login git-jiangshide8.gmail.com password 1/6PLFhB-9Rbtl7-TAzm9Bzj_zKuxGNq5ALCzFfSuhHgs
拷贝进去,然后保存,然后重新执行:
$ repo init -u https://android.googlesource.com/a/platform/manifest
记住与之前的多来个a路径哦,再接着,执行:
sudo sysctl -w net.ipv4.tcp_window_scaling=0
$ repo sync -j1
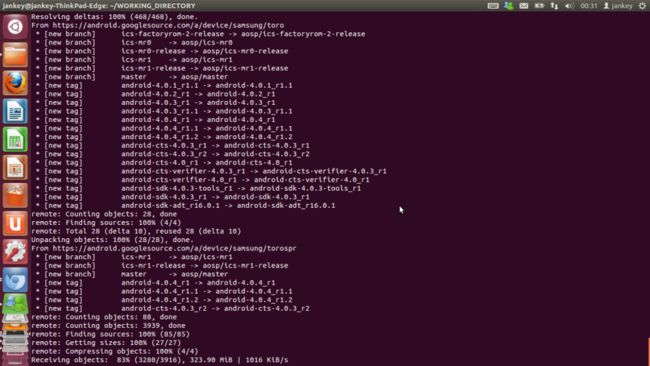
就OK了,为来让各位放心去操作,我把成功操作的图都截取下来:


