IOS 绘图
// UIGraphicsBeginImageContext(CGSizeMake(20, 200));
CGContextRef context = UIGraphicsGetCurrentContext();
CGContextSetStrokeColorWithColor(context, [UIColor orangeColor].CGColor);
CGContextSetLineWidth(context, 2.0);
CGContextMoveToPoint(context, 1, 1);
CGContextAddLineToPoint(context, 1, 200);
CGContextStrokePath(context);
// UIImage *image = UIGraphicsGetImageFromCurrentImageContext();
// UIGraphicsEndImageContext();
简单的绘制,如果要返回图片,返回注释部分。
转自:http://blog.csdn.net/spmno/article/details/6427089
| Drawing iPhone 2D Graphics with Quartz |
As previously discussed in Drawing iPhone 2D Graphics with Quartz , the Quartz 2D API is the primary mechanism by which 2D drawing operations are performed within iPhone applications. Having provided an overview of Quartz 2D as it pertains to iPhone development in that chapter, the focus of this chapter is to provide a tutorial that provides examples of how 2D drawing is performed. If you are new to Quartz 2D and have not yet read Drawing iPhone 2D Graphics with Quartz it is recommended that you do so now before embarking on this tutorial.
|
||
[edit ] The iPhone Drawing Example Application
The application created in this tutorial will contain a subclassed UIView component within which the drawRect method will be overridden and used to perform a variety of 2D drawing operations.
[edit ] Creating the New Project
Create the new project by launching the Xcode development environment and selecting the option to create a new project. When prompted to select a template for the application, choose the View-based Applicationoption and name the project draw2D.
[edit ] Creating the UIView Subclass
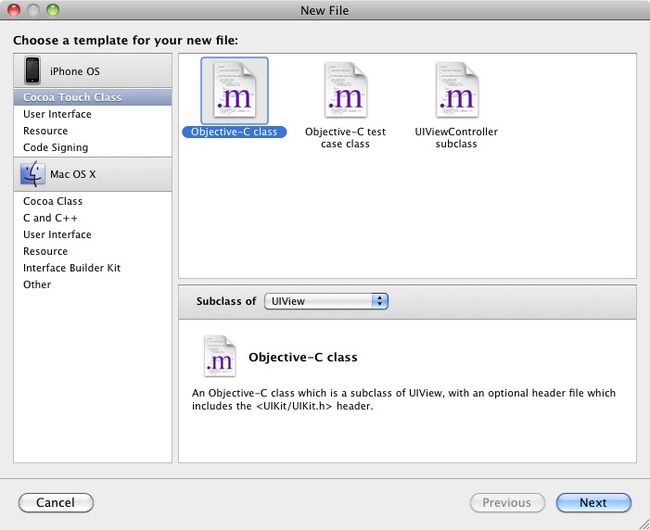
In order to draw graphics on the view it is necessary create a subclass of the UIView object and override the drawRect method. In the Groups & Files panel located on the left hand side of the main Xcode project window right click on the Classes entry and select Add -> New File.. from the resulting menu. In the New File window, select the Objective-C class icon and ensure that the Subclass of menu is set to UIView as illustrated in the following figure:
Click on the Next button and in the subsequent screen, name the class implementation file draw2D.m and select the Also create “draw2D.h” option if it is not already selected before clicking on the Finish button.
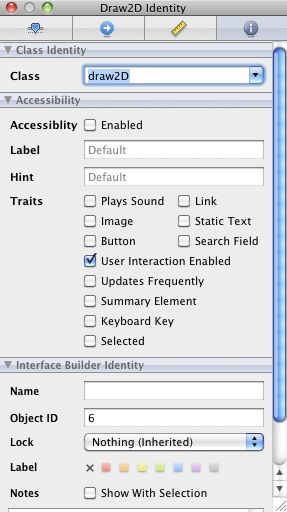
Double click on the draw2DViewController.xib file so that it loads into the Interface Builder tool and select the UIView component in the View window. Display the Identity Inspector (Tools -> Identity Inspector or press theCommand+4 key combination) and change the Class setting from UIView to our new class named draw2D:
Save the changes and exit from Interface Builder.
[edit ] Locating the drawRect Method in the UIView Subclass
Now that we have subclassed our application’s UIView the next step is to implement the drawRect method in this subclass. Fortunately Xcode has already created a template of this method for us. To locate this method, select the draw2D.m file in the Groups & Files panel of the main Xcode project window and scroll down the file contents in the edit pane until the drawRect method comes into view (it should be located immediately beneath the initWithFrame method):
#import "draw2D.h"

@implementation draw2D

- (id)initWithFrame:(CGRect)frame {
if (self = [super initWithFrame:frame]) {
// Initialization code
}
return self;
}

- (void)drawRect:(CGRect)rect {
// Drawing code
}
.
.
@end
In the remainder of this tutorial we will modify the code in the drawRect method to perform a variety of different drawing operations.
[edit ] Drawing a Line
In order to draw a line on an iPhone screen using Quartz 2D we first need to obtain the graphics context for the view:
CGContextRef context = UIGraphicsGetCurrentContext();
Once the context has been obtained, the width of the line we plan to draw needs to be specified:
CGContextSetLineWidth(context, 2.0);
Next, we need to create a color reference. We can do this by specifying the RGBA components of the required color (in this case opaque blue):
CGFloat components[] = {0.0, 0.0, 1.0, 1.0};
CGColorRef color = CGColorCreate(colorspace, components);
Using the color reference and the context we can now specify that the color is to be used when drawing the line:
CGContextSetStrokeColorWithColor(context, color);
The next step is to move to the start point of the line that is going to be drawn:
CGContextMoveToPoint(context, 0, 0);
The above line of code indicates that the start point for the line is the top left hand corner of the device display. We now need to specify the end point of the line, in this case 300, 400:
CGContextAddLineToPoint(context, 300, 400);
Having defined the line width, color and path, we are ready to draw the line and release the colorspace and color reference objects:
CGContextStrokePath(context);
CGColorSpaceRelease(colorspace);
CGColorRelease(color);
Bringing this all together gives us a drawRect method that reads as follows:
- (void)drawRect:(CGRect)rect {

CGContextRef context = UIGraphicsGetCurrentContext();

CGContextSetLineWidth(context, 2.0);

CGColorSpaceRef colorspace = CGColorSpaceCreateDeviceRGB();

CGFloat components[] = {0.0, 0.0, 1.0, 1.0};

CGColorRef color = CGColorCreate(colorspace, components);

CGContextSetStrokeColorWithColor(context, color);

CGContextMoveToPoint(context, 0, 0);
CGContextAddLineToPoint(context, 300, 400);

CGContextStrokePath(context);
CGColorSpaceRelease(colorspace);
CGColorRelease(color);
}
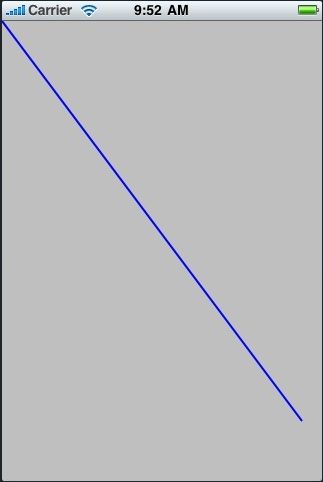
When compiled and run, the application should display as illustrated in the following figure:
Note that in the above example we manually created the colorspace and color reference. As described in Drawing iPhone 2D Graphics with Quartz colors can also be created using the UIColor class. For example, the same result as outlined above can be achieved with fewer lines of code as follows:
- (void)drawRect:(CGRect)rect {

CGContextRef context = UIGraphicsGetCurrentContext();

CGContextSetLineWidth(context, 2.0);

CGContextSetStrokeColorWithColor(context, [UIColor blueColor].CGColor);

CGContextMoveToPoint(context, 0, 0);
CGContextAddLineToPoint(context, 300, 400);

CGContextStrokePath(context);
}
[edit ] Drawing Paths
As you may have noticed, in the above example we draw a single line by essentially defining the path between two points. Defining a path that comprises multiple points allows us to draw using a sequence of straight lines all connected to each other using repeated calls the CGContextAddLineToPoint() function. Non-straight lines may also be added to a shape using calls to, for example, the CGContextAddArc() function.
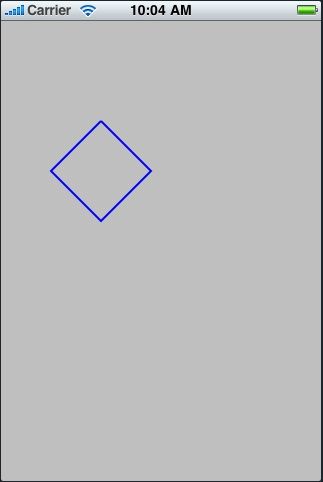
The following code draws a diamond shape:
- (void)drawRect:(CGRect)rect {

CGContextRef context = UIGraphicsGetCurrentContext();

CGContextSetLineWidth(context, 2.0);

CGContextSetStrokeColorWithColor(context, [UIColor blueColor].CGColor);

CGContextMoveToPoint(context, 100, 100);
CGContextAddLineToPoint(context, 150, 150);
CGContextAddLineToPoint(context, 100, 200);
CGContextAddLineToPoint(context, 50, 150);
CGContextAddLineToPoint(context, 100, 100);

CGContextStrokePath(context);
}
When executed, the above code should produce output that appears as follows:
[edit ] Drawing a Rectangle
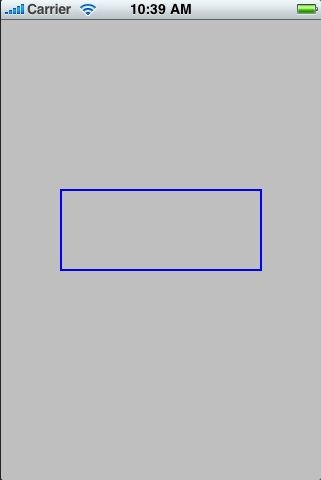
Rectangles are drawn in much the same way as any other path is drawn, with the exception that the path is defined by specifying the x and y co-ordinates of the top left hand corner of the rectangle together with the rectangle’s height and width. These dimensions are stored in a CGRect structure and passed through as an argument to the CGContextAddRect function:
- (void)drawRect:(CGRect)rect {

CGContextRef context = UIGraphicsGetCurrentContext();

CGContextSetLineWidth(context, 2.0);

CGContextSetStrokeColorWithColor(context, [UIColor blueColor].CGColor);

CGRect rectangle = CGRectMake(60,170,200,80);

CGContextAddRect(context, rectangle);

CGContextStrokePath(context);
}
The above code will result in the following display when compiled and executed:
[edit ] Drawing an Ellipse or Circle
Circles and ellipses are drawn by defining the rectangular area into which the shape must fit and then calling the CGContextAddEllipseInRect() function:
- (void)drawRect:(CGRect)rect {

CGContextRef context = UIGraphicsGetCurrentContext();

CGContextSetLineWidth(context, 2.0);

CGContextSetStrokeColorWithColor(context, [UIColor blueColor].CGColor);

CGRect rectangle = CGRectMake(60,170,200,80);

CGContextAddEllipseInRect(context, rectangle);

CGContextStrokePath(context);
}
When compiled, the above code will produce the following graphics:
In order to draw a circle simply define a rectangle with equal length sides (a square in other words).
[edit ] Filling a Path with a Color
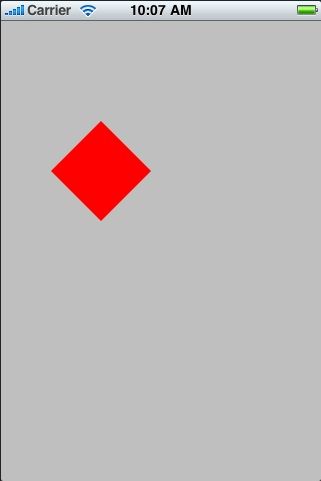
A path may be filled with a color using a variety of Quartz 2D API functions. Rectangular and elliptical paths may be filled using the CGContextFillRect() and CGContextFillEllipse() functions respectively. Similarly, a path may be filled using the CGContextFillPath() function. Prior to executing a fill operation, the fill color must be specified using the CGContextSetFillColorWithColor() function.
The following example defines a path and then fills it with the color red:
- (void)drawRect:(CGRect)rect {
CGContextRef context = UIGraphicsGetCurrentContext();

CGContextMoveToPoint(context, 100, 100);
CGContextAddLineToPoint(context, 150, 150);
CGContextAddLineToPoint(context, 100, 200);
CGContextAddLineToPoint(context, 50, 150);
CGContextAddLineToPoint(context, 100, 100);

CGContextSetFillColorWithColor(context, [UIColor redColor].CGColor);
CGContextFillPath(context);
}
The above code produces the following graphics on the device or simulator display when compiled and run:
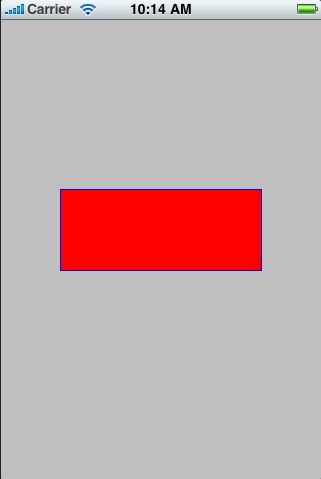
The following code draws a rectangle with a blue border and then fills the rectangular space with red:
- (void)drawRect:(CGRect)rect {

CGContextRef context = UIGraphicsGetCurrentContext();

CGContextSetLineWidth(context, 2.0);
CGContextSetStrokeColorWithColor(context, [UIColor blueColor].CGColor);
CGRect rectangle = CGRectMake(60,170,200,80);
CGContextAddRect(context, rectangle);
CGContextStrokePath(context);
CGContextSetFillColorWithColor(context, [UIColor redColor].CGColor);
CGContextFillRect(context, rectangle);
}
When added to the example application, the resulting display should appear as follows:
[edit ] Drawing an Arc
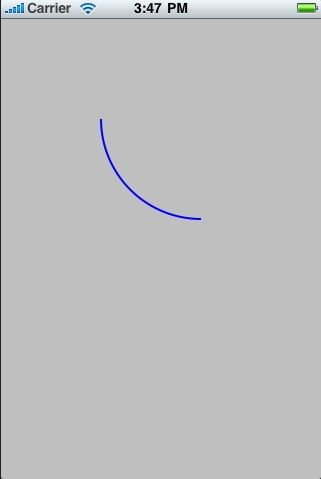
An arc may be drawn by specifying two tangent points and a radius using the CGContextAddArcToPoint() function:
- (void)drawRect:(CGRect)rect {

CGContextRef context = UIGraphicsGetCurrentContext();

CGContextSetLineWidth(context, 2.0);

CGContextSetStrokeColorWithColor(context, [UIColor blueColor].CGColor);

CGContextMoveToPoint(context, 100, 100);
CGContextAddArcToPoint(context, 100,200, 300,200, 100);
CGContextStrokePath(context);
}
The above code will result in the following graphics output:
[edit ] Drawing a Cubic Bézier Curve
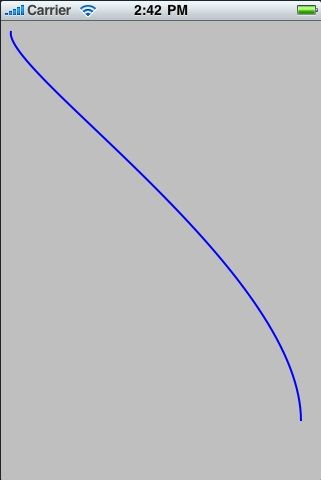
A cubic Bézier curve may be drawn by moving to a start point and then passing two control points and an end point through to the CGContextAddCurveToPoint() function:
- (void)drawRect:(CGRect)rect {

CGContextRef context = UIGraphicsGetCurrentContext();

CGContextSetLineWidth(context, 2.0);

CGContextSetStrokeColorWithColor(context, [UIColor blueColor].CGColor);

CGContextMoveToPoint(context, 10, 10);

CGContextAddCurveToPoint(context, 0, 50, 300, 250, 300, 400);

CGContextStrokePath(context);
}
The above code will cause the following curve to be drawn when compiled and executed in our example application:
[edit ] Drawing a Quadratic Bézier Curve
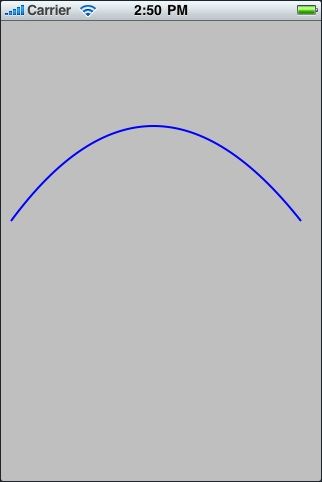
A quadratic Bézier curve is drawn using the CGContextAddQuadCurveToPoint() function, providing a control and end point as arguments having first moved to the start point:
- (void)drawRect:(CGRect)rect {

CGContextRef context = UIGraphicsGetCurrentContext();

CGContextSetLineWidth(context, 2.0);

CGContextSetStrokeColorWithColor(context, [UIColor blueColor].CGColor);

CGContextMoveToPoint(context, 10, 200);

CGContextAddQuadCurveToPoint(context, 150, 10, 300, 200);

CGContextStrokePath(context);
}
The above code, when executed, will display a curve that appears as illustrated in the following figure:
[edit ] Dashed Line Drawing
So far in this chapter we have performed all our drawing with a solid line. Quartz also provides support for drawing dashed lines. This is achieved via the Quartz CGContextSetLineDash() function which takes as its arguments the following:
- context – The graphics context of the view on which the drawing is to take place
- phase - A floating point value that specifies how far into the dash pattern the line starts
- lengths – An array containing values for the lengths of the painted and unpainted sections of the line. For example an array containing 5 and 6 would cycle through 5 painted unit spaces followed 6 unpainted unit spaces.
- count – A count of the number of items in the lengths array
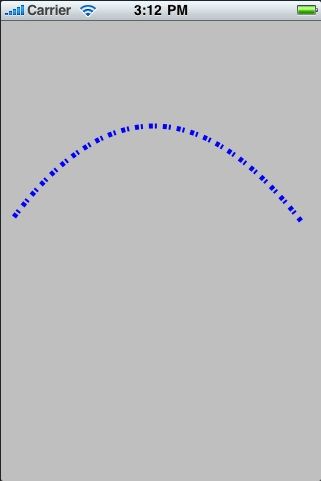
For example, a [2,6,4,2] lengths array applied to a curve drawing of line thickness 5.0 will appear as follows:
The corresponding drawRect code that drew the above line reads as follows:
- (void)drawRect:(CGRect)rect {

CGContextRef context = UIGraphicsGetCurrentContext();

CGContextSetLineWidth(context, 5.0);

CGContextSetStrokeColorWithColor(context, [UIColor blueColor].CGColor);

CGFloat dashArray[] = {2,6,4,2};

CGContextSetLineDash(context, 3, dashArray, 4);

CGContextMoveToPoint(context, 10, 200);

CGContextAddQuadCurveToPoint(context, 150, 10, 300, 200);

CGContextStrokePath(context);
}
[edit ] Drawing an Image into a Graphics Context
An image may be drawn into a graphics context either by specifying the coordinates of the top left hand corner of the image (in which case the image will appear full size) or resized so that it fits into a specified rectangular area. Before we can display an image in our example application, however, that image must first be added to the project resources.
Begin by locating the desired image using the Finder and then drag and drop that image onto the Resourcescategory of the Groups & Files panel of the Xcode main project window. Rename the image if necessary by slow double clicking on the file name so that it highlights and enters edit mode.
The following example drawRect method code displays the image full size located at 0, 0:
- (void)drawRect:(CGRect)rect {

CGContextRef context = UIGraphicsGetCurrentContext();

UIImage *myImage = [UIImage imageNamed:@"pumpkin.jpg"];

CGPoint imagePoint = CGPointMake(0, 0);

[myImage drawAtPoint:imagePoint];

[myImage release];
}
As is evident when the application is run, the size of the image far exceeds the available screen size:
Using the drawInRect method of the UIImage object we can scale the image to fit better on the screen:
- (void)drawRect:(CGRect)rect {

UIImage *myImage = [UIImage imageNamed:@"pumpkin.jpg"];

CGRect imageRect = CGRectMake(10, 10, 300, 400);

[myImage drawInRect:imageRect];

[myImage release];
}
This time, the entire image fits comfortably on the screen:
