Android 自定义控件之第三讲:obtainStyledAttributes 系列函数详解
在项目中开发自定义控件时,或多或少都会用到 obtainStyledAttributes(AttributeSet, int[], int, int) 或者 obtainAttributes(AttributeSet, int[]) 函数,它们的主要作用是:根据传入的参数,返回一个对应的 TypedArray ,如果小伙伴还没有看过 LZ 的第二讲,那么请自行移步 Android 自定义控件之第二讲:TypedArray 详解,好了,就先扯到这里,下面开始今天内容讲解:
获取 TypedArray 对象 的函数一共四个:
1.public TypedArray obtainStyledAttributes (int[] attrs);
2.public TypedArray obtainStyledAttributes (int resid, int[] attrs);
3.public TypedArray obtainAttributes (AttributeSet set, int[] attrs);
4.public TypedArray obtainStyledAttributes (AttributeSet set, int[] attrs, int defStyleAttr, int defStyleRes)。
讲解之前,需要说明一点:函数 1、2、4 都是 Resources.Theme 的函数,而 3 是 Resources 的函数。
接下来,我们针对这四个函数一 一进行讲解:
1. 解析前的准备
1. 在资源文件 values 下创建文件 attrs.xml,如下:
<?xml version="1.0" encoding="utf-8"?>
<resources>

    <declare-styleable name="MyFirstCustomerView">
        <attr name="text" format="string" />
        <attr name="textColor" format="color"/>
        <attr name="textSize" format="dimension"/>
    </declare-styleable>

</resources>
2. 在资源文件 layout 下创建文件 activity_main.xml,如下:
<RelativeLayout xmlns:android="http://schemas.android.com/apk/res/android"
    xmlns:tools="http://schemas.android.com/tools"
    xmlns:first_customer="http://schemas.android.com/apk/res/com.smart.customer_view_03_19"
    android:layout_width="match_parent"
    android:layout_height="match_parent"
    tools:context="${packageName}.${activityClass}" >

    <com.smart.customer_view_03_19.customerview.MyFirstCustomerView
        android:layout_width="wrap_content"
        android:layout_height="wrap_content"
        android:padding="@dimen/small_padding"
        android:layout_centerInParent="true"
        first_customer:text="第一种"
        first_customer:textColor="@color/green"
        first_customer:textSize="@dimen/x_large_font"
        />

</RelativeLayout>
2. 解析
1. obtainStyledAttributes (int[] attrs)
Google Developer 是这么解释这个函数的:
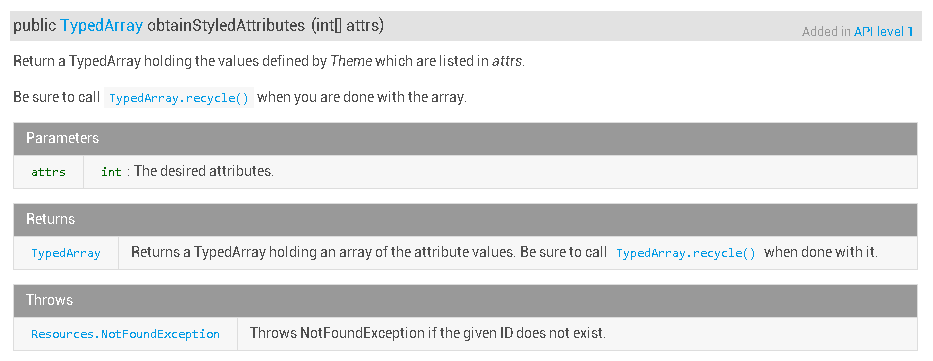
主要信息也就这么一句:
Return a TypedArray holding the values defined by Theme which are listed in attrs
它的大意是:返回一个与 attrs 中列举出的属性相关的数组,数组里面的值由 Theme 指定。从上面的概述中,我们可以知道:这个 Theme 就是关键。于是 LZ 各种试,皇天不负苦心人,谜底最终还是解开了:
attrs 对应的属性值必须定义在 Application 中 android:theme 对应的 style 下,也就是说:
我们在为 Application 设置主题的同时需要在对应的主题下为 attrs 设置相关的属性:
1. 清单文件
<application  android:allowBackup="true" android:icon="@drawable/ic_launcher" android:label="@string/app_name" android:theme="@style/MyAppTheme_1" >
        <activity  android:name="com.smart.customer_view_03_19.MainActivity" android:label="@string/app_name" >
            <intent-filter>
                <action android:name="android.intent.action.MAIN" />

                <category android:name="android.intent.category.LAUNCHER" />
            </intent-filter>
        </activity>
    </application>
2. styles 文件
<!-- MyAppTheme_1 -->
    <style name="MyAppTheme_1" parent="@android:style/Theme.Light.NoTitleBar"> <item name="textColor">@color/red</item> <item name="text">第一种</item> <item name="textSize">@dimen/x_large_font</item> </style>
3. 构造函数
TypedArray _TypedArray = mContext.getTheme().obtainStyledAttributes (R.styleable.MyFirstCustomerView);应用程序运行效果如下:
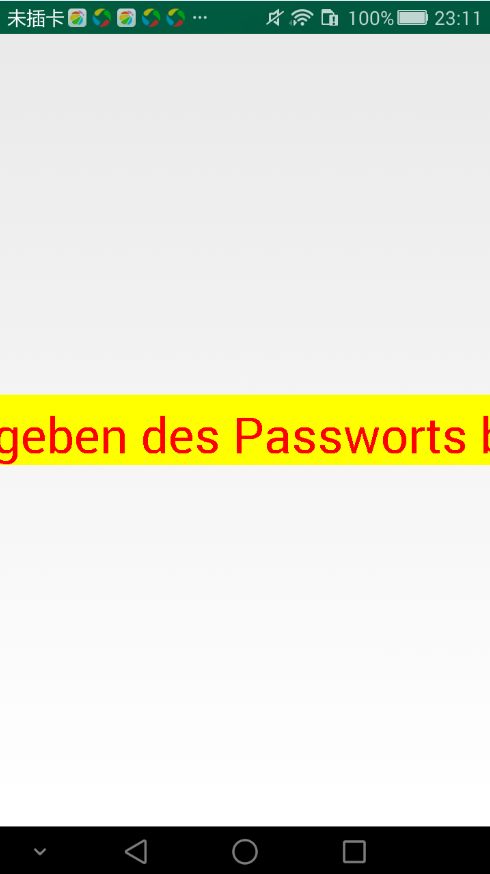
what?!
这些个奇怪字符都是从哪里来的,其实 LZ 也不知道,但是打了个断点看了下,发现从 mText = _TypedArray.getString(R.styleable.MyFirstCustomerView_text); 获取数据的时候已经是这些奇怪字符了,出现问题了,当然有解决问题的办法,我们只需要在构造函数里面做如下操作:
if(!TextUtils.isEmpty(mText)){
            mText = "第一种";
}
这样之后,就是我们想要的效果了:
对!就是这么个情况,搜了下貌似没有人遇到上面的问题,关键这个函数本来就很少有人用,所以等后面吧,也许未来的某一天,LZ 灵机一动,就知道这个问题的答案了,哈哈~,开玩笑~
不知道小伙伴有没有发现,我们在 Layout 布局文件中也为 attrs 对应的属性赋值了,其实简单的分析下就可以知道:无论我们有没有在 Layout 布局文件中为 attrs 对应属性赋值,这些值都不会起作用,因为这些值是从 Theme 中获取的,不相信的小伙伴可以自己试下,答案肯定和 LZ 分析的一样。
2. obtainStyledAttributes (int resid, int[] attrs)
Google Developer 是这么解释这个函数的:
细心的朋友一定会发现,其实这个函数的解释和上面的那个差不多。没错!格式几乎一样,因此我们只需要仿照上面的例子,找出这句话里面的关键字即可:
Return a TypedArray holding the values defined by the style resource resid which are listed in attrs
这句话的大意是:返回一个与 attrs 中列举出的属性相关的数组,数组里面的值由 样式属性resid 指定。其实这句话已经很明确了,因此我们就不做过多的赘述,直接上 Demo:
1. 清单文件
<application  android:allowBackup="true" android:icon="@drawable/ic_launcher" android:label="@string/app_name" android:theme="@style/AppTheme" >
        <activity  android:name="com.smart.customer_view_03_19.MainActivity" android:label="@string/app_name" >
            <intent-filter>
                <action android:name="android.intent.action.MAIN" />

                <category android:name="android.intent.category.LAUNCHER" />
            </intent-filter>
        </activity>
    </application>
2. styles 文件
<!-- 第二种 :此时不需要在 Xml 布局文件中声明自定义控件的属性-->
    <!-- MyFirstCustomerViewStyle_1 -->
    <style name="MyFirstCustomerViewStyle_1" > <item name="textColor">@color/green</item> <item name="text">第二种</item> <item name="textSize">@dimen/x_large_font</item> </style>
3. 构造函数
TypedArray _TypedArray = mContext.getTheme().obtainStyledAttributes (R.style.MyFirstCustomerViewStyle_1,R.styleable.MyFirstCustomerView);
应用程序运行效果如下:
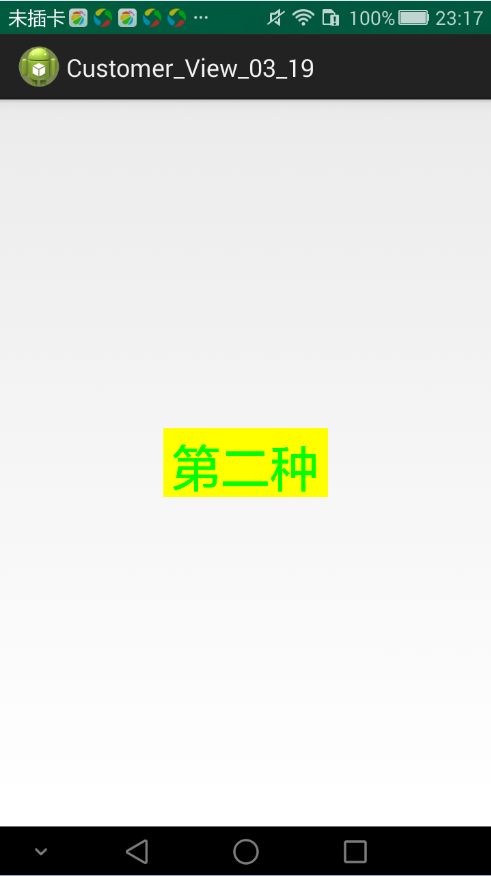
对,就是这么简单!
同上个函数一样,因为 attrs 的属性都是 style 文件中获取的,因此无论是否在 Layout 布局文件中为 attrs 添加属性,这些值都不会起作用。
3. obtainAttributes (AttributeSet set, int[] attrs)
Google Developer 是这么解释这个函数的:
相信在自定义控件的时候,应该有好多小伙伴和 LZ 一样喜欢用这个函数吧。
同上面两个函数一样,也是一句话:
Retrieve a set of basic attribute values from an AttributeSet, not performing styling of them using a theme and/or style resources.
这句话的大意是:从 AttributeSet 中获取 attrs 对应的属性值,不为这些属性值设置样式。
考虑到很多小伙伴经常使用这个函数,因此,直接上 Demo:
1. XML 布局文件
<!-- first_customer:text="第三种" -->
    <com.smart.customer_view_03_19.customerview.MyFirstCustomerView  android:layout_width="wrap_content" android:layout_height="wrap_content" android:padding="@dimen/small_padding" android:layout_centerInParent="true" first_customer:text="第三种" first_customer:textColor="@color/blue" first_customer:textSize="@dimen/x_large_font" />
2. 清单文件
<application  android:allowBackup="true" android:icon="@drawable/ic_launcher" android:label="@string/app_name" android:theme="@style/AppTheme" >
        <activity  android:name="com.smart.customer_view_03_19.MainActivity" android:label="@string/app_name" >
            <intent-filter>
                <action android:name="android.intent.action.MAIN" />

                <category android:name="android.intent.category.LAUNCHER" />
            </intent-filter>
        </activity>
    </application>
3. 构造函数
TypedArray _TypedArray = mContext.getResources().obtainAttributes (attrs,R.styleable.MyFirstCustomerView)不知道小伙伴还记不记得 LZ 在上面说过这个函数的特殊性—— Resources 里面的函数。
应用程序运行效果如下:
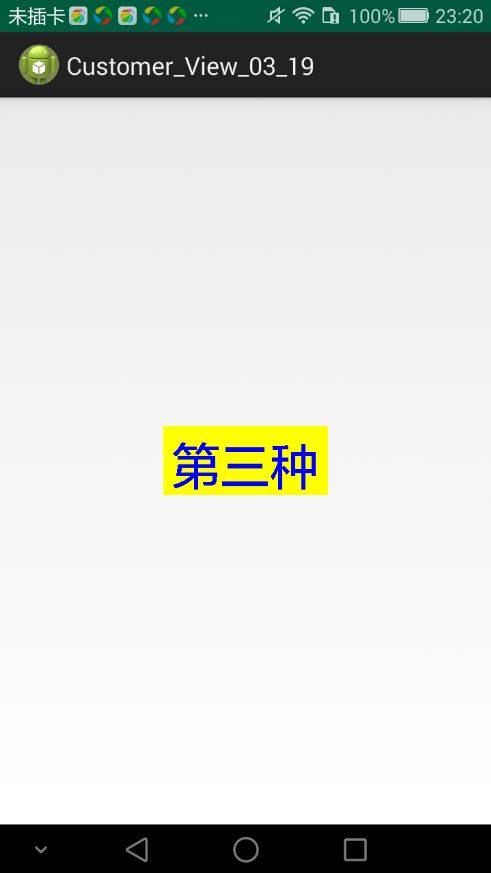
同上面的两个函数不同,在这个函数里面的有个特别的参数 AttributeSet,它对应着 attrs 里面的属性,AttributeSet 对象中的数据是从 XML 布局文件中读取出来的,因此此时如果我们不在布局文件中为 attrs 相关属性设置值,那么就会报错!报错!!报错!!!切记,小伙伴~
4. obtainStyledAttributes (AttributeSet set, int[] attrs, int defStyleAttr, int defStyleRes)
Google Developer 是这么解释这个函数的:

相信很多人看完这么多的注释之后都蒙圈了,LZ 也不例外,第一次看的时候,稀里糊涂的就看完了,看完之后,发现什么也没懂~就是知道怎么用,但是具体里面的细节,一问三不知。终于今天静下心好好研究了下,把之前所有的迷惑都解开了,接下来就让我将这个函数讲个一清二楚吧,哈哈~
上面的 Google 开发者文档的大意是:
返回一个与 attrs 属性相对应的数组。另外,如果在 AttributeSet 中为 attrs 指定了样式属性,那么这个样式属性就会应用在这些属性上。
attribute 最终由下面四个因素决定:
在 AttributeSet 中定义的属性(Any attribute values in the given AttributeSet);
AttributeSet 指定的样式资源文件(The style resource specified in the AttributeSet (named “style”));
由 defStyleAttr 和 defStyleRes 指定的样式资源文件(The default style specified by defStyleAttr and defStyleRes);
主题中的默认值(The base values in this theme)。
上面四种元素的优先级是从上到下排序的,也就是说:如果在 AttributeSet 中定义了某个属性的值,那么无论后面的样式属性如何定义,它的值都不会改变。
接下来我们分别解释下,函数中各参数的含义:
AttributeSet set :XML 中定义的属性值,可能为 null;
int[] attrs :目标属性值;
int defStyleAttr :在当前主题中有一个引用指向样式文件,这个样式文件将 TypedArray 设置默认值。如果此参数为 0 则表示不进行默认值设置。
int defStyleRes :默认的样式资源文件,只有当 defStyleAttr 为 0 或者无法在对应的主题下找到资源文件时才起作用。如果此参数为 0 则表示不进行默认设置。
好了,接下来就开始这部分的讲解吧:
1. attrs 文件
<?xml version="1.0" encoding="utf-8"?>
<resources>

    <declare-styleable name="MyFirstCustomerView">
        <attr name="text" format="string" />
        <attr name="textColor" format="color"/>
        <attr name="textSize" format="dimension"/>
        <!-- 第四种 -->
        <attr name="myCustomerStyle" format="reference"></attr>
    </declare-styleable>

</resources>
2. style 文件
<resources>
    <!-- 第四种(1):在 Xml 布局文件中直接声明属性-->
    <!-- 第四种(2)-->
    <!-- MyAppTheme_2 -->
    <style name="MyAppTheme_2" parent="@android:style/Theme.Light.NoTitleBar"> <item name="myCustomerStyle">@style/MyFirstCustomerViewStyle_2</item> </style>
    <!-- MyFirstCustomerViewStyle_2 -->
    <style name="MyFirstCustomerViewStyle_2" parent="@android:style/Theme.Light.NoTitleBar"> <item name="textColor">@color/oriange</item> <item name="text">第四种(2)</item> <item name="textSize">@dimen/x_large_font</item> </style>
    <!-- 第四种 (3)-->
    <!-- MyFirstCustomerViewStyle_3 -->
    <style name="MyFirstCustomerViewStyle_3" > <item name="textColor">@color/purple</item> <item name="text">第四种(3)</item> <item name="textSize">@dimen/x_large_font</item> </style>
</resources>
3. xml 布局文件
<com.smart.customer_view_03_19.customerview.MyFirstCustomerView
        android:layout_width="wrap_content"
        android:layout_height="wrap_content"
        android:padding="@dimen/small_padding"
        android:layout_centerInParent="true"
        first_customer:text="第四种(1)"
        first_customer:textColor="@color/blue"
        first_customer:textSize="@dimen/x_large_font"
        />
4. 清单文件
<application  android:allowBackup="true" android:icon="@drawable/ic_launcher" android:label="@string/app_name" android:theme="@style/MyAppTheme_2" >
        <activity  android:name="com.smart.customer_view_03_19.MainActivity" android:label="@string/app_name" >
            <intent-filter>
                <action android:name="android.intent.action.MAIN" />

                <category android:name="android.intent.category.LAUNCHER" />
            </intent-filter>
        </activity>
    </application>
5. 构造函数
TypedArray _TypedArray = mContext.getTheme().obtainStyledAttributes(attrs, R.styleable.MyFirstCustomerView, R.attr.myCustomerStyle, R.style.MyFirstCustomerViewStyle_3);应用程序运行效果如下:
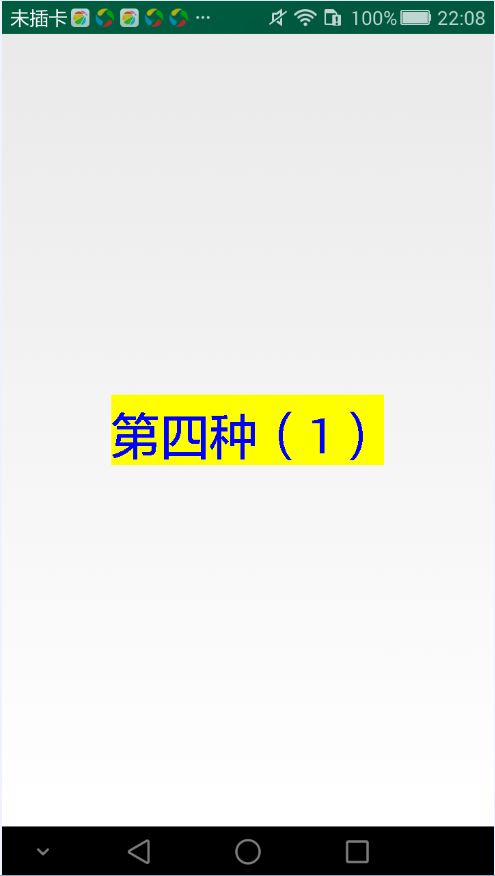
这是默认情况,在这种情况下,因为 AttributeSet 属性不为 null,因此后面的两个参数的作用是无法体现出来的。
于是乎,接下来,我们就让 AttributeSet 为 null。看有什么情况发生:
其他地方都不改变,只需将构造函数稍微做下更改:
1. 构造函数
TypedArray _TypedArray = mContext.getTheme().obtainStyledAttributes(null, R.styleable.MyFirstCustomerView, R.attr.myCustomerStyle, R.style.MyFirstCustomerViewStyle_3);应用程序运行效果如下:
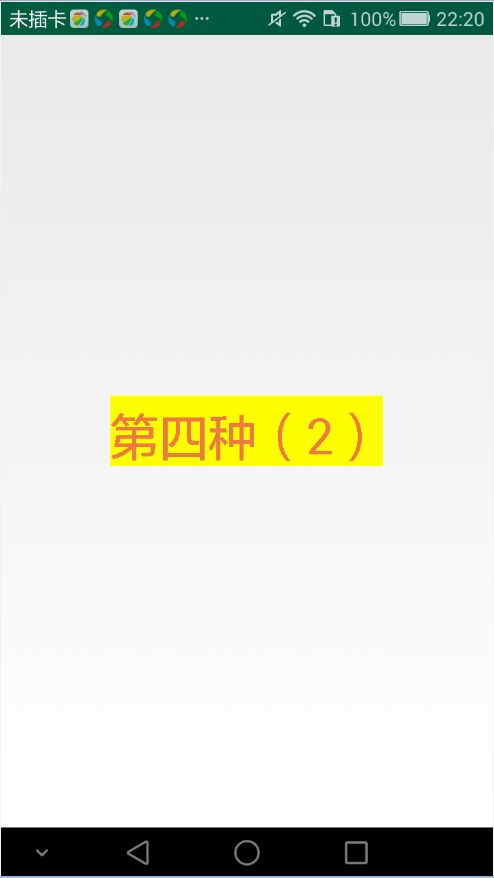
有没有觉得很神奇,没错,此时应用的正是第三个参数对应的样式文件。
它的调用逻辑是这样的:
那么,如果第三个参数为 0 会有怎样的结果呢:
其他地方都不改变,只需将构造函数稍微做下更改:
1. 构造函数
TypedArray _TypedArray = mContext.getTheme().obtainStyledAttributes(null, R.styleable.MyFirstCustomerView, 0, R.style.MyFirstCustomerViewStyle_3);应用程序运行效果如下:
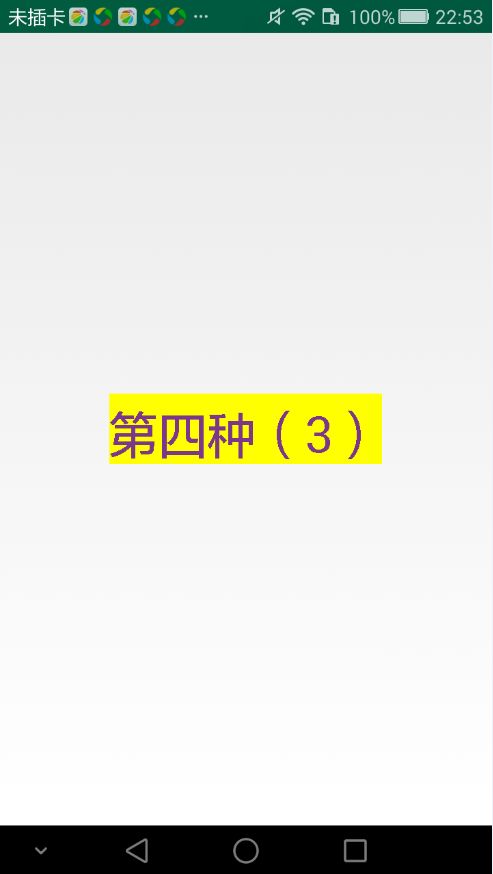
不知道小伙伴是否还记得 LZ 在讲此函数四个决定因子时说过,它们的优先级是从高到底依次排列的:
AttributeSet > defStyleAttr > defStyleRes
这样一说之后,我想小伙伴肯定都知道怎么会出现上面三种情况了吧。好了,到这里,这篇文章也就讲完了,接下来,我们做个总结:
1. 获取 TypedArray 对象 的函数一共四个:
1.obtainStyledAttributes (int[] attrs);
2.obtainStyledAttributes (int resid, int[] attrs);
3.obtainAttributes (AttributeSet set, int[] attrs);
4.obtainStyledAttributes (AttributeSet set, int[] attrs, int defStyleAttr, int defStyleRes)。
2. 第三个和第四个是最常用的。
Ps:参考文章
开发者平台_obtainStyledAttributes
开发者平台_obtainAttributes
时候不早啦,准备休息啦,希望可以帮到小伙伴,have a good day~
LZ 本来想把程序在 CSDN 分享给小伙伴呢,可是,上传了几次都不行,结果 LZ 放弃了,LZ 把程序上传到了百度云盘,伸手党可以自行下载~
项目地址