gamma correct blurring
博主实现
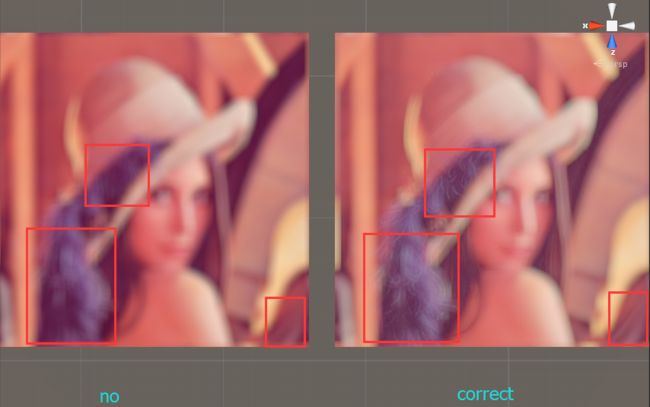
来自wolf96的测试
未矫正的模糊颜色不准确,而且丢失了大量细节
正文
One mistake most of us have done at some point is to do perform an image bluring downsizeing (or other linear pixel operation) on photographs without taking gamma into account. And that's because photographs are encoded in gamma space for best display quality. Ideally your image blurring algorithm should preserve the image brightness intact and only blur the detail in it, or in other words, if the blur kernel is going to be energy conserving, it will have to operate in linear space rather than gamma space. So, when blurring an photograph, one should degamma the image pixels before accumulating them, and then probably apply gamma back to the result after averaging for display. This, of course, is something we now always do, because it's a pain and most of the times slow if done by hand (thankfully most GPU hardware these days can do this for you if you choose the correct internal format for your textures).
This observation applies to box lurring, gaussian blurring, image downsampling, sobel filters, and basically anything that is a linear combination of pixel values, but it can probably be best illustrated with this simple box blur pseudocode below.
Wrong way to do a box blur: vec3 col = vec3(0.0);
for( int j=-w; j<=w; j++ )
for( int i=-w; i<=w; i++ )
{
col += src[x+i,y+j];
}
dst[x,y] = col / ((2*w+1)*(2*w+1)); |
Correct way to do a box blur: vec3 col = vec3(0.0);
for( int j=-w; j<=w; j++ )
for( int i=-w; i<=w; i++ )
{
col += DeGamma( src[x+i,y+j] );
}
dst[x,y] = Gamma( col / ((2*w+1)*(2*w+1)) ); |
Here Gamma() and DeGamma() are the gamma correction function and its inverse. These can probably be just approximations, such as Gamma(x) = pow( x, 1.0/2.2 ) and DeGamma(x) = pow( x, 2.2 ), or even Gamma(x) = sqrt(x) and DeGamma(x) = x*x if you really want to safe some cycles.
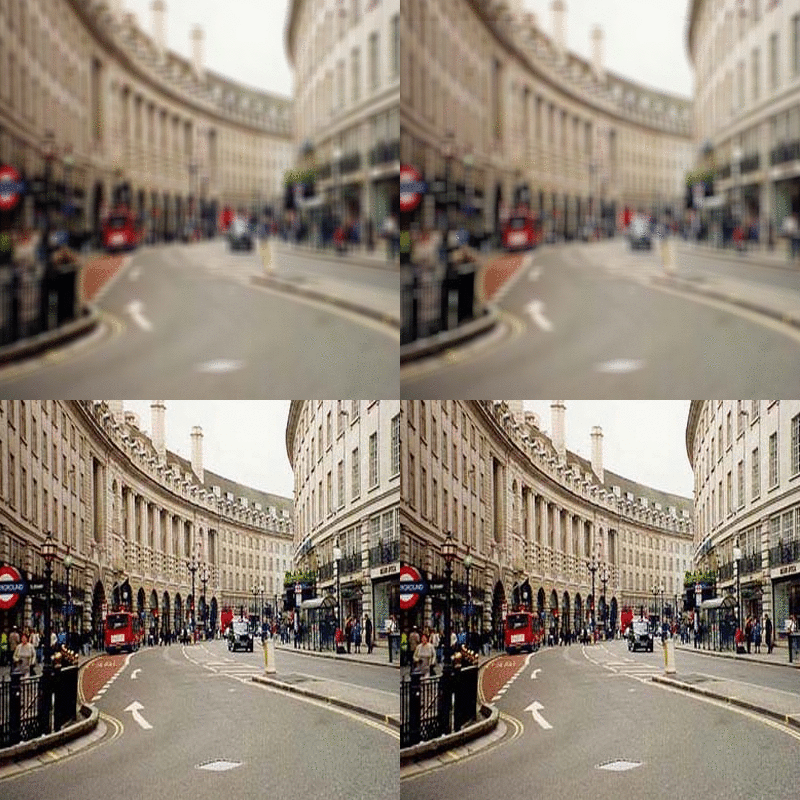
The image bellow shows on the left side the wrong (and most common) way to blur an image, and the right side shows the result of correct blurring. Note how the correct version does not get darker but retains the original overall intensity after blurring, unlike the one in the left. The effect is pretty obvious in the area where the bus is in the picture. The effect would be even more obvious if the correct and incorrect images were overlapping.

Left, gamma unaware blurring (too dark). Right, gamma correct blurring (correct brightness)
So, remember. If you are in the GPU, use sRGB for textures that containt photographics material and are ready to be displayed as they are. If you are in the CPU, remember to apply the inverse gamma correction. You probably want to do with a LUT with 256 entries that stores 16 bit integers with the fixed point representation of the de-gammaed value (mapping 8 bit to 8 bit would give you a lose of quality, for that point of storing images in gamma space is exatcly to improve perceptual quantification quality).
http://iquilezles.org/www/articles/gamma/gamma.htm


