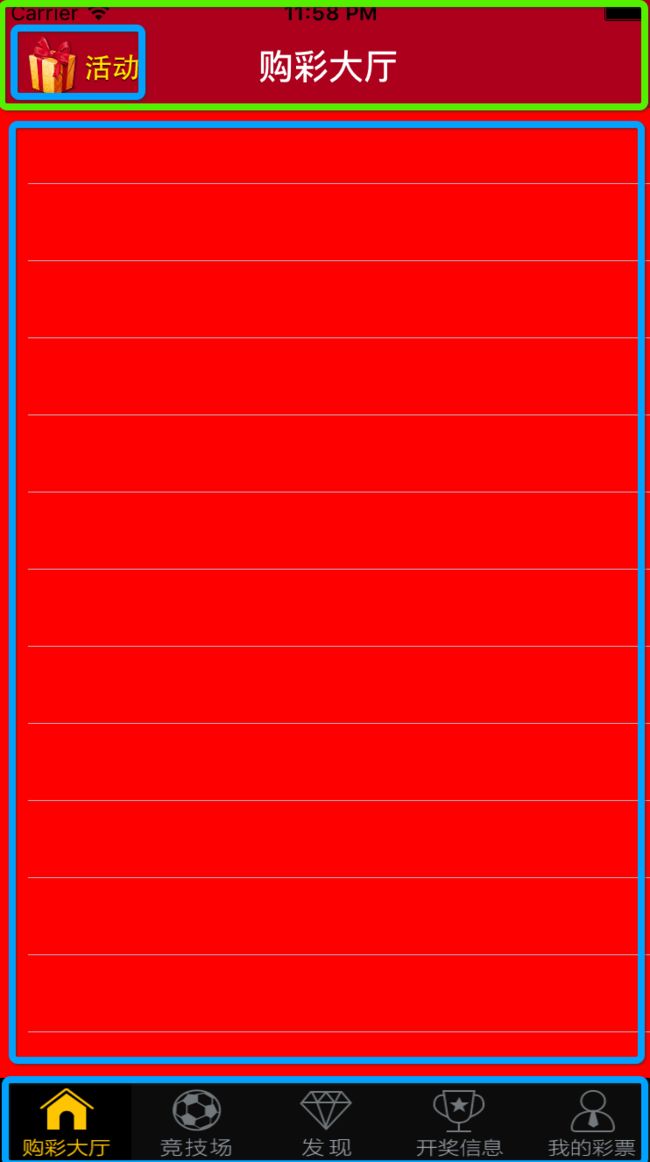
一. 开发准备
1. 理清项目的总体架构–每个页面所用的控制器类型
2. 层级关系–找出每个层级是否有关
3. 计划采取搭建框架的方式(纯代码或者storyboard)
—3.1 当项目的总体页面小于或者等于四个的时候,选用storyboard.反之选用纯代码
二. 纯代码搭建(结构清晰)
1. App展示图:

2. 根据功能模块,我们需要先创建文件夹–创建5个文件夹
3. 每个功能模块里面的子文件夹都是需要根据MVC的思想来创建
4. 设置APP启动界面
5. 设置APP应用图标
6. 设置类的前缀–在每次创建类的时候会直接在起始位置加上公司的名称的首字母,注意要大写.
三. 子控制器的添加部分
1. 将Min删除

2. 创建窗口和根控制器
- (BOOL)application:(UIApplication *)application didFinishLaunchingWithOptions:(NSDictionary *)launchOptions {
self.window = [[UIWindow alloc] initWithFrame:[UIScreen mainScreen].bounds];
XFTabBarController *tabBarController = [[XFTabBarController alloc] init];
self.window.rootViewController = tabBarController;
[self.window makeKeyAndVisible];
return YES;
}
3. 自定义UITabBarController控制器
— 为什么要自定义的原因:由于我们需要往UITabBarController里面添加子控制器,那么这样就需要UITabBarController控制器自己管理,如果都写在AppDelegate里面不便于管理,而且过于累赘.自定义UITabBarController之后就让属于UITabBarController的东西让它自己管理.
4. 创建需要添加的子控制器
#pragma mark - 创建需要添加的子控制器
- (void)setUpAllChildViewController
{
XFHallViewController *hall = [[XFHallViewController alloc] init];
hall.view.backgroundColor = [UIColor greenColor];
[self setUpOneChildViewController:hall image:[UIImage imageNamed:@"TabBar_LotteryHall_new"] selImage:[UIImage imageNamed:@"TabBar_LotteryHall_selected_new"] title:@"购彩大厅"];
XFAreanViewController *arean = [[XFAreanViewController alloc] init];
arean.view.backgroundColor = [UIColor redColor];
[self setUpOneChildViewController:arean image:[UIImage imageNamed:@"TabBar_Arena_new"] selImage:[UIImage imageNamed:@"TabBar_Arena_selected_new"] title:@"竞技场"];
XFDiscoverViewController *discover = [[XFDiscoverViewController alloc] init];
discover.view.backgroundColor = [UIColor yellowColor];
[self setUpOneChildViewController:discover image:[UIImage imageNamed:@"TabBar_Discovery_new"] selImage:[UIImage imageNamed:@"TabBar_Discovery_selected_new"] title:@"发现"];
XFHistoryViewController *history = [[XFHistoryViewController alloc] init];
history.view.backgroundColor = [UIColor blueColor];
[self setUpOneChildViewController:history image:[UIImage imageNamed:@"TabBar_History_new"] selImage:[UIImage imageNamed:@"TabBar_History_selected_new"] title:@"开奖信息"];
XFMyLotterViewController *lotter = [[XFMyLotterViewController alloc] init];
lotter.view.backgroundColor = [UIColor purpleColor];
[self setUpOneChildViewController:lotter image:[UIImage imageNamed:@"TabBar_MyLottery_new"] selImage:[UIImage imageNamed:@"TabBar_MyLottery_selected_new"] title:@"我的彩票"];
}
5. 由于我们采用的是主流框架的搭建方式,那么我们需要在UITabBarController控制器里面添加一个导航控制器,同时给控制器的底部添加按钮的图片和标题
#pragma mark - 用于添加创建子控件时候需要的参数
- (void)setUpOneChildViewController:(UIViewController *)vc image:(UIImage *)image selImage:(UIImage *)selImage title:(NSString *)title
{
vc.title = title;
vc.tabBarItem.image = image;
vc.tabBarItem.selectedImage = selImage;
[self.arrayItem addObject:vc.tabBarItem];
if ([vc isKindOfClass:[XFAreanViewController class]]) {
XFAreanNavigationController *areanNav = [[XFAreanNavigationController alloc] initWithRootViewController:vc];
[self addChildViewController:areanNav];
}else{
XFNavigationController *nav = [[XFNavigationController alloc] initWithRootViewController:vc];
[self addChildViewController:nav];
}
}
6. 我们采用抽取方法的形式将子控制器的创建和标题的添加些分别写在两个方法中
四. 控制器底部按钮创建于添加部分
1. 程序一运行我们会发现,系统自带的tabBar并不能满足我们的需求
— 原因:运行后我们发现,系统自带的控制器,在tabBar部分按钮显示的图片突出了tabBar的范围,并不能满足要求.(tabBar的高度是44)
2. 创建两个装模型的数组
第一段代码是在UITabBarController控制器中
@property (nonatomic, strong) NSMutableArray *arrayItem;
第二段代码是在自定义的tabBar中
@property (nonatomic, strong) NSArray *arrayItem;
3. 创建和添加控制器底部按钮
运用get和set方法达到创建底部按钮和添加底部按钮的操作
创建:
#pragma mark - 在里面创建tabBar下面的按钮
- (void)setArrayItem:(NSArray *)arrayItem
{
_arrayItem = arrayItem;
for (int i = 0; i < arrayItem.count; i++) {
UIButton *btn = [UIButton buttonWithType:UIButtonTypeCustom];
btn.tag = i;
UITabBarItem *item = arrayItem[i];
[btn setBackgroundImage:item.image forState:UIControlStateNormal];
[btn setBackgroundImage:item.selectedImage forState:UIControlStateSelected];
[self addSubview:btn];
[btn addTarget:self action:@selector(btnClick:) forControlEvents:UIControlEventTouchDown];
if (i == 0) {
[self btnClick:btn];
}
}
}
添加(布局):
#pragma mark - 布局子控件
- (void)layoutSubviews
{
[super layoutSubviews];
int count = (int)self.subviews.count;
CGFloat x = 0;
CGFloat y = 0;
CGFloat btnW = self.bounds.size.width / count;
CGFloat btnH = self.bounds.size.height
for (int i = 0; i < count; i++) {
x = i * btnW;
UIButton *btn = self.subviews[i];
btn.frame = CGRectMake(x, y, btnW, btnH);
}
}
五. 按钮的业务逻辑
总体思路采用的方法:代理
1. 监听底部按钮的点击事件
在创建底部按钮的时候我往里面加了一个监听按钮的方法
[btn addTarget:self action:@selector(btnClick:) forControlEvents:UIControlEventTouchDown];
实现监听中的方法,同时我们在里面设置按钮选中的状态
#pragma mark - 实现监听方法
- (void)btnClick:(UIButton *)btn
{
self.preSelecBtn.selected = NO;
btn.selected = YES;
self.preSelecBtn = btn;
if ([self.delegate respondsToSelector:@selector(tabBar:selectBtnIndex:)]) {
[self.delegate tabBar:self selectBtnIndex:btn.tag];
}
}
2. 取消系统自带的按钮选中的高亮状态,用自己设置的按钮点击后的亮度
- (void)setHighlighted:(BOOL)highlighted
{
}
3. 通过点击底部按钮,切换控制器
在自定义的tabBar中写入协议,并且设置代理
@class XFTabBar;
@protocol XFTabBarDelegate<NSObject>
- (void)tabBar:(XFTabBar *)tabBar selectBtnIndex:(NSInteger)index;
@end
@interface XFTabBar : UIView
@property (nonatomic, strong) NSArray *arrayItem;
@property (nonatomic, weak) id<XFTabBarDelegate>delegate;
设置XFTabBarController控制器为代理
tabBar.delegate = self;
4. 在按钮监听的方法中做出判断
if ([self.delegate respondsToSelector:@selector(tabBar:selectBtnIndex:)]) {
[self.delegate tabBar:self selectBtnIndex:btn.tag];
}
5. 让XFTabBarController控制器实现代理方法
#pragma mark - 实现代理方法
- (void)tabBar:(XFTabBar *)tabBar selectBtnIndex:(NSInteger)index
{
self.selectedIndex = index;
}
六. 导航条的处理
原因:由于在App中看到的每个界面的导航条的样式都不一样,设置了图片,那么系统自带的导航条行业是无法满足我们的需求,那么我们自定义两种类型的导航控制器,通过设置里面导航条的样式来达到需求
1. 创建两种类型的导航控制器:一种是竞技场用的导航控制器和其它页面所用的导航控制器

2. 两种导航控制器中的方法都是一样的(就只是将自己传入的图片修改)
+ (void)initialize
{
UINavigationBar *bar = [UINavigationBar appearanceWhenContainedInInstancesOfClasses:@[[XFNavigationController class]]];
[bar setBackgroundImage:[UIImage imageNamed:@"NavBar64"] forBarMetrics:UIBarMetricsDefault];
NSMutableDictionary *dict = [NSMutableDictionary dictionary];
dict[NSForegroundColorAttributeName] = [UIColor whiteColor];
dict[NSFontAttributeName] = [UIFont boldSystemFontOfSize:20];
[bar setTitleTextAttributes:dict];
}
特别说明:对上面的代码部分,只要将绿色部分图片修改为个对应的图片样式就可以
3. 选中各自的导航控制器的判断方法
if ([vc isKindOfClass:[XFAreanViewController class]]) {
XFAreanNavigationController *areanNav = [[XFAreanNavigationController alloc] initWithRootViewController:vc];
[self addChildViewController:areanNav];
}else{
XFNavigationController *nav = [[XFNavigationController alloc] initWithRootViewController:vc];
[self addChildViewController:nav];
}
七. 导航控制器顶部的活动按钮
说明活动按钮的功能:当点击活动按钮的时候,会弹出一张灰色的遮盖,将整个屏幕盖住;然后在遮盖的上面会出现一张图片(两者是同时出现的).当点击图片上右上角的x是会使得图片缩小到某个部位,然后遮盖也移除.
1. 自定义一个继承UIView的类,用来创建遮盖

类中的方法:
+ (void)show
{
XFCoverView *coverView = [[XFCoverView alloc] init];
coverView.backgroundColor = [UIColor blackColor];
coverView.alpha = 0.6;
coverView.frame = [UIScreen mainScreen].bounds;
[[UIApplication sharedApplication].keyWindow addSubview:coverView];
}
2. 设置并且监听购彩大厅控制器顶部的左侧按钮
self.navigationItem.leftBarButtonItem = [[UIBarButtonItem alloc] initWithImage:[UIImage imageWithOriImageName:@"CS50_activity_image"] style:UIBarButtonItemStylePlain target:self action:@selector(activity)];
3. 实现监听方法
#pragma mark - 实现监听方法
- (void)activity
{
[XFCoverView show];
XFPopView *popView = [XFPopView showInPoint:self.view.center];
popView.delegate = self;
}
4. 移除图片和遮盖
采用思路:代理
4.1 首先我们实现下面两个方法:
+ (instancetype)showInPoint:(CGPoint)point;
- (void)hiddenInPoint:(CGPoint)point;
代码描述1:给定一个点,显示出图片将要出现的位置,并且返回图片
#pragma mark - 图片出现
+ (instancetype)showInPoint:(CGPoint)point
{
XFPopView *popView = [[NSBundle mainBundle] loadNibNamed:@"XFPopView" owner:nil options:nil][0];
popView.center = point;
[[UIApplication sharedApplication].keyWindow addSubview:popView];
return popView;
}
代码描述2:外界给定一个点,知道图片将要隐藏的位置
#pragma mark - 图片隐藏
- (void)hiddenInPoint:(CGPoint)point
{
[UIView animateWithDuration:0.7 animations:^{
self.center = point;
self.transform = CGAffineTransformMakeScale(0.00001, 0.00001);
} completion:^(BOOL finished) {
for (UIView *view in [UIApplication sharedApplication].keyWindow.subviews ) {
if ([view isKindOfClass:[XFCoverView class]]) {
[view removeFromSuperview];
}
[self removeFromSuperview];
}
}];
}
4.2 协议定义与代理设置
让自定义的图片成为拟定协议方:
@class XFPopView;
@protocol XFPopViewDelegate <NSObject>
- (void)popView:(XFPopView *)popView ;
@end
@interface XFPopView : UIView
@property (nonatomic, weak) id <XFPopViewDelegate>delegate;
@end
设置代理:在购彩大厅的监听活动按钮的方法中设置代理:
popView.delegate = self;
4.3 监听图片上的退出按钮
图片采用Xib的方法创建,理由是因为图片的格式是固定不变的.
代码描述:我们在下面图片移除的按钮中设置判断代理实现的方法
#pragma mark - 图片移除按钮的监听
- (IBAction)btnCloseClick:(UIButton *)sender
{
if ([self.delegate respondsToSelector:@selector(popView:)]) {
[self.delegate popView:self];
}
}
4.4 代理实现协议的方法
#pragma mark - 实现代理方法

- (void)popView:(XFPopView *)popView { [popView hiddenInPoint:CGPointMake(20, 40)]; }
八. 结束语
最后部分有一点瑕疵,这里我先买个关子,先听听你们的理解,明天再奉上代码优化部分(提醒优化部位:最后的点击图片退出部分).


