Centos 6.5 安装 Icinga2 -- Icinga2-web
Icinga2 Icinga2-web 安装配置教程
1.关闭selinux
iptables -F[root@localhost ~]# sed -i 's/SELINUX=enforcing/SELINUX=disabled/' /etc/selinux/config
[root@localhost ~]# setenforce 0
chkconfig iptables off
3. 安装系统插件
[root@localhost ~]# yum -y install wget vim
4. 安装并配置 yum 源
添加 Icinga 源
[root@localhost ~]# cat > /etc/yum.repos.d/icinga.repo <<EOF
> [ICINGA]
> name=ICINGA
> baseurl=http://packages.icinga.org/epel/6/release/
> enable=1
> gpgcheck=0
> EOF
安装 epel 源
[root@localhost~]# rpm -Uvh https://dl.fedoraproject.org/pub/epel/epel-release-latest-6.noarch.rpm
5.配置时间自动同步计划任务
[root@localhost ~]# yum -y install ntp
[root@localhost ~]# crontab –e
*/5 * * * * /usr/sbin/ntpdate time.windows.com > /dev/null
6.安装并配置icinga 依赖包。
【PHP】
[root@localhost ~]# yum install –y php-cli php-pear php-xmlrpc php-xsl php-pdo php-soap php-gd php-ldap php php-mysql php-intl php-pecl-imagick php-pgsql httpd
[root@localhost ~]# sed -i 's/;date.timezone =/date.timezone = Asia\/\Shanghai/' /etc/php.ini
[root@localhost ~]# service httpd restart
[root@localhost ~]# chkconfig httpd --level 35 on
【mysql】
[root@localhost ~]# yum install mysql-server mysql –y
[root@localhost ~]# service mysqld start
[root@localhost ~]# chkconfig mysqld --level 35 on
# 创建一个数据库,并授权
[root@localhost ~]# mysql
mysql> create database icinga default charset utf8;
Query OK, 1 row affected (0.00 sec)
mysql> grant all on icinga.* to icinga@'127.0.0.1' identified by '123';
Query OK, 0 rows affected (0.00 sec)
mysql> create database icingaweb2 default charset utf8;
Query OK, 1 row affected (0.00 sec)
mysql> grant all on icingaweb2.* to icingaweb2@'127.0.0.1' identified by '123';
Query OK, 0 rows affected (0.00 sec)
mysql> flush privileges;
Query OK, 0 rows affected (0.00 sec)
【DB DBO】
[root@localhost ~]# yum install icinga2-ido-mysql icinga-idoutils-libdbi-mysql –y
[root@localhost ~]# service icinga2 start
[root@localhost ~]# chkconfig icinga2 on
[root@localhost ~]# service ido2db start
[root@localhost ~]# chkconfig ido2db on
二、安装主程序
1.安装 icinga2
[root@localhost ~]# yum install –y icinga2 boost-regex boost-system boost-test boost-thread icinga2-common icingacli
2.安装 icinga2-web
[root@localhost ~]# yum install -y icingaweb2
3.重启网站服务
[root@localhost ~]# service httpd restart
4.数据库处理
[root@localhost ~]# mysql -h 127.0.0.1 -u icinga -p123 icinga < /usr/share/icinga2-ido-mysql/schema/mysql.sql
5.插件安装
[root@localhost ~]# yum install nagios-plugins-all –y
6.生成key
[root@localhost ~]# icingacli setup config directory --group icingaweb2
[root@localhost ~]# icingacli setup token create
The newly generated setup token is: 383e9bd1ceef9a94
7.按需求修改ido2db 配置文件
[root@localhost etc]# vim /etc/icinga/ido2db.cfg
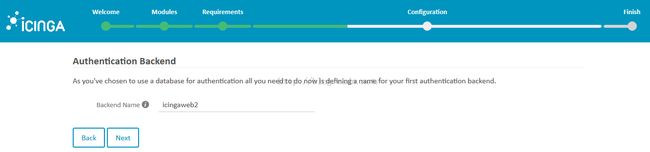
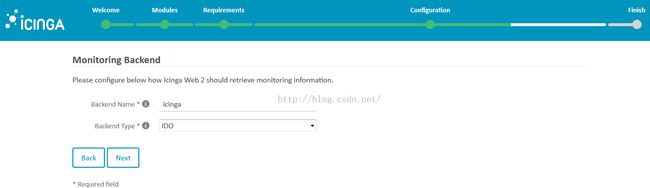
8.安装icingaweb2
http://192.168.31.219/icingaweb2/setup
如果出现 The directory /etc/icingaweb2 is not writable.就关闭SELINUX


mysql -uroot -p
use mysql
pdate user set password=password("123456") where user="root";
GRANT ALL PRIVILEGES ON *.* TO root@"%" IDENTIFIED BY '1234.com' WITH GRANT OPTION;
GRANT ALL PRIVILEGES ON *.* TO icinga@"%" IDENTIFIED BY '1234.com' WITH GRANT OPTION;
flush privileges;