Android蓝牙学习笔记(二)
不扯淡,继续写没有水平的菜鸟博客。这篇文章是上一篇的继续http://blog.csdn.net/leilifengxingmw/article/details/51104351
现在应该到了连接设备的阶段了。
为了使你的应用能在两个设备之间建立连接,你必须实现服务端和客户端机制,因为一个设备必须打开服务的socket,另一个设备发起主动连接。当客户端和服务端在同一个RFCOMM 信道上有一个BluetoothSocket的时候。两者是可以连接的。当两者连接后,两者可以进开始数据的交互。
注意:如果两个设备以前没有配对过,那么安卓框架在连接的过程中会自动展示一个配对请求的通知或者对话框来通知用户。连接过程是一个阻塞的直到用户成功配对,或者由于对方拒绝而失败,或者超时。
第一步:建立一个server socket 来接受连接的基本步骤
1: 通过调用listenUsingRfcommWithServiceRecord(String, UUID). 来获得一个BlueToothServerSocket
2 : 调用accept()来监听连接请求。这是一个阻塞的方法不应再主activity 的ui线程调用
3 : 除非你想接受另外的连接,否则就调用 close();说明一下,close()方法会释放socket server 的所有资源,但是不会关闭accept()方法返回的已经连接的BluetoothSocket。和TCP/IP不同,RFCOMM 只允许一个信道每次只有一个客户端连接。所以在大多数情况下在接受一个连接的socket后,最好调用close()
安卓官网上的示例代码,在一个新的线程中建立server
private class AcceptThread extends Thread {
    private final BluetoothServerSocket mmServerSocket;

    public AcceptThread() {
        // Use a temporary object that is later assigned to mmServerSocket,
        // because mmServerSocket is final
        BluetoothServerSocket tmp = null;
        try {
            // MY_UUID is the app's UUID string, also used by the client code
            tmp = mBluetoothAdapter.listenUsingRfcommWithServiceRecord(NAME, MY_UUID);
        } catch (IOException e) { }
        mmServerSocket = tmp;
    }

    public void run() {
        BluetoothSocket socket = null;
        // Keep listening until exception occurs or a socket is returned
        while (true) {
            try {
                socket = mmServerSocket.accept();
            } catch (IOException e) {
                break;
            }
            // If a connection was accepted
            if (socket != null) {
                // Do work to manage the connection (in a separate thread)
                manageConnectedSocket(socket);
                mmServerSocket.close();
                break;
            }
        }
    }

    /** Will cancel the listening socket, and cause the thread to finish */
    public void cancel() {
        try {
            mmServerSocket.close();
        } catch (IOException e) { }
    }
}
第二步 建立一个客户端来发起连接的步骤
1 : 使用 BlueToothDevice调用createRfcommSocketToServiceRecord(UUID).来得到一个 BluetoothSocket
2 : 调用connect()方法来发起连接;说明 1:connect()是一个阻塞方法,不应该在主线程中调用。2:在调用connect()方法后你必须确保设备不再搜索其他的设备,不然连接很有可能会失败。所以在调用connect()方法之前可以调用 mBluetoothAdapter.cancelDiscovery()
android 官方示例代码 ,在新的线程中建立客户端
private class ConnectThread extends Thread {
    private final BluetoothSocket mmSocket;
    private final BluetoothDevice mmDevice;

    public ConnectThread(BluetoothDevice device) {
        // Use a temporary object that is later assigned to mmSocket,
        // because mmSocket is final
        BluetoothSocket tmp = null;
        mmDevice = device;

        // Get a BluetoothSocket to connect with the given BluetoothDevice
        try {
            // MY_UUID is the app's UUID string, also used by the server code
            tmp = device.createRfcommSocketToServiceRecord(MY_UUID);
        } catch (IOException e) { }
        mmSocket = tmp;
    }

    public void run() {
        // Cancel discovery because it will slow down the connection
        mBluetoothAdapter.cancelDiscovery();

        try {
            // Connect the device through the socket. This will block
            // until it succeeds or throws an exception
            mmSocket.connect();
        } catch (IOException connectException) {
            // Unable to connect; close the socket and get out
            try {
                mmSocket.close();
            } catch (IOException closeException) { }
            return;
        }

        // Do work to manage the connection (in a separate thread)
        manageConnectedSocket(mmSocket);
    }

    /** Will cancel an in-progress connection, and close the socket */
    public void cancel() {
        try {
            mmSocket.close();
        } catch (IOException e) { }
    }
}
第三步,管理一个连接
1 : 分别通过 getInputStream() and getOutputStream() 得到输入输出流
2 : 用 read(byte[]) and write(byte[]).来读写数据
android 官方示例代码
private class ConnectedThread extends Thread {
    private final BluetoothSocket mmSocket;
    private final InputStream mmInStream;
    private final OutputStream mmOutStream;

    public ConnectedThread(BluetoothSocket socket) {
        mmSocket = socket;
        InputStream tmpIn = null;
        OutputStream tmpOut = null;

        // Get the input and output streams, using temp objects because
        // member streams are final
        try {
            tmpIn = socket.getInputStream();
            tmpOut = socket.getOutputStream();
        } catch (IOException e) { }

        mmInStream = tmpIn;
        mmOutStream = tmpOut;
    }

    public void run() {
        byte[] buffer = new byte[1024];  // buffer store for the stream
        int bytes; // bytes returned from read()

        // Keep listening to the InputStream until an exception occurs
        while (true) {
            try {
                // Read from the InputStream
                bytes = mmInStream.read(buffer);
                // Send the obtained bytes to the UI activity
                mHandler.obtainMessage(MESSAGE_READ, bytes, -1, buffer)
                        .sendToTarget();
            } catch (IOException e) {
                break;
            }
        }
    }

    /* Call this from the main activity to send data to the remote device */
    public void write(byte[] bytes) {
        try {
            mmOutStream.write(bytes);
        } catch (IOException e) { }
    }

    /* Call this from the main activity to shutdown the connection */
    public void cancel() {
        try {
            mmSocket.close();
        } catch (IOException e) { }
    }
}
下面是效果图,先是server端的效果图

点击第一个按钮,打开了蓝牙后点击“开启服务端等待连接按钮”
Client 的效果图
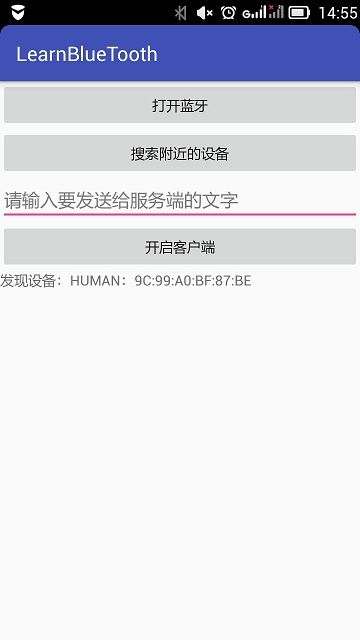
点击“打开蓝牙按钮,等待蓝牙打开。蓝牙打开后,点击搜索附近的设备。如果你的另一台设备已经运行了服务端,并开启了可检测性,那么搜索到的设备的名称和MAC地址会显示在界面上。这是在文本框中输入发送给服务端的文字,然后点击开启客户端。我点击后效果如下,然后在点击后弹出的对话框中点击允许,稍等一会,服务端的界面上就会显示客户端发送过来的文字。”

注意:客户端和服务端我写在了一个android工程里,我运行服务端的时候会修改AndroidManifest.xml文件让ServerActivity.java作为程序的入口
 <activity android:name=".ServerActivity">
            <intent-filter>
                <action android:name="android.intent.action.MAIN" />

                <category android:name="android.intent.category.LAUNCHER" />
            </intent-filter>
        </activity>
当我运行客户端的时候,我会修改AndroidManifest.xml文件让ClientActivity.java作为程序的入口
 <activity android:name=".ClientActivity">
            <intent-filter>
                <action android:name="android.intent.action.MAIN" />

                <category android:name="android.intent.category.LAUNCHER" />
            </intent-filter>

        </activity>
结尾:行,差不多结尾了。自己写的示例代码真的不咋的。Android 之路还很漫长,还得继续努力啊!工程代码的链接地址:http://download.csdn.net/detail/leilifengxingmw/9486537