图像去水印算法
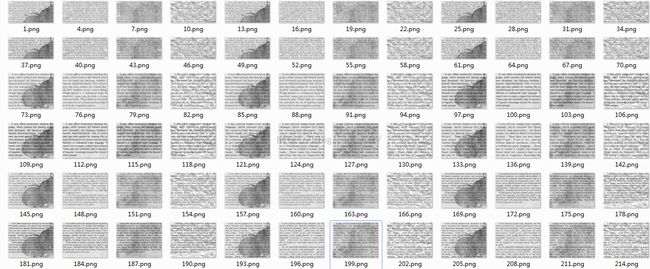
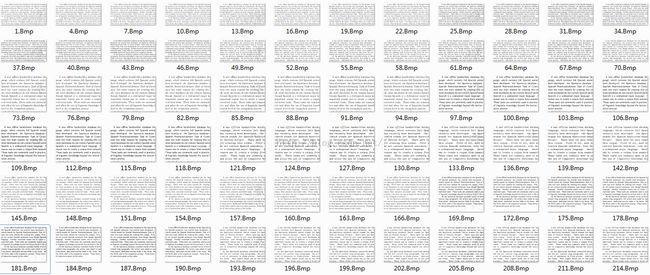
先上效果图,这些分别是有水印的图片以及处理之后的图片。算法十分简单,主要是想法比较有趣。下面会贴出代码,这次专门注释了一下。
算法中的训练值以及训练结果x、y
如上图x是a1、b1、……d5、e5组成的一个25维向量,输出y为c3。用这样的框在图片中扫描,可以得到足够多训练数据,这里展示的效果图片只用了不到20%的图片做训练,因为这里数据实在太多,第一次全部读取内存直接不够了,16G内存。
# coding:utf-8
import argparse
import cPickle
import logging
import numpy
import os.path
import PIL.Image
import sys
import glob
import cv2
import gzip
numpy.random.seed(51244)
from keras.models import Sequential
from keras.layers.core import Dense, Dropout, Activation
from keras.optimizers import SGD

def to_range(ary):  #change to +-1.0
    return ary* 2.0/255.0 - 1.0

def from_range(ary): #rechange from +-1.0
    return (ary + 1.0) * 255.0/2.0

def x_from_image(source, neighbors):  #get the x_train data
    img = PIL.Image.open(source)
    ary = to_range(numpy.array(img))
    enlarged_img = enlarged(ary, neighbors)      #边框填充
    patches = patchify(enlarged_img, neighbors)  #宽度为2*neighbors+1的n个矩阵
    return numpy.array(patches), ary.shape       #x_train data(每个像素点周围的(2n+1)平方像素点) ,原图shape


def y_from_image(source, neighbors): #get the y_train data
    output = []
    cleaned_path = os.path.join('./train_cleaned',os.path.basename(source))
    img = PIL.Image.open(cleaned_path)
    ary = to_range(numpy.array(img))
    height, width = ary.shape
    for i in xrange(height):
        for j in xrange(width):
            output.append(ary[i, j].flatten())  #flatten()??
    return output

def patchify(enlarged, neighbors):  #获取周围点组成集合
    output = []
    height, width = enlarged.shape
    for i in xrange(neighbors, height-neighbors):
        for j in xrange(neighbors, width-neighbors):
            patch = enlarged[i-neighbors:i+neighbors+1, j-neighbors:j+neighbors+1]
            output.append(patch.flatten())
    return output

def enlarged(ary, neighbors):  #填充外围边角
    height, width = ary.shape
    enlarged = numpy.zeros((height + 2 * neighbors, width + 2 * neighbors))
    # Fill in the corners
    enlarged[:neighbors,:neighbors] = ary[0, 0]
    enlarged[:neighbors,-neighbors:] = ary[0, -1]
    enlarged[-neighbors:,:neighbors] = ary[-1, 0]
    enlarged[-neighbors:,-neighbors:] = ary[-1, -1]
    # Fill in the edges
    enlarged[:neighbors, neighbors:-neighbors] = ary[0, :] # top
    enlarged[neighbors:-neighbors, :neighbors] = ary[:, 0][numpy.newaxis].T # left
    enlarged[-neighbors:, neighbors:-neighbors] = ary[-1, :] # top
    enlarged[neighbors:-neighbors, -neighbors:] = ary[:, -1][numpy.newaxis].T # right
    # Fill in the chewy center
    enlarged[neighbors:-neighbors,neighbors:-neighbors] = ary
    return enlarged

def load_training(limit=10,neighbors=2): #读取测试图片
    xs = []
    ys = []
    for path in glob.glob('./train/*.png')[:limit]:
        patches, _ = x_from_image(path, neighbors)
        solutions = y_from_image(path, neighbors)
        xs.extend(patches)
        ys.extend(solutions)
    return xs, ys

def save_training_data(x,y):  #保存测试图片
    f = open('training_data.pkl','wb')
    cPickle.dump(x,f,-1)
    cPickle.dump(y,f,-1)
    f.close()

def load_training_data():  #读取测试图片
    f = open('training_data.pkl')
    x = cPickle.load(f)
    y = cPickle.load(f)
    f.close()
    return x,y

def split_training(xs, ys):  #分出一部分测试集
    joined = zip(xs, ys)
    numpy.random.shuffle(joined)
    xs = [x for x, _ in joined]
    ys = [y for _, y in joined]
    train_count = int(len(xs)*9/10.0)
    valid_count = int(len(xs)/10.0)
    res = (xs[:train_count], ys[:train_count],xs[train_count:], ys[train_count:])
    return [numpy.array(r) for r in res]


'''
def build_model(input_size): #建模
    model = Sequential()
    model.add(Dense(input_size, 512, init='lecun_uniform'))
    model.add(Activation('tanh'))                             #激活函数不能随意选择,这里处理的数据是+-1.0 用tanh做激活函数?
    model.add(Dense(512, 256, init='lecun_uniform'))
    model.add(Activation('tanh'))
    model.add(Dense(256, 128, init='lecun_uniform'))
    model.add(Activation('tanh'))
    model.add(Dense(128, 64, init='lecun_uniform'))
    model.add(Activation('tanh'))
    model.add(Dense(64, 1, init='lecun_uniform'))
    model.add(Activation('tanh'))
    sgd = SGD(lr=0.01, momentum=0.9) # , nesterov=True)
    model.compile(loss='mean_squared_error', optimizer=sgd)
    return model
'''

def build_model(input_size): #建模
    model = Sequential()
    model.add(Dense(input_size, 512, init='lecun_uniform'))
    model.add(Activation('tanh'))
    model.add(Dropout(0.25))
    model.add(Dense(512, 512, init='lecun_uniform'))
    model.add(Activation('tanh'))
    model.add(Dropout(0.25))
    model.add(Dense(512, 256, init='lecun_uniform'))
    model.add(Activation('tanh'))
    model.add(Dropout(0.25))
    model.add(Dense(256, 128, init='lecun_uniform'))
    model.add(Activation('tanh'))
    model.add(Dropout(0.5))
    model.add(Dense(128, 1, init='lecun_uniform'))
    model.add(Activation('tanh'))
    sgd = SGD(lr=0.05, momentum=0.9) # , nesterov=True)
    model.compile(loss='mean_squared_error', optimizer=sgd)
    return model

def train(limit=10, neighbors=2, epochs=10, batch_size=500):  #训练
    print 'loading data...'
    if os.path.exists('./training_data.pkl'):
        xs,ys = load_training_data()
    else:
        xs,ys = load_training(limit, neighbors)
        save_training_data(xs,ys)
        print 'the training_data has been saved!'
    train_x, train_y, valid_x, valid_y= split_training(xs, ys)
    print 'building model...'
    model = build_model(len(train_x[0]))
    if os.path.exists('./clean_weight'):
        model.load_weights(filepath = 'clean_weight')
    model.fit(train_x, train_y,
              nb_epoch=epochs,
              batch_size=batch_size,
              show_accuracy=True,
              validation_data=(valid_x, valid_y))
    model.save_weights(filepath='clean_weight',overwrite=True)


def load_test_images(limit=None, neighbors=2):  #读取测试图片
    image_specs = []
    xs = []
    for path in glob.glob('./test/*.png')[:limit]:
        image_number = os.path.basename(path)[:-len('.png')]
        patches, shape = x_from_image(path, neighbors)
        image_specs.append((image_number, shape))  #图片代号,形状
        xs.append(patches) #数据
    return image_specs, xs  #(代号,形状),训练数据

def create_pictures(limit=5):  #生成新的clean图片
    imgs = []
    image_specs, xs = load_test_images(limit=limit) #(代号,形状),训练数据
    model = build_model(25)   #if neighbors ==2   (2*n+1)^2
    model.load_weights(filepath = 'clean_weight')
    for (num, shape), patches in zip(image_specs, xs):
        predictions = model.predict(patches)
        shaped = from_range(predictions.reshape(shape))  #还原
        img = PIL.Image.fromarray(shaped)
        add = './clean/'+str(num)+'.Bmp'
        imgs.append(img)
        img = numpy.array(img)
        cv2.imwrite(add,img)        #保存图片
    return image_specs, imgs #(代号,形状),图片


if __name__ == '__main__':
<span style="white-space:pre">	</span>#train(limit=30, neighbors=2, epochs=35, batch_size=1000)
   <span style="white-space:pre">	</span>image_specs,imgs = create_pictures(limit = None)
下面说一下这次遇到的问题,这次的问题跟以往不同,之前多是算法和模型修改的问题。这次感觉明显自己的编程技巧不够。
python是非常好用,编码速度快,但是运行速度也是够慢的。下面是个测试图,运行速度差了差不多十倍。第一个代码是用cython写的,第二个是直接python写的,代码如下:
    n=0
    for i in xrange(10000):
        for j in xrange(10000):
            n+=1
    print n
这个程序在读取训练数据的时候十分慢,这里读取了不到20%的数据保存下来就有快1.5G,保存下来下次训练的时候直接读取cPickle保存的文件会快不少。
def save_training_data(x,y):  #保存测试图片
    f = open('training_data.pkl','wb')
    cPickle.dump(x,f,-1)
    cPickle.dump(y,f,-1)
    f.close()

def load_training_data():  #读取测试图片
    f = open('training_data.pkl')
    x = cPickle.load(f)
    y = cPickle.load(f)
    f.close()
    return x,y
当时觉得数据太大,就用了gzip.open(),数据缩小了十倍以上,不过不知道为什么读取速度好像也慢了10倍的感觉。
试着把读取图片的那段用cython修改了一下,不过只快了10%的样子,可能是技术不好吧,以后有需求的话认真学习一下。
这里还可以考虑用多线程加速,用top指令看到cpu使用率是100%以为程序自动多线程了,后来查了下发现这个cpu使用率可以到800%,或者更高,根据电脑核心的数量决定。
还有内存不足,只读取了一部分数据训练,这里也没有解决,之后在遇到大数据集的时候应该要想办法解决的,但是感觉前面两个问题的优先级还是更高一些,毕竟多次读取测试集就好了,只是速度太慢,这样程序的运行效率不高。
先写这么多,后面如果把这些问题解决会继续补充。


