2.CollapsingToolbarLayout详解和应用
一、AppBarLayout嵌套CollapsingToolbarLayout
布局activity_mian.xml代码如下:
<?xml version="1.0" encoding="utf-8"?>
<android.support.design.widget.CoordinatorLayout xmlns:android="http://schemas.android.com/apk/res/android"
xmlns:app="http://schemas.android.com/apk/res-auto"
android:id="@+id/main_content"
android:layout_width="match_parent"
android:layout_height="match_parent"
android:fitsSystemWindows="true">
<android.support.design.widget.AppBarLayout
android:id="@+id/appbar"
android:layout_width="match_parent"
android:layout_height="256dp"
android:theme="@style/ThemeOverlay.AppCompat.Dark.ActionBar"
android:fitsSystemWindows="true">
<android.support.design.widget.CollapsingToolbarLayout
android:id="@+id/collapsing_toolbar"
android:layout_width="match_parent"
android:layout_height="match_parent"
app:layout_scrollFlags="scroll|exitUntilCollapsed"
android:fitsSystemWindows="true"
app:contentScrim="?attr/colorPrimary"
app:expandedTitleMarginStart="48dp"
app:expandedTitleMarginEnd="64dp"
>
<ImageView
android:id="@+id/backdrop"
android:layout_width="match_parent"
android:layout_height="match_parent"
android:scaleType="centerCrop"
android:fitsSystemWindows="true"
android:src="@drawable/header"
app:layout_collapseParallaxMultiplier="0.6"
app:layout_collapseMode="parallax"
/>
<android.support.v7.widget.Toolbar
android:id="@+id/toolbar"
android:layout_width="match_parent"
android:layout_height="?attr/actionBarSize"
app:layout_collapseMode="pin"
/>
</android.support.design.widget.CollapsingToolbarLayout>
</android.support.design.widget.AppBarLayout>
<android.support.v4.widget.NestedScrollView
android:layout_width="match_parent"
android:layout_height="match_parent"
app:layout_behavior="@string/appbar_scrolling_view_behavior">
<LinearLayout
android:layout_width="match_parent"
android:layout_height="match_parent"
android:orientation="vertical"
android:paddingTop="24dp">
<android.support.v7.widget.CardView
android:layout_width="match_parent"
android:layout_height="wrap_content"
android:layout_margin="16dp">
<LinearLayout
android:padding="@dimen/activity_horizontal_margin"
android:orientation="vertical"
android:layout_width="match_parent"
android:layout_height="wrap_content">
<TextView
android:layout_width="match_parent"
android:layout_height="wrap_content"
android:text="CardView"
android:textAppearance="@style/TextAppearance.AppCompat.Title" />
<TextView
android:layout_width="match_parent"
android:layout_height="wrap_content"
android:text="card_string" />
</LinearLayout>
</android.support.v7.widget.CardView>
</LinearLayout>
</android.support.v4.widget.NestedScrollView>
<android.support.design.widget.FloatingActionButton
android:layout_height="wrap_content"
android:layout_width="wrap_content"
app:layout_anchor="@id/appbar"
app:layout_anchorGravity="bottom|right|end"
android:src="@android:drawable/ic_dialog_email"
android:layout_margin="10dp"
android:clickable="true"/>
</android.support.design.widget.CoordinatorLayout>
MainActivity代码:
import android.graphics.Color;
import android.os.Bundle;
import android.support.design.widget.CollapsingToolbarLayout;
import android.support.v7.app.AppCompatActivity;
import android.support.v7.widget.Toolbar;
import android.view.Menu;
import android.view.MenuItem;

import static com.example.zhenfei.myapplication.R.id;
import static com.example.zhenfei.myapplication.R.layout;

public class MainActivity extends AppCompatActivity {
@Override
protected void onCreate(Bundle savedInstanceState) {
super.onCreate(savedInstanceState);
setContentView(layout.activity_main);
Toolbar mToolbar = (Toolbar) findViewById(id.toolbar);
mToolbar.setTitleTextColor(Color.BLACK);//设置ToolBar的titl颜色
setSupportActionBar(mToolbar);
CollapsingToolbarLayout collapsingToolbarLayout = (CollapsingToolbarLayout) findViewById(id.collapsing_toolbar);
collapsingToolbarLayout.setTitle("ceshi");

}

@Override
public boolean onCreateOptionsMenu(Menu menu) {
// Inflate the menu; this adds items to the action bar if it is present.
getMenuInflater().inflate(R.menu.menu_main, menu);
        return true;
}

@Override
public boolean onOptionsItemSelected(MenuItem item) {
// Handle action bar item clicks here. The action bar will
        // automatically handle clicks on the Home/Up button, so long
        // as you specify a parent activity in AndroidManifest.xml.
int id = item.getItemId();

//noinspection SimplifiableIfStatement
if (id == R.id.action_settings) {
return true;
}

return super.onOptionsItemSelected(item);
}
}
好了,接下来,我们来学习下CollaspingToolbarLayout, 顺便学习下上面出现的新的属性。
1.1 fitSystemWindows 属性
首先看到AppBarLayout的fitsSystemWindows属性,官方文档描述:
Boolean internal attribute to adjust view layout based on system windows such as the status bar. If true, adjusts the padding of this view to leave space for the system windows. Will only take effect if this view is in a non-embedded activity.
意思就是:会根据系统的版本,调整PaddingTop的值,使得我们的视图不会遮挡到系统的状态栏。4.4以下的话,paddingTop为0.4.4的话 paddingTop就为StatusBar的高度。下面用2张截图介绍。
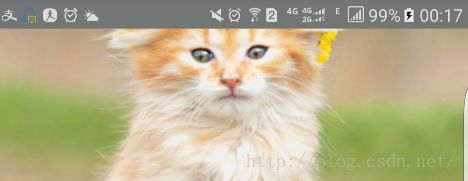
这个是没设置fitsSystemWindows属性的截图:
这个是设置fitsSystemWindows属性的截图:
可以看到,设置了以后,我们就不会影响到statusBar的背景颜色了。(4.4以下的设置不设置效果一样)。
2.2 app:layout_collapseMode
app:layout_collapseMode
属性在CollapsingToolbarLayout中定义,在CollapsingToolbarLayout的子视图中使用。
collapseMode有三个值:
1.COLLAPSE_MODE_OFF:The view will act as normal with no collapsing behavior.这个很好理解,对滚动什么的事件都不处理。
2.COLLAPSE_MODE_PIN:The view will pin in place until it reaches the bottom of the CollapseToolbarLayout.意思是,设置了这个属性的视图,直到他到CollapseToolbarLayout都会固定在一个位置。但是,这个不是
3.COLLAPSE_MODE_PARALLAX : The view will scroll in a parallax fashion. See setParallaxMultiplier(float) to change the multiplier used.意思就是设置了这个值以后,可以让你的View一起滚动,同时可以结合setParallaxMultiplier这个方法(XML中设置app:layout_collapseParallaxMultiplier)来控制滚动视觉差。这里的滚动视觉差,意思就是,你设置了0那么就会图片一起滚动,你设置了1那么,图片是不会滚动的。
好了,下面我们来做实验,首先测试Toolbar的pin效果。
首先我们修改布局文件如下:
<android.support.design.widget.CollapsingToolbarLayout
android:id="@+id/collapsing_toolbar"
android:layout_width="match_parent"
android:layout_height="match_parent"
app:layout_scrollFlags="scroll|exitUntilCollapsed"
android:fitsSystemWindows="true"
app:contentScrim="?attr/colorPrimary"
app:expandedTitleMarginStart="48dp"
app:expandedTitleMarginEnd="64dp"
>

    <ImageView
android:id="@+id/backdrop"
android:layout_width="match_parent"
android:layout_height="match_parent"
android:scaleType="centerCrop"
android:fitsSystemWindows="true"
android:src="@drawable/header"
app:layout_collapseParallaxMultiplier="0.6"
app:layout_collapseMode="parallax"
/>

    <android.support.v7.widget.Toolbar
android:id="@+id/toolbar"
android:layout_width="match_parent"
android:background="@android:color/black"
android:layout_height="?attr/actionBarSize"
/>


</android.support.design.widget.CollapsingToolbarLayout>
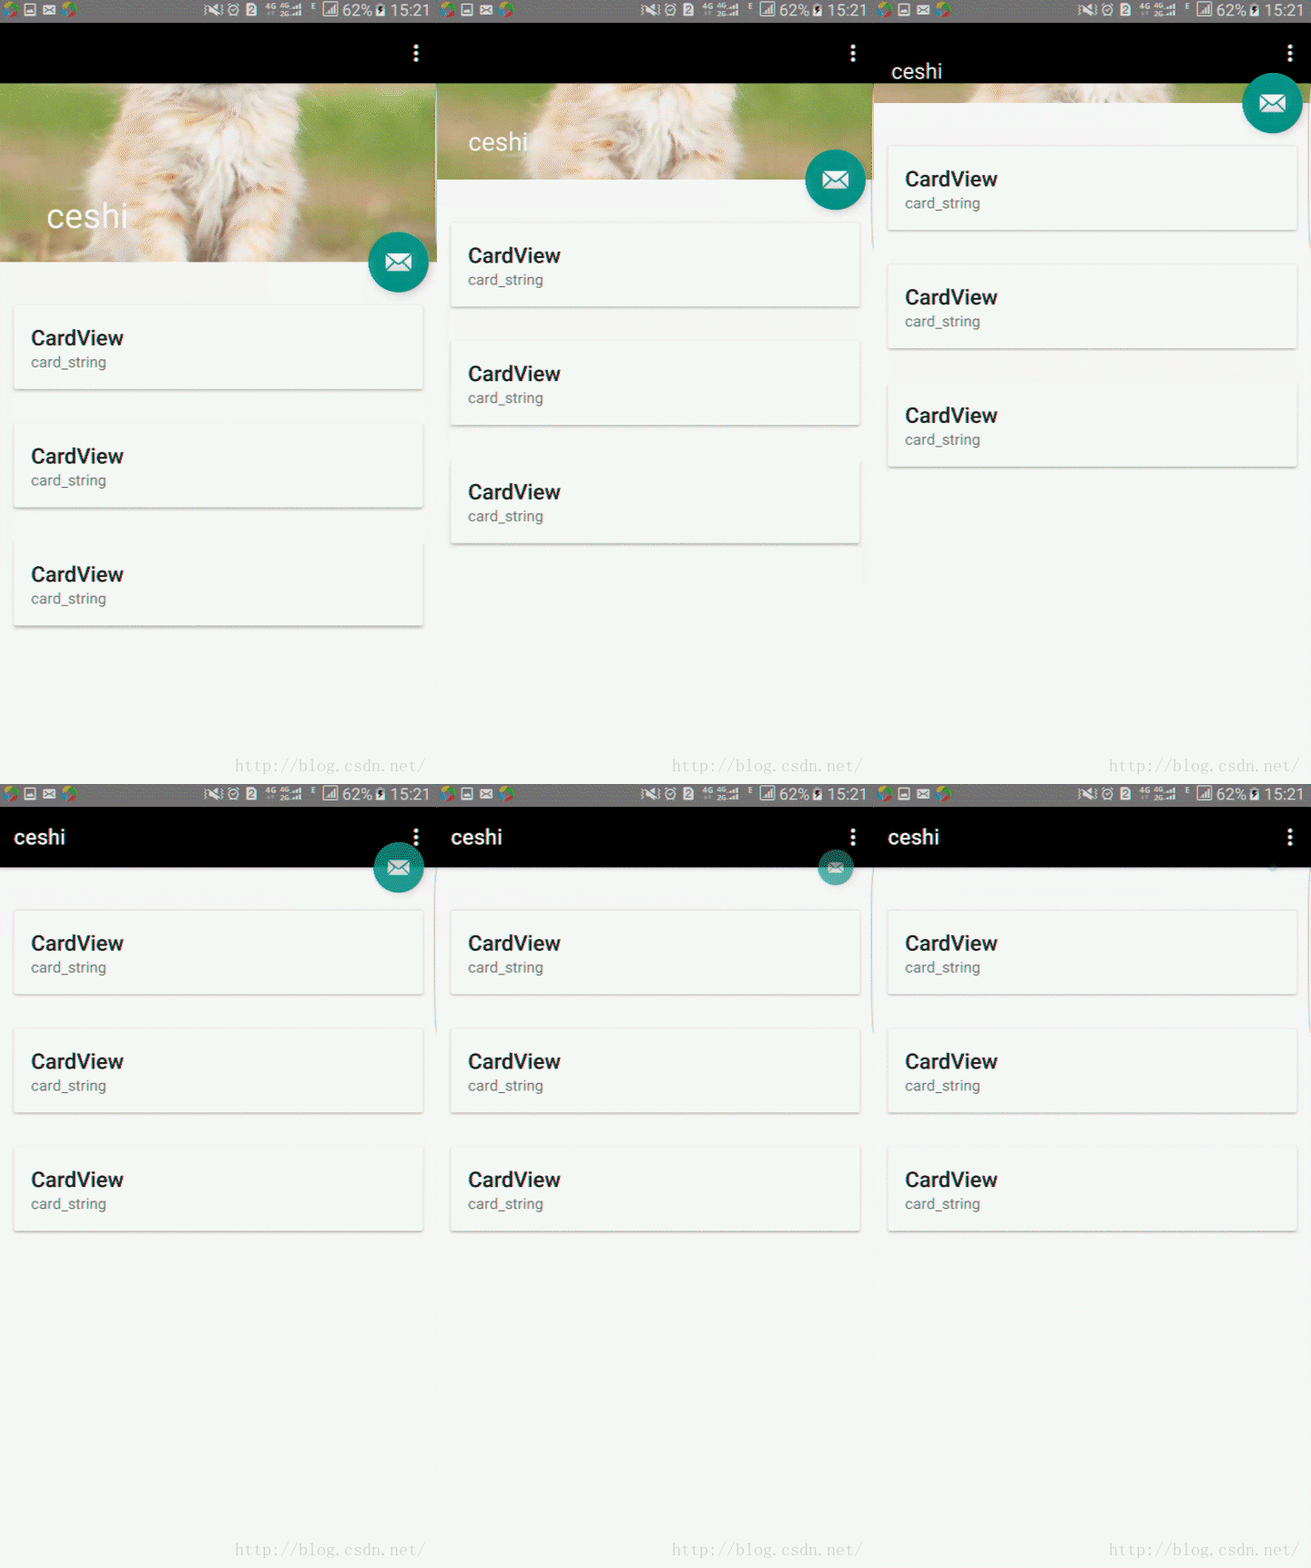
运行效果图。
下面,我们加上pin
Toolbar的代码更正如下:
<android.support.v7.widget.Toolbar
android:id="@+id/toolbar"
android:layout_width="match_parent"
android:background="@android:color/black"
android:layout_height="?attr/actionBarSize"
/>
运行效果图:
上面对比一下就可以看出pin的效果是如何的。其中上面的标题,即:文字“ceshi"是CoollpasingToolbarLayout中设置的。
接下来,介绍COLLAPSE_MODE_PARALLAX 这个属性
首先,布局文件为:
<android.support.design.widget.CollapsingToolbarLayout
android:id="@+id/collapsing_toolbar"
android:layout_width="match_parent"
android:layout_height="match_parent"
app:layout_scrollFlags="scroll|exitUntilCollapsed"
android:fitsSystemWindows="true"
app:contentScrim="?attr/colorPrimary"
app:expandedTitleMarginStart="48dp"
app:expandedTitleMarginEnd="64dp"
>
<ImageView
android:id="@+id/backdrop"
android:layout_width="match_parent"
android:layout_height="match_parent"
android:scaleType="centerCrop"
android:fitsSystemWindows="true"
android:src="@drawable/header"
app:layout_collapseParallaxMultiplier="0.6"
/>
</pre></div><div style="font-size:13.6364px; font-family:微软雅黑; line-height:19.0909px; widows:auto">在这里,我们去掉了ImageView的 layout_collapseMode属性,改成如下</div><div style="font-size:13.6364px; font-family:微软雅黑; line-height:19.0909px; widows:auto"><span style="white-space:pre"></span><pre name="code" class="html">    <android.support.v7.widget.Toolbar
android:id="@+id/toolbar"
android:layout_width="match_parent"
android:background="@android:color/black"
android:layout_height="?attr/actionBarSize"
app:layout_collapseMode="pin"
/>


</android.support.design.widget.CollapsingToolbarLayout>
运行后可以看到,背景图片是不会滚动的。
加上去以后,背景图片才会滚动。
接下里我们来尝试下app:layout_collapseParallaxMultiplier这个属性的作用。
首先,更改布局文件为:
<android.support.design.widget.CollapsingToolbarLayout
android:id="@+id/collapsing_toolbar"
android:layout_width="match_parent"
android:layout_height="match_parent"
app:layout_scrollFlags="scroll|exitUntilCollapsed"
android:fitsSystemWindows="true"
app:contentScrim="?attr/colorPrimary"
app:expandedTitleMarginStart="48dp"
app:expandedTitleMarginEnd="64dp"
>

    <ImageView
android:id="@+id/backdrop"
android:layout_width="match_parent"
android:layout_height="match_parent"
android:scaleType="centerCrop"
android:fitsSystemWindows="true"
android:src="@drawable/header"
app:layout_collapseParallaxMultiplier="0"
app:layout_collapseMode="parallax"
/>

    <android.support.v7.widget.Toolbar
android:id="@+id/toolbar"
android:layout_width="match_parent"
android:layout_height="?attr/actionBarSize"
app:layout_collapseMode="pin"
/>


</android.support.design.widget.CollapsingToolbarLayout>
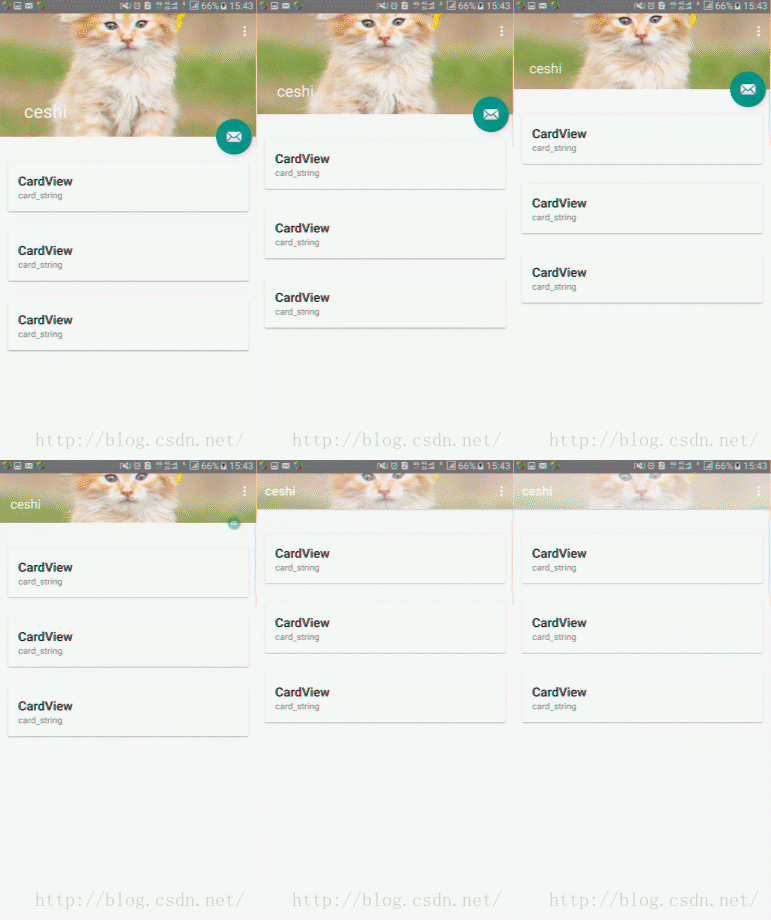
可以看到,运行效果图如下,这个猫的背景图片是会随着滚动的,
而我们如果只设置了0.7呢?
我们就会发现,整个图片的滚动只有30%而已,而设置0.9,整个图片的滚动大小,就只剩下10%,设置为0,那么整个图片就没有了滚动的效果。
下面贴出几个运行的效果图
设置为0.2
app:layout_collapseParallaxMultiplier="0.2"
效果:
设置为0.6
效果:
设置为0.9
效果:
1.3 题外话:CoordinatorLayout的layout_anchor
在上面的UI种,我们可以看到有一个FloatingActionButton,可以随着CollapseToolbarLayout一起滚动。这个是通过
CoordinatorLayout 的
layout_anchor来实现的。
悬浮视图使用它以后,CoordinatorLayout会把悬浮视图和设置的视图绑定在一起。可以通过layout_anchorGravity来来控制所在的位置。(margin和padding无效)
比如:
<android.support.design.widget.FloatingActionButton
android:layout_height="wrap_content"
android:layout_width="wrap_content"
app:layout_anchor="@id/appbar"
app:layout_anchorGravity="bottom|right|end"
android:src="@android:drawable/ic_dialog_email"
android:layout_margin="10dp"
android:clickable="true"/>
使用CollapsingToolbarLayout实现折叠效果,需要注意3点
1. AppBarLayout的高度固定
2. CollapsingToolbarLayout的子视图设置layout_collapseMode属性,如果想要Toolbar固定,那么一定要设置Toolbar为pin模式,但是parallax其实不需要,因为滚动这个效果,是CollaspingToolbarLayout实现的。子View设置,只是让子View跟着滚动而已。
3. 关联悬浮视图设置app:layout_anchor,app:layout_anchorGravity属性
4.另外标题内容是在CollapseToolbarLayout实现的,而不是Toolbar,滑动以后,标题内容固定在顶部是 CollapseToolbarLayout内部实现的,这个和是否设置了layout_collapseMode。
上面就是对CollapseToolbarLayout的介绍了。
上面还有用到了NetScrollView和CarView这些View,这些在之后的文章会详细介绍。
http://download.csdn.net/detail/savelove911/9504295
欢迎下载。
本文参考: http://www.mamicode.com/info-detail-919406.html
http://blog.csdn.net/xyz_lmn/article/details/48055919
在这里感谢上述的文章的作者。
也欢迎各位指出本文的错误之处。


