Xilinx FPGA ML605 开发笔记——简单中断实现
上一篇文章http://blog.csdn.net/stormragewang/article/details/39581545介绍了如何使用LED显示跑马灯,在这篇博客中将介绍下如何使用PUSH_BUTTON发送中断,同时对上一篇文章中如何修改LED与GPIO的连线为IO做一个详细的介绍。
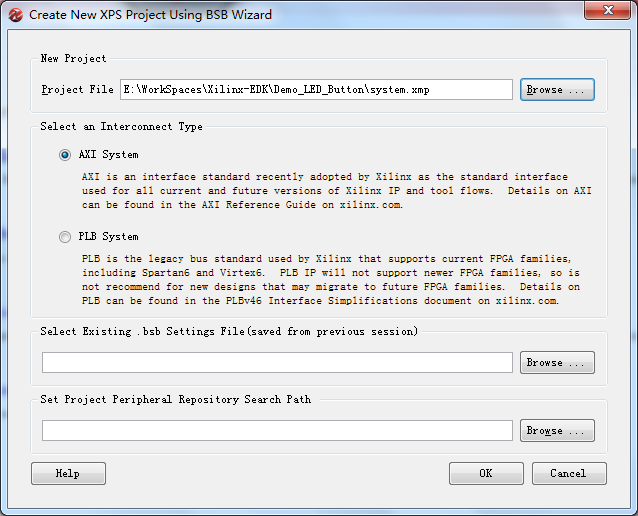
首先还是通过Xilinx Platform Studio创建一个XPS工程
后面选择开发板的型号照旧
再选择自己需要的外设,我选择了RAM、LED、PUSH_BUTTON和UART,注意将PUSH_BUTTON的“使用中断”选项选中
这样工程就创建好了
下面详细介绍下如何修改LED与GPIO的连线为IO线
未修改前我们可以看到连线的详细情况如下(默认为输出线):
首先我们修改mhs文件
将GPIO的输出线改为输入输出线
改为
再修改端口的定义
改为
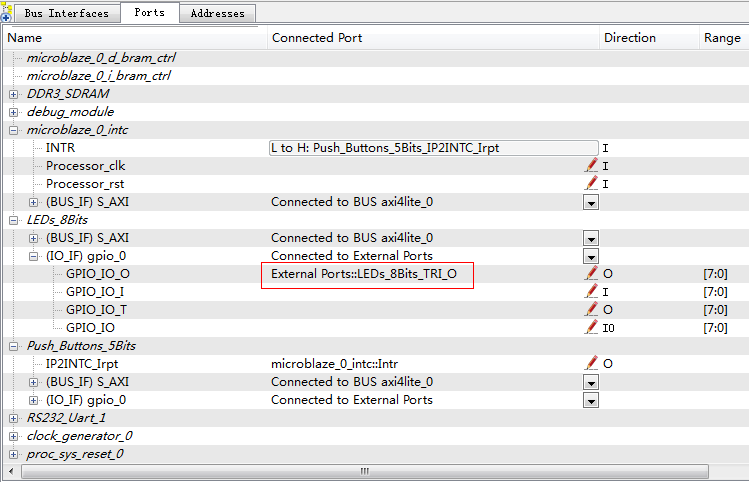
这时连线就修改完了,结果如图
再修改与主芯片连接的管脚,这时我们修改UCF文件
修改为
这时引脚就修改完了,结果如图
再依次完成左边的发布流程
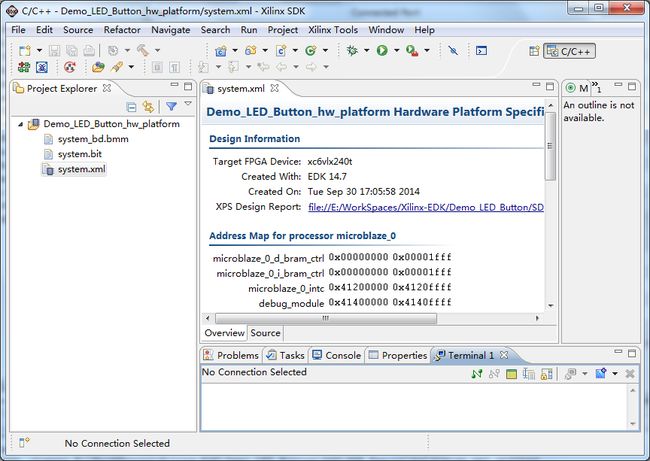
发布完成后打开SDK,结果如图
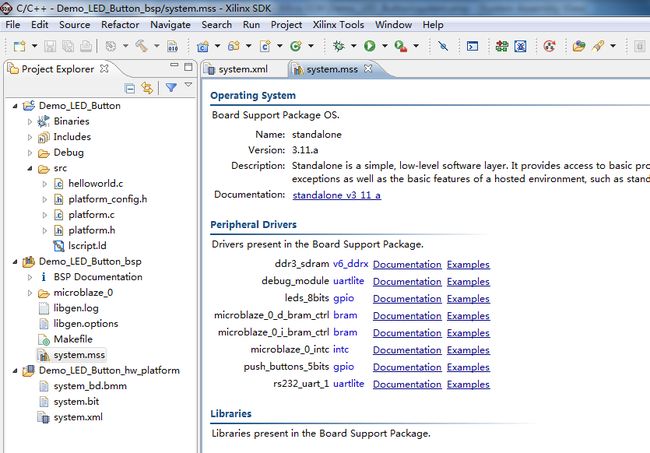
再新建一个工程可以看到对应的bsp工程中有IP核的使用参考文档
现在完成我们需要外设完成的功能的编码工作就行了,这里实现了LED的跑马灯和按按钮时LED全灭
源码如下:
/*
 * led_button.c
 *
 *  Created on: 2014-9-30
 *      Author:
 */
#include <stdio.h>
#include <math.h>
#include "xparameters.h"
#include "xgpio.h"
#include "xgpio_l.h"
#include "xintc.h"

XGpio Gpio_LEDS;
XGpio Gpio_Buttons;
XIntc Intc_Ctrl;

#define LED_DELAY   6000000
#define LED_NUM     8
#define DATA_CHANNEL 1

void pushButtonHandle(void *pshButton);

int led_button()
{
    int status;
    int index = 0;
    u32 DATAS[] = {0x01, 0x02, 0x04, 0x08, 0x10, 0x20, 0x40, 0x80};
    volatile int Delay;
    //初始化LED
    status = XGpio_Initialize(&Gpio_LEDS, XPAR_LEDS_8BITS_DEVICE_ID);
    if (status != XST_SUCCESS) {
    	return XST_FAILURE;
    }
    //led全灭
    XGpio_SetDataDirection(&Gpio_LEDS, DATA_CHANNEL, 0x00000000);
    XGpio_DiscreteWrite(&Gpio_LEDS, DATA_CHANNEL, 0x00);
    xil_printf("LEDs have been Initialized\r\n");
    //初始化按钮
    status = XGpio_Initialize(&Gpio_Buttons, XPAR_PUSH_BUTTONS_5BITS_DEVICE_ID);
    if (status != XST_SUCCESS)
    {
    	return XST_FAILURE;
    }
    status = XIntc_Initialize(&Intc_Ctrl, XPAR_INTC_0_DEVICE_ID);
    if (status != XST_SUCCESS)
    {
    	return XST_FAILURE;
    }
    status = XIntc_Connect(&Intc_Ctrl, XPAR_INTC_0_GPIO_1_VEC_ID, pushButtonHandle, &Gpio_Buttons);
    if (status != XST_SUCCESS)
    {
    	return XST_FAILURE;
    }
    XIntc_Enable(&Intc_Ctrl, XPAR_INTC_0_GPIO_1_VEC_ID);
    XGpio_InterruptEnable(&Gpio_Buttons, XGPIO_IR_CH1_MASK);
    XGpio_InterruptGlobalEnable(&Gpio_Buttons);
//    microblaze_register_handler(XIntc_DeviceInterruptHandler, XPAR_INTC_0_DEVICE_ID);
    microblaze_enable_interrupts();
    XIntc_Start(&Intc_Ctrl, XIN_REAL_MODE);
    xil_printf("Push Buttons have been Initialized\r\n");
    while (1)
    {
        XGpio_SetDataDirection(&Gpio_LEDS, DATA_CHANNEL, 0x00000000);
        XGpio_DiscreteWrite(&Gpio_LEDS, DATA_CHANNEL, DATAS[index]);
        index ++;
        index = index % LED_NUM;
        for (Delay = 0; Delay < LED_DELAY; Delay++);
//        XGpio_SetDataDirection(&Gpio_LEDS, DATA_CHANNEL, 0xFFFFFFFF);
//        u32 tmp = XGpio_DiscreteRead(&Gpio_LEDS, DATA_CHANNEL);
//        xil_printf("Read the data:%d\r\n", tmp);
    }
    return XST_SUCCESS;
}


void pushButtonHandle(void *pshButton)
{
	XGpio* PushButton = (XGpio*) pshButton;
//	u32 buttonData = XGpio_DiscreteRead(PushButton, DATA_CHANNEL);
//	int buttonIndex = log2(buttonData);
//	xil_printf("Button[%d] has been pushed!\r\n", buttonIndex);
	XGpio_InterruptClear(PushButton, 0xff);
	//使LED全灭
	XGpio_SetDataDirection(&Gpio_LEDS, DATA_CHANNEL, 0x00000000);
	XGpio_DiscreteWrite(&Gpio_LEDS, DATA_CHANNEL, 0x00);
}
其中中断的部分参考了 http://www.cnblogs.com/elitezhe/p/axi-atyls-Interrupt-MicroBlaze.html


