PXE无人值守配置文档
一、系统环境
实验环境:VMwareWorkstation 12
系统平台:CentOSrelease 6.4 (桌面安装安装)
网络模式:NAT模式(共享主机的IP地址)
DHCP / TFTP IP:192.168.1.5
HTTP / FTP / NFS IP:192.168.1.5
防火墙已关闭: /etc/init.d/iptables stop
配置Selinux :SELINUX=disabled
sed -i 's#SELINUX=enforcing#SELINUX=disabled#g'/etc/selinux/config
二、准备工作
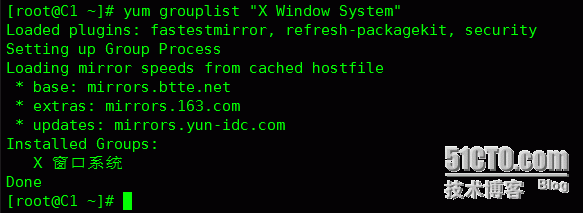
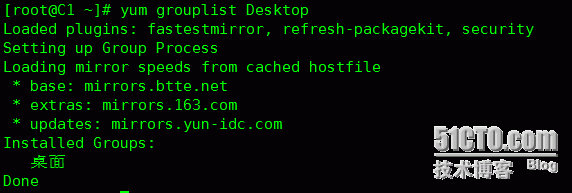
生成ks.cfg 文件需要system-config-kickstart 工具,而此工具依赖于XWindows,我们需要安装X Windows 和Desktop 。
我在安装系统时以自定义安装了这两个包,用以下命令查看:
[root@C1~]# yum grouplist X Window System
[root@C1 ~]# yumgrouplist Desktop
三、配置HTTP安装方式
系统的安装方式可以选择HTTP、FTP、 NFS,我们这里介绍HTTP方式的安装
3.1、安装并配置HTTP
[root@C1 ~]# yum �y install httpd(安装http服务)
[root@C1 ~]# rpm -qa |grep http(查看http安装情况)
3.2、开启服务并设置开机启动
[root@C1 ~]# /etc/init.d/httpd start
[root@C1 ~]# chkconfig --level 35 httpdon
3.3、加载IOS镜像
3.4、将ios文件挂载至某个目录下(可自己规划)
[root@C1 ~]# cp -r /mnt/cdrom//var/www/html/
[root@C1 ~]# mount /dev/cdrom /mnt/cdrom
3.4、复制光盘全部内容至http的根目录/var/www/html下
[root@C1 ~]# cp -r /mnt/cdrom//var/www/html/
![]()
到这里HTTP部分配置完成,继续往下看
四、配置TFTP
4.1、安装tftp-server
[root@C1~]# yum �y install tftp-server
![]()
4.2、启动tftp服务
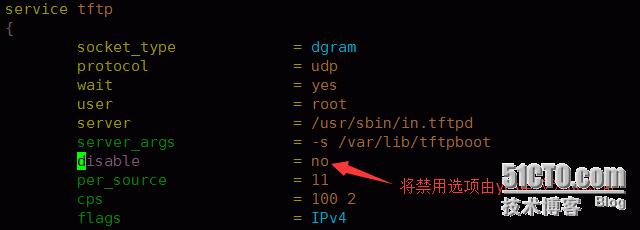
(tftp服务配置文件默认是禁用状态,需要修改配置文件信息)
[root@C1~]# vim /etc/xinetd.d/tftp
由于tftp服务是挂载在超级进程xinetd 下的,所以通过启动
xinetd 来启动tftp服务。
[root@C1~]# /etc/init.d/xinetd start
4.3、设置开机启动xinetd
[root@C1~]# chkconfig xinetd on
五、配置支持PXE的启动程序
5.1、安装syslinux
说明:syslinux是一个功能强大的引导加载程序,而且兼容各种介质。更加确切地说:SYSLINUX是一个小型的Linux操作系统,它的目的是简化首次安装Linux的时间,并建立修护或其它特殊用途的启动盘。
[root@C1~]# yum -y install syslinux
5.2、拷贝pxelinux.0文件
[root@C1 ~]# cp /usr/share/syslinux/pxelinux.0 /var/lib/tftpboot
![]()
5.3、复制镜像相关文件到指定文件夹
1)、说明:复制iso 镜像中的/image/pxeboot/initrd.img 和vmlinux 至/var/lib/tftpboot/ 文件夹中
[root@C1~]#cp/var/www/html/cdrom/images/pxeboot/{initrd.img,vmlinuz}/var/lib/tftpboot/
![]()
2)、说明:复制iso 镜像中的/isolinux/*.msg 至/var/lib/tftpboot/ 文件夹中
[root@C1 ~]# cp/var/www/html/cdrom/isolinux/*.msg /var/lib/tftpboot/
![]()
3)、 在/var/lib/tftpboot/ 中新建一个pxelinux.cfg目录
[root@C1~]# mkdir /var/lib/tftpboot/pxelinux.cfg
![]()
4)、 将iso 镜像中的/isolinux 目录中的isolinux.cfg复制到pxelinux.cfg目录中,同时更改文件名称为default
[root@C1~]#cp/var/www/html/cdrom/isolinux/isolinux.cfg/var/lib/tftpboot/pxelinux.cfg/default
![]()
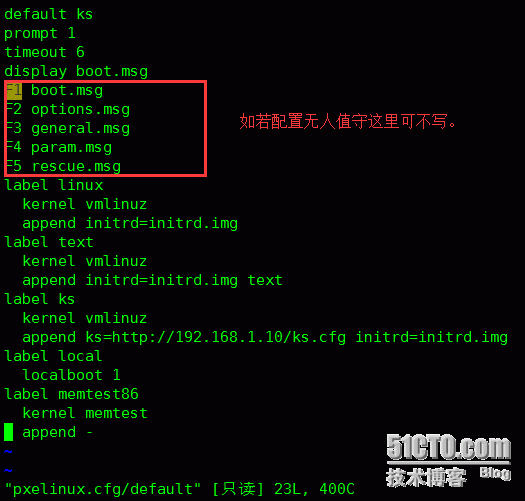
5)、 修改default文件
vim /var/lib/tftpboot/pxelinux.cfg/default
![]()
defaultvesamenu.c32
prompt0//0表示不等待用户控制
timeout1
…………
labellinux
menulabel ^Install or upgrade an existing system
menudefault
kernelvmlinuz
appendks=ftp://192.168.1.10/ks.cfg initrd=initrd.img(告诉系统从哪里获取ks.cfg文件)
六、DHCP安装配置
6.1、安装DHCP
[root@C1~]# yum -y install dhcp
![]()
6.2、修改DHCP配置文件,
1)、复制配置模板文件到DHCP的配置目录(也可以自己写配置文件)
[root@C1~]#cp -f /usr/share/doc/dhcp-4.1.1/dhcpd.conf.sample /etc/dhcp/dhcpd.conf
![]()
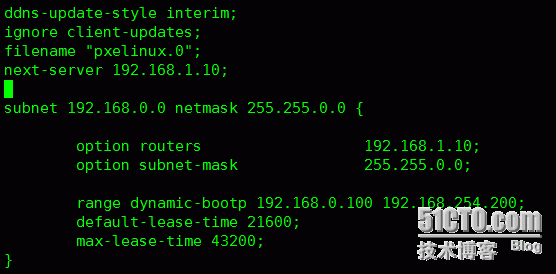
2)、编辑配置文件。
vim /etc/dhcp/dhcpd.conf
# dhcpd.conf
ddns-update-style interim;
ignore client-updates;
next-server 192.168.1.10; //指定TFTP服务器的地址
filename "/pxelinux.0"; //指定PXE引导程序的文件名
subnet 192.168.1.0 netmask 255.255.255.0{
option routers 192.168.1.10;
option subnet-mask 255.255.255.0;
range 192.168.1.150 192.168.1.200;
default-lease-time 21600;
max-lease-time 43200;
6.3启动DHCP服务。
[root@C1 ~]# /etc/init.d/dhcpd start
七、Kickstart(ks.cfg)安装配置
7.1、安装Kickstart
[root@C1 ~]# yum -y installsystem-config-kickstart
![]()
7.2、桌面环境下配置Kickstart
1)、在桌面环境下配置
切换桌面命令:startx init5
在桌面环境下输入命令:
system-config-kickstart
1.1、设置语言,键盘,时区,Root密码,安装完毕后重启等。
1.2 、设置安装方式,这篇文章介绍的是HTTP方式的安装,故选择HTTP
1.3、安装MBR
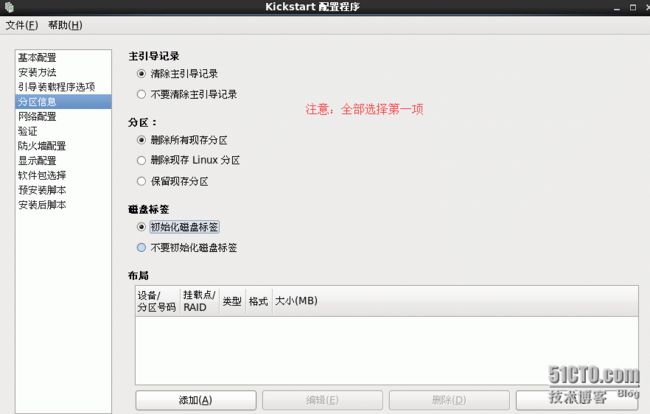
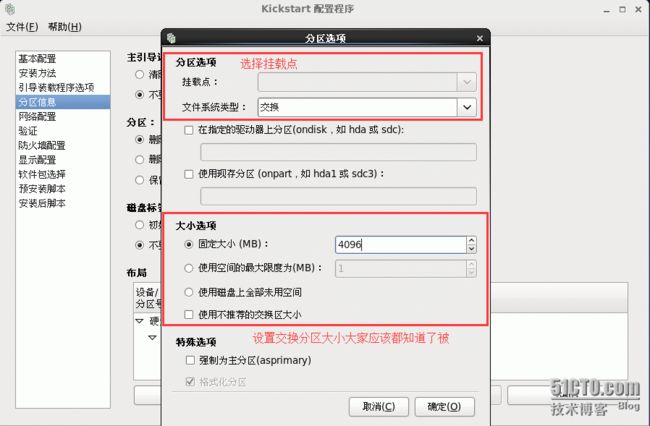
1.4、设置分区
注意:上图分区选项全部选择第一项。切记,
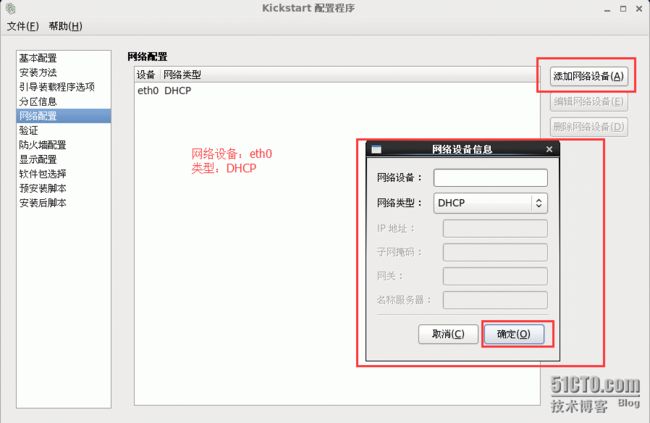
1.5、网络配置
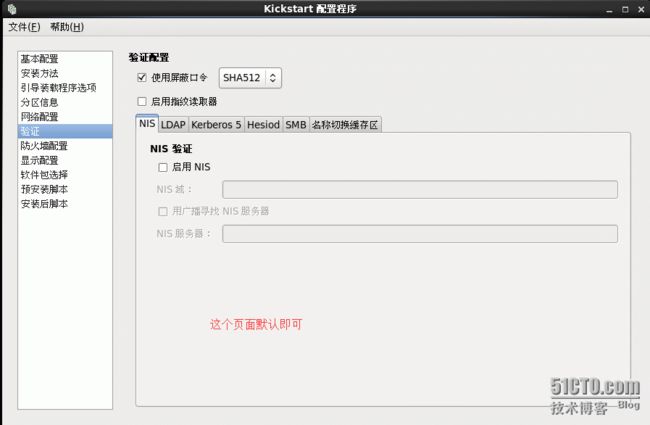
1.6、认证配置
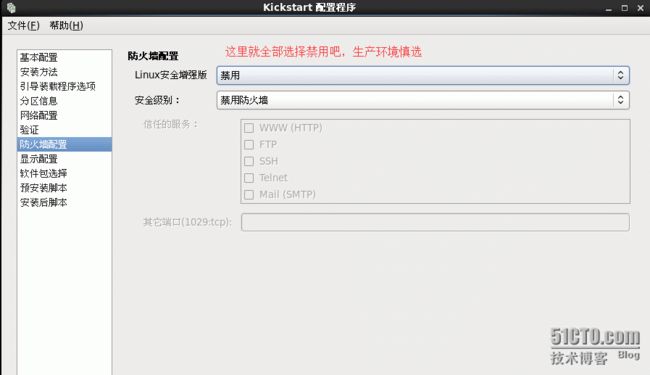
1.7、SELinux和防火墙配置
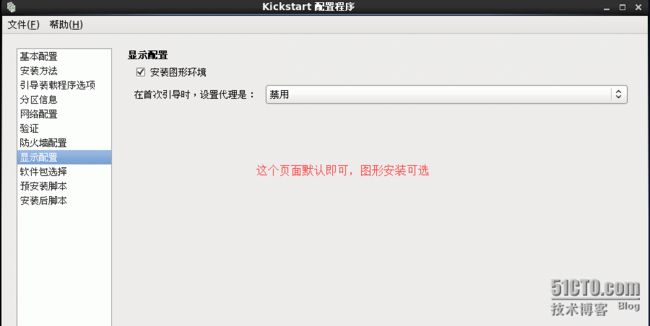
1.8、图形环境配置
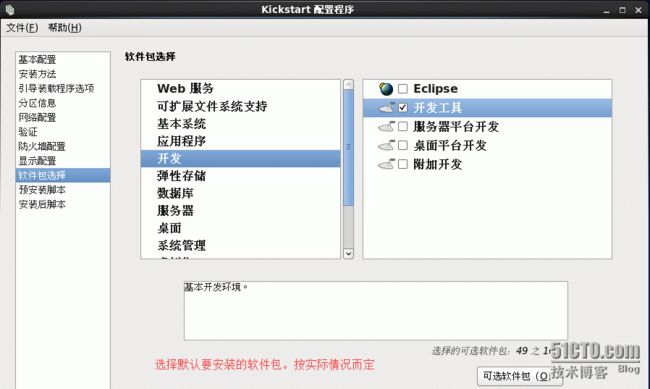
1.9、软件包安装选择
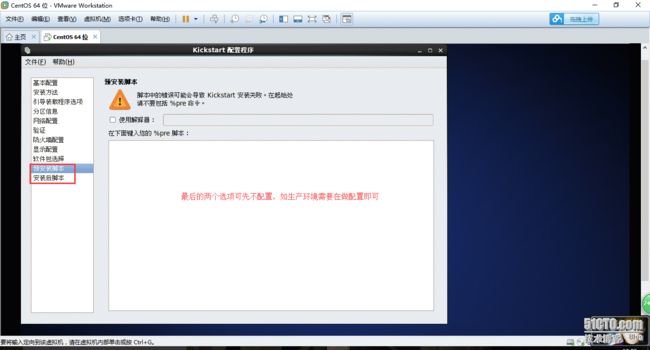
2.0、预览和生成ks.cfg文件。并保存在/var/www/html/ 文件夹下
2.1、可以打开/var/www/html/ks.cfg文件进行查看并做修改。
以下是ks.cfg模板。
#platform=x86, AMD64, 或 Intel EM64T
#version=DEVEL
# Firewall configuration
firewall --disabled
# Install OS instead of upgrade
install
# Use network installation
url --url="http://192.168.1.10/cdrom"
# Root password
rootpw --iscrypted$1$OWmf8nyz$e/k/zgAT3.7OUMyUUntJo1
# System authorization information
auth --useshadow --passalgo=sha512
# Use graphical install
graphical
# System keyboard
keyboard us
# System language
lang en_US
# SELinux configuration
selinux --disabled
# Do not configure the X Window System
skipx
# Installation logging level
logging --level=info
# Reboot after installation
reboot
# System timezone
timezone Asia/Shanghai
# Network information
network --bootproto=dhcp --device=eth0 --onboot=on
# System bootloader configuration
bootloader --location=mbr
# Clear the Master Boot Record
zerombr
# Partition clearing information
clearpart --all --initlabel
# Disk partitioning information
part / --fstype="ext4"--size=20000
part /boot --fstype="ext4"--size=200
part /home --fstype="ext4"--size=10000
part swap --fstype="swap"--size=20480
%packages
@development
@ha
@ha-management
@system-management-snmp
%end
备注:用模板的情况下可不用切换桌面环境生成ks文件
注意事项:说明:key--skip 如果是红帽系统,此选项可以跳过输入序列号过程;如果是CentOS 系列,则可以不保留此项内容;
reboot 此选项必须存在,也必须文中设定位置,不然kickstart显示一条消息,并等待用户按任意键后才重新引导;
clearpart--all --initlabel 此条命令必须添加,不然系统会让用户手动选择是否清除所有数据,这就需要人为干预了,从而导致自动化过程失败;
参考链接1:http://www.cnblogs.com/mchina/p/centos-pxe-kickstart-auto-install-os.html
参考链接2:http://www.linuxidc.com/Linux/2013-07/87456p3.htm
参考链接3:http://yuhongchun.blog.51cto.com/1604432/1100567
