Android MD控件之CardView
原文地址:http://blog.csdn.net/whitley_gong/article/details/51170240
一、前言
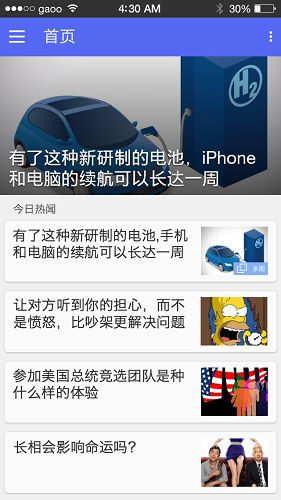
CardView是Android5.0中的一个全新控件,是一种卡片的视图,就是知乎日报首页的风格(下图),从本质上看,可以将CardView看做是FrameLayout在自身之上添加了圆角和阴影效果。有了它,我们即便没有特别好的美感,也可以做出效果很不错的界面。
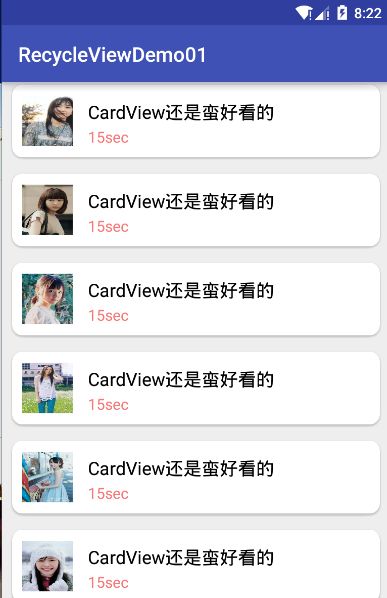
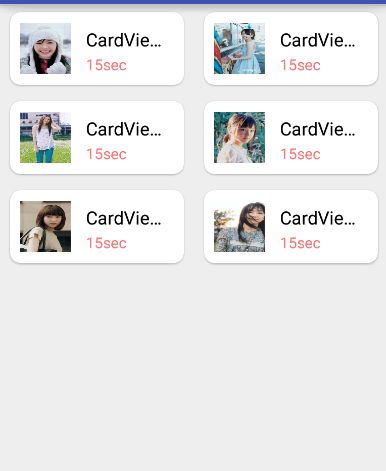
二、效果展示
一般来说,CardView是配合RecyclerView作为Item来使用的,用来显示有层次的内容,或者列表和网格。那么,想来看一下这个展示demo 的效果,还是很不错的吧。
三、使用方法
Android Studio添加CardView引用
dependencies {
  compile 'com.android.support:cardview-v7:23.1.1'
}
Demo的item.xml布局代码
<android.support.v7.widget.CardView xmlns:android="http://schemas.android.com/apk/res/android"
                                    xmlns:app="http://schemas.android.com/apk/res-auto"
                                    android:layout_width="match_parent"
                                    android:layout_height="wrap_content"
                                    android:layout_marginBottom="2dp"
                                    android:layout_marginLeft="5dp"
                                    android:layout_marginRight="5dp"
                                    android:layout_marginTop="2dp"
                                    app:cardBackgroundColor="#FFF"
                                    app:cardCornerRadius="10dp"
                                    app:cardUseCompatPadding="true"
                                    app:contentPadding="10dp"
                                    app:elevation="1dp">

    <LinearLayout
        android:id="@+id/ll_item_container"
        android:layout_width="match_parent"
        android:layout_height="match_parent"
        android:orientation="horizontal">

        <ImageView
            android:id="@+id/iv_item_icon"
            android:layout_width="50dp"
            android:layout_height="50dp"
            android:layout_gravity="center_vertical|left"
            android:layout_marginRight="15dp"
            android:background="@drawable/img1"
            />
        <LinearLayout
            android:layout_width="wrap_content"
            android:layout_height="wrap_content"
            android:orientation="vertical"
            android:layout_gravity="right"
            >

            <TextView
                android:id="@+id/tv_item_content"
                android:layout_width="match_parent"
                android:layout_height="wrap_content"
                android:text="CardView挺好看"
                android:singleLine="true"
                android:ellipsize="end"
                android:layout_marginTop="5dp"
                android:textColor="#000"
                android:textSize="18sp"
                />

            <TextView
                android:id="@+id/tv_item_duration"
                android:layout_width="match_parent"
                android:layout_height="wrap_content"
                android:gravity="center_vertical"
                android:text="15sec"
                android:layout_marginTop="2dp"
                android:textColor="#FFFA7777"
                android:textSize="15sp"
                />
        </LinearLayout>
    </LinearLayout>

</android.support.v7.widget.CardView>
其他可以暂时不用管它,这里讲一下使用到的CardView的几个属性:基本都是看到名字就知道意思了,剩下的后面会统一讲。
cardBackgroundColor:设置card背景颜色
cardCornerRadius:设置卡片的圆角大小
contentPadding:设置卡片内容于边距的间隔
cardUseCompatPadding:最需要注意的属性,它在5.0以下的系统中默认是true, 但在5.0系统中默认为false,如果不设置 app:cardUseCompatPadding=”true”的话会造成在5.0系统的Android手机上不能看到阴影效果。
四、CardView属性介绍
| 属性名 | 功能 |
|---|---|
| android:cardCornerRadius | 设置card圆角的大小 |
| android:cardBackgroundColor | 设置card背景颜色 |
| android:elevation | 设置阴影的大小 |
| card_view:cardElevation | 设置card背景颜色 |
| card_view:cardMaxElevation | 设置card背景颜色 |
| card_view:contentPadding | 设置card背景颜色 |
| card_view:contentPaddingBottom | 设置卡片内容于下边距的间隔 |
| card_view:contentPaddingTop | 设置卡片内容于上边距的间隔 |
| card_view:contentPaddingLeft | 设置卡片内容于左边距的间隔 |
| card_view:contentPaddingRight | 设置卡片内容于右边距的间隔 |
| card_view:contentPaddingStart | 设置卡片内容于边距的间隔起始 |
| card_view:contentPaddingEnd | 设置卡片内容于边距的间隔终止 |
| card_view:cardUseCompatPadding | 设置内边距,V21+的版本和之前的版本仍旧具有一样的计算方式 |
| card_view:cardPreventConrerOverlap | 设置内边距,在V20和之前的版本中添加内边距,这个属性为了防止内容和边角的重叠 |
波纹点击效果:
开发中你可能需要使用到点击的波纹效果,默认情况,CardView是不可点击的,并且没有任何的触摸反馈效果。
实现这种行为,必须提供一下属性:android:clickable和android:foreground。
<android.support.v7.widget.CardView
  xmlns:android="http://schemas.android.com/apk/res/android"
  xmlns:card_view="http://schemas.android.com/apk/res-auto"
  ...
  android:clickable="true"
  android:foreground="?android:attr/selectableItemBackground">
  ...
</android.support.v7.widget.CardView>
使用的注意实现:
-
对于在低版本中,设置了CardElevation后,CardView会自动留出空间供阴影显示,但对于Android L版本,就需要手动设置Margin边距来预留空间,这样的结果就是在Android 5.0以上的手机上可以正常显示,但对于Android 4.4.x的手机上就发现边距很大,导致浪费了屏幕空间。
-
解决上面问题,需要我们做适配。可以在/res/value和/res/value-v21分别创建dimens.xml文件,在dimens.xml里,随意命名,对于Android 5.0以上的设置数值0dp,对于Android 5.0以下的设置数值(根据实际需求)。这样就解决低版本中边距过大或者视觉效果不好的问题了。
五、总结和源码下载:
基本上CardView的使用就到这里了,至于这里用到的RecyclerView的使用会在后面的文章中继续更新,敬请期待!
源码下载