【OpenGL】Shader实例分析(一)-Wave
转发请保持地址:http://blog.csdn.net/stalendp/article/details/21993227
这篇文章主要分析一个Shader,从而感受shader的魅力,并学习相关shader的函数的用法。
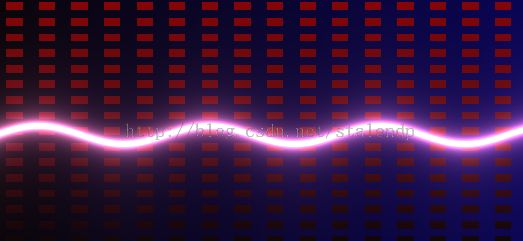
先看Shader运行的效果:
下面是代码:
- Shader "shadertoy/Waves" { //see https://www.shadertoy.com/view/4dsGzH
- CGINCLUDE
- #include "UnityCG.cginc"
- #pragma target 3.0
- struct vertOut {
- float4 pos:SV_POSITION;
- float4 srcPos;
- };
- vertOut vert(appdata_base v) {
- vertOut o;
- o.pos = mul (UNITY_MATRIX_MVP, v.vertex);
- o.srcPos = ComputeScreenPos(o.pos);
- return o;
- }
- fixed4 frag(vertOut i) : COLOR0 {
- fixed3 COLOR1 = fixed3(0.0,0.0,0.3);
- fixed3 COLOR2 = fixed3(0.5,0.0,0.0);
- float BLOCK_WIDTH = 0.03;
- float2 uv = (i.srcPos.xy/i.srcPos.w);
- // To create the BG pattern
- fixed3 final_color = fixed3(1.0);
- fixed3 bg_color = fixed3(0.0);
- fixed3 wave_color = fixed3(0.0);
- float c1 = fmod(uv.x, 2.0* BLOCK_WIDTH);
- c1 = step(BLOCK_WIDTH, c1);
- float c2 = fmod(uv.y, 2.0* BLOCK_WIDTH);
- c2 = step(BLOCK_WIDTH, c2);
- bg_color = lerp(uv.x * COLOR1, uv.y * COLOR2, c1*c2);
- // TO create the waves
- float wave_width = 0.01;
- uv = -1.0 + 2.0*uv;
- uv.y += 0.1;
- for(float i=0.0; i<10.0; i++) {
- uv.y += (0.07 * sin(uv.x + i/7.0 + _Time.y));
- wave_width = abs(1.0 / (150.0 * uv.y));
- wave_color += fixed3(wave_width * 1.9, wave_width, wave_width * 1.5);
- }
- final_color = bg_color + wave_color;
- return fixed4(final_color, 1.0);
- }
- ENDCG
- SubShader {
- Pass {
- CGPROGRAM
- #pragma vertex vert
- #pragma fragment frag
- #pragma fragmentoption ARB_precision_hint_fastest
- ENDCG
- }
- }
- FallBack Off
- }
下面进行分析:
1. ComputeScreenPos的解析:
用于把三维的坐标转化为屏幕上的点。有两种方式,请参考 官方例子
ComputeScreenPos在UnityCG.cginc文件中定义如下:
- // Projected screen position helpers
- #define V2F_SCREEN_TYPE float4
- inline float4 ComputeScreenPos (float4 pos) {
- float4 o = pos * 0.5f;
- #if defined(UNITY_HALF_TEXEL_OFFSET)
- o.xy = float2(o.x, o.y*_ProjectionParams.x) + o.w * _ScreenParams.zw;
- #else
- o.xy = float2(o.x, o.y*_ProjectionParams.x) + o.w;
- #endif
- #if defined(SHADER_API_FLASH)
- o.xy *= unity_NPOTScale.xy;
- #endif
- o.zw = pos.zw;
- return o;
- }
2. 背景的绘制
2.1) fmod用于求余数,比如fmod(1.5, 1.0) 返回0.5;
2.2) step用于大小的比较,step(a,x) : 0 if x<a; 1 if x>=a; 比如: step(1, 1.2), 返回1; step(1, 0.8) 返回0;
2.3) 结合fmod和step可以得到一个虚线的效果。 比如要得到虚线段长度为1的代码如下:
c1 = fmod(x, 2*width); c1=step(width,c1); //其中width为1
那么如果x的范围是[0,1),c1的值为0;范围为[1,2),c1的值为1;2为一个周期;
那么fmod起到了制作周期的作用,step计算周期内的0和1;
2.4)把2.3中的知识运用到2维,就可以计算出方块。
lerp函数的用法:lerp( a , b ,f ), f为百分数(取值范围[0,1]);如果f为0,则lerp返回a,f为1,则返回b。f为0到1之间,就返回a到b之间的值。
代码中的 lerp(uv.x * COLOR1, uv.y * COLOR2, c1*c2); 其中c1和c2的取值不是为1,就是为0,所以就可以变成网格的情况。 背景绘制如下:
3. 波纹的绘制
3.1 ) 坐标的转化
uv = -1.0 + 2.0*uv; // 把原始的uv进行扩展和位移,得到新的uv。我们的操作就是在新的uv上进行的,最终显示时会映射到原来到uv,请参考下图
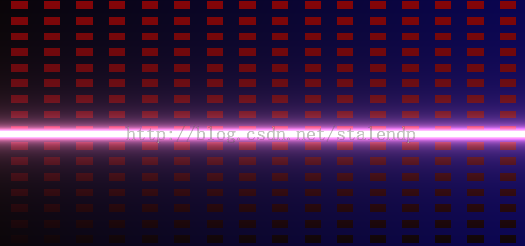
3.2 ) 画一条直线:
由于上面把y轴移动到屏幕的中心,所以屏幕的上半部分为正的,下半部分为负的,代码如下:
- wave_width = abs(1.0 / (50.0 * uv.y));
- wave_color = fixed3(wave_width * 1.9, wave_width, wave_width * 1.5);
3.3)把直线变为曲线,并使其动起来:
- uv.y += (0.07 * sin(uv.x*10 + _Time.y));
- wave_width = abs(1.0 / (50.0 * uv.y));
- wave_color = fixed3(wave_width * 1.9, wave_width, wave_width * 1.5);
3.4)多画几条曲线,形成波浪:
- for(float i=0.0; i<10.0; i++) {
- uv.y += (0.07 * sin(uv.x + i/7.0 + _Time.y));
- wave_width = abs(1.0 / (150.0 * uv.y));
- wave_color += fixed3(wave_width * 1.9, wave_width, wave_width * 1.5);
- }
其实写shader,很多时候都是要通过不断地效果叠加并调试来达到效果。


