Before following the instructions below you should already have completed the Building for PX4 on Windows with Make instructions which include the installation of Eclipse and downloading the ardupilot, PX4Firmware and PX4NuttX code.
These instructions are partially based on the PX4 Windows Toolchain Installation wiki.
Contents [hide]
- 1 Starting Eclipse
- 2 Creating the Project
- 3 Setting .pde files as C++
- 4 Use spaces instead of Tabs
- 5 Building from Eclipse
Starting Eclipse
If you are using Windows 7 you should be able to start eclipse from the start menu by selecting:
Start >> All Programs >> PX4 Toolchain >> PX4 Eclipse
For Windows 8 users you will need to directly run the px4_eclipse.bat file which can be found in:
C:\px4\toolchain\msys\1.0\px4_eclipse.bat
Creating the Project
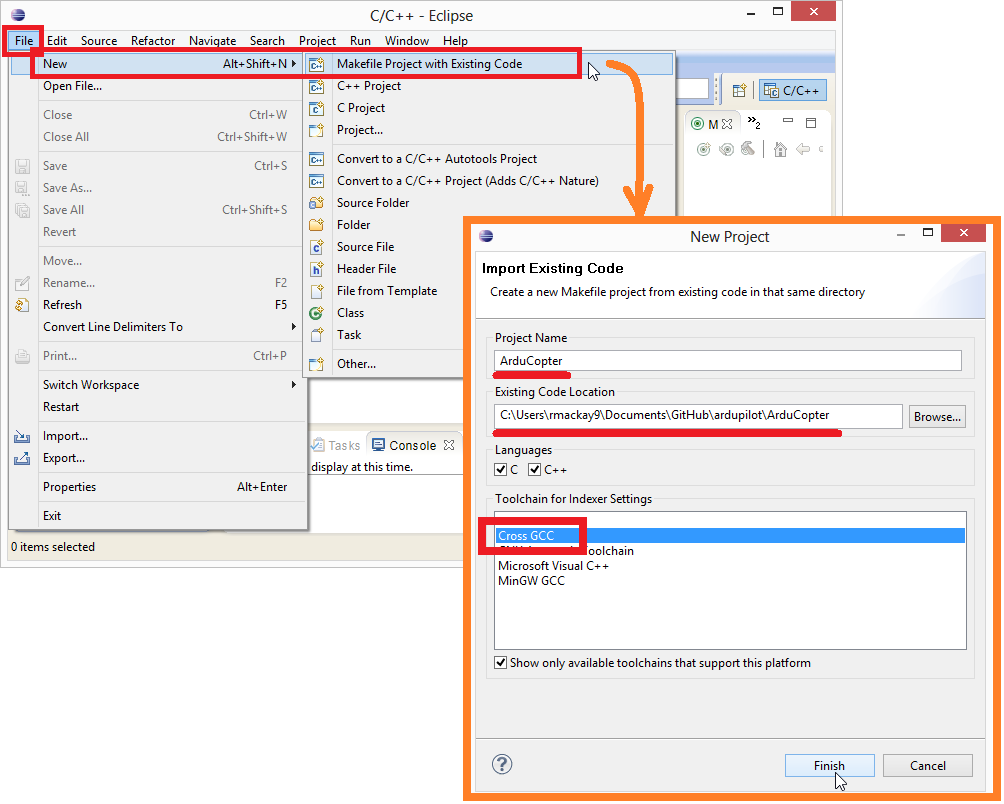
- Select File >> New >> Make Project with Existing Code
- Fill in the Project Name and set the “Existing Code Location” to the ArduCopter directory
- Set the Toolchain to be “Gross GCC” and press Finish
Setting .pde files as C++
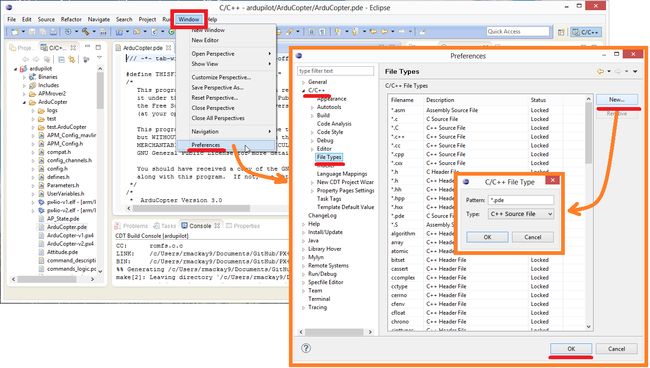
This optional step will cause Eclipse to parse .pde files as C++ files which improves the colouring of comments and code but also leads to many incorrect warnings as Eclipse is not able to see declarations.
Use spaces instead of Tabs
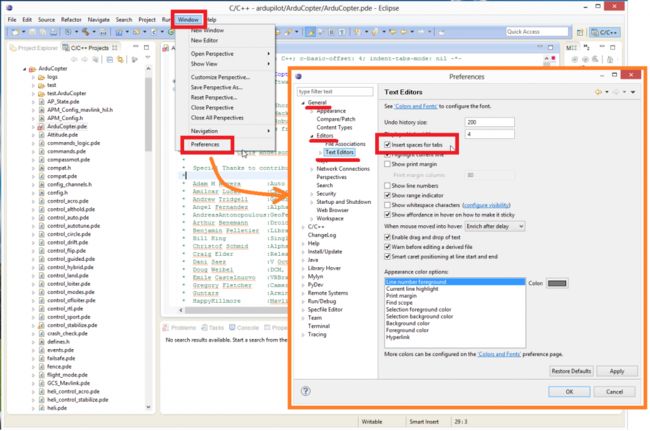
By default ArduCopter, ArduPlane and ArduRover use spaces in place of tabs. This can be set to the default in Eclipse by changing two settings. The first is by selecting Window > Preferences > General > Editors > Text Editors > Insert spaces for tabs.
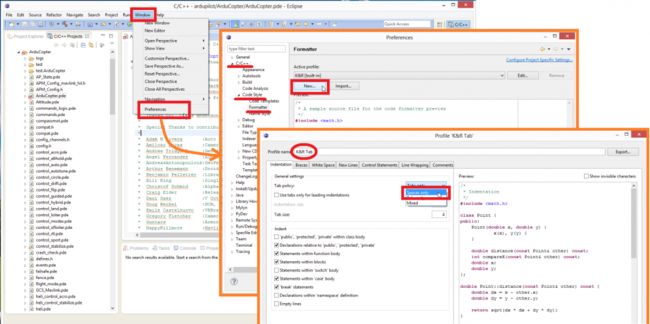
The second is by selecting Windows > Preferences > C/C++ > Code Style > Formatter and creating a new Profile (i.e. “K&R Tab”) which has the “Indentation” set to “Spaces only”
Building from Eclipse
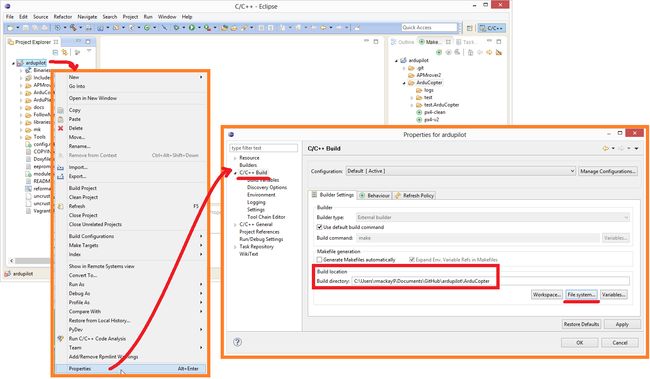
In the Project Explorer right-mouse-click on the ardupilot folder and select Properties. Then under C/C++ Build set the “Build location” to the ArduCopter or ArduPlane directory as shown above.
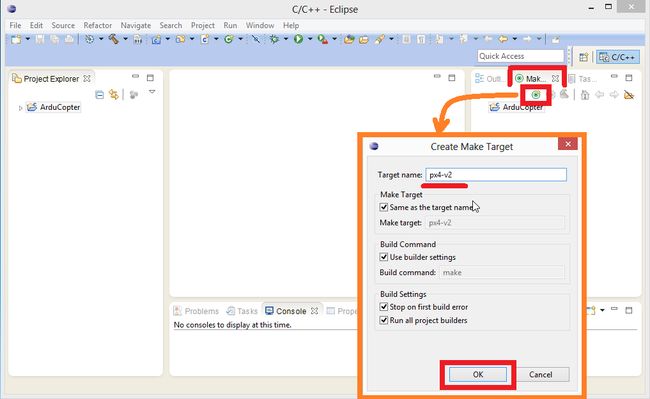
In the Make window on the right create any of these make targets (the full list of possible targets can be found in px4_targets.mk):
px4-v1 <– builds quad firmware for the original px4
px4-v2 <– builds quad firmware for the Pixhawk
px4-v2-hexa <— builds the Pixhawk firmware for a hexacopter (other supported suffixes include “heli” and “octa”)
clean <— “cleans” the ardupilot directory
px4-clean <— “cleans” the ardupilot, PX4Firmware and PX4NuttX directories
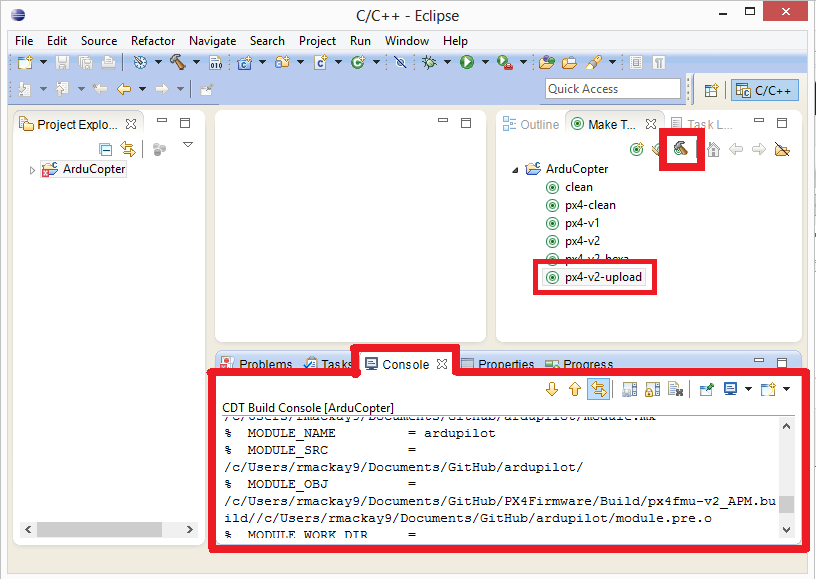
px4-v2-upload <– builds the quad firmware for the Pixhawk and attempts to upload upon successful compile
Note: there is currently not option to upload for frames other than quad.
The make target can be built by pushing the green circle + hammer icon. The build progress will appear in the Console window.
Questions about this page? Comments? Suggestions? Post to APM Forum! Use the platform specific to your query, and make sure to include the name of the page you are referring to.