Android开发手记1--环境配置
我的开发工具是MyEclipse+WindowsXP。和Eclipse的配置方法是基本一样的,当然在linux下开发是更好的,毕竟Android是基于linux内核的手机系统。
第一步:下载Android SDK,下载地址:http://dl.google.com/android/android-sdk-windows-1.5_r3.zip;解压好像花费时间比较长,可能是我机器太烂的原因吧。下载解压后如图:
第二步:安装ADT开发插件(Eclipse的强大与灵活就在于此,安装不同的插件就会是不同的IDE),我一般选择的是在线安装。
Help->Software Updates->Find and Install->Search for new features to install->New Remote Site:
URL地址是:https://dl-ssl.google.com/android/eclipse/
第三步:前两步进行完后重新启动eclipse后就算安装完毕了。下面是进行必要的配置。指定SDK路径。
Window->Preferences:在sdk location中选择sdk安装的目录。
第四步:新建一个android工程(Android Project):填写工程名(HelloGphone)和程序名(HelloTest),选择sdk版本,我选择的是1.5(当然要最新的喽)。
下面是生成的工程布局图:
注意android程序的布局是放在xml中的。AndroidManifest.xml该文件是由用于 Eclipse 的 Android Developer Tools 插件自动创建的,不需要我们做什么,它把程序整合在一起。
另外MyEclipse中对于布局文件是有可视化效果的,这方便了我们的UI设计:
文件:
main.xml:
<?xml version="1.0" encoding="utf-8"?> <LinearLayout xmlns:android="http://schemas.android.com/apk/res/android" android:orientation="vertical" android:layout_width="fill_parent" android:layout_height="fill_parent" > <TextView android:layout_width="fill_parent" android:layout_height="wrap_content" android:text="@string/hello" /> </LinearLayout>
上述文件描述了在LinearLayout中有一个TextView空间,他的文本值为string类型的hello属性(android:text="@string/hello")。
String.xml
<?xml version="1.0" encoding="utf-8"?> <resources> <string name="hello">Hello World, HelloTest!</string> <string name="app_name">HelloTest</string> </resources>
第五步:运行程序,首先要配置Dalvik Virtual Machine。在此就是配置一个新的AVD
我新建AVD(Create AVD)名字为MyAVD。
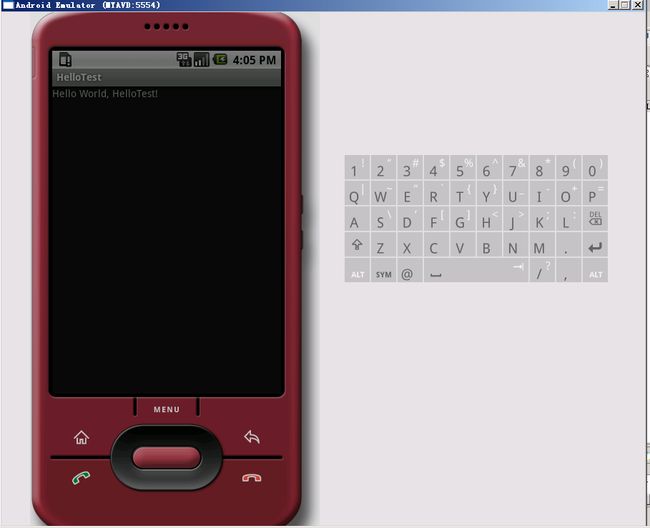
这样运行该工程就可以了,不过这时机器会很慢,只要耐心的等待就会出现下面的画面了:
至此,我们的开发环境就算成功搭建完成。


