手把手教你做安豆计算器(四)-界面美化
第5节 界面美化
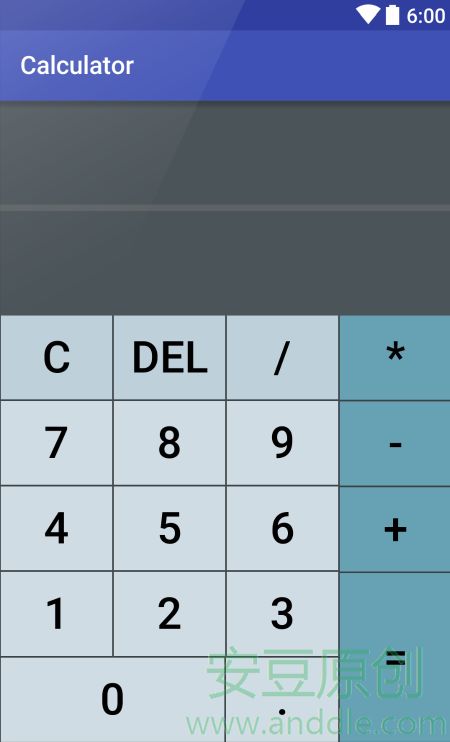
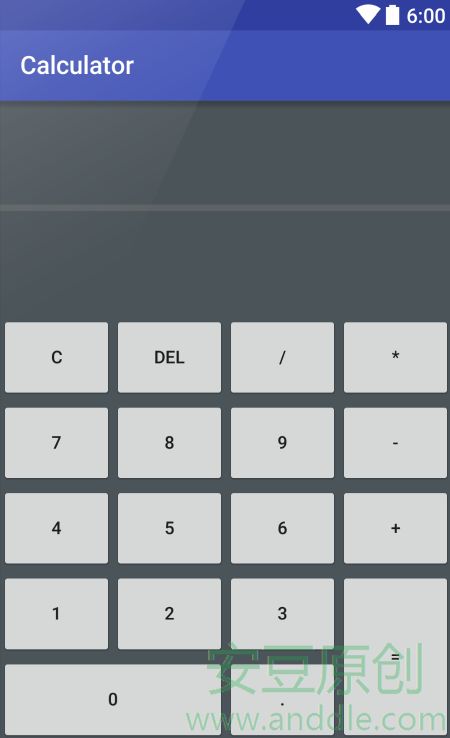
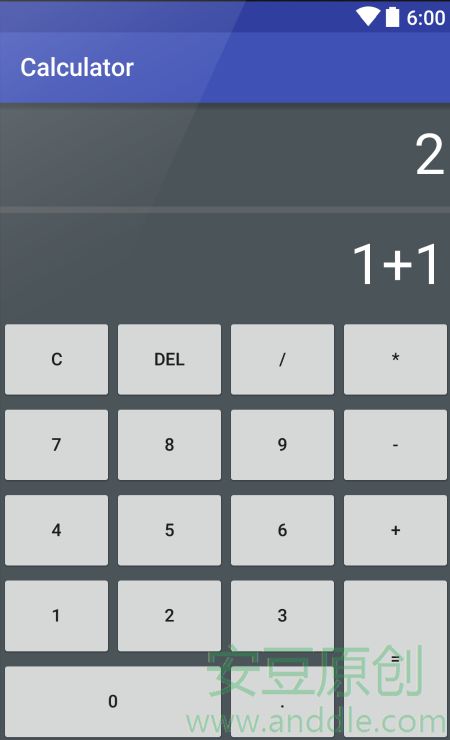
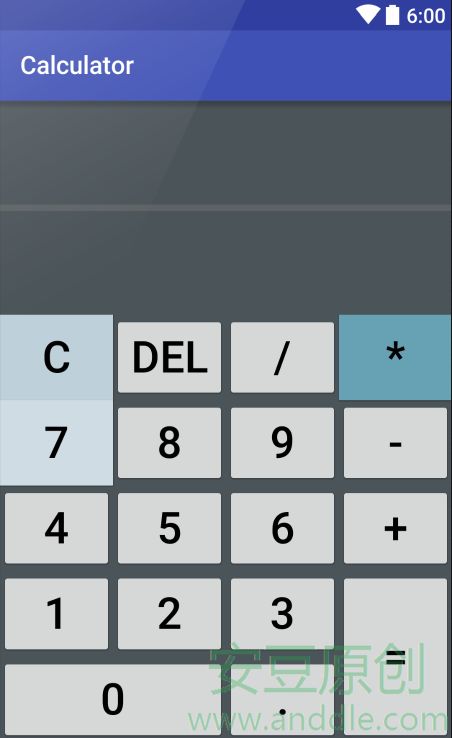
这一节,我们将对粗糙的计算器界面进行美化,最后让它的效果如下,
5.1 整体背景色
给整个背景调整一个背景颜色,让它变得美观。
- 在布局文件
activity_main.xml中,给整个界面增加一个背景颜色#FF4B5459,对界面的父布局LinearLayout使用android:background属性设置; 这里的颜色是采用
AARRGGBB的形式进行定义的,AA表示透明度,RR代表红色,GG代表绿色,BB代表蓝色;<LinearLayout xmlns:android="http://schemas.android.com/apk/res/android" xmlns:tools="http://schemas.android.com/tools" android:layout_width="match_parent" android:layout_height="match_parent" tools:context="com.anddle.calculator.MainActivity" android:orientation="vertical" android:background="#FF4B5459"> </LinearLayout>
5.2 美化显示区域
开始调整显示区域。
5.2.1 添加显示区域分隔栏
结果显示区域和表达式显示区域混在一起,不易分辨,需要把它们分开;
- 它们表达式区域和结果区域之间,增加一条间隔线,高度设置为
5dp; 间隔线的颜色为
#FF5C6265;<LinearLayout android:layout_width="match_parent" android:layout_height="0dp" android:layout_weight="1" android:orientation="vertical"> <TextView android:id="@+id/result_area" android:layout_width="match_parent" android:layout_height="0dp" android:layout_weight="1"/> <View android:layout_width="match_parent" android:layout_height="5dp" android:background="#FF5C6265" /> <TextView android:id="@+id/formula_area" android:layout_width="match_parent" android:layout_height="0dp" android:layout_weight="1"/> </LinearLayout>
5.2.2 修改字体和排列
- 显示区域的字体颜色通过
android:textColor属性设置成白色#FFFFFFFF; - 字体大小通过
android:textSize属性设置成45sp; - 通过
android:gravity属性让文字位于左边居中显示; - 显示区域的页边距通过
android:padding属性设置成5dp;
<LinearLayout  android:layout_width="match_parent" android:layout_height="0dp" android:layout_weight="1" android:orientation="vertical">

    <TextView  android:id="@+id/result_area" android:layout_width="match_parent" android:layout_height="0dp" android:layout_weight="1" android:textColor="#FFFFFFFF" android:textSize="45sp" android:gravity="center_vertical|right" android:padding="5dp"/>

    <View  android:layout_width="match_parent" android:layout_height="5dp" android:background="#FF5C6265" />

    <TextView  android:id="@+id/formula_area" android:layout_width="match_parent" android:layout_height="0dp" android:layout_weight="1" android:textColor="#FFFFFFFF" android:textSize="45sp" android:gravity="center_vertical|right" android:padding="5dp"/>

</LinearLayout>
5.3 美化键盘
接下来开始美化键盘。
5.3.1 字体大小和颜色修改
修改Button的字体大小和字体颜色,与修改TextView的字体大小和字体颜色完全一样,
android:textColor设置文字颜色为黑色#FF000000;android:textSize设置文字大小为35sp;
<TableRow android:layout_weight="1">
    <Button android:id="@+id/btn_c" android:text="C" android:onClick="onClick" android:textColor="#FF000000" android:textSize="35sp"/>
    ......
</TableRow>
5.3.2 增加按钮效果
下面开始修改Button的按键背景效果,我们的键盘有3种效果:
- 数字按键
0-9.使用的效果; CDEL/使用的效果;*-+=使用的效果;
修改按钮的背景需要使用selector drawble。首先用数字按钮举例。
5.3.2.1 数字按键效果
打开
res\values\colors.xml文件,定义没有按下按钮时背景的颜色为#D0DCE3,按下按钮时背景的颜色为#BED1DB;<resources> ...... <color name="colorDigitalBtnNormal">#D0DCE3</color> <color name="colorDigitalBtnPressed">#BED1DB</color> </resources>在
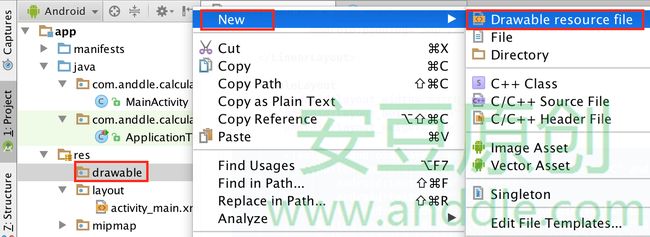
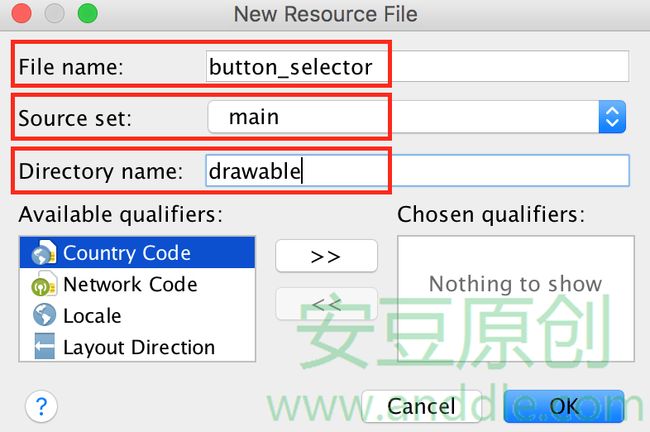
res\drawable\目录下,点击右键,启动创建drawable resource的向导;创建selector drawable的xml文件,文件名为
digital_btn_selector.xml;根据
Button是否被按下的状态android:state_pressed,分别为它们设置不同的颜色,android:state_pressed=true,说明当前按钮被按下,android:state_pressed=false,说明当前按钮没有被按下;设置颜色使用@color关键字,并加上之前在colors.xml中定义的颜色的名字;<selector xmlns:android="http://schemas.android.com/apk/res/android"> <item android:state_pressed="false" android:drawable="@color/colorDigitalBtnNormal"/> <item android:state_pressed="true" android:drawable="@color/colorDigitalBtnPressed"/> </selector>给数字按键
7的Button设置android:background属性,使用drawable selector,<TableRow android:layout_weight="1"> <Button android:id="@+id/btn_7" android:text="7" android:onClick="onClick" android:textColor="#FF000000" android:textSize="35sp" android:background="@drawable/digital_btn_selector"/> ...... </TableRow>这样就能看到数字按键的效果了。
5.3.2.2 浅色按键效果
定义
没有按下按钮时背景的颜色为#BED1DB,按下按钮时背景的颜色为#66A1B4;<resources> ...... <color name="colorSymbolLightBtnNormal">#BED1DB</color> <color name="colorSymbolLightBtnPressed">#66A1B4</color> </resources>创建selector drawable的xml文件,文件名为
symbol_light_btn_selector.xml;<selector xmlns:android="http://schemas.android.com/apk/res/android"> <item android:state_pressed="false" android:drawable="@color/colorSymbolLightBtnNormal"/> <item android:state_pressed="true" android:drawable="@color/colorSymbolLightBtnPressed"/> </selector>给按键
C的Button设置android:background属性,使用drawable selector,<TableRow android:layout_weight="1"> <Button android:id="@+id/btn_c" android:text="C" android:onClick="onClick" android:textColor="#FF000000" android:textSize="35sp" android:background="@drawable/symbol_light_btn_selector"/> ...... </TableRow>
5.3.2.3 深色按键效果
定义
没有按下按钮时背景的颜色为#66A1B4,按下按钮时背景的颜色为#78CCE6;<resources> ...... <color name="colorSymbolDarkBtnNormal">#66A1B4</color> <color name="colorSymbolDarkBtnPressed">#78CCE6</color> </resources>创建selector drawable的xml文件,文件名为
symbol_dark_btn_selector.xml;<selector xmlns:android="http://schemas.android.com/apk/res/android"> <item android:state_pressed="false" android:drawable="@color/colorSymbolDarkBtnNormal"/> <item android:state_pressed="true" android:drawable="@color/colorSymbolDarkBtnPressed"/> </selector>给按键
*的Button设置android:background属性,使用drawable selector,<TableRow android:layout_weight="1"> <Button android:id="@+id/btn_mul" android:text="*" android:onClick="onClick" android:textColor="#FF000000" android:textSize="35sp" android:background="@drawable/symbol_dark_btn_selector"/> ...... </TableRow>
5.3.3 使用style来实现三种不同的效果
要修改所有的按钮效果,可以给每个Button使用android:background属性增加对应的背景,但是这样就需要修改很多地方。
为了减少修改每个Button的工作量,可以将上面Button的3种显示效果各定义成一种style,然后再为Button设置对应的style就可以了。
先以数字按键为例,来定义style。
5.3.3.1 数字按键style
- 打开
res\values\styles.xml文件; 将
Button的共同特性定义成一个style---DigitalBtnStyle;此外,为了键盘美观,通过定义android:layout_margin属性,增加了每个按钮的间距。<resources> ...... <style name="DigitalBtnStyle"> <item name="android:layout_margin">0.5dp</item> <item name="android:textSize">35sp</item> <item name="android:textColor">#FF000000</item> <item name="android:background">@drawable/digital_button_selector</item> </style> </resources>为所有数字按钮设置
style属性,添加DigitalBtnStyle风格;<TableRow android:layout_weight="1"> <Button android:id="@+id/btn_7" android:text="7" android:onClick="onClick" android:layout_weight="1" android:layout_width="0dp" android:layout_height="match_parent" style="@style/DigitalBtnStyle" /> ...... </TableRow>
5.3.3.2 符号浅色按键style
在
res\values\styles.xml文件中,定义SymbolLightBtnStyle。<resources> ...... <style name="SymbolLightBtnStyle"> <item name="android:layout_margin">0.5dp</item> <item name="android:textSize">35sp</item> <item name="android:textColor">#FF000000</item> <item name="android:background">@drawable/symbol_light_button_selector</item> </style> </resources>为
CDEL/按钮设置style属性,添加SymbolLightBtnStyle风格;<TableRow android:layout_weight="1"> <Button android:id="@+id/btn_c" android:text="C" android:onClick="onClick" android:layout_weight="1" android:layout_width="0dp" android:layout_height="match_parent" style="@style/SymbolLightBtnStyle" /> ...... </TableRow>
5.3.3.3 符号深色按键style
在
res\values\styles.xml文件中,定义SymbolDarkBtnStyle。<resources> ...... <style name="SymbolDarkBtnStyle"> <item name="android:layout_margin">0.5dp</item> <item name="android:textSize">35sp</item> <item name="android:textColor">#FF000000</item> <item name="android:background">@drawable/symbol_dark_button_selector</item> </style> </resources>为
*-+=按钮设置style属性,添加SymbolDarkBtnStyle风格;<LinearLayout android:layout_width="0dp" android:layout_height="match_parent" android:layout_weight="1" android:orientation="vertical"> <Button android:id="@+id/btn_mul" android:text="*" android:layout_weight="1" android:onClick="onClick" android:layout_width="match_parent" android:layout_height="0dp" style="@style/SymbolDarkBtnStyle"/> ...... </LinearLayout>
5.3.4 使用style来实现显示区域的效果
显示区域也可以使用style,
在
res\values\styles.xml文件中,定义一个TextAreaStyle。<style name="TextAreaStyle"> <item name="android:textColor">#FFFFFFFF</item> <item name="android:textSize">45sp</item> <item name="android:gravity">center_vertical|right</item> </style>使用
TextAreaStyle<LinearLayout android:layout_width="match_parent" android:layout_height="0dp" android:layout_weight="1" android:orientation="vertical"> <TextView android:id="@+id/result_area" android:layout_width="match_parent" android:layout_height="0dp" android:layout_weight="1" style="@style/TextAreaStyle" /> <View android:layout_width="match_parent" android:layout_height="5dp" android:background="#FF5C6265" /> <TextView android:id="@+id/formula_area" android:layout_width="match_parent" android:layout_height="0dp" android:layout_weight="1" style="@style/TextAreaStyle" /> </LinearLayout>
至此,计算器界面美化完成。
