EventBus使用
序言
刚刚看了EventBus源码解析,自己也写了一个demo。下面简单的介绍一下EventBus.
EventBus是一个为Android设计的事件发布与订阅系统。
注意:要订阅事件,你的类里面必须有一个相应事件的处理方法。改方法必须使用注解Suscribe声明。并且声明为public返回值为void,参数只能有一个。为了接受到事件,需要将你的类注册到EventBus上。在不需要的时候解除注册。
使用
第一步
使用EventBus首先定义一个事件类
public class TestEvent {
    public String msg;

    public TestEvent(String msg) {
        this.msg = msg;
    }
}
第二步
然后再你先要处理事件的类中编写,处理方法
     //注意在EventBus3.0以后使用注解的形式向EventBus声明这是一个处理指定事件的方法
     //至于处理什么事件,则根据方法的参数决定,注意参数有且只有一个。
    public void onGetMsg(TestEvent event){
        String msg ="get on SecondActivity"+ event.msg;

        Toast.makeText(this, msg, Toast.LENGTH_LONG).show();
    }
第三步
在需要的地方注册,例如在Activity的onCreat方法中,在其他的组件中也可以使用。
EventBus.getDefault().register(this);在不需要的地方,解除注册,防止内存泄漏。
EventBus.getDefault().unregister(this);第四步
在需要发布消息的时候调用
    //post中为你想发布的消息类型
   EventBus.getDefault().post(new TestEvent("post from ThirdActivity"));
Demo
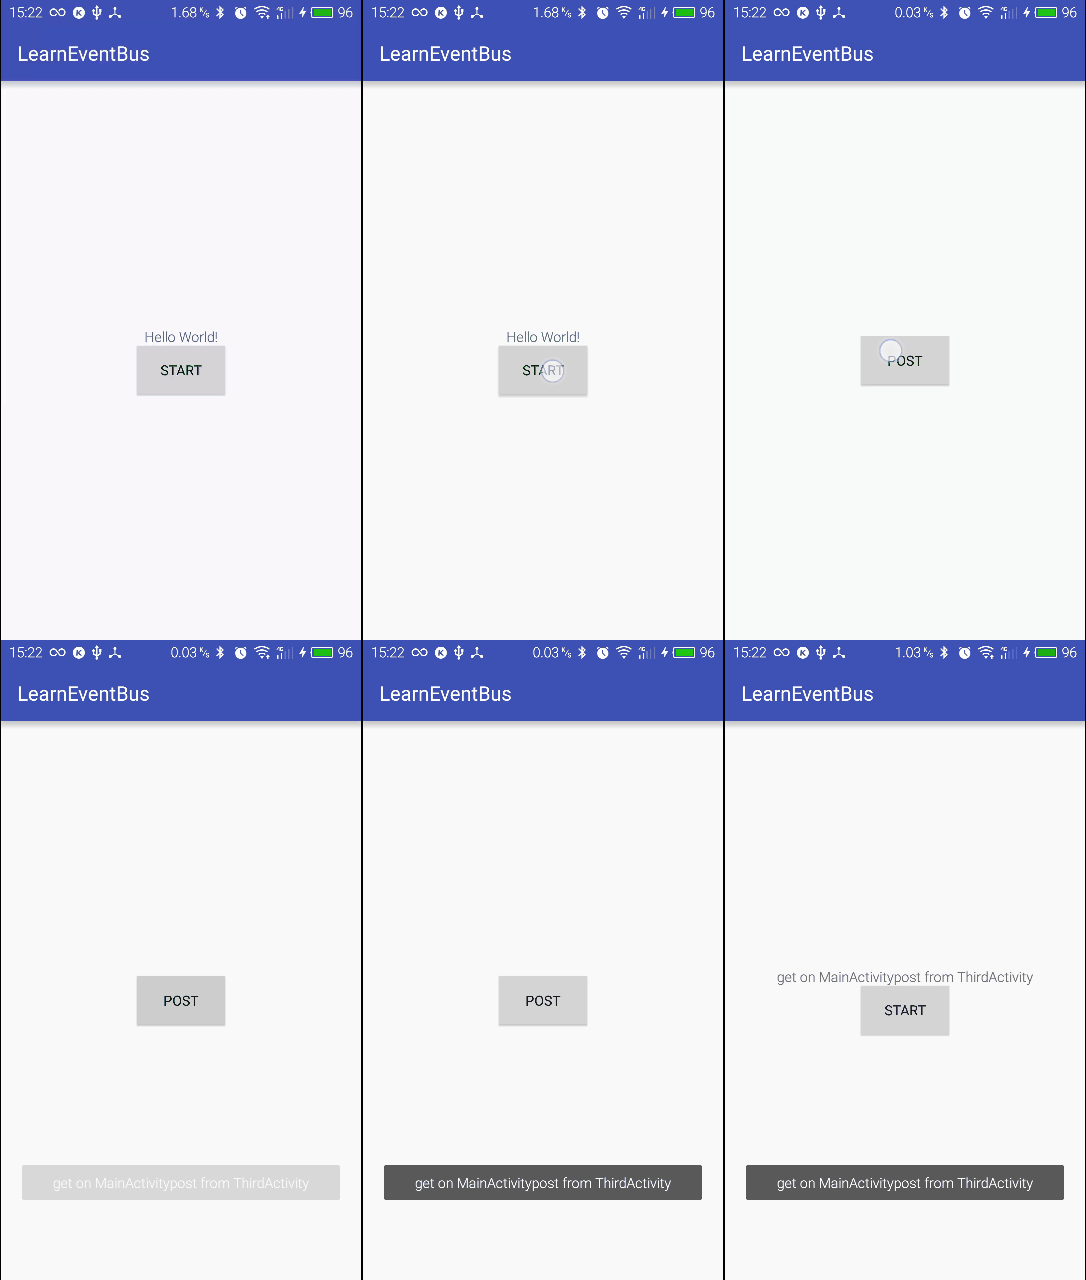
小面是我的一个demo,思路是在第一个Activity中添加事件处理方法,并将自己注册到EventBus,点击按钮跳转到第二个Activity中。在第二个Activity中也有一个按钮,点击按钮发布事件,第一个Activity接受到事件,修改布局中的TextView,并用Toast显示出来。
第一个Activity
package trs.com.learneventbus;

import android.content.Intent;
import android.support.v7.app.AppCompatActivity;
import android.os.Bundle;
import android.view.View;
import android.widget.TextView;
import android.widget.Toast;

import org.greenrobot.eventbus.EventBus;
import org.greenrobot.eventbus.Subscribe;
import org.greenrobot.eventbus.ThreadMode;

import trs.com.learneventbus.event.TestEvent;

public class MainActivity extends AppCompatActivity implements View.OnClickListener {
    TextView textView;
    @Override
    protected void onCreate(Bundle savedInstanceState) {
        super.onCreate(savedInstanceState);
        setContentView(R.layout.activity_main);
        textView= (TextView) findViewById(R.id.tv);
        findViewById(R.id.btn).setOnClickListener(this);
        EventBus.getDefault().register(this);
    }

    @Subscribe(threadMode = ThreadMode.MAIN,priority = 100)
    public void onGetMsg(TestEvent event){
        String msg ="get on MainActivity"+ event.msg;
        textView.setText(msg);
        Toast.makeText(this,msg,Toast.LENGTH_LONG).show();
    }


    @Override
    public void onClick(View v) {
        startActivity(new Intent(this,SecondActivity.class));
    }

    @Override
    protected void onDestroy() {
        super.onDestroy();
        EventBus.getDefault().unregister(this);
    }
}
第一个布局文件
<?xml version="1.0" encoding="utf-8"?>
<LinearLayout xmlns:android="http://schemas.android.com/apk/res/android" xmlns:tools="http://schemas.android.com/tools" android:layout_width="match_parent" android:layout_height="match_parent" android:gravity="center" android:orientation="vertical" tools:context="trs.com.learneventbus.MainActivity">

    <TextView  android:id="@+id/tv" android:layout_width="wrap_content" android:layout_height="wrap_content" android:text="Hello World!" />
    <Button  android:text="start" android:id="@+id/btn" android:layout_width="wrap_content" android:layout_height="wrap_content" />
</LinearLayout>
第二个Activity
public class SecondActivity extends AppCompatActivity implements View.OnClickListener {

    @Override
    protected void onCreate(Bundle savedInstanceState) {
        super.onCreate(savedInstanceState);
        setContentView(R.layout.activity_second);
        findViewById(R.id.btn).setOnClickListener(this);
    }

    @Override
    public void onClick(View v) {
        EventBus.getDefault().post(new TestEvent("post from ThirdActivity"));
    }

}
第二个布局
<?xml version="1.0" encoding="utf-8"?>
<RelativeLayout xmlns:android="http://schemas.android.com/apk/res/android" xmlns:tools="http://schemas.android.com/tools" android:layout_width="match_parent" android:layout_height="match_parent" tools:context="trs.com.learneventbus.SecondActivity">
    <Button  android:id="@+id/btn" android:text="post" android:layout_centerInParent="true" android:layout_width="wrap_content" android:layout_height="wrap_content" />
</RelativeLayout>
高级
关于EventBus的高级用法,主要是关于注解Subscribe的使用:
@Documented
@Retention(RetentionPolicy.RUNTIME)
@Target({ElementType.METHOD})
public @interface Subscribe {
    ThreadMode threadMode() default ThreadMode.POSTING;

    /** * If true, delivers the most recent sticky event (posted with * {@link EventBus#postSticky(Object)}) to this subscriber (if event available). */
    boolean sticky() default false;

    /** Subscriber priority to influence the order of event delivery. * Within the same delivery thread ({@link ThreadMode}), higher priority subscribers will receive events before * others with a lower priority. The default priority is 0. Note: the priority does *NOT* affect the order of * delivery among subscribers with different {@link ThreadMode}s! */
    int priority() default 0;
}
注解中可以设置三个参数,threadMode,sticky,priority。它们表示事件回调的线程方式,是否是粘性的,优先级。
1.threadMode
threadMode是一个枚举,表示事件发生时,对处理方法的回调应该在哪个线程中进行。有四个选项:
| 类型 | 用途 |
|---|---|
| POSTING | 表示事件的发布与处理都在同一个线程 |
| MAIN | 事件的处理会在切换到主线程中,方便更新UI |
| BACKGROUND | 事件的处理会在一个单独的线程中,如果发布的线程不是主线程,就直接在发布的线程中回调 |
| ASYNC | 事件的处理会在一个单独的线程中,与发布事件不是同一个线程,即使不是在主线程中发布的。 |
2.sticky
如果sticky设置为true,EventBus则会自动的保存最新的一个事件,直到手动的移除,而且发布事件的时候使用的是
EventBus.postSticky(event)3.priority
priority是一个int类型的数,数值越大,越先接受到事件。
设置方式如下
  @Subscribe(threadMode = ThreadMode.MAIN,priority = 100,sticky =true)
    public void onGetMsg(TestEvent event){
        String msg ="get on MainActivity"+ event.msg;
        textView.setText(msg);
        Toast.makeText(this,msg,Toast.LENGTH_LONG).show();
    }