springmvc web项目搭建
开发环境
myeclipse+maven+tomcat
步骤
1.创建maven项目

然后两次next
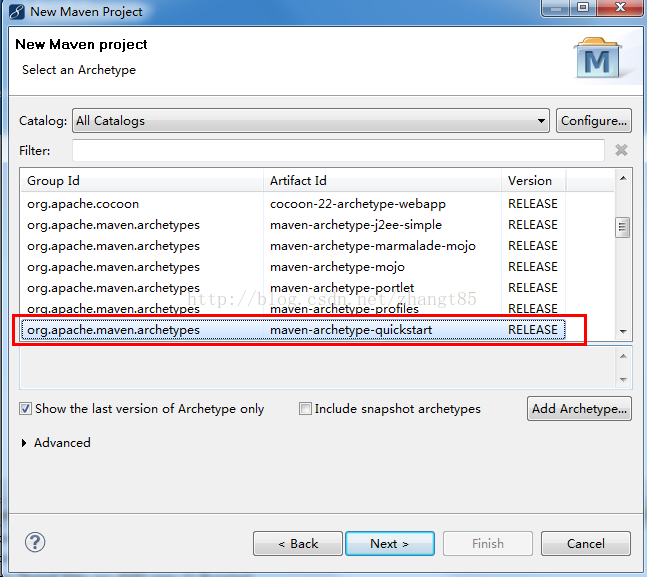
继续next
将项目的gourpId,artifactId,版本填写好,点击finish。maven项目创建完成
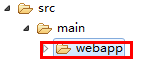
2.将maven项目转为web项目
在main下新建文件夹webapp
选中项目,右键

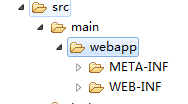
点击Browse,选择刚才创建的webapp文件夹,部署路径一栏自己命名,然后点击finish,项目就转为一个web项目
打开webapp文件夹,web项目的配置文件已经创建好了
3.配置pom.xml
因为是基于springmvc的web项目,并且页面需要用到jstl标签,所以需要增加如下依赖,
		<properties>
                      <project.build.sourceEncoding>UTF-8</project.build.sourceEncoding>
                      <spring.version>3.2.4.RELEASE</spring.version>
                      <jstl.version>1.2</jstl.version>
               </properties>

                 <dependency>
			<groupId>org.springframework</groupId>
			<artifactId>spring-webmvc</artifactId>
			<version>${spring.version}</version>
		</dependency>

		<!-- jsp页面引用jstl所需要 -->
		<dependency>
			<groupId>jstl</groupId>
			<artifactId>jstl</artifactId>
			<version>${jstl.version}</version>
		</dependency>
修改packaging标签为war
<packaging>war</packaging>
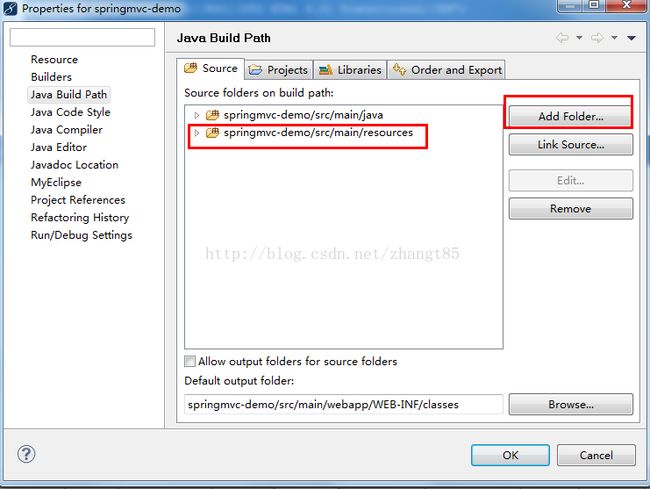
4.配置web.xml
在main下创建resources文件夹,并且配置为Source
在resources下新建applicationContext.xml,具体内容如下
<?xml version="1.0" encoding="UTF-8"?>
<beans xmlns="http://www.springframework.org/schema/beans"
	xmlns:aop="http://www.springframework.org/schema/aop" xmlns:mvc="http://www.springframework.org/schema/mvc"
	xmlns:context="http://www.springframework.org/schema/context"
	xmlns:util="http://www.springframework.org/schema/util" xmlns:xsi="http://www.w3.org/2001/XMLSchema-instance"
	xmlns:p="http://www.springframework.org/schema/p" xmlns:task="http://www.springframework.org/schema/task"
	xsi:schemaLocation="http://www.springframework.org/schema/beans http://www.springframework.org/schema/beans/spring-beans-3.0.xsd
  http://www.springframework.org/schema/mvc http://www.springframework.org/schema/mvc/spring-mvc-3.0.xsd
  http://www.springframework.org/schema/aop http://www.springframework.org/schema/aop/spring-aop-3.0.xsd
  http://www.springframework.org/schema/context http://www.springframework.org/schema/context/spring-context-3.0.xsd
  http://www.springframework.org/schema/util http://www.springframework.org/schema/util/spring-util-3.0.xsd
  http://www.springframework.org/schema/task http://www.springframework.org/schema/task/spring-task-3.0.xsd">

	<context:component-scan base-package="com.henry" />
	<mvc:annotation-driven />

</beans>
继续在resources下新建dispatcher.xml,内容如下:
<?xml version="1.0" encoding="UTF-8"?>
<beans xmlns="http://www.springframework.org/schema/beans"
  xmlns:xsi="http://www.w3.org/2001/XMLSchema-instance"
  xmlns:p="http://www.springframework.org/schema/p"
  xsi:schemaLocation="http://www.springframework.org/schema/beans
  http://www.springframework.org/schema/beans/spring-beans-3.0.xsd">

  <bean class="org.springframework.web.servlet.view.InternalResourceViewResolver"
  		p:prefix="/views/"
  		p:suffix=".jsp"/>
</beans>
上面两个文件新增完成后,配置web.xml
<?xml version="1.0" encoding="UTF-8"?>
<web-app version="2.5" xmlns="http://java.sun.com/xml/ns/javaee"
	xmlns:xsi="http://www.w3.org/2001/XMLSchema-instance"
	xsi:schemaLocation="http://java.sun.com/xml/ns/javaee
	http://java.sun.com/xml/ns/javaee/web-app_2_5.xsd">

	<context-param>
		<param-name>contextConfigLocation</param-name>
		<param-value>classpath:applicationContext.xml</param-value>
	</context-param>
	<listener>
		<listener-class>org.springframework.web.context.ContextLoaderListener</listener-class>
	</listener>


	<servlet>
		<servlet-name>dispatcher</servlet-name>
		<servlet-class>org.springframework.web.servlet.DispatcherServlet</servlet-class>
		<init-param>
			<param-name>contextConfigLocation</param-name>
			<param-value>/WEB-INF/classes/dispatcher.xml</param-value>
		</init-param>
		<load-on-startup>1</load-on-startup>
	</servlet>
	<servlet-mapping>
		<servlet-name>dispatcher</servlet-name>
		<url-pattern>*.html</url-pattern>
	</servlet-mapping>

    <!-- 防止中文字符乱码 -->
    <filter>
        <filter-name>characterEncodingFilter</filter-name>
        <filter-class>org.springframework.web.filter.CharacterEncodingFilter</filter-class>
        <init-param>
            <param-name>encoding</param-name>
            <param-value>UTF-8</param-value>
        </init-param>
    </filter>
    <filter-mapping>
        <filter-name>characterEncodingFilter</filter-name>
        <url-pattern>/*</url-pattern>
    </filter-mapping>
 <!-- jsp页面需要引入的标签,存放在本地项目中,避免从网络下载 -->
	<jsp-config>
		<taglib>
			<taglib-uri>http://java.sun.com/jsp/jstl/core</taglib-uri>
			<taglib-location>/WEB-INF/tld/c.tld</taglib-location>
		</taglib>
		<taglib>
			<taglib-uri>http://java.sun.com/jsp/jstl/fmt</taglib-uri>
			<taglib-location>/WEB-INF/tld/fmt.tld</taglib-location>
		</taglib>
		<taglib>
			<taglib-uri>http://java.sun.com/jsp/jstl/functions</taglib-uri>
			<taglib-location>/WEB-INF/tld/fn.tld</taglib-location>
		</taglib>
		<taglib>
			<taglib-uri>http://www.springframework.org/tags</taglib-uri>
			<taglib-location>/WEB-INF/tld/spring.tld</taglib-location>
		</taglib>
	</jsp-config>
</web-app>
在web.xml中,我们新增了jsp-config的配置,这是将这些用到的标签放到了项目本地,目的是避免网络下载
在dispatcher.xml中,我们配置了视图的存放路径,所以需要新建这个路径文件
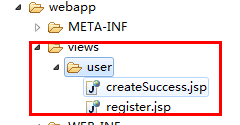
5.业务代码
UserController.java
@Controller
@RequestMapping("/user")
public class UserController {


	@RequestMapping("/register")
	public String register(){
		return "user/register";
	}

	@RequestMapping(method=RequestMethod.POST)
	public ModelAndView createUser(User user){
		ModelAndView mv = new ModelAndView();
		mv.setViewName("user/createSuccess");
		mv.addObject("user", user);
		return mv;

	}
}
User.java
public class User {
	private String userName;
	private String password;
	private String realName;
	public String getUserName() {
		return userName;
	}
	public void setUserName(String userName) {
		this.userName = userName;
	}
	public String getPassword() {
		return password;
	}
	public void setPassword(String password) {
		this.password = password;
	}
	public String getRealName() {
		return realName;
	}
	public void setRealName(String realName) {
		this.realName = realName;
	}


}
register.jsp
<%@ page language="java" contentType="text/html; charset=UTF-8"  pageEncoding="UTF-8"%>
<%@ taglib uri="http://java.sun.com/jsp/jstl/core" prefix="c"%>

<!DOCTYPE HTML PUBLIC "-//W3C//DTD HTML 4.01 Transitional//EN">
<html>
  <head>
   <title>新增用户</title>
  </head>

  <body>

  	<form action="<c:url value="/user.html"/>" method="post">
  		<table>
  			<tr>
  				<td>用户名:</td>
  				<td><input type="text" name="userName"/></td>
  			</tr>
  			<tr>
  				<td>密码:</td>
  				<td><input type="password" name="password"/></td>
  			</tr>
  			<tr>
  				<td>姓名:</td>
  				<td><input type="text" name="realName"/></td>
  			</tr>
  			<tr>
  				<td colspan="2"><input type="submit" name="提交"/></td>
  			</tr>
  		</table>
  	</form>
  </body>
</html>
createSuccess.jsp
<%@ page language="java" contentType="text/html; charset=UTF-8"  pageEncoding="UTF-8"%>
<%@ taglib uri="http://java.sun.com/jsp/jstl/core" prefix="c"%>

<!DOCTYPE HTML PUBLIC "-//W3C//DTD HTML 4.01 Transitional//EN">
<html>
  <head>
   <title>创建用户成功</title>
  </head>

  <body>

  恭喜!${user.userName}创建成功
  </body>
</html>
这样一个完整的springmvc的demo工程新建完成。
然后部署到tomcat下,进行测试一下
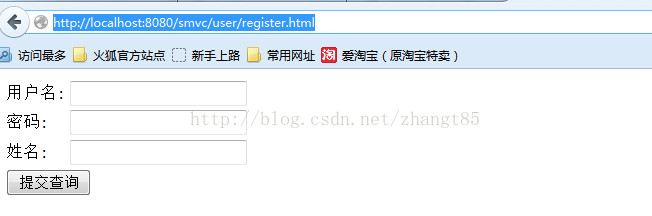
http://localhost:8080/smvc/user/register.html中的smvc自己在转web项目的时候的命名,如果不知道,可以再tomcat的部署路径下查看