【体感】Intel Realsense开发: C++环境配置+语音合成Demo (不需要硬件也能运行)
这几天在尝试着用Realsense进行开发,并没有找到比较趁手的中文配置文档,故而自己摸索了下来写一篇配置环境的文章并实现一个语音合成的小Demo。
首先友情链接,Realsense驱动安装:http://blog.csdn.net/zmdsjtu/article/details/53085649
--------------------------环境配置----------------------
首先确认下props文件存放位置(简直福音)
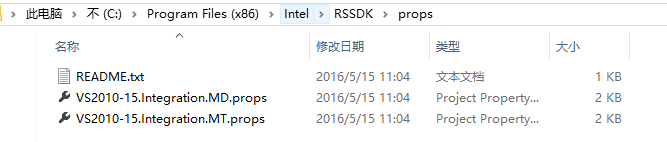
接着新建一个空项目,在属性管理器的界面载入props文件
期中MD为动态库,MT为静态库。
本文采用Release X64所以在这个框架下载入了MT静态库文件
接着需要配置下链接器的附加依赖项
libpxc.lib
libpxcutils.lib
oleaut32.lib
user32.lib
odbccp32.lib
ole32.lib
advapi32.lib
shell32.lib
winmm.lib
gdi32.lib
comdlg32.lib
uuid.lib
winspool.lib
odbc32.lib
kernel32.lib
comctl32.lib
(否则会报错error LNK2001: 无法解析的外部符号 __imp_waveOutPrepareHeader)
//天真的我以为props配置完并不需要手动加lib来着……囧,太年轻
然后粘贴一下代码就可以流畅地跑起来啦~~
Voiceout这个类是我从语音合成的示例代码里拷贝出来加以删改之后的类,放在了同一个cpp里方便阅读(当然这是个不好的习惯,大家还是放在.h文件里比较好)
废话不多说,上代码://大家可以对照着下面的英文文档看下流程。
#include <Windows.h>
#include <vector>
#include "pxcspeechsynthesis.h"
#include "pxcsession.h"


class VoiceOut {
protected:

    enum { buffering = 3 };

    WAVEHDR             m_headers[buffering];
    PXCAudio::AudioData m_data[buffering];
    PXCAudio*           m_samples[buffering];

    // poor man's autogrowing bytestream
    std::vector<byte>   m_wavefile;

    int         m_nsamples;
    HWAVEOUT m_hwo;

    WAVEFORMATEX m_wfx;

public:

    VoiceOut(PXCSpeechSynthesis::ProfileInfo *pinfo) {
        m_nsamples= 0;
        m_hwo= 0;

        memset(&m_wfx,0, sizeof(m_wfx));
        m_wfx.wFormatTag= WAVE_FORMAT_PCM;
        m_wfx.nSamplesPerSec= pinfo->outputs.sampleRate;
        m_wfx.wBitsPerSample= 16;
        m_wfx.nChannels= pinfo->outputs.nchannels;
        m_wfx.nBlockAlign= (m_wfx.wBitsPerSample / 8)*m_wfx.nChannels;
        m_wfx.nAvgBytesPerSec= m_wfx.nBlockAlign*m_wfx.nSamplesPerSec;

        waveOutOpen(&m_hwo,WAVE_MAPPER, &m_wfx, 0, 0, CALLBACK_NULL);
    }

    void RenderAudio(PXCAudio *audio) {
        int k = (m_nsamples%buffering);
        if (m_nsamples++ >=buffering) {
            while (waveOutUnprepareHeader(m_hwo,&m_headers[k], sizeof(WAVEHDR)) == WAVERR_STILLPLAYING)
                Sleep(10);
            m_samples[k]->ReleaseAccess(&m_data[k]);
            m_samples[k]->Release();
        }
        audio->AddRef();
        m_samples[k]= audio;
        if(m_samples[k]->AcquireAccess(PXCAudio::ACCESS_READ, PXCAudio::AUDIO_FORMAT_PCM, &m_data[k]) >= PXC_STATUS_NO_ERROR) {
            memset(&m_headers[k],0, sizeof(WAVEHDR));
            m_headers[k].dwBufferLength= m_data[k].dataSize * 2;
            m_headers[k].lpData= (LPSTR)m_data[k].dataPtr;
            waveOutPrepareHeader(m_hwo,&m_headers[k], sizeof(WAVEHDR));
            waveOutWrite(m_hwo,&m_headers[k], sizeof(WAVEHDR));
        }
    }


    ~VoiceOut(void) {
        if (!m_hwo ||m_nsamples <= 0) return;
        for (int i = m_nsamples - buffering + 1;i<m_nsamples; i++) {
            if (i<0) i++; //If he have 1 AudioObject in m_samples 'k' will be -1.It is exeption for the alghorithm. Bug 57423
            int k = (i%buffering);
            while(waveOutUnprepareHeader(m_hwo, &m_headers[k], sizeof(WAVEHDR)) == WAVERR_STILLPLAYING)
                Sleep(10);
            m_samples[k]->ReleaseAccess(&m_data[k]);
            m_samples[k]->Release();
        }
        waveOutClose(m_hwo);
    }
};


int main(){

PXCSpeechSynthesis *tts = 0;
PXCSession  *session=PXCSession::CreateInstance();
session->CreateImpl<PXCSpeechSynthesis>(&tts);

PXCSpeechSynthesis::ProfileInfo pinfo;
tts->QueryProfile(0, &pinfo);
pinfo.language = PXCSpeechSynthesis::LANGUAGE_CN_CHINESE;
tts->SetProfile(&pinfo);

// Synthesize the text string
tts->BuildSentence(1, L"终于成功了");

// Retrieve the synthesized speech
intnbuffers = tts->QueryBufferNum(1);

VoiceOutvo(&pinfo);

for (int i = 0;i<nbuffers; i++) {
    PXCAudio *audio =tts->QueryBuffer(1, i);
    // send audio to the audio output device
    vo.RenderAudio(audio);

}

// Clean up
tts->ReleaseSentence(1);
system("pause");


}
----------------------以下是关于语音合成模块的详细信息--------------------
语音合成和语音识别是独立于Realsense硬件的两块内容,也就是说不需要Realsense也能使用Intel提供的语音合成和离线语音识别的功能。
本文主要测试以及梳理语音合成模块。
首先打开安装好的开发者套件,选择Common Samples里最下面的Speech Synthesis功能,点击Run进行简单测试。
首先讲解下官方给出的软件模块,图中圈出来的三块Volume,Pitch,Rate很直观地代表音量,音调以及说话速率。
其中音量Volume的范围是0-100,很直观
音调Pitch的范围是50-200,50代表音调最粗壮,200最尖锐
说话速率Speech Rate的范围是50-400,很直观
语音合成中文和英文是分开的,故而需要手动在Language里选择,否则用默认的Eng输入中文不会有声音。
用默认参数80 100 100听起来还是蛮好听的,哈哈。
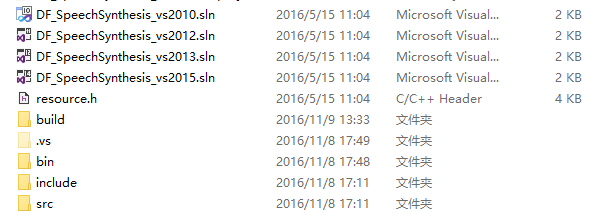
下面打开Sources源码进行测试,可以看到无论是2010,2012,2013还是2015都有对应项目,这里打开2015进行测试。
打开之后不需要配置环境就可以很方便地跑通了
下面开始正文,如何把语音合成模块用于我们自己的程序,漫漫长路才刚刚开始。
官方说明文档: 点这里
不愿意打开的话大概就是下面这些内容,不愿意看的话跳过看上面的代码即可。
Speech Synthesis Produre
To implement speech synthesis in your application, follow the steps below:
| Locate the Module Implementation: Use the CreateImpl function to create an instance of the PXCSpeechSynthesis instance, as illustrated in Example 155. |
Example 155:Create a Speech Synthesis Module Instance
| PXCSpeechSynthesis *tts=0; session->CreateImpl<PXCSpeechSynthesis>(&tts); |
| Initialize the Module: Get available configurations using the QueryProfile function and set the configuration using the SetProfile function. See Example 156. |
Example 156:Initialize the Speech Synthesis Module
| PXCSpeechSynthesis::ProfileInfo pinfo; tts->QueryProfile(0,&pinfo); pinfo.language=PXCSpeechSynthesis::LANGUAGE_US_ENGLISH; tts->SetProfile(&pinfo); |
Always set the language. If not set, the default language is undetermineddepending on what is currently installed on the platform.
| .
|
Synthesize speech: Use the BuildSentence function to synthesize a sentence. The synthesized speech is stored as multiple audio buffers identified by the sentence identifier, which can be any non-zero unique value. Use the QueryBuffer function to retrieve the synthesized speech buffers, illustrated in Example 157. |
You maysynthesize multiple sentences before retrieving any synthesized data. Use the ReleaseSentence function to release any resourcesallocated for the synthesized speech.
Example 157:Synthesize a Sentence Into Speech
| // Synthesize the text string tts->BuildSentence(1, L”Speakthis”);
// Retrieve the synthesized speech int nbuffers=tts->QueryBufferNum(1); for (int i=0;i<nbuffers;i++){ PXCAudio *audio=tts->QueryBuffer(1, i); // send audio to the audio output device ... }
// Clean up tts->ReleaseSentence(1); |
有问题欢迎大家留言~
最后祝大家学习愉快~: )