Tensorflow第四课,图片相似度比较前的图片裁剪
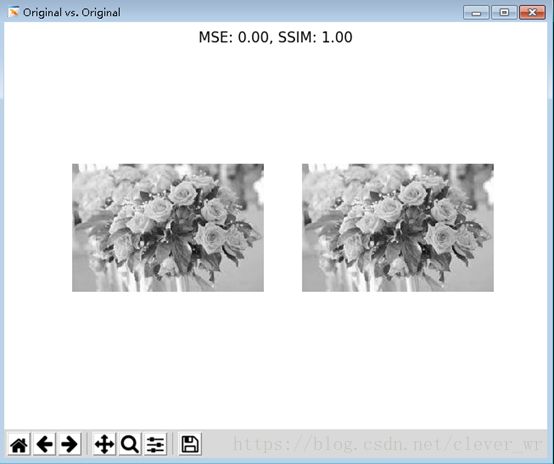
使用Tensorflow来对图片相似度进行比较时,发现在进行相同的一张图片之间的比较时,是可以比较得出结果的。即MSE=0,ssim=1。说明这两张图片是相同的。其中主要MSE和SSIM公式分别通过下面的公式获得。
均分误差:
结构相似性:
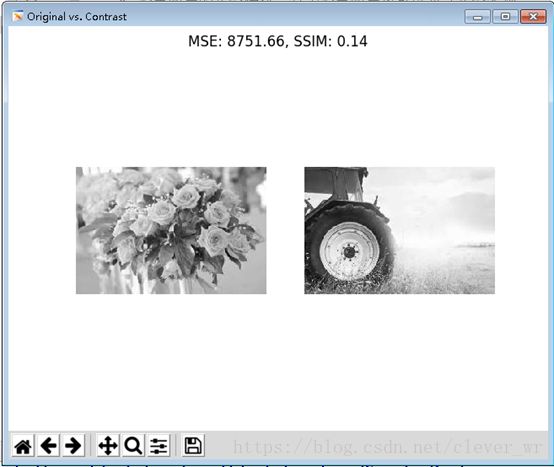
但是在进行两个不同图片之间的比较时就会出现下面的报错:ValueError: operands could not be broadcast together with shapes (182,176) (185,173)。想了半天才明白应该是两个图片的长宽不一样,那么处理起来就会报错啊。然后我就进行了图片的裁剪处理,其主要代码如下:
def crop_or_pad(filePath):
    filename = [filePath]
    filename_queue = tf.train.string_input_producer(filename)
    reader = tf.WholeFileReader()
    key, value = reader.read(filename_queue)
    images = tf.image.decode_jpeg(value)  # tf.image.decode_png(value)
    CP_H = 180
    CP_W = 270
    # 裁切图片
    with tf.Session() as sess:
        coord = tf.train.Coordinator()
        threads = tf.train.start_queue_runners(coord=coord)

        reshapeimg = tf.image.resize_image_with_crop_or_pad(images, CP_H, CP_W)
        # reimg1的类型是
        reimg1 = reshapeimg.eval()
        scipy.misc.imsave('/root/PycharmProjects/ImageIdentification/Image/crop_or_pad1.jpg', reimg1)

        coord.request_stop()
        coord.join(threads)
        print('crop_or_pad successful!')
先对图片进行相应的裁剪,然后再把处理好的图片保存起来,然后在进行图片的加载和相似度比较就可以了。
# -*- coding: UTF-8 -*-
from skimage.measure import structural_similarity as ssim
import matplotlib.pyplot as plt
import numpy as np
import cv2
import tensorflow as tf
import scipy.misc

def mse(imageA, imageB):
    err = np.sum((imageA.astype("float") - imageB.astype("float")) ** 2)
    err /= float(imageA.shape[0] * imageA.shape[1])
    return err

def crop_or_pad(filePath):
    filename = [filePath]
    filename_queue = tf.train.string_input_producer(filename)
    reader = tf.WholeFileReader()
    key, value = reader.read(filename_queue)
    images = tf.image.decode_jpeg(value)  # tf.image.decode_png(value)
    CP_H = 180
    CP_W = 270
    # 裁切图片
    with tf.Session() as sess:
        coord = tf.train.Coordinator()
        threads = tf.train.start_queue_runners(coord=coord)
        reshapeimg = tf.image.resize_image_with_crop_or_pad(images, CP_H, CP_W)
        # reimg1的类型是
        reimg1 = reshapeimg.eval()
        scipy.misc.imsave('/root/PycharmProjects/ImageIdentification/Image/crop_or_pad1.jpg', reimg1)
        coord.request_stop()
        coord.join(threads)
        print('crop_or_pad successful!')

def compare_images(imageA, imageB, title):
    m = mse(imageA, imageB)
    s = ssim(imageA, imageB)
    # setup the figure
    fig = plt.figure(title)  # 创建一个窗口
    plt.suptitle("MSE: %.2f, SSIM: %.2f" % (m, s))
    # show first image
    ax = fig.add_subplot(1, 2, 1) # 将窗口划分为1行两列的子图当前为第1个子图
    plt.imshow(imageA, cmap=plt.cm.gray) # 图片的绘制,plt.cm.gray显示为灰度图
    plt.axis("off") # 不显示坐标尺寸

    # show the second image
    ax = fig.add_subplot(1, 2, 2) # 将窗口划分为1行两列的子图当前为第2个子图
    plt.imshow(imageB, cmap=plt.cm.gray)
    plt.axis("off")

    # show the images
    plt.show() # 显示窗口
if __name__ == '__main__':
    #图片格式转化,转化成长和宽一致的图片
    crop_or_pad('/root/PycharmProjects/ImageIdentification/Image/image2.jpg')
    # 图片加载
    original = cv2.imread("/root/PycharmProjects/ImageIdentification/Image/crop_or_pad.jpg")
    contrast = cv2.imread("/root/PycharmProjects/ImageIdentification/Image/crop_or_pad1.jpg")
    shopped = cv2.imread("/root/PycharmProjects/ImageIdentification/Image/crop_or_pad.jpg")
    # 图片的灰阶转化
    # convert the images to grayscale
    original = cv2.cvtColor(original, cv2.COLOR_BGR2GRAY)
    contrast = cv2.cvtColor(contrast, cv2.COLOR_BGR2GRAY)
    shopped = cv2.cvtColor(shopped, cv2.COLOR_BGR2GRAY)
    # 彩色图片的灰阶转化:对于彩色图片也可以通过灰阶实现
    # Gray = R * 0.299 + G * 0.587 + B * 0.114
    fig = plt.figure("Images")
    images = ("Original", original), ("Contrast", contrast), ("Photoshopped", shopped)
    # loop over the images
    for (i, (name, image)) in enumerate(images):
        # show the image
        ax = fig.add_subplot(1, 3, i + 1)
        ax.set_title(name)
        plt.imshow(image, cmap=plt.cm.gray)
        plt.axis("off")
    # show the figure
    plt.show()


    # compare the images
    compare_images(original, original, "Original vs. Original")
    compare_images(original, contrast, "Original vs. Contrast")
    compare_images(original, shopped, "Original vs. Photoshopped")
图片比较结果:
通过图片自身比较可知,MSE为0,表示相似度完全相同。
两个不同图片之间的比较,可以看出MSE很大,说明相似度很小。


