音频编码(一)——FFmpeg编码
声波
这里为啥讲到了声波,讲到了我们的中学物理上的知识,因为我想大家能从根本理解后面音频编码的各种参数以及原因。当然这些知识网上都能搜到,我只是整合一下。
定义
声音是由物体振动产生的声波,发声体产生的振动在空气或其他物质中的传播叫做声波。声波借助各种介质向四面八方传播。这句话我们总结几点:
- 声音本质是声波
- 声波是由物体震动产生
- 声波传播需要介质
关键名词
振幅、周期、频率这些我就不解释了。我简单说下,振幅和音量相关;频率和单位时间的震动次数有关,进一步说就是和音调有关,有音乐理论基础的朋友应该知道,我们知道 do 、re 、mi..... ,我们看一下钢琴的图
这里小字这一组的a1的的频率就是440HZ,频率越高,音调越高。每一种声音都有各自的基本波形,称为基波。不同声音的基波中混入的谐波有多有少,导致音质变化多端,也就是音色的不同。
我们现在总结下:声音其实也是一种波,既然是波那就是有频率和周期,当然我们听到的声音可能是多个声波干涉形成,可能是规则稳定的波,
也可能是不规则的波。我们采集编码,目的就是为了更加接近的记录一定时间段内声波的形态。
抽样
抽样是把模拟信号以其信号带宽2倍以上的频率提取样值,变为在时间轴上离散的抽样信号的过程。在音频编码上我们经常会看到
44100的采样频率,人耳能识别的最高频率大约是20kHZ,按我们刚在说的2倍以上的的频率取样值也比较的符合,我们常见的CD,采样率为44.1kHz
低频和高频的采样,比如:我们用44100HZ频率对20000HZ的声波采样,那么每次震动,也就是每个声波的周期只有大约2次采样;当我们去采样20HZ的声波时候,每次震动就采样了大约2000次。所以我们知道对低频的声波能保证较好的记录,对于较高频率的声波却无法保证这也是为什么有些音响发烧友指责CD有数码声不够真实的原因,CD的44.1KHz采样也无法保证高频信号被较好记录。要较好的记录高频信号,看来需要更高的采样率。
有损和无损
所谓有损和无损都是相对而言,我们常说的无损是指采样后的PCM音频文件,包括封装后的WAV都是无损的。同样编码后的MP3就是有损的。我们通常
参考的是PCM。那么PCM真正的是否有损呢?相对于自然的模拟信号,当然是有损的。声音是连续的模拟信号,要做到真正的无损是困难的,就像用数字去表达圆周率,不管精度多高,
也只是无限接近,而不是真正等于圆周率的值。
FFmpeg编码PCM文件
需求:通过FFmpeg将PCM文件编码成AAC文件,最终的文件我们可以进行播放。
有朋友奇怪为什么要讲将PCM编码为AAC,而不是用Android设备采集再编码输出?我这样介绍是有特殊考虑的,因为从音频采集到编码输出中间会有很多的坑,如果直接上手这一步,可能会出现各种问题。所以我们一步步来,先保证FFmpeg编码PCM文件是没问题的,我们再进行下一步,否则一次性调试太多东西,出问题你都不知道是哪里的问题。好了我们进入主题。
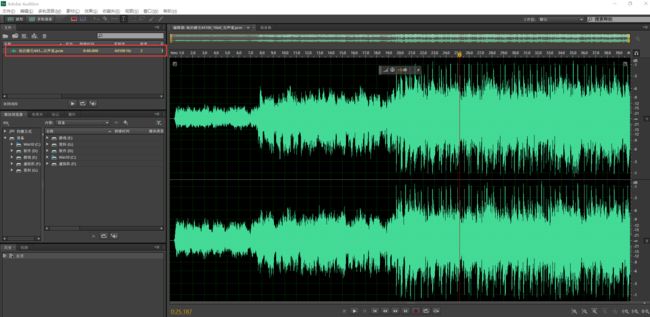
测试文件:http://ovjkwgfx6.bkt.clouddn.com/pcm.zip 我们使用里面的"她的睫毛44100_16bit_双声道.pcm",当然我们可以先打开这个文件看一下这个pcm,同时也可以停一下确保音频是没问题的,后面对编码出来的aac文件进行对比。
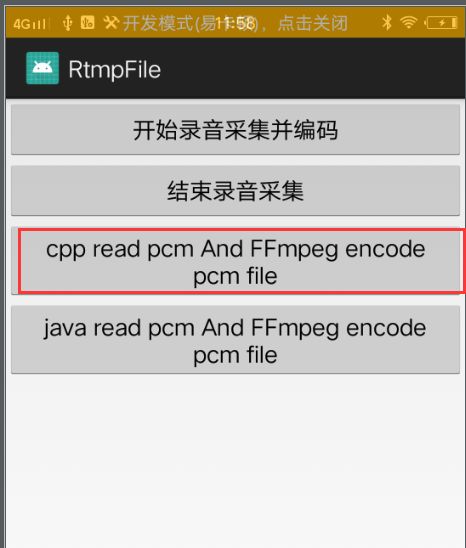
大家也可以下载源码运行起来试一下:
注意:需要编码的pcm文件需要放在Sd卡的FFmpegSample目录下,代码比较粗暴,没有过多的交互,不会有什么编码成功的弹窗等,请大家谅解。大家都是经验丰富的攻城狮,所以大家点击后,最好看log,里面会有编码过程的信息。
入口在AudioRecordFFmpegActivity,代码我就不全部贴了,只讲核心逻辑:
第一步:初始化
各种初始化,打开封装格式上下文等等,这些是FFmpge的基础,前面大家都用的比较数据了,就不说了
    av_register_all();

    avformat_alloc_output_context2(&pFormatCtx, NULL, NULL, out_file);
    fmt = pFormatCtx->oformat;

    //注意输出路径
    if (avio_open(&pFormatCtx->pb, out_file, AVIO_FLAG_READ_WRITE) < 0) {
        av_log(NULL, AV_LOG_ERROR, "%s", "输出文件打开失败!\n");
        return -1;
    }
第二步:打开编码器
首先需要找到编码器:
    pCodec = avcodec_find_encoder(AV_CODEC_ID_AAC);
    if (!pCodec) {
        av_log(NULL, AV_LOG_ERROR, "%s", "没有找到合适的编码器!");
        return -1;
    }
第三步:新建一个流
传递的参数就是第一步初始化的封装上下文和第二步找到的编码器
    audio_st = avformat_new_stream(pFormatCtx, pCodec);
    if (audio_st == NULL) {
        av_log(NULL, AV_LOG_ERROR, "%s", "avformat_new_stream error");
        return -1;
    }
第三步:设置编码器上下文的参数
这里的上下文就是从第三步中的流中得到
    pCodecCtx = audio_st->codec;
    pCodecCtx->codec_id = fmt->audio_codec;
    pCodecCtx->codec_type = AVMEDIA_TYPE_AUDIO;
    pCodecCtx->sample_fmt = outSampleFmt;
    pCodecCtx->sample_rate = sampleRate;
    pCodecCtx->channel_layout = AV_CH_LAYOUT_STEREO;
    pCodecCtx->channels = av_get_channel_layout_nb_channels(pCodecCtx->channel_layout);
    pCodecCtx->bit_rate = 64000;
这里的参数我们前面有定义:
    AVSampleFormat inSampleFmt = AV_SAMPLE_FMT_S16;
//    AVSampleFormat outSampleFmt = AV_SAMPLE_FMT_S16;
    AVSampleFormat outSampleFmt = AV_SAMPLE_FMT_FLTP;
    const int sampleRate = 44100;
    const int channels = 2;
    const int sampleByte = 2;
也就是格式是AV_SAMPLE_FMT_FLTP 、双通道、位深是2个字节、频率是44100。
第四步:打开编码器
    if (avcodec_open2(pCodecCtx, pCodec, NULL) < 0) {
        av_log(NULL, AV_LOG_ERROR, "%s", "编码器打开失败!\n");
        return -1;
    }
有朋友可能出现编码器打开错误,如果在第三步设置格式时使用的AV_SAMPLE_FMT_S16,那就会打开失败,因为FFmpge默认编码器支持的输入格式只能是AV_SAMPLE_FMT_FLTP。这里需要注意。
第五步:初始化重采样上下文
    ///2 音频重采样 上下文初始化
    SwrContext *asc = NULL;
    asc = swr_alloc_set_opts(asc,
                             av_get_default_channel_layout(channels), outSampleFmt,
                             sampleRate,//输出格式
                             av_get_default_channel_layout(channels), inSampleFmt, sampleRate, 0,
                             0);//输入格式
    if (!asc) {
        av_log(NULL, AV_LOG_ERROR, "%s", "swr_alloc_set_opts failed!");
        return -1;
    }
    ret = swr_init(asc);
    if (ret < 0) {
        printAvError(ret);
        loge("swr_init error");
        return ret;
    }
前面我们提到过FFmpeg编码器默认支持输入是输入格式只能是AV_SAMPLE_FMT_FLTP,而我们PCM文件是 AV_SAMPLE_FMT_S16 ,所以需要进行转换后才能交给编码器编码。这里我们要用到SwrContext。
说到格式,就多说一点。正常我们从Android设备采集到的PCM数据是AV_SAMPLE_FMT_S16格式,也就是两个声道交替存储,每个样点2个字节。而FFmpeg默认的AAC编码器不支持这种格式的编码,只支持AV_SAMPLE_FMT_FLTP,这种格式是按平面存储,样点是float类型,所谓平面也就是
每个声道单独存储,比如左声道存储到data[0]中,右声道存储到data[1]中。
第六步:初始化AVFrame
    frame = av_frame_alloc();
    frame->nb_samples = pCodecCtx->frame_size;
    frame->format = pCodecCtx->sample_fmt;
    av_log(NULL, AV_LOG_DEBUG, "sample_rate:%d,frame_size:%d, channels:%d", sampleRate,
           frame->nb_samples, frame->channels);
    //编码每一帧的字节数
    size = av_samples_get_buffer_size(NULL, pCodecCtx->channels, pCodecCtx->frame_size,
                                      pCodecCtx->sample_fmt, 1);
    frame_buf = (uint8_t *) av_malloc(size);
    //一次读取一帧音频的字节数
    readSize = frame->nb_samples * channels * sampleByte;
    char *buf = new char[readSize];

    avcodec_fill_audio_frame(frame, pCodecCtx->channels, pCodecCtx->sample_fmt,
                             (const uint8_t *) frame_buf, size, 1);
这里主要看到av_samples_get_buffer_size方法,这个方法主要是计算编码每一帧输入给编码器需要多少个字节。然后我们自己再分配空间,填充到初始化AVFrame中。这里我稍微讲一点源码,让大家更清楚,这几个方法的作用。
先看到av_samples_get_buffer_size
int av_samples_get_buffer_size(int *linesize, int nb_channels, int nb_samples,
                               enum AVSampleFormat sample_fmt, int align)
{
    int line_size;
    int sample_size = av_get_bytes_per_sample(sample_fmt);
    int planar      = av_sample_fmt_is_planar(sample_fmt);

    /* validate parameter ranges */
    if (!sample_size || nb_samples <= 0 || nb_channels <= 0)
        return AVERROR(EINVAL);

    /* auto-select alignment if not specified */
    if (!align) {
        if (nb_samples > INT_MAX - 31)
            return AVERROR(EINVAL);
        align = 1;
        nb_samples = FFALIGN(nb_samples, 32);
    }

    /* check for integer overflow */
    if (nb_channels > INT_MAX / align ||
        (int64_t)nb_channels * nb_samples > (INT_MAX - (align * nb_channels)) / sample_size)
        return AVERROR(EINVAL);

    line_size = planar ? FFALIGN(nb_samples * sample_size,               align) :
                         FFALIGN(nb_samples * sample_size * nb_channels, align);
    if (linesize)
        *linesize = line_size;

    return planar ? line_size * nb_channels : line_size;
}
这个方法根据channel,编码器每一帧的采样数、数据格式来计算每一帧所需要的存储空间。首先如果是平面存储,那就是每个声道单独存放到data[0]、data[1]... 然后根据编码器设置的sample_size和位深来计算每个通道需要的大小。最后算出整个一帧输入需要的
大小。
接下来我们看看avcodec_fill_audio_frame
int avcodec_fill_audio_frame(AVFrame *frame, int nb_channels,
                             enum AVSampleFormat sample_fmt, const uint8_t *buf,
                             int buf_size, int align)
{
    int ch, planar, needed_size, ret = 0;

    needed_size = av_samples_get_buffer_size(NULL, nb_channels,
                                             frame->nb_samples, sample_fmt,
                                             align);
    if (buf_size < needed_size)
        return AVERROR(EINVAL);

    planar = av_sample_fmt_is_planar(sample_fmt);
    if (planar && nb_channels > AV_NUM_DATA_POINTERS) {
        if (!(frame->extended_data = av_mallocz_array(nb_channels,
                                                sizeof(*frame->extended_data))))
            return AVERROR(ENOMEM);
    } else {
        frame->extended_data = frame->data;
    }

    if ((ret = av_samples_fill_arrays(frame->extended_data, &frame->linesize[0],
                                      (uint8_t *)(intptr_t)buf, nb_channels, frame->nb_samples,
                                      sample_fmt, align)) < 0) {
        if (frame->extended_data != frame->data)
            av_freep(&frame->extended_data);
        return ret;
    }
    if (frame->extended_data != frame->data) {
        for (ch = 0; ch < AV_NUM_DATA_POINTERS; ch++)
            frame->data[ch] = frame->extended_data[ch];
    }

    return ret;
}
这里先做了一段校验,然后主要看到av_samples_fill_arrays方法。
int av_samples_fill_arrays(uint8_t **audio_data, int *linesize,
                           const uint8_t *buf, int nb_channels, int nb_samples,
                           enum AVSampleFormat sample_fmt, int align)
{
    int ch, planar, buf_size, line_size;

    planar   = av_sample_fmt_is_planar(sample_fmt);
    buf_size = av_samples_get_buffer_size(&line_size, nb_channels, nb_samples,
                                          sample_fmt, align);
    if (buf_size < 0)
        return buf_size;

    audio_data[0] = (uint8_t *)buf;
    for (ch = 1; planar && ch < nb_channels; ch++)
        audio_data[ch] = audio_data[ch-1] + line_size;

    if (linesize)
        *linesize = line_size;

    return buf_size;
}
首先是获取planar和buf_size,如果是planar格式那么就要走下面这段
    for (ch = 1; planar && ch < nb_channels; ch++)
        audio_data[ch] = audio_data[ch-1] + line_size;
设置每个通道数据的指针,所有的数据都是存在buf里,只是打包格式所有通道交替存,而planar格式要设置单独设置指针来指向每个通道。
第七步 复制编码器参数,写文件头
第八步 编码
    for (int i = 0;; i++) {
        //读入PCM
        if (fread(buf, 1, readSize, in_file) < 0) {
            printf("文件读取错误!\n");
            return -1;
        } else if (feof(in_file)) {
            break;
        }
        frame->pts = apts;
        AVRational av;
        av.num = 1;
        av.den = sampleRate;
        apts += av_rescale_q(frame->nb_samples, av, pCodecCtx->time_base);
        int got_frame = 0;
        //重采样源数据
        const uint8_t *indata[AV_NUM_DATA_POINTERS] = {0};
        indata[0] = (uint8_t *) buf;
        int len = swr_convert(asc, frame->data, frame->nb_samples, //输出参数,输出存储地址和样本数量
                              indata, frame->nb_samples
        );
        //编码
        ret = avcodec_send_frame(pCodecCtx, frame);
        if (ret < 0) {
            av_log(NULL, AV_LOG_ERROR, "%s", "avcodec_send_frame error\n");
        }

        ret = avcodec_receive_packet(pCodecCtx, &pkt);
        if (ret < 0) {
            av_log(NULL, AV_LOG_ERROR, "%s", "avcodec_receive_packet!error \n");
            printAvError(ret);
            continue;
        }
        pkt.stream_index = audio_st->index;
        av_log(NULL, AV_LOG_DEBUG, "第%d帧", i);
        pkt.pts = av_rescale_q(pkt.pts, pCodecCtx->time_base, audio_st->time_base);
        pkt.dts = av_rescale_q(pkt.dts, pCodecCtx->time_base, audio_st->time_base);
        pkt.duration = av_rescale_q(pkt.duration, pCodecCtx->time_base, audio_st->time_base);
        ret = av_write_frame(pFormatCtx, &pkt);
        if (ret < 0) {
            av_log(NULL, AV_LOG_ERROR, "av_write_frame error!");
        }
        av_packet_unref(&pkt);
    }
- 首先是读取原始数据
fread(buf, 1, readSize, in_file)。这里的readSize就是我们前面计算的每一帧的大小。 - 设置pts
- 数据重采样,使用
swr_convert格式转换 - 编码,输出
第九步 写文件尾,释放资源
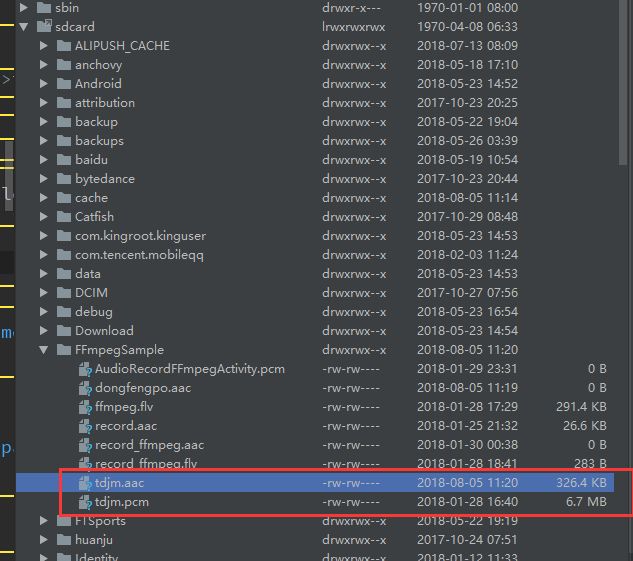
最后我们会在SD卡的的FFmpegSample目录下找到tdjm.aac文件,我们发现编码器是6.7M,编码后326.4KB。当然播放也是没有问题的
源码地址: 音频编码(FFmpeg编码一)
测试文件:http://ovjkwgfx6.bkt.clouddn.com/pcm.zip
注意:大家如果对代码有不懂得地方,比如FFmpeg的so文件等,请看专题前面的文章。


