Android自定义控件 沉浸式ViewGroup
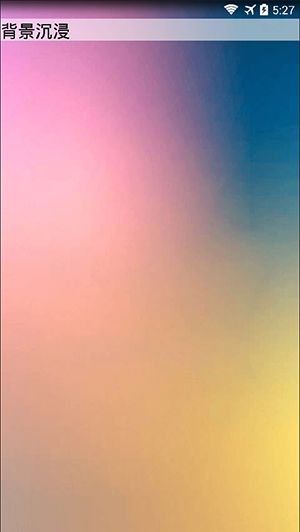
Android4.4开始,官方已经允许我们修改通知栏,使其沉浸式。每次开发需要界面沉浸式时,虽然不困难,但是还算是挺繁琐的,所以开发了一套沉浸式的viewgroup方便今后开发。基本上所需要实现的沉浸式的状态都能实现,但是控件自身设计上侵入性较强,具体如何就见仁见智了。效果看下图:


代码方面
/**
 * 类描述:沉浸布局必要接口
 * 创建人:Monke
 * 创建时间:2017/1/17
 * @version V1.0
 */
public interface IimmerseView {

    void setImmersePadding(int left, int top, int right, int bottom);
}这是沉浸式viewgroup的通用实现接口,因为原来的设置padding方法会数值不准确。
<declare-styleable name="ImmerseTitleLayout">

        <attr name="need_immerse" format="boolean"/>
    declare-styleable>
这是沉浸状态参数,默认是false,如果是true。则是viewgroup内部view也会沉浸在状态栏上。
/**
 * 类描述:沉浸布局管理器
 * 创建人:Monke
 * 创建时间:2017/1/17
 *
 * @version V1.0
 */
public class ImmerseManager {
    private ViewGroup viewGroup;
    private Boolean allImmerse = false;    //默认内部内容不沉浸  默认会设置paddingTop

    private int paddingTop = 0;
    private int realHeight = 0;
    private FrameLayout rootView;

    public ImmerseManager(ViewGroup viewGroup, AttributeSet attrs) {
        if (viewGroup instanceof IimmerseView) {
            this.viewGroup = viewGroup;
            init(attrs);
        } else {
            throw new RuntimeException("Viewgroup并未实现IimmerseView接口");
        }
    }

    private void init(AttributeSet attrs) {
        if (attrs != null) {
            TypedArray typedArray = viewGroup.getContext().obtainStyledAttributes(attrs, R.styleable.ImmerseTitleLayout);
            allImmerse = typedArray.getBoolean(R.styleable.ImmerseTitleLayout_need_immerse, allImmerse);
            typedArray.recycle();
        }
        paddingTop = viewGroup.getPaddingTop();
        if (Build.VERSION.SDK_INT >= Build.VERSION_CODES.KITKAT) {
            rootView = (FrameLayout) ((Activity) viewGroup.getContext()).findViewById(android.R.id.content);
            ((Activity) viewGroup.getContext()).getWindow().setFlags(WindowManager.LayoutParams.FLAG_TRANSLUCENT_STATUS,
                    WindowManager.LayoutParams.FLAG_TRANSLUCENT_STATUS);
            viewGroup.setPadding(viewGroup.getPaddingLeft(), getPaddingTop(paddingTop), viewGroup.getPaddingRight(), viewGroup.getPaddingBottom());
        }
    }

    public void setImmersePadding(int left, int top, int right, int bottom) {
        viewGroup.setPadding(left, getPaddingTop(top), right, bottom);
    }

    public int onMeasureHeight(int heightMeasureSpec) {
        int result = -1;
        int heightMode = View.MeasureSpec.getMode(heightMeasureSpec);
        int tempHeight = View.MeasureSpec.getSize(heightMeasureSpec);
        if (Build.VERSION.SDK_INT >= Build.VERSION_CODES.KITKAT && rootView.getChildAt(0) != viewGroup && heightMode == View.MeasureSpec.EXACTLY && viewGroup.getMeasuredHeight() > 0) {
            if (viewGroup.getLayoutParams().height >= 0 && realHeight != tempHeight) {
                realHeight = tempHeight + StatusBarUtils.getStatus_height();
                result = realHeight;
            }
        }
        return result;
    }

    private int getPaddingTop(int paddingtop) {
        paddingTop = paddingtop;
        if (Build.VERSION.SDK_INT >= Build.VERSION_CODES.KITKAT && !allImmerse) {
            return paddingTop + StatusBarUtils.getStatus_height();
        } else {
            return paddingTop;
        }
    }
}这是核心代码,因为有版本判断所以这是可以向下兼容的,与其他ViewGroup无异,需要实现沉浸式的ViewGroup只需要实现它的对象。
下面是修改为沉浸式的FrameLayout
/**
 * 类描述:沉浸FrameLayout布局
 * 创建人:Monke
 * 创建时间:2017/1/17
 *
 * @version V1.0
 */
public class ImmerseFrameLayout extends FrameLayout implements IimmerseView {

    protected ImmerseManager immerseManager;

    public ImmerseFrameLayout(Context context) {
        super(context);
        initManager(null);
    }

    public ImmerseFrameLayout(Context context, AttributeSet attrs) {
        super(context, attrs);
        initManager(attrs);
    }

    public ImmerseFrameLayout(Context context, AttributeSet attrs, int defStyleAttr) {
        super(context, attrs, defStyleAttr);
        initManager(attrs);
    }

    @SuppressLint("NewApi")
    public ImmerseFrameLayout(Context context, AttributeSet attrs, int defStyleAttr, int defStyleRes) {
        super(context, attrs, defStyleAttr, defStyleRes);
        initManager(attrs);
    }

    public void initManager(AttributeSet attrs){
        immerseManager = new ImmerseManager(this,attrs);
    }

    @Override
    protected void onMeasure(int widthMeasureSpec, int heightMeasureSpec) {
        int resultHeight =  immerseManager.onMeasureHeight(heightMeasureSpec);
        super.onMeasure(widthMeasureSpec, heightMeasureSpec);
        if(resultHeight>0){
            setMeasuredDimension(widthMeasureSpec, resultHeight);
            getLayoutParams().height = resultHeight;
        }
    }

    public void setImmersePadding(int left, int top, int right, int bottom) {
        immerseManager.setImmersePadding(left,top,right,bottom);
    }
}
代码逻辑很简单,就不多做说明,修改后的控件只有setPadding值需要用新方法,其他的方法没问题,照常使用。如果需要使用此套控件,麻烦移步https://github.com/ZhangQinhao/ImmerseLayout,觉得有BUG或者可以修改的地方可以私信给我,共同成长。