springMvc集成Swagger2(springfox)
在开发时,为了节省写接口文档的时间,可以集成swagger2来进行接口文档的生成与接口功能测试。
一、引入swagger2与配置
只需要在项目中引入swagger2的pom(swagger需要依赖jackson相关包)
    io.springfox
    springfox-swagger2
    2.4.0
引入jackson相关包,由于springfox使用的是2.4.0的版本,所以jackson版本最高支持到2.6.5。
springfox和jackson的依赖需要版本对应。
    com.fasterxml.jackson.core
    jackson-core
    2.6.5


    com.fasterxml.jackson.core
    jackson-databind
    2.6.5


    com.fasterxml.jackson.core
    jackson-annotations
    2.6.5
成功映入swagger2后,在项目中创建一个swagger2的配置文件对象
@Configuration//spring提供的配置标签
@EnableSwagger2//开启swagger2
public class Swagger2Config {

    /**
     * swagger2的配置对象
     * 把一个配置好的docker(swagger的配置对象)交给spring来管理
     *
     * @return
     */
    @Bean
    public Docket apiConfig() {
        return new Docket(DocumentationType.SWAGGER_2).select().build().apiInfo(productApiInfo());
    }
    private ApiInfo productApiInfo() {
        ApiInfo apiInfo = new ApiInfo("测试系统数据接口文档",
                "测试使用接口文档",
                "0.0.1",
                "www.yuewo365.com",
                new Contact("ivan",null,"[email protected]"),
                "license",
                "license url");
        return apiInfo;
    }
}
将配置对象交给spring管理后项目就已经集成好swagger2了。
二、swagger2的接口自定义注解
在需要自定义信息的接口使用swagger2提供的标签。
在Controller类上使用@Api注解
@Api(tags = "用户资源",//接口类型名称
    description = "用户相关操作接口",//接口的详细介绍
    produces = "application/json")//指定该类里所有接口的统一返回格式协议
public class UserInfoRestController {
}
在接口上使用@ApiOperation注解
对于参数的说明使用@ApiImplictParam
使用@ApiResponse标签来指定放回状态码说明
@ApiOperation(value = "用户注册",//接口的名称
                notes = "用户注册接口",//接口的简介
                response = Employee.class)//指定返回的对象格式
@ApiImplicitParams({
        @ApiImplicitParam(value = "用户名",//参数名称
                            name = "username",//指定那个参数
                            required = true,//是否必须
                            paramType = "query"),//参数的类型,如果是普通的post请求,使用query
        @ApiImplicitParam(value = "密码",name = "password",required = true,paramType = "query")
})
@ApiResponses(@ApiResponse(code = 401,message = "当前用户令牌异常"))public ObjectResponse register(String username , String password) {
}
在请求参数对象中使用@ApiModel来定义对象里的信息,使用@ApiModelProperty定义类中的字段
@ApiModel(value = "员工",description = "员工模型,用于创建员工的时候提交")
public class Employee {
@ApiModelProperty(value = "员工ID",required = true)
private Long id;
}
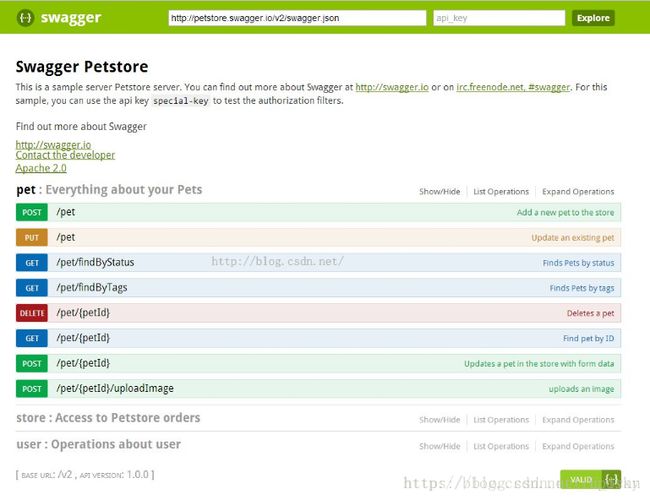
三、可视化界面swagger-ui
引入pom,springfox-swagger-ui的版本需要与swagger2的版本相同。
    io.springfox
    springfox-swagger-ui
    2.4.0
在spring配置文件中设置静态资源
<mvc:resources location="classpath:/META-INF/resources/" mapping="swagger-ui.html"/>
<mvc:resources location="classpath:/META-INF/resources/webjars/" mapping="/webjars/**"/>
启动项目访问 http://{项目ip}:{端口}/swagger-ui.html
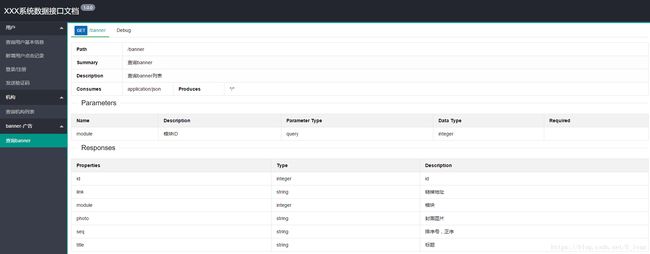
swagger-ui的第三方界面swagger-ui-layer,版本使用提供的最新版本
https://github.com/caspar-chen/swagger-ui-layer
    com.github.caspar-chen
    swagger-ui-layer
    0.0.4
配置与swagger-ui类似,只需要修改resources的映射路径为dosc.html

