Spring Boot学习笔记 - 整合Swagger2自动生成RESTful API文档
在App后端开发中经常需要对移动客户端(Android、iOS)提供RESTful API接口,在后期版本快速迭代的过程中,修改接口实现的时候都必须同步修改接口文档,而文档与代码又处于两个不同的媒介,除非有严格的管理机制,不然很容易导致代码与接口文档不一致现象。
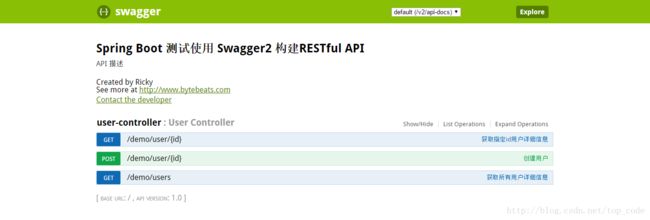
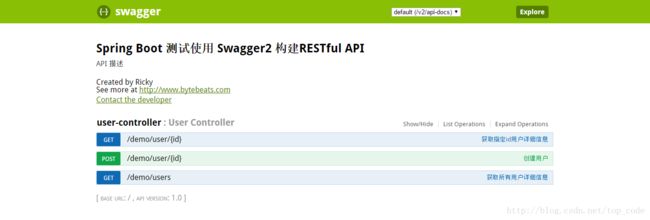
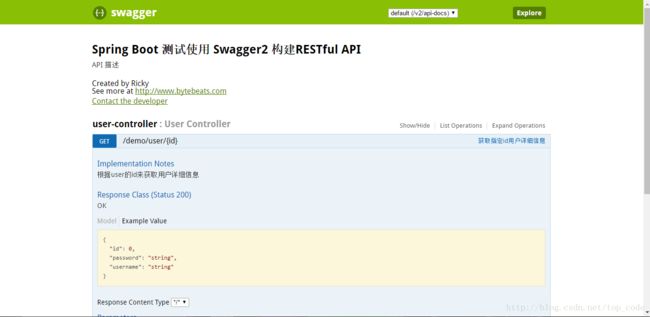
本文将介绍RESTful API的重磅好伙伴Swagger2,它可以轻松的整合到Spring生态链中,并与Spring MVC程序配合组织出强大RESTful API文档。它既可以减少我们创建文档的工作量,同时又将说明内容整合入实现代码中,让维护文档和修改代码整合为一体,方便让我们在修改代码逻辑的同时方便的修改文档说明。另外Swagger2也提供了强大的页面测试功能来调试每个RESTful API,具体效果如下图所示:

Spring Boot整合Swagger2
1、添加Swagger2依赖
在pom.xml中加入Swagger2的依赖
<dependency>
  <groupId>io.springfoxgroupId>
  <artifactId>springfox-swagger2artifactId>
  <version>2.6.1version>
dependency>
<dependency>
  <groupId>io.springfoxgroupId>
  <artifactId>springfox-swagger-uiartifactId>
  <version>2.6.1version>
dependency>
2、编写Swagger2配置类
类名随意,但需要增加@EnableSwagger2和@Configuration注解,如下:
package com.bytebeats.springboot.ch2.swagger;

import org.springframework.context.annotation.Bean;
import org.springframework.context.annotation.Configuration;
import springfox.documentation.builders.ApiInfoBuilder;
import springfox.documentation.builders.PathSelectors;
import springfox.documentation.builders.RequestHandlerSelectors;
import springfox.documentation.service.ApiInfo;
import springfox.documentation.service.Contact;
import springfox.documentation.spi.DocumentationType;
import springfox.documentation.spring.web.plugins.Docket;
import springfox.documentation.swagger2.annotations.EnableSwagger2;

/**
 * ${DESCRIPTION}
 *
 * @author Ricky Fung
 * @create 2017-01-02 23:53
 */
@EnableSwagger2
@Configuration
public class Swagger2Config {

    @Bean
    public Docket createRestApi() {
        return new Docket(DocumentationType.SWAGGER_2)
                .apiInfo(apiInfo())
                .select()
                //为当前包路径
                .apis(RequestHandlerSelectors.basePackage("com.bytebeats.springboot.ch2.controller"))
                .paths(PathSelectors.any())
                .build();
    }
    //构建 api文档的详细信息函数
    private ApiInfo apiInfo() {
        return new ApiInfoBuilder()
                //页面标题
                .title("Spring Boot 测试使用 Swagger2 构建RESTful API")
                //创建人
                .contact(new Contact("Ricky", "http://www.bytebeats.com", "[email protected]"))
                //版本号
                .version("1.0")
                //描述
                .description("API 描述")
                .build();
    }
}
通过@Configuration注解,让Spring来加载该类配置,@EnableSwagger2注解来启用Swagger2。
再通过createRestApi函数创建Docket的Bean之后,apiInfo()用来创建该Api的基本信息(这些基本信息会展现在文档页面中)。select()函数返回一个ApiSelectorBuilder实例用来控制哪些接口暴露给Swagger来展现,本例采用指定扫描的包路径来定义,Swagger会扫描该包下所有Controller定义的API,并产生文档内容(除了被@ApiIgnore注解的API)。
3、编写Controller
这里开始编写自己的RESTful Controller,跟正常开发没什么区别。主要是接口方法上面新增了几个注解:
- 通过@ApiOperation注解来给API增加说明
- 通过@ApiImplicitParams、@ApiImplicitParam注解来给参数增加说明
- 通过@ApiIgnore来忽略那些不想让生成RESTful API文档的接口
UserController代码如下:
package com.bytebeats.springboot.ch2.controller;

import com.bytebeats.springboot.ch2.domain.User;
import io.swagger.annotations.ApiImplicitParam;
import io.swagger.annotations.ApiImplicitParams;
import io.swagger.annotations.ApiOperation;
import org.springframework.web.bind.annotation.*;
import springfox.documentation.annotations.ApiIgnore;

import java.util.ArrayList;
import java.util.List;

/**
 * ${DESCRIPTION}
 *
 * @author Ricky Fung
 * @create 2017-01-02 23:41
 */
@RestController
@RequestMapping("/demo")
public class UserController {

    @ApiOperation(value="创建用户", notes="根据User对象创建用户")
    @ApiImplicitParams({
            @ApiImplicitParam(dataType = "java.lang.Long", name = "id", value = "id", required = true, paramType = "path"),
            @ApiImplicitParam(dataType = "User", name = "user", value = "用户信息", required = true)
    })
    @RequestMapping(value = "/user/{id}",method = RequestMethod.POST)
    public User insert(@PathVariable Long id, @RequestBody User user){

        System.out.println("id:"+id+", user:"+user);
        user.setId(id);

        return user;
    }

    @ApiOperation(value="获取指定id用户详细信息", notes="根据user的id来获取用户详细信息")
    @ApiImplicitParam(name = "id",value = "用户id", dataType = "String", paramType = "path")
    @RequestMapping(value = "/user/{id}", method = RequestMethod.GET)
    public User getUser(@PathVariable Long id){

        User user = new User();
        user.setId(id);
        user.setPassword("abc");
        user.setUsername("12345");
        return user;
    }

    @ApiOperation(value="获取所有用户详细信息", notes="获取用户列表信息")
    @RequestMapping(value = "/users", method = RequestMethod.GET)
    public List getUserList(){

        List list = new ArrayList<>();
        User user = new User();
        user.setId(15L);
        user.setPassword("ricky");
        user.setUsername("root");

        list.add(user);

        return list;
    }

    @ApiIgnore
    @ApiOperation(value="删除指定id用户", notes="根据id来删除用户信息")
    @ApiImplicitParam(name = "id",value = "用户id", dataType = "java.lang.Long", paramType = "path")
    @RequestMapping(value = "/user/{id}", method = RequestMethod.DELETE)
    public String delete(@PathVariable Long id){
        System.out.println("delete user:"+id);
        return "OK";
    }
}
完成上述代码后,打包Spring Boot程序并启动,打开浏览器访问:http://localhost:8080/swagger-ui.html,就能看到前文所展示的RESTful API的页面。

源码下载
点此下载源码:https://github.com/TiFG/spring-boot-in-action
