Linux运维:Zabbix监控(一)
一、Zabbix安装
- 注意:redhat7.3 的操作系统
1、安装zabbix,注意依赖性
[root@server7 ~]# ls
anaconda-ks.cfg
fping-3.10-1.el7.x86_64.rpm
iksemel-1.4-2.el7.centos.x86_64.rpm
php-bcmath-5.4.16-42.el7.x86_64.rpm
php-mbstring-5.4.16-42.el7.x86_64.rpm
zabbix-agent-3.4.6-1.el7.x86_64.rpm
zabbix-get-3.4.6-1.el7.x86_64.rpm
zabbix-java-gateway-3.4.6-1.el7.x86_64.rpm
zabbix-proxy-mysql-3.4.6-1.el7.x86_64.rpm
zabbix-server-mysql-3.4.6-1.el7.x86_64.rpm
zabbix-web-3.4.6-1.el7.noarch.rpm
zabbix-web-mysql-3.4.6-1.el7.noarch.rpm

[root@server7 ~]# yum install -y *
2、配置数据库
[root@server7 ~]# yum install -y mariadb-server
[root@server7 ~]# systemctl start mariadb
[root@server7 ~]# mysql_secure_installation
[root@server7 ~]# mysql -uroot -pwestos
MariaDB [(none)]> create database zabbix character set utf8 collate utf8_bin;
MariaDB [(none)]> grant all privileges on zabbix.* to zabbix@localhost identified by 'westos';

MariaDB [(none)]> show databases;
+--------------------+
| Database           |
+--------------------+
| information_schema |
| mysql              |
| performance_schema |
| zabbix             |
+--------------------+
3、配置zabbix
[root@server7 ~]# cd /usr/share/doc/zabbix-server-mysql-3.4.6/ ##导入zabbix数据
[root@server7 zabbix-server-mysql-3.4.6]# zcat create.sql.gz | mysql -uzabbix -p zabbix
[root@server7 zabbix-server-mysql-3.4.6]# cd /etc/zabbix/
[root@server7 zabbix]# vim zabbix_server.conf
125 DBPassword=westos
132 DBSocket=/var/lib/mysql/mysql.sock

[root@server7 zabbix]# cd /etc/httpd/conf.d/
[root@server7 conf.d]# vim zabbix.conf
 19         php_value date.timezone Asia/Shanghai

[root@server7 conf.d]# systemctl start zabbix-server zabbix-agent httpd
[root@server7 conf.d]# systemctl enable zabbix-server zabbix-agent httpd
Created symlink from /etc/systemd/system/multi-user.target.wants/zabbix-server.service to /usr/lib/systemd/system/zabbix-server.service.
Created symlink from /etc/systemd/system/multi-user.target.wants/zabbix-agent.service to /usr/lib/systemd/system/zabbix-agent.service.
Created symlink from /etc/systemd/system/multi-user.target.wants/httpd.service to /usr/lib/systemd/system/httpd.service.
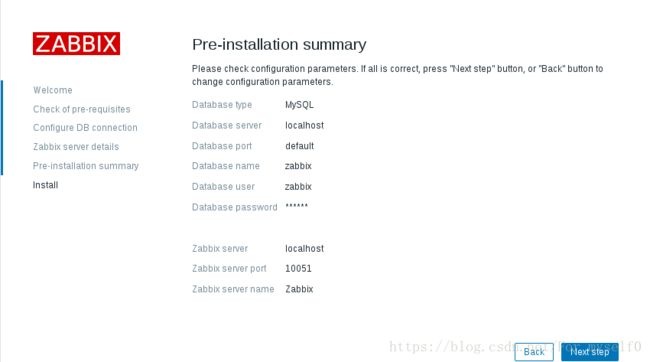
4、访问 http://172.25.120.11/zabbix 配置即可
二、监控 redhat6 系统的主机
- 注意:域名解析
1、监控主机安装 zabbix-agent
[root@server2 ~]# ls
zabbix-agent-3.4.6-1.el6.x86_64.rpm
[root@server2 ~]# rpm -ivh zabbix-agent-3.4.6-1.el6.x86_64.rpm
warning: zabbix-agent-3.4.6-1.el6.x86_64.rpm: Header V4 RSA/SHA512 Signature, key ID a14fe591: NOKEY
Preparing...                ########################################### [100%]
   1:zabbix-agent           ########################################### [100%]
2、配置 zabbix-agent
agent配置:
server:zabbix主机IP ##zabbix主动发现
serveractive:zabbix主机IP ##agent主动注册
[root@server2 ~]# vim /etc/zabbix/zabbix_agentd.conf
 97 Server=172.25.120.11
138 ServerActive=172.25.120.11
149 Hostname=server2

[root@server2 ~]# /etc/init.d/zabbix-agent start
Starting Zabbix agent: [ OK ]- 日志报错,需要 server 端手动添加监控主机
- tail -f :监控文件的最后几行
[root@server2 ~]# tail -f /var/log/zabbix/zabbix_agentd.log
  1407:20180719:151005.682 TLS support:           YES
  1407:20180719:151005.682 **************************
  1407:20180719:151005.682 using configuration file: /etc/zabbix/zabbix_agentd.conf
  1407:20180719:151005.683 agent #0 started [main process]
  1411:20180719:151005.684 agent #4 started [listener #3]
  1410:20180719:151005.685 agent #3 started [listener #2]
  1412:20180719:151005.687 agent #5 started [active checks #1]
  1409:20180719:151005.689 agent #2 started [listener #1]
  1408:20180719:151005.691 agent #1 started [collector]
  1412:20180719:151005.695 no active checks on server [172.25.120.11:10051]: host [server2] not found
3、server自动发现(server主动)
- 以下所有操作均在zabbix网页进行:
- 配置 –> 动作 –> 自动发现 –> 更新
- 修改”自动发现”的操作:
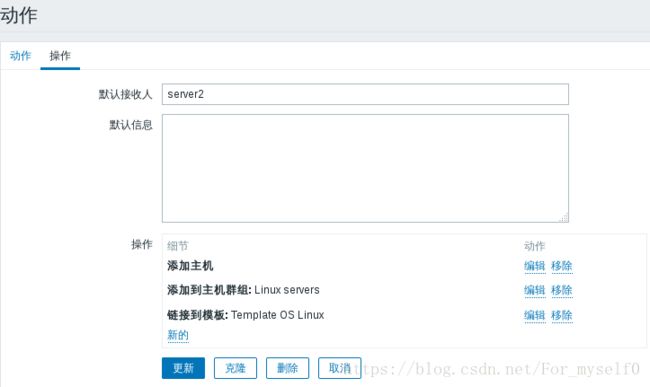
- 启用:

- 配置 –> 自动发现 –> 设定区间 –> 更新
- 自动发现规则,更新:
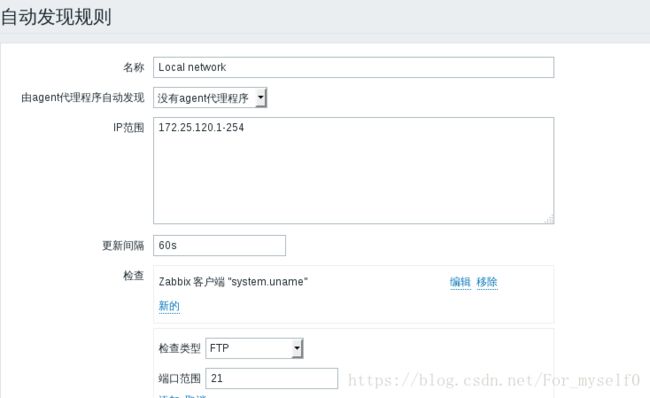
- 启用规则:

- 默认刷新时间为1h,可修改为60s;
- 成功监控结果:

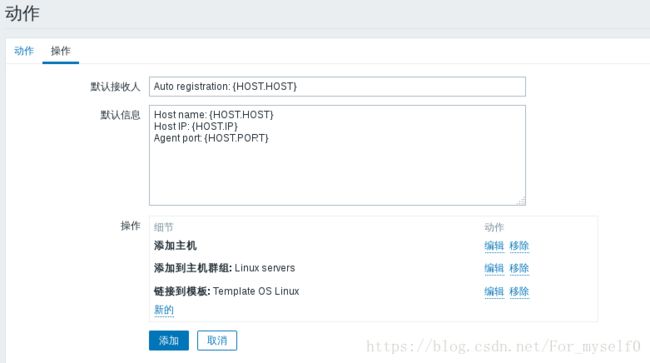
4、server自动注册(agent主动)
三、配置主机监控项
1、httpd
- agent安装启动http,zabbix端添加监控项 HTTP Servers
[root@server2 ~]# yum install -y httpd
[root@server2 ~]# /etc/init.d/httpd start
Starting httpd: httpd: Could not reliably determine the server's fully qualified domain name, using 172.25.120.2 for ServerName
                                                           [  OK  ]
2、mysql
- zabbix主机
[root@server7 conf.d]# mkdir /var/lib/zabbix
[root@server7 conf.d]# cd /var/lib/zabbix/
[root@server7 zabbix]# vim .my.cnf
[mysql]
host=localhost
user=zabbix
password=westos
socket=/var/lib/mysql/mysql.sock

[mysqladmin]
host=localhost
user=zabbix
password=westos
socket=/var/lib/mysql/mysql.sock

[root@server7 zabbix]# systemctl restart zabbix-agent3、自定义监控模板(nginx)
- agent端:
- 注意:zabbix监控主机需要删除http监控模板
[root@server2 ~]# /etc/init.d/httpd stop
Stopping httpd:                                            [  OK  ]
[root@server2 ~]# ls
nginx-1.8.0-1.el6.ngx.x86_64.rpm  zabbix-agent-3.4.6-1.el6.x86_64.rpm
[root@server2 ~]# rpm -ivh nginx-1.8.0-1.el6.ngx.x86_64.rpm
warning: nginx-1.8.0-1.el6.ngx.x86_64.rpm: Header V4 RSA/SHA1 Signature, key ID 7bd9bf62: NOKEY
Preparing...                ########################################### [100%]
   1:nginx                  ########################################### [100%]
[root@server2 ~]# cd /etc/nginx/conf.d/
[root@server2 conf.d]# vim default.conf
 13     location /status {
 14         stub_status on;
 15         access_log off;
 16         allow 127.0.0.1;
 17         deny all;
 18     }

[root@server2 conf.d]# nginx -t
nginx: the configuration file /etc/nginx/nginx.conf syntax is ok
nginx: configuration file /etc/nginx/nginx.conf test is successful
[root@server2 conf.d]# /etc/init.d/nginx start
Starting nginx:                                            [  OK  ]

[root@server2 conf.d]# cd /etc/zabbix/zabbix_agentd.d/
[root@server2 zabbix_agentd.d]# cp userparameter_mysql.conf userparameter_nginx.conf

[root@server2 zabbix_agentd.d]# vim userparameter_nginx.conf
UserParameter=nginx.active,curl -s http://127.0.0.1/status | awk 'NR==1' | awk '{print $3}'
UserParameter=nginx.accept,curl -s http://127.0.0.1/status | awk 'NR==3' | awk '{print $1}'
UserParameter=nginx.request,curl -s http://127.0.0.1/status | awk 'NR==3' | awk '{print $3}'
[root@server2 zabbix_agentd.d]# /etc/init.d/zabbix-agent restart- zabbix端测试:
[root@server7 zabbix]# zabbix_get -s 172.25.120.2 -k nginx.active
1
[root@server7 zabbix]# zabbix_get -s 172.25.120.2 -k nginx.accept
3
[root@server7 zabbix]# zabbix_get -s 172.25.120.2 -k nginx.request
4- 网页配置
- 添加监控项 :注意键值,必须为agent端定义的:nginx.active/nginx.accept/nginx.request

- 添加图形:图形类别根据需求:正常、层积、pie、爆发

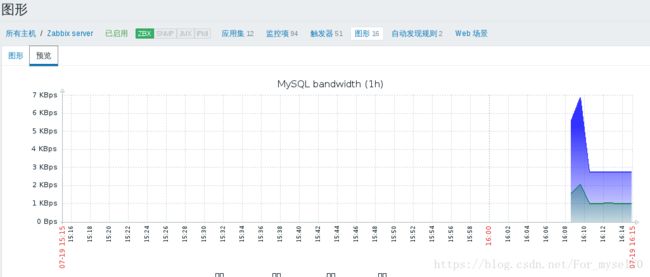
- 监控结果:

四、percona 插件管理
1、安装percona
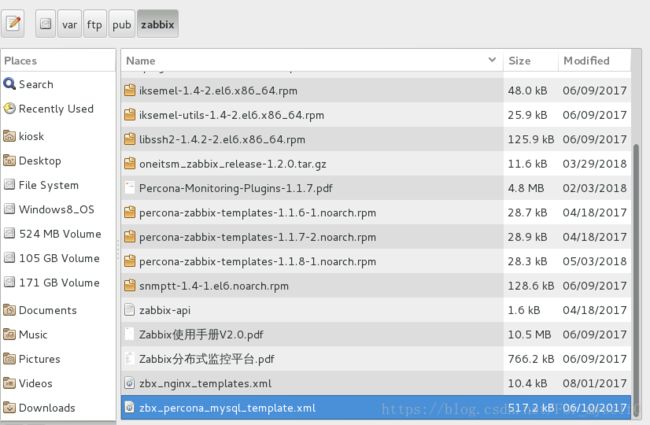
[root@server7 ~]# rpm -ivh percona-zabbix-templates-1.1.8-1.noarch.rpm
warning: percona-zabbix-templates-1.1.8-1.noarch.rpm: Header V4 DSA/SHA1 Signature, key ID cd2efd2a: NOKEY
Preparing...                          ################################# [100%]
Updating / installing...
   1:percona-zabbix-templates-1.1.8-1 ################################# [100%]

Scripts are installed to /var/lib/zabbix/percona/scripts
Templates are installed to /var/lib/zabbix/percona/templates
2、配置 percona
[root@server7 ~]# cd /var/lib/zabbix/percona/scripts   ##脚本目录
[root@server7 scripts]# vim ss_get_mysql_stats.php.cnf
$mysql_user = 'root';
$mysql_pass = 'westos';

[root@server7 scripts]# ls
get_mysql_stats_wrapper.sh  ss_get_mysql_stats.php  ss_get_mysql_stats.php.cnf

[root@server7 scripts]# cd /var/lib/zabbix/percona/templates    ##zabbix配置文件
[root@server7 templates]# ls
userparameter_percona_mysql.conf
zabbix_agent_template_percona_mysql_server_ht_2.0.9-sver1.1.8.xml
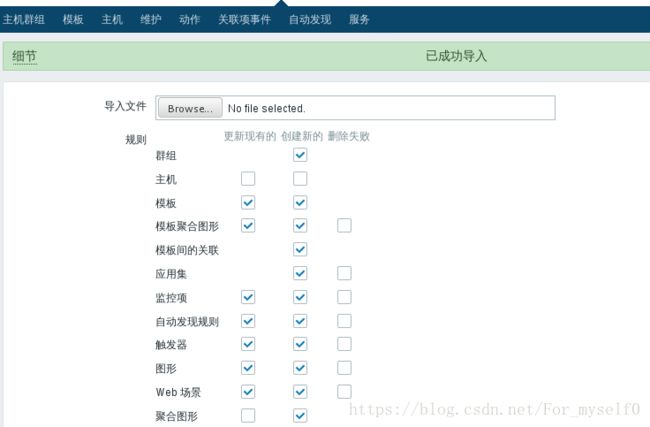
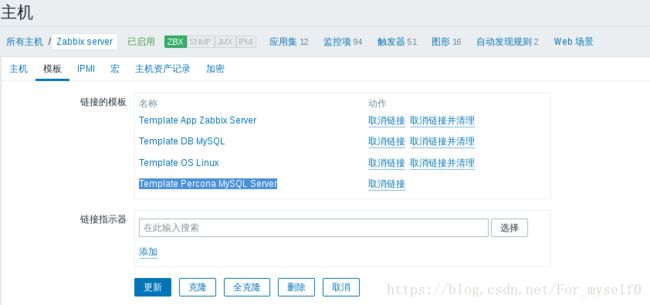
[root@server7 templates]# cp userparameter_percona_mysql.conf /etc/zabbix/zabbix_agentd.d/
[root@server7 templates]# systemctl restart zabbix-agent- zabbix测试;注意:测试完必须删除/tmp/localhost-mysql_cacti_stats.txt
- 否则会因为权限问题报错(root、zabbix)
[root@server7 scripts]# /var/lib/zabbix/percona/scripts/get_mysql_stats_wrapper.sh gg
19
[root@server7 scripts]# cd /tmp/
[root@server7 tmp]# rm -fr localhost-mysql_cacti_stats.txt
[root@server7 tmp]# cd /var/lib/zabbix/
[root@server7 zabbix]# vim .my.cnf
##新增
[client]
user=root
password=westos

[root@server7 zabbix]# sudo -u zabbix -H /var/lib/zabbix/percona/scripts/get_mysql_stats_wrapper.sh running-slave
0
[root@server7 zabbix]# ls /tmp/ ##确保没有".txt"文件
hsperfdata_root
ks-script-jNI6Kd
systemd-private-01cf2a2ba5b849708973f33419243010-httpd.service-HPKK60
systemd-private-01cf2a2ba5b849708973f33419243010-mariadb.service-Qr2zkw
yum.log
[root@server7 tmp]# systemctl restart zabbix-agent