一.第一个Java RESTFul 服务
本节讲述基于JavaSE环境的Jersey 官文文档中提供的示例simple-service,并在此基础上扩展自定义的RESTFul 资源服务
1.1 环境准备
准备开发RESTFul 服务的环境 包括JDK Maven 和 IDEA
1.2 创建服务
1.从Maven 原型创建项目
Jersey 官方文档中的提供的例子simple-service 是一个Maven 原型项目,在控制台执行如下命令来生成我们想要的simole-service 项目,项目的存储路径可以自行选择
mvn archetype:generate -DarchetypeArtifactId=jersey-quickstart-grizzly2 -DarchetypeGroupId=org.glassfish.jersey.archetypes
-DinteractiveMode=false -DgroupId=com.example -DartifactId=simple-service -Dpackage=com.example -DarchetypeVersion=2.26
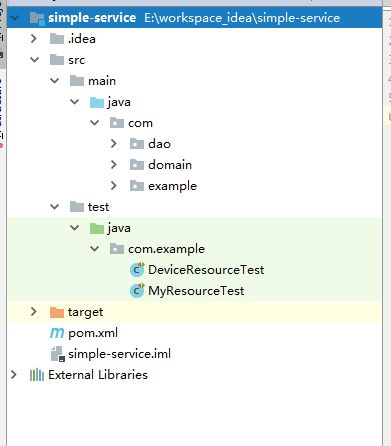
控制台命令成功执行之后,会在当前目录下创建simple-service目录。该目录包含了simple-service 项目的源代码
2.项目入口类分析
因为这是一个javaSE项目 所以需要一个入口类来启动服务并加载项目资源
package com.example;

import org.glassfish.grizzly.http.server.HttpServer;
import org.glassfish.jersey.grizzly2.httpserver.GrizzlyHttpServerFactory;
import org.glassfish.jersey.jdkhttp.JdkHttpServerFactory;
import org.glassfish.jersey.server.ResourceConfig;
import org.glassfish.jersey.simple.SimpleContainer;
import org.glassfish.jersey.simple.SimpleContainerFactory;
import java.io.IOException;
import java.net.URI;

/**
 * Main class.
 *
 */
public class Main {
    // 服务器路径
    public static final String BASE_URI = "http://localhost:8080/myapp/";
    public static HttpServer startServer() {
        // 加载资源
        final ResourceConfig rc = new ResourceConfig().packages("com.example");

        //创建和启动grizzly http 服务器
        return GrizzlyHttpServerFactory.createHttpServer(URI.create(BASE_URI), rc);
    }
    public static com.sun.net.httpserver.HttpServer startServerByHTTPServer(){
        final ResourceConfig rc = new ResourceConfig().packages("com.example");
        return JdkHttpServerFactory.createHttpServer(URI.create(BASE_URI),rc);
    }
    /**
     * 启动服务器
     * @param args
     * @throws IOException
     */
    public static void main(String[] args) throws IOException {
        final HttpServer server = startServer();
        System.out.println(String.format("Jersey app started with WADL available at "
                + "%sapplication.wadl\nHit enter to stop it...", BASE_URI));
        System.in.read();
        server.stop();
    }
}
Main类定义了HTTP服务器的路径即http://localhost:8080/myapp/ .在其构造器中映射了源代码所在的包名为 new ResourceConfig().packages("com.example"); 这意味着 服务器启动时会自动扫描该包下的所有类,根据该包中所含类的REST资源路径的注解,在内存中做好映射。这样一来客户端请求指定路径后服务端就可以根据映射,分派请求给相应的资源类实例的相应的方法了
2.资源类分析
套用Web 开发环境中典型的三层逻辑,资源类位于逻辑分层的最高层----API层 其下为Service 层和数据访问层,在三层逻辑中,API层用于对外公布接口
package com.example;

import javax.ws.rs.GET;
import javax.ws.rs.Path;
import javax.ws.rs.Produces;
import javax.ws.rs.core.MediaType;

/**
 * Root resource (exposed at "myresource" path)
 */
@Path("myresource")
public class MyResource {

    /**
     * Method handling HTTP GET requests. The returned object will be sent
     * to the client as "text/plain" media type.
     *
     * @return String that will be returned as a text/plain response.
     */
    @GET
    @Produces(MediaType.TEXT_PLAIN)
    public String getIt() {
        return "Got it!";
    }
}
1.3 扩展服务
1.增加设备实体类(在com.domain 包下新建一个Device 类)
package com.domain;

import javax.xml.bind.annotation.XmlAttribute;
import javax.xml.bind.annotation.XmlRootElement;

@XmlRootElement(name="device")
public class Device {

    private String deviceIP;
    private int deviceStatus;

    public Device(){

    }

    public Device(String deviceIP){
        this.deviceIP = deviceIP;
    }

    public String getDeviceIP() {
        return deviceIP;
    }

    public void setDeviceIP(String deviceIP) {
        this.deviceIP = deviceIP;
    }

    @XmlAttribute
    public int getDeviceStatus() {
        return deviceStatus;
    }

    public void setDeviceStatus(int deviceStatus) {
        this.deviceStatus = deviceStatus;
    }
}
package com.dao;

import com.domain.Device;
import com.sun.org.apache.bcel.internal.generic.RETURN;

import java.util.concurrent.ConcurrentHashMap;

public class DeviceDao {

    private ConcurrentHashMap fakeDB = new ConcurrentHashMap<>();

    public DeviceDao(){
        fakeDB.put("127.0.0.1",new Device("127.0.0.1"));
        fakeDB.put("192.168.4.74",new Device("192.168.4.74"));
    }

    public Device getDevice(String IP){
        return fakeDB.get(IP);
    }

    public Device updateDevice(Device device){
        String IP = device.getDeviceIP();
        fakeDB.put(IP,device);
        return fakeDB.get(IP);
    }
}
该类标注了JAXB 标准定义的@XmlRootElement 和 @XmlAttribute 注解 以便将Device类和XML格式的设备数据相互转化并在服务器和客户端之间传输
2.增加设备资源类
创建了设备实体类之后,我们需要一个资源来公布设备的REST API
package com.example;

import com.dao.DeviceDao;
import com.domain.Device;

import javax.ws.rs.*;
import javax.ws.rs.core.MediaType;
import javax.ws.rs.core.MultivaluedMap;
import java.util.List;
import java.util.Map;

@Path(value = "device")
public class DeviceResource {

    private DeviceDao deviceDao;

    public DeviceResource(){
        deviceDao = new DeviceDao();
    }

    @GET
    @Produces({MediaType.APPLICATION_JSON,MediaType.APPLICATION_XML})
    public Device get(@QueryParam("ip") final String deviceIP){
        Device device = null;
        if (deviceIP != null){
            device = deviceDao.getDevice(deviceIP);
        }
        return device;
    }

    @PUT
    @Produces({MediaType.APPLICATION_JSON,MediaType.APPLICATION_XML})
    public Device put(final Device device){
        Device result = null;
        if (device != null){
            result = deviceDao.updateDevice(device);
        }
        return result;
    }

}
@PUT是标注处理put请求 @Produces({MediaType.APPLICATION_JSON,MediaType.APPLICATION_XML}) 是标注返回实体的类型,支持JSON 和XML 数据格式
3.测试和运行服务
package com.example;

import com.domain.Device;
import org.glassfish.grizzly.http.server.HttpServer;
import org.junit.After;
import org.junit.Assert;
import org.junit.Before;
import org.junit.Test;

import javax.ws.rs.client.Client;
import javax.ws.rs.client.ClientBuilder;
import javax.ws.rs.client.Entity;
import javax.ws.rs.client.WebTarget;
import javax.ws.rs.core.MediaType;
import java.util.HashMap;
import java.util.Map;

public class DeviceResourceTest {
    private HttpServer httpServer;
    private WebTarget target;
    @Before
    public void setUp() throws Exception{
        httpServer = Main.startServer();
        final Client client = ClientBuilder.newClient();
        target = client.target(Main.BASE_URI);
    }
    @After
    public void tearDown() throws Exception{
        httpServer.shutdown();
    }
    @Test
    public void testGetDevice(){
        final String targetIP = "127.0.0.1";
        final Device device = target.path("device").queryParam("ip",targetIP).request().get(Device.class);
        Assert.assertEquals(targetIP,device.getDeviceIP());
    }
    @Test
    public void testPutDevice(){
        Device device = new Device();
        device.setDeviceIP("192.168.5.5");
        device.setDeviceStatus(2);
        Entity entity = Entity.entity(device, MediaType.APPLICATION_XML_TYPE);
        Device result = target.path("device").request().put(entity,Device.class);
        Assert.assertEquals("192.168.5.5",result.getDeviceIP());
    }

    @Test
    public void testPost(){
        Device device = new Device();
        device.setDeviceIP("192.168.5.5");
        device.setDeviceStatus(2);
        Entity entity = Entity.entity(device, MediaType.TEXT_PLAIN_TYPE);
        String result = target.path("device").request().post(entity,String.class);
        Assert.assertEquals(result,"SUCCESS");
    }
}
打开控制台 在项目的目录下运行 :mvn clean test 如果测试通过 即断言验证成功
二.第一个Servlet 容器 服务
1.1 创建和分析Web 服务
simple-service-webapp项目也是Jersey官方文档中的例子,同样是个Maven原型
mvn archetype:generate -DarchetypeArtifactId=jersey-quickstart-webapp
                -DarchetypeGroupId=org.glassfish.jersey.archetypes -DinteractiveMode=false
                -DgroupId=com.example -DartifactId=simple-service-webapp -Dpackage=com.example
                -DarchetypeVersion=2.26
在 控制台下 执行该命令 就可以获取源代码了

通过maven 将项目打包 部署至tomcat运行即可
三.REST 服务类型
1.REST 服务分为四种类型

- 类型一:当服务中没有Application 子类时 容器会查找Servlet的子类来做入口,如果Servlet 的子类也不存在,则REST服务类型为类型一
- 类型二:当服务类中没有Application 子类,但存在Servlet的子类时,则REST 服务类型为类型二
- 类型三:服务中定义了Application 的子类 而且这个Application 的子类使用了@ApplicationPath注解 则REST服务类型为类型三
- 类型四:如果服务中定义了Application 的子类 但是这个Application 的子类没有使用@ApplicationPath注解 则REST服务类型为类型四
2.REST 服务类型一
类型一相应的逻辑是服务中同时不存在Application的子类和Servlet的子类,因此需要为REST服务动态生成一个名为javax.ws.rs.core.Application 的Servlet 实例,并自动探测匹配资源,需要在 web.xml 下配置
        Jersey Web Application
        org.glassfish.jersey.servlet.ServletContainer

            jersey.config.server.provider.packages
            com.example

        1


        Jersey Web Application
        /webapi/*
3.REST 服务类型二
类型二 相应的逻辑不存在Application 的子类 ,但存在Servlet的子类,因此需要有个类继承自HttpServlet
package com.example;

import javax.servlet.annotation.WebInitParam;
import javax.servlet.annotation.WebServlet;

import org.glassfish.jersey.servlet.ServletContainer;

/**
 * 类型二:不存在Application子类,存在Servlet的子类,ServletContainer 继承自HttpServlet
 */
@WebServlet(initParams = @WebInitParam(name = "jersey.config.server.provider.packages", value = "com.example"),
urlPatterns = "/webapi/*",
loadOnStartup = 1)
public class AirServlet extends ServletContainer {
    private static final long serialVersionUID = 1L;
}
四.REST 服务类型三
类型三 相应的逻辑存在Application 的子类并且定义了@ApplicationPath 注解
package com.example;

import javax.ws.rs.ApplicationPath;
import org.glassfish.jersey.server.ResourceConfig;

@ApplicationPath("/webapi/*")
public class AirResourceConfig extends ResourceConfig {
    public AirResourceConfig() {
        packages("com.example");
    }
}
五.REST 服务类型四
类型四 不存在Servlet 子类 也不存在或者不允许使用@ApplicationPath 注解
package com.example;

import java.util.HashSet;
import java.util.Set;

import javax.ws.rs.core.Application;

public class AirApplication extends Application {
    @Override
    public Set> getClasses() {
        final Set> classes = new HashSet>();
        classes.add(MyResource.class);
        return classes;
    }
}