7.QML中的信号和信号处理
- 1. 信号处理器
- 2. 附加信号处理器
- 3. Connections
- 4. 使用connect()函数连接信号和槽
- 5. 自定义信号
1. 信号处理器
QML中使用on+信号的方式作为信号处理器,来处理所所发送的信号。比如相应按钮的点击事件,代码如下:
Button {
    text: '退出'
    anchors.centerIn: parent
    onClicked: {
        Qt.quit()
    }
}clicked为点击按钮所发出的信号,与QPushButton发出的clicked信号是相同的,而使用onClicked作为信号的处理器,点击按钮后,相应大括号({})中的语句,即Qt.quit(),程序退出。
2. 附加信号处理器
QML语言的语法中,有一个附加属性和附加信号处理器的概念,这是附加到一个对象的额外属性。下面是附加属性和附加信号处理器的简单用法:
import QtQuick 2.0
import QtQuick.Window 2.0
import QtQuick.Controls 1.4

Window {
    id: mainWindow
    width: 800
    height: 600
    visible: true

    Rectangle {
        anchors.fill: parent
        Button {
            text: '退出'
            anchors.centerIn: parent
            onClicked: {
                Qt.quit()
            }
        }

        Text {
            id: text
            text: ''
            anchors.top: parent.top
            anchors.topMargin: 10
            anchors.horizontalCenter: parent.horizontalCenter
        }

        Keys.enabled: true
        focus: true
        Keys.onPressed: {
            if (event.key === Qt.Key_Up)
                text.text = 'Has Pressed Up Key'
            else if (event.key === Qt.Key_Down)
                text.text = 'Has Pressed Down Key'
            else if (event.key === Qt.Key_Left)
                text.text = 'Has Pressed Left Key'
            else if (event.key === Qt.Key_Right)
                text.text = 'Has Pressed Right Key'
        }
    }
}
当按键盘的上、下、左、右按键时,显示不同的字符串。
3. Connections
Connections对象创建一个到QML信号的连接。
- target: 指向发出信号的对象。
- 使用on + 信号的方式相应信号处理。
Button {
    id: button
    text: '退出'
    anchors.centerIn: parent
}

Connections {
    target: button
    onClicked: {
        Qt.quit()
    }
}这个效果同上面的实现。C++中定义的信号,也可以使用Connections连接并处理信号的相应。
import QtQuick 2.0
import QtQuick.Window 2.0
import QtQuick.Controls 1.4
import QtQuick.Layouts 1.1
import Demos.SignalDeno 1.0

Window {
    id: mainWindow
    width: 800
    height: 600
    visible: true

    Rectangle {
        anchors.fill: parent

        SignalDemo {
            id: signalDemo
        }

        ColumnLayout {
            anchors.centerIn: parent
            Text {
                id: text
                text: ''
            }

            Button {
                id: button
                text: '确定'

                onClicked: {
                    signalDemo.callTestSignal()
                }
            }

            Connections {
                target: signalDemo
                onTestSignal: {
                    text.text = 'Recved Test Signals'
                }
            }
        }
    }
}
C++中的头文件:
#ifndef SIGNAL_DEMO_H
#define SIGNAL_DEMO_H
#include C++中的源文件:
#include "SignalDemo.h"

SignalDemo::SignalDemo(QObject *parent)
    :QObject(parent)
{

}

SignalDemo::~SignalDemo()
{

}

void SignalDemo::callTestSignal(void)
{
    emit testSignal();
}
4. 使用connect()函数连接信号和槽
Qt C++中可以使用QObject::connect()的方式连接信号和槽,QML中也有类似的方法,就是使用signal.connect()连接信号和槽,当然也可以信号连接信号;有connect()方法当然也有disconnect()方法去断开信号和槽函数的连接。下面是使用signal.connect()改写上面的信号和槽的连接,可以达到相同的效果:
import QtQuick 2.0
import QtQuick.Window 2.0
import QtQuick.Controls 1.4
import QtQuick.Layouts 1.1
import Demos.SignalDeno 1.0

Window {
    id: mainWindow
    width: 800
    height: 600
    visible: true

    Rectangle {
        anchors.fill: parent

        SignalDemo {
            id: signalDemo
        }

        ColumnLayout {
            anchors.centerIn: parent
            Text {
                id: text
                text: ''
            }

            Button {
                id: button
                text: '确定'

                onClicked: {
                    signalDemo.callTestSignal()
                }
            }

            function disposeTestSignal() {
                text.text = 'Recved Test Signals'
            }

            Component.onCompleted: {
                // 连接信号和处理的槽函数
                signalDemo.testSignal.connect(disposeTestSignal)
            }

//            Connections {
//                target: signalDemo
//                onTestSignal: {
//                    text.text = 'Recved Test Signals'
//                }
//            }
        }
    }
}
5. 自定义信号
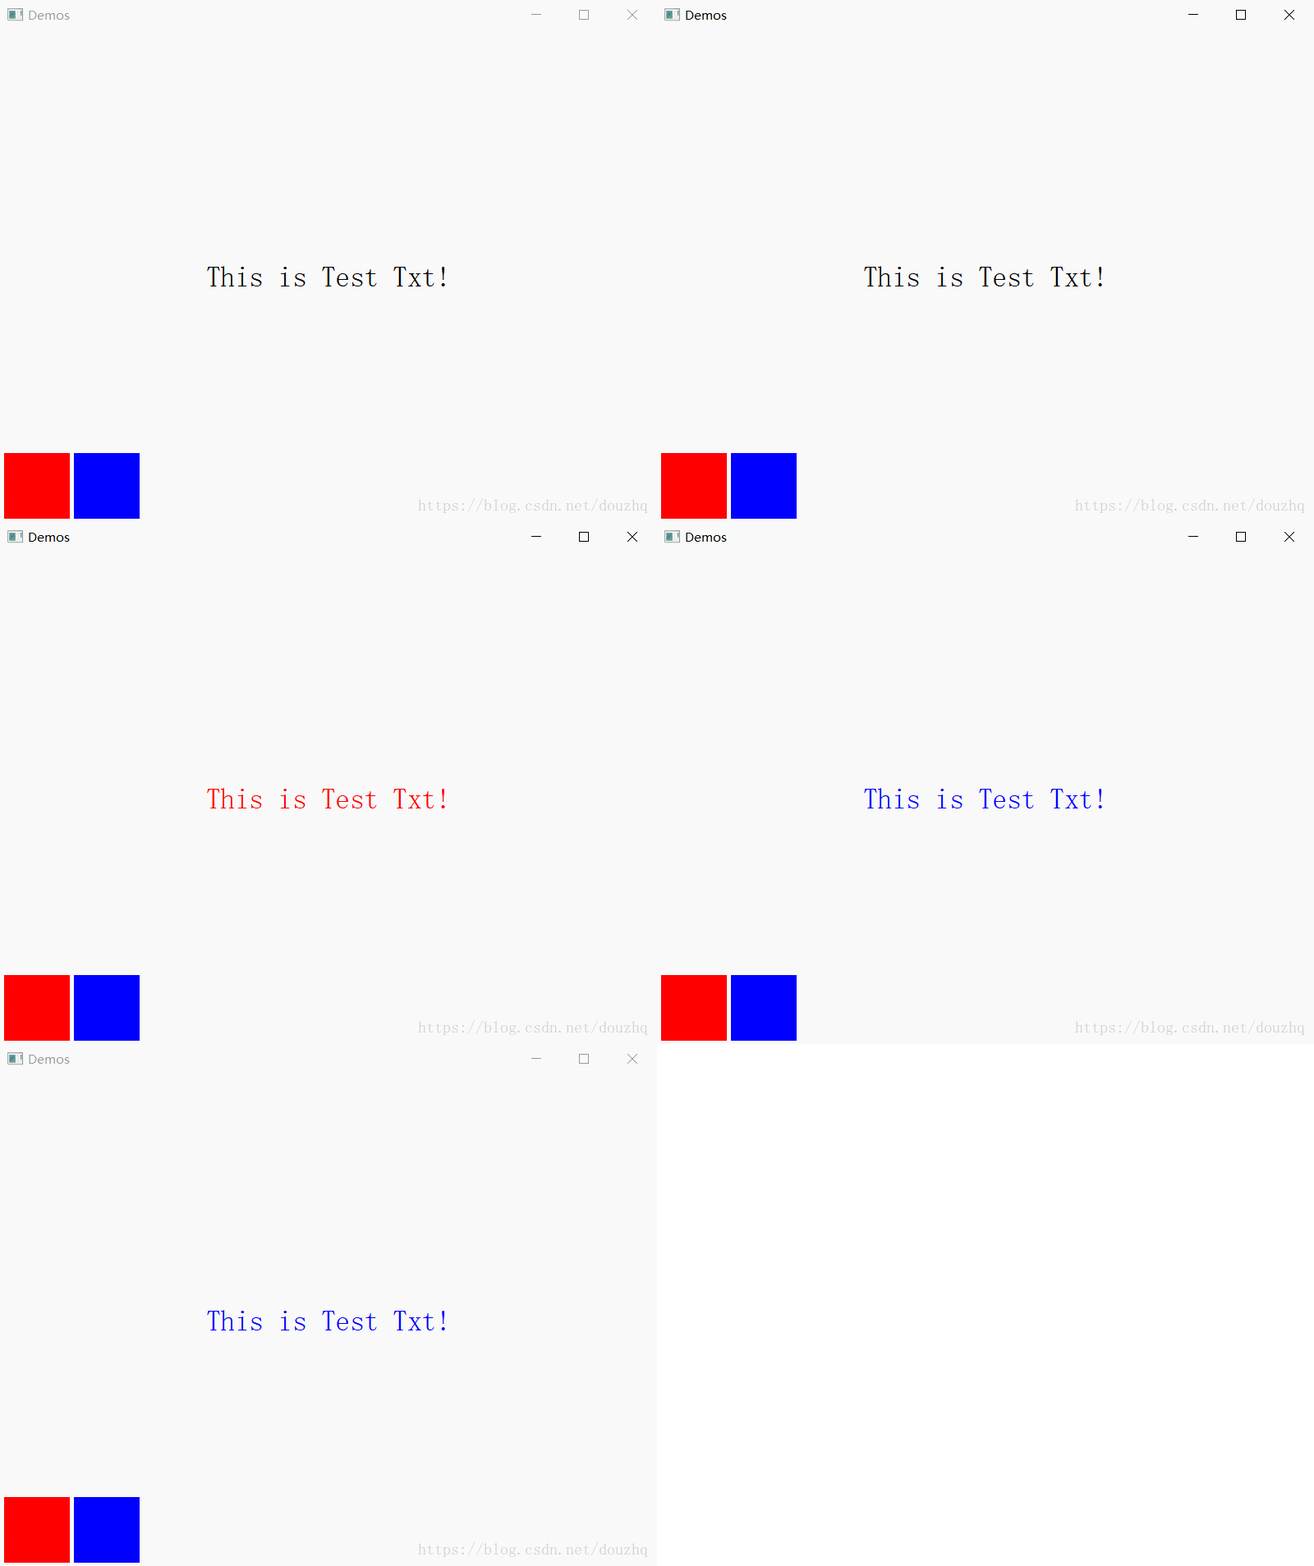
使用QML的自定义信号,可以使用如下形式:
signal name [type parameterName, …]
发送信号,可以直接使用函数即可;下面是一个简单的示例:
import QtQuick 2.0
import QtQuick.Window 2.0
import QtQuick.Controls 1.4

Window {
    id: mainWindow
    width: 800
    height: 600
    visible: true

    Text {
        id: text
        text: 'This is Test Txt!'
        font.pixelSize: 35
        anchors.centerIn: parent

        function textColorChange(clr) {
            text.color = clr
        }

        Component.onCompleted: {
            button1.sendThisColor.connect(textColorChange)
            button2.sendThisColor.connect(textColorChange)
        }
    }

    Rectangle {
        id: button1
        width: 80
        height: 80
        anchors.left: parent.left
        anchors.leftMargin: 5
        anchors.bottom: parent.bottom
        anchors.bottomMargin: 5
        color: Qt.rgba(1.0, 0, 0)
        signal sendThisColor(color rectColor)

        MouseArea {
            anchors.fill: parent
            onClicked: {
                button1.sendThisColor(button1.color)
            }
        }
    }

    Rectangle {
        id: button2
        width: 80
        height: 80
        anchors.left: button1.right
        anchors.leftMargin: 5
        anchors.bottom: parent.bottom
        anchors.bottomMargin: 5
        color: Qt.rgba(0.0, 0.0, 1.0)
        signal sendThisColor(color rectColor)

        MouseArea {
            anchors.fill: parent
            onClicked: {
                button2.sendThisColor(button2.color)
            }
        }
    }
}
