目录
一、Tensor的创建和使用
二、Tensor放到GPU上执行
三、Tensor总结
一、Tensor的创建和使用
1.概念和TensorFlow的是基本一致的,只是代码编写格式的不同。我们声明一个Tensor,并打印它,例如:
import torch
#定义一个Tensor矩阵
a = torch.Tensor([1, 2], [3, 4],[5, 6], [7, 8])
print(a)
print('{}'.format(a))
然后会发现报以下错误:
new() received an invalid combination of arguments - got (list, list, list, list), but expected one of: * (torch.device device) * (torch.Storage storage) * (Tensor other) * (tuple of ints size, torch.device device) * (object data, torch.device device)
意思是接收到无效的参数组合。其实是少写了一对中括号,这是初学者的常用错误。
2.改成如下形式:
import torch
#定义一个Tensor矩阵
a = torch.Tensor([[1, 2], [3, 4],[5, 6], [7, 8]])
print(a)
print('{}'.format(a))
结果为:
3.如果想查看的它的大小可以加一句话:
import torch
#定义一个Tensor矩阵
a = torch.Tensor([[1, 2], [3, 4],[5, 6], [7, 8]])
print('{}'.format(a.size()))
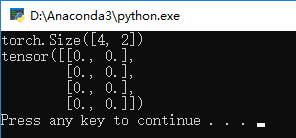
结果为:
即4行2列的矩阵
4.如果想生成一个全为0的矩阵,可以输入如下代码:
import torch
#定义一个Tensor矩阵
a = torch.Tensor([[1, 2], [3, 4],[5, 6], [7, 8]])
print('{}'.format(a.size()))
b = torch.zeros((4, 2))
print(b)
结果为:
即4行2列数组元素全为0的矩阵
5.如果想生成不同类型的数据,可以改变torch.后面函数名称,例如下面这样:
import torch
#定义一个Tensor矩阵
a = torch.Tensor([[1, 2], [3, 4],[5, 6], [7, 8]])
print('{}'.format(a))
b = torch.zeros((4, 2))
print(b)
c = torch.IntTensor([[1, 2], [3, 4],[5, 6], [7, 8]])
print(c)
d = torch.LongTensor([[1, 2], [3, 4],[5, 6], [7, 8]])
print(d)
e = torch.DoubleTensor([[1, 2], [3, 4],[5, 6], [7, 8]])
print(e)
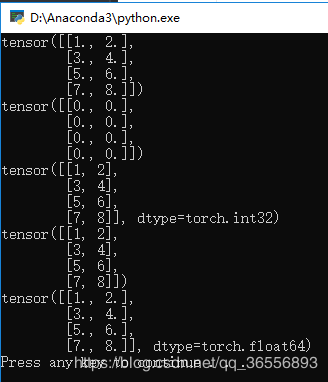
结果为:
6.如果想访问Tensor里的一个元素或者改变它,可以输入如下代码:
print(e[1, 1])
#改变元素值
e[1, 1] = 3
print(e[1, 1])
代码变为:
import torch
#定义一个Tensor矩阵
a = torch.Tensor([[1, 2], [3, 4],[5, 6], [7, 8]])
print('{}'.format(a))
b = torch.zeros((4, 2))
print(b)
c = torch.IntTensor([[1, 2], [3, 4],[5, 6], [7, 8]])
print(c)
d = torch.LongTensor([[1, 2], [3, 4],[5, 6], [7, 8]])
print(d)
e = torch.DoubleTensor([[1, 2], [3, 4],[5, 6], [7, 8]])
print(e)
print(e[1, 1])
#改变元素值
e[1, 1] = 3
print(e[1, 1])
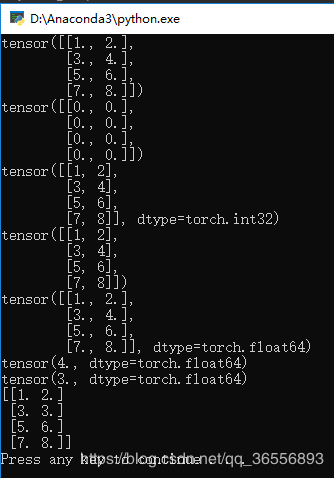
结果为:
说明原来4的位置数值变为了3
7.最重要的是Tensor和Numpy之间的转换,例如我们把e变为numpy类型,添加以下代码:
f = e.numpy()
print(f)
变为:
import torch
#定义一个Tensor矩阵
a = torch.Tensor([[1, 2], [3, 4],[5, 6], [7, 8]])
print('{}'.format(a))
b = torch.zeros((4, 2))
print(b)
c = torch.IntTensor([[1, 2], [3, 4],[5, 6], [7, 8]])
print(c)
d = torch.LongTensor([[1, 2], [3, 4],[5, 6], [7, 8]])
print(d)
e = torch.DoubleTensor([[1, 2], [3, 4],[5, 6], [7, 8]])
print(e)
print(e[1, 1])
#改变元素值
e[1, 1] = 3
print(e[1, 1])
#转换为Numpy
f = e.numpy()
print(f)
结果为:
可以看到没有tensor()了~
我们再把f变为tensor类型,输入以下代码:
g = torch.from_numpy(f)
print(g)
变为:
import torch
#定义一个Tensor矩阵
a = torch.Tensor([[1, 2], [3, 4],[5, 6], [7, 8]])
print('{}'.format(a))
b = torch.zeros((4, 2))
print(b)
c = torch.IntTensor([[1, 2], [3, 4],[5, 6], [7, 8]])
print(c)
d = torch.LongTensor([[1, 2], [3, 4],[5, 6], [7, 8]])
print(d)
e = torch.DoubleTensor([[1, 2], [3, 4],[5, 6], [7, 8]])
print(e)
print(e[1, 1])
#改变元素值
e[1, 1] = 3
print(e[1, 1])
#转换为Numpy
f = e.numpy()
print(f)
#转换为Tensor
g = torch.from_numpy(f)
print(g)
结果为:
可以看到又变成了Tensor类型~
二、Tensor放到GPU上执行
1.通过如下代码判断是否支持GPU:
if torch.cuda.is_available():
h = g.cuda()
print(h)
变为
import torch
#定义一个Tensor矩阵
a = torch.Tensor([[1, 2], [3, 4],[5, 6], [7, 8]])
print('{}'.format(a))
b = torch.zeros((4, 2))
print(b)
c = torch.IntTensor([[1, 2], [3, 4],[5, 6], [7, 8]])
print(c)
d = torch.LongTensor([[1, 2], [3, 4],[5, 6], [7, 8]])
print(d)
e = torch.DoubleTensor([[1, 2], [3, 4],[5, 6], [7, 8]])
print(e)
print(e[1, 1])
#改变元素值
e[1, 1] = 3
print(e[1, 1])
#转换为Numpy
f = e.numpy()
print(f)
#转换为Tensor
g = torch.from_numpy(f)
print(g)
#将Tensor放在GPU上
if torch.cuda.is_available():
h = g.cuda()
print(h)
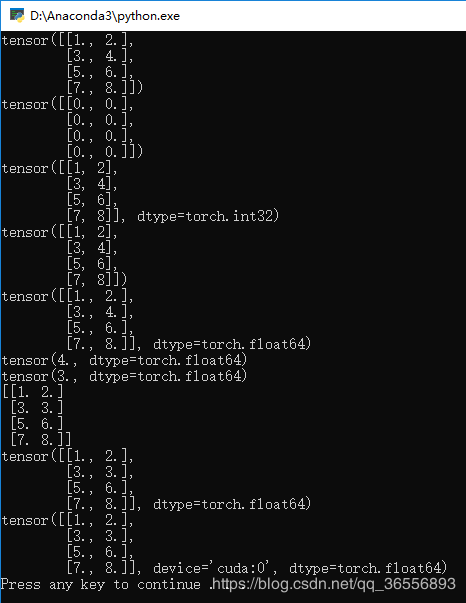
2.生成结果会慢一下,然后可以看到多了一个device=‘cuda:0’:
三、Tensor总结
1.Tensor和Numpy都是矩阵,区别是前者可以在GPU上运行,后者只能在CPU上
2.Tensor和Numpy互相转化很方便,类型也比较兼容
3.Tensor可以直接通过print显示数据类型,而Numpy不可以,例如:dtype = torch.float64


