最近为了升级曾经用Django做的网站,决定升级修改下架构,而且在当今Rest风格API的架构正在一步步的***到各个公司的API设计中,那Django这个框架呢?当然也会例外。
现在现在以相对比较好用的rest framework做个demo:
环境:ubuntu, mysql, python, django, django-rest-framework
在开始创建项目之前,我们用virtualenv先搭建一个新的虚拟环境,这样会确保我们的包配置很好的从正在工作的其他项目中隔离,在这里里面你可以做任何你想做的,而且可以共享系统中已安装的组件,只需要安装本项目特有的组件,是一个很好用的"沙盒":
virtualenv env
source env/bin/activate #激活当前虚拟环境
在任何时候想要退出虚拟环境,只需要输入:
deactivate
安装django
(env)bing@ubuntu:/usr/local$pip install django
Downloading/unpackingdjango
  Downloading Django-1.9.8-py2.py3-none-any.whl(6.6MB): 6.6MB downloaded
Installing collectedpackages: django
Successfullyinstalled django
Cleaning up...
安装djangorestframework
(env)bing@ubuntu:/usr/local$pip install djangorestframework
Downloading/unpackingdjangorestframework

 Downloadingdjangorestframework-3.4.1-py2.py3-none-any.whl (705kB):
0% 4.1k  Downloading
djangorestframework-3.4.1-py2.py3-none-any.whl(705kB):   1%
8.2k Downloading djangorestframework-3.4.1-py2.py3-none-any.whl
(705kB):   1% 12kB
………..
loaded
Installing collectedpackages: djangorestframework
Successfullyinstalled djangorestframework
Cleaning up...
(env)bing@ubuntu:/usr/local$
安装markdown - 让API可浏览
(env)bing@ubuntu:/usr/local$pip install django
安装django-filter - 过滤器
(env)bing@ubuntu:/usr/local$pip install django-filter
安装MySqL:
(env)bing@ubuntu:/usr/local$sudo apt-get install mysql-server
Reading packagelists... Done
Building dependencytree
Reading stateinformation... Done
The following extrapackages will be installed:
  libdbd-mysql-perl libdbi-perllibhtml-template-perl libmysqlclient18
  libterm-readkey-perl mysql-client-5.5mysql-client-core-5.5 mysql-common
  mysql-server-5.5 mysql-server-core-5.5
Suggested packages:
  libmldbm-perl libnet-daemon-perllibplrpc-perl libsql-statement-perl
  libipc-sharedcache-perl tinyca mailx
The following NEWpackages will be installed:
  libdbd-mysql-perl libdbi-perllibhtml-template-perl libmysqlclient18
  libterm-readkey-perl mysql-client-5.5mysql-client-core-5.5 mysql-common
  mysql-server mysql-server-5.5mysql-server-core-5.5
0 upgraded, 11 newlyinstalled, 0 to remove and 24 not upgraded.
Need to get 99.3kB/9,594 kB of archives.
After thisoperation, 97.1 MB of additional disk space will be used.
安装成功后验证:
(env)bing@ubuntu:/usr/local$mysql -uroot -p
Enter password:
Welcome to the MySQLmonitor.  Commands end with ; or \g.
Your MySQLconnection id is 44
Server version:5.5.50-0ubuntu0.14.04.1 (Ubuntu)

Copyright (c) 2000,2016, Oracle and/or its affiliates. All rights reserved.

Oracle is aregistered trademark of Oracle Corporation and/or its
affiliates. Othernames may be trademarks of their respective
owners.

Type 'help;' or '\h'for help. Type '\c' to clear the current input statement.

mysql>
现在开始创建项目
django-admin.py startproject resttest
创建Web API.
cd resttest
python manage.py startapp testapi
cd ..
第一次同步数据库
(env)bing@ubuntu:/usr/local/resttest$python manage.py migrate
Operations toperform:
  Apply all migrations: admin, contenttypes,auth, sessions
Running migrations:
  Rendering model states... DONE
  Applying contenttypes.0001_initial... OK
  Applying auth.0001_initial... OK
  Applying admin.0001_initial... OK
  Applyingadmin.0002_logentry_remove_auto_add... OK
  Applyingcontenttypes.0002_remove_content_type_name... OK
  Applyingauth.0002_alter_permission_name_max_length... OK
  Applyingauth.0003_alter_user_email_max_length... OK
  Applyingauth.0004_alter_user_username_opts... OK
  Applyingauth.0005_alter_user_last_login_null... OK
  Applyingauth.0006_require_contenttypes_0002... OK
  Applyingauth.0007_alter_validators_add_error_messages... OK
  Applying sessions.0001_initial... OK
(env)bing@ubuntu:/usr/local/resttest$
为我们的项目初始化一个管理员:
(env)bing@ubuntu:/usr/local/resttest$python manage.py createsuperuser
Username (leaveblank to use 'lybing'):
Email address:[email protected]
Password:
Password (again):
Superuser createdsuccessfully.
(env)bing@ubuntu:/usr/local/resttest$
Serializers - 数据的展示模块: resttest/testapi/serializers.py
from django.contrib.auth.models import User, Group
from rest_framework import serializers

class UserSerializer(serializers.HyperlinkedModelSerializer):
    class Meta:
        model = User
        fields = ('url', 'username', 'email', 'groups')

class GroupSerializer(serializers.HyperlinkedModelSerializer):
    class Meta:
        model = Group
        fields = ('url', 'name')
备注:这里我们使用hyperlinked关联,同样你可以用主键或其他各种其他关系,但是hyperlinking是一个很好的RESTful设计
Views : resttest/testapi/views.py
from django.contrib.auth.models import User, Group
from rest_framework import viewsets
from  testapi.serializers import UserSerializer, GroupSerializer

class UserViewSet(viewsets.ModelViewSet):
    queryset = User.objects.all().order_by('-date_joined')
    serializer_class = UserSerializer

class GroupViewSet(viewsets.ModelViewSet):
    queryset = Group.objects.all()
    serializer_class = GroupSerializer
与其写多个view倒不如将一些有相同行为的view分组叫ViewSets,如果有需有需要,我们可以很容易的拆成单独的view,但是使用viewsets保持view逻辑便于组织也非常简明.
配置API Url:resttest/urls.py
from django.conf.urls import url, include
from rest_framework import routers
from testapi import views

router = routers.DefaultRouter()
router.register(r'users', views.UserViewSet)
router.register(r'groups', views.GroupViewSet)

# 用自动url路由来连接我们的API
# 另外,包含我们登录用的可浏览的API的url
urlpatterns = [
    url(r'^', include(router.urls)),
    url(r'^api-auth/', include('rest_framework.urls', namespace='rest_framework'))
]
设置:resttest/settings.py
INSTALLED_APPS = (
    ...
    'rest_framework',
)
REST_FRAMEWORK = {
    'DEFAULT_PERMISSION_CLASSES':('rest_framework.permissions.IsAdminUser',),
    'PAGE_SIZE': 10
}
启动服务端测试
python manage.py runserver
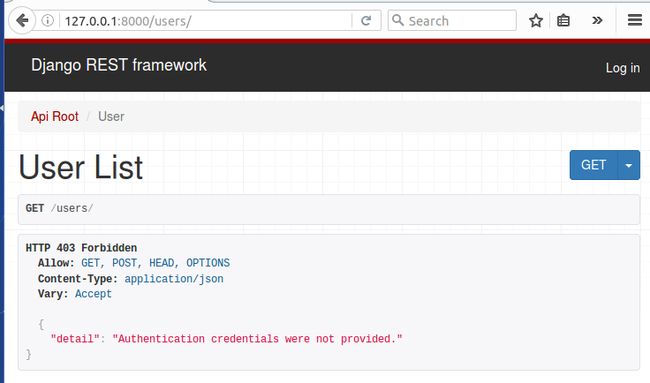
未登录的页面
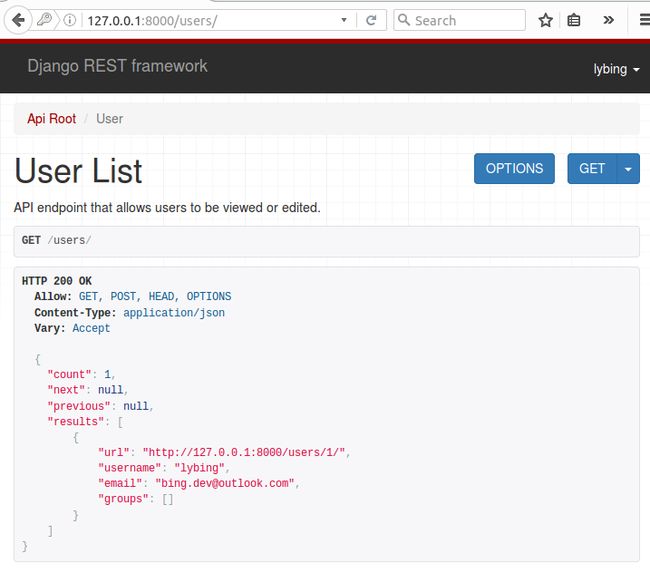
点击右上角的Log in登录,用户名和密码在是上面初始化的管理员
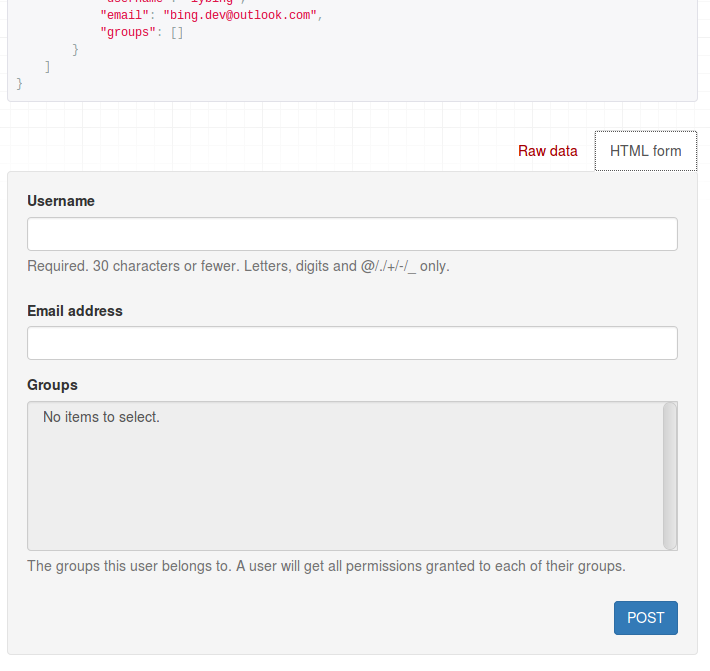
如要添加新的用户则可以在下面输入数据,直接点击Post即可


