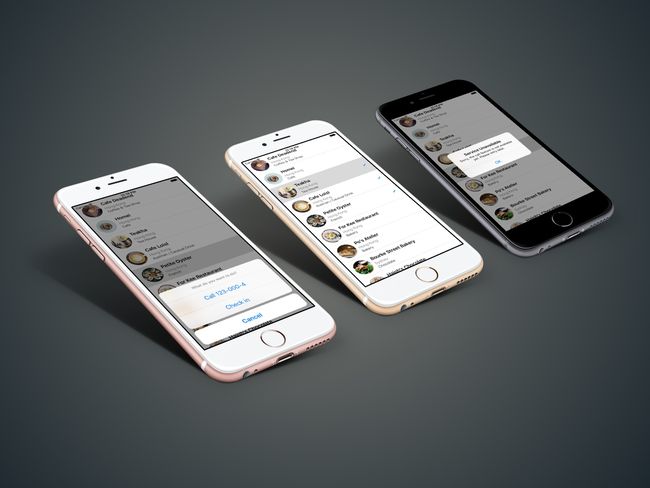
继续上一部分 开始用Swift开发iOS 10 - 7 定制Table Views项目 FoodPin的代码,添加两个功能:
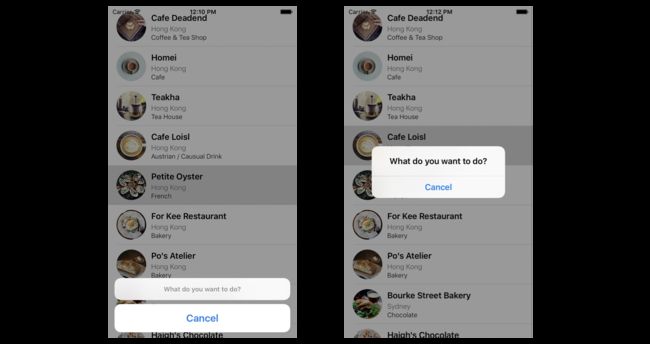
- 点击cell时,产生弹框,弹框中有两个功能选项 Call 和 Check-in
- 当点击Check-in选项时,为cell加上对号
理解UITableViewDelegate协议
代理模式在iOS编程中非常常见的。每个代理负责特定的角色或任务,维持系统的简单和干净。当一个对象需要完成特定任务时,可以依靠另一个对象完成。这在软件设计模式中通常叫做"separation of concerns"。
UITableViewController就应用了代理模式。两个协议完成不同的任务。UITableViewDataSource协议负责提供和管理table的数据。UITableViewDelegate协议负责设置table的section headings 和 footers,以及操作cell selections和cell recording。
阅读文档
怎么知道
UITableViewDelegate中有那些方法呢?
阅读Apple的官方iOS开发文档(https://developer.apple.com/library/ios/))。作为iOS开发者,需要经常阅读API 文档。目前没有单个的书籍可覆盖所有iOS SDK。 Xcode中提供方便的查看文档的方法,在相关代码处option+点击,出现弹框展示文档简介,再在弹框上点击相关代码就直接进入详细文档处。
文档对不同方法进行了分类,比如UITableViewDelegate的文档就有上面提到的Managing Selections:
func tableView(UITableView, willSelectRowAt: IndexPath)
func tableView(UITableView, didSelectRowAt: IndexPath)
实现协议中管理列选项方法
- 在
RestaurantTableViewController类中实现tableView(_:didSelectRowAt:)方法:
override func tableView(_ tableView: UITableView, didSelectRowAt indexPath:
IndexPath) {
    // 1
    let optionMenu = UIAlertController(title: nil, message: "What do you want
to do?", preferredStyle: .actionSheet)
    // 2
    let cancelAction = UIAlertAction(title: "Cancel", style: .cancel, handler:
nil)
    optionMenu.addAction(cancelAction)
    // 3
    present(optionMenu, animated: true, completion: nil)
}
- 1 创建了
UIAlertController。UIAlertController是从iOS8被引入,用来替代以前的UIAlertView和UIActionSheet,向用户弹出警示信息;preferredStyle参数有两个值:.actionSheet和.alert,表示替代的两种样式。
- 2 创建一个cancel样式的
UIAlertAction。UIAlertController的警示弹出框一般是由最上面的title+message(都不是非必须的)和一些Action组成,cancel action在最下面。

- 3
present是UIViewController中的方法,用于展示。
添加Actions到ALert Controller中
- Call action
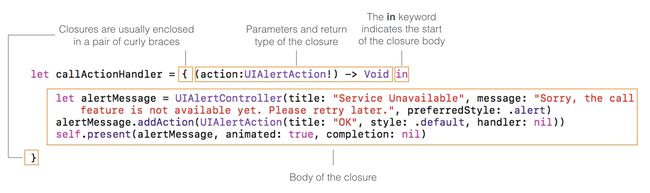
let callActionHandler = { (action:UIAlertAction!) -> Void in
    let alertMessage = UIAlertController(title: "Service Unavailable", message:
"Sorry, the call feature is not available yet. Please retry later.",
preferredStyle: .alert)
    alertMessage.addAction(UIAlertAction(title: "OK", style: .default, handler:
nil))
    self.present(alertMessage, animated: true, completion: nil)
}
let callAction = UIAlertAction(title: "Call " + "123-000-\(indexPath.row)",
style: .default, handler: callActionHandler)
optionMenu.addAction(callAction)
callActionHandler是swift闭包结构的一种写法,关于闭包可查看以撸代码的形式学习Swift-7:Closure。这个代码块在Call action被点击是执行。
- Check-in action
// Check-in action
let checkInAction = UIAlertAction(title: "Check in", style: .default, handler:
{
    (action:UIAlertAction!) -> Void in
    let cell = tableView.cellForRow(at: indexPath)
    cell?.accessoryType = .checkmark
})
optionMenu.addAction(checkInAction)
当用户点击“Check in”action时,为选中的cell增加一个对号,表明是用户喜欢的。accessoryType包括disclosureIndicator, detailDisclosureButton, checkmark 和 detailButton。
当cell被选中后,这个cell会一直灰色高亮。去掉:
tableView.deselectRow(at: indexPath, animated: false)
解决Bug
现在应用运行后,check-in某一cell时,可能会出现其他cell同时也被check-in。
这个问题是因为cell重复使用导致的。当一个屏幕滚动时,新进的cell就会利用滚出的得cell,以提高效率。解决方法:为每个cell创造一个是否被check-in的标志。
- 在
RestaurantTableViewController中创建一个Boolean类型的数组:
var restaurantIsVisited = Array(repeating: false, count: 21) - check-in后就把对应的标志修改为true:
let checkInAction = UIAlertAction(title: "Check in", style: .default, handler:
{
    (action:UIAlertAction!) -> Void in
    let cell = tableView.cellForRow(at: indexPath)
    cell?.accessoryType = .checkmark
    self.restaurantIsVisited[indexPath.row] = true
}
- 在每一次生成cell是也要检查是否check-in,在
tableView(_:cellForRowAt:)放的return cell之前加入:
cell.accessoryType = restaurantIsVisited[indexPath.row] ? .checkmark : .none
练习
当选中也被check-in的cell时,check-in Action的文本变成Undo Check in,点击后取消其对号。修一下check-in代码:
let cell = tableView.cellForRow(at: indexPath)
if cell?.accessoryType == .checkmark {
    let checkInAction = UIAlertAction(title: "Undo Check in", style: .default, handler:
    {
        (action:UIAlertAction!) -> Void in
        cell?.accessoryType = .none
        self.restaurantIsVisited[indexPath.row] = false
    })
    optionMenu.addAction(checkInAction)
} else {
    let checkInAction = UIAlertAction(title: "Check in", style: .default, handler:
    {
        (action:UIAlertAction!) -> Void in
        cell?.accessoryType = .checkmark
        self.restaurantIsVisited[indexPath.row] = true
    })
    optionMenu.addAction(checkInAction)
}

代码
Beginning-iOS-Programming-with-Swift
说明
此文是学习appcode网站出的一本书 《Beginning iOS 10 Programming with Swift》 的一篇记录
系列文章目录
- 开始用Swift开发iOS 10 - 1 前言
- 开始用Swift开发iOS 10 - 2 Hello World!第一个Swift APP
- 开始用Swift开发iOS 10 - 3 介绍Auto Layout
- 开始用Swift开发iOS 10 - 4 用Stack View设计UI
- [开始用Swift开发iOS 10 - 5 原型的介绍]
- 开始用Swift开发iOS 10 - 6 创建简单的Table Based App
- 开始用Swift开发iOS 10 - 7 定制Table Views
- 开始用Swift开发iOS 10 - 8 Table View和UIAlertController的交互