带你进入异步Django+Vue的世界 - Didi打车实战(1)
Demo: https://didi-taxi.herokuapp.com/
本篇来完成前端的框架和注册登录页面。
UI框架大家随意选择,符合自己需求就行。
比如你只需要桌面端,那iView比较合适。如果只需要手机端,那选Framework7、Element等等。如果要同时适配桌面+手机端,Vuetify、Bootstrap比较合适。
我们这里使用Github 18k星的Vuetify。
添加Vuetify到前端:
vue-cli命令行添加就行:
vue add vuetify
然后,会自动更新main.js, App.vue, package.json等文件。
打开新终端,运行:
yarn lint --fix
yarn serve
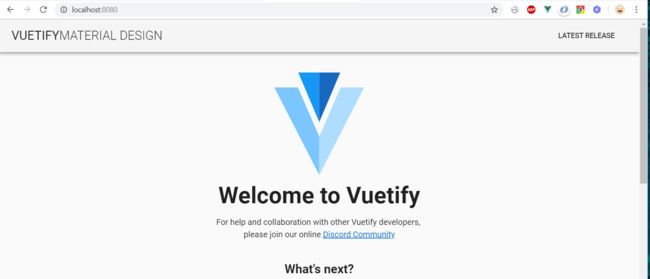
浏览器打开http://localhost:8080,就能看到Vuetify的demo页面了:
UI设计
编写前端代码之前,先对我们的设计目标进行规划。大家可以先画蓝图,发挥自己的想像力,对用户要友好。
总体UI
- 最上面为导航条
- 按钮:商标、登录、注册、退出登录、叫车/接单
- 桌面使用时,显示完整按钮名称,手机端只显示图标。Vuetify会自动调整。
- 针对注册和未注册用户,显示不同菜单
桌面版:
手机版:
内容区
在导航条下方,通过Vue-Router来导航。
首页显示当前进行中的打车,和打车历史-
注册页面:
-
登录页面:
-
全局提示:
对于操作成功、失败,有明显的提示:
打车页面:
使用Modal弹出框来实现,TBD
前端代码
我们在第一篇里,已经导入了前端代码的框架,支持Vue-Router, Vuex, axios。可以方便地以此为基础开发。
1. 静态主页index.html
添加icon链接,你也可以选择font-awesome等其它icon
Didi Taxi
2. 导航条
写到主组件App.vue即可。根据用户是否已经登录,显示不同的菜单。
# /src/App.vue


          Didi


          {{ item.icon }}
          {{ item.title }}


。。。
3. 全局提示
我们通过v-alert组件,显示Vuex store里的提示数据。
# /src/App.vue


。。。


            {{ alert != null ? alert.msg : '' }}
Vuex里,alert为这种格式:
alert: { type: 'success', msg: 'Sign up success!' }
type: success/error/info/warning
需要更新Vuex store:
添加相应的state/mutations/actions。
- state:全局变量
- mutations:更新变量的值,必须是同步的
- actions:操作事务,是异步的,可以操作多个mutations
- getters:在返回变量值之前,可以添加其它运算,比如只返回部分符合条件的数值
# /src/store/index.js
import Vue from 'vue'
import Vuex from 'vuex'
import messages from './modules/messages'

Vue.use(Vuex)

export default new Vuex.Store({
  modules: {
    messages
  },
  state: {
    loading: false,
    alert: null,
    // alert: { type: 'success', msg: 'Login success!' },
    // user: { id: 1, username: 'admin', first_name: '', last_name: '' }
    user: null
  },
  mutations: {
    setLoading (state, payload) {
      state.loading = payload
    },
    setAlert (state, payload) {
      state.alert = payload
    },
    clearAlert (state) {
      state.alert = null
    },
    setUser (state, payload) {
      state.user = payload
    }
  },
  actions: {
    setUserInfo ({ commit }) {
        let u = localStorage.getItem('user')
        if (u) {
          u = JSON.parse(u)
        } else {
          console.log('>>> no user info found in localStorage')
        }
        commit('setUser', u)
    },
    clearAlert ({ commit }) {
      commit('clearAlert')
    }
  },
  getters: {
    loading (state) {
      return state.loading
    },
    alert (state) {
      return state.alert
    },
    user (state) {
      return state.user
    }
  }
})
我们把上面文件里的注释去掉,测试一下:
  state: {
    //alert: null
    alert: { type: 'success', msg: 'Login success!' }
  },
你应该能成功看到提示:
4. home路由
更新路由文件,支持以下路由:
# /src/router.js
import Vue from 'vue'
import Router from 'vue-router'
import Home from './views/Home.vue'
import My404 from './views/My404.vue'
import Signup from './views/Signup.vue'
import Signin from './views/Signin.vue'

Vue.use(Router)

export default new Router({
  mode: 'history',
  base: process.env.BASE_URL,
  routes: [
    {
      path: '/',
      name: 'home',
      component: Home
    },
    {
      path: '/sign_up',
      name: 'sign_up',
      component: Signup
    },
    {
      path: '/log_in',
      name: 'log_in',
      component: Signin
    },
    {
      path: '/messages',
      name: 'messages',
      // route level code-splitting
      // this generates a separate chunk (xxx.[hash].js) for this route
      // which is lazy-loaded when the route is visited.
      component: () => import(/* webpackChunkName: "messages" */ './views/Messages.vue')
    },
    { path: '*', name: 'my404', component: My404 }
  ]
})
编辑页面文件home.vue,先显示空白打车记录:
On-going Trip
{{ card_text }}
Cancel
View
Trip History
{{ card_text }}
View ALL
后续会使用服务器返回的数据,来更新显示。
5. 注册路由
注册页面,显示三条输入行:username, password1, password2
针对两次密码,进行对比提示
# /src/views/Signup.vue
当点击Register注册时,发送请求到后端。
这里的最佳实践是,所有跟后端的API交互,都统一提取出来放在Vuex,方便更新和管理。
Vuex添加signUserUp 注册action:
- 更新
loading- 按钮的状态在交互时,会提示正在跟后台通信 - 通过
messageService.signUserUp()发送POST - 更新
setAlert- 显示注册成功提示 - 注册成功后,转向Home路由
# /src/store/modules/messages.js
const actions = {
  signUserUp ({ commit }, payload) {
    commit('setLoading', true, { root: true })
    messageService.signUserUp(payload)
      .then(messages => {
        commit('setAlert', { type: 'success', msg: 'Sign up success!' }, { root: true })
        commit('setLoading', false, { root: true })
        router.push('/')
      })
  },
API统一放在/src/services/messageService.js:
import api from '@/services/api'

export default {
  signUserUp (payload) {
    return api.post(`sign_up/`, payload)
      .then(response => response.data)
  },
确保后台Django程序运行中:
python manage.py runserver
测试一下,应该能顺利注册新用户了。
但是,当前对异常处理没有任何处理,用户不知道为什么注册失败了。
我们可以对后端返回值处理,然后提示。
但对于100个API呢?也一次次处理么?太低效了!我们来归纳一下。
axios统一处理header和异常
对于后端,可能要前端提供一些额外的header信息,比如csrf, token。
前端收到返回值,也要提示用户。
- header加上csrf:
'X-CSRFToken': Cookies.get('csrftoken') - error信息,通过Vuex提示给用户:
store.commit('setAlert', { type: 'error', msg: error.response.data })
# /src/services/api.js
import axios from 'axios'
import Cookies from 'js-cookie'

import vueconfig from '@/config'
import store from '@/store'

axios.interceptors.request.use(
  config => {
    config.baseURL = `${vueconfig.baseUrl}/api/`
    config.withCredentials = true // 允许携带token 解决跨域产生的相关问题
    config.timeout = 10000 // 10s

    config.headers = {
      'Content-Type': 'application/json',
      'X-CSRFToken': Cookies.get('csrftoken')
    }
    return config
  },
  error => {
    return Promise.reject(error)
  }
)

// 在 response 拦截器实现
axios.interceptors.response.use(
  response => {
    // console.log(response)
    return response
  },
  error => {
    console.log(error.response)
    if (error.response.status === 400) {
      // Bad Request. within module: { root: true } ??
      store.commit('setAlert', { type: 'error', msg: error.response.data })
    } else if (error.response.status === 403) {
      // Forbidden 403
      store.commit('setAlert', { type: 'error', msg: error.response.data.detail })
      localStorage.removeItem('user')
      store.commit('setUser', null)
    } else if ([405].includes(error.response.status)) {
      // Method Not Allowed 405
      store.commit('setAlert', { type: 'error', msg: error.response.data.detail })
    } else {
      console.log(`>>> un-handled error code! ${error.response.status}`)
    }
    store.commit('setLoading', false)
    return Promise.reject(error)
  }
)

export default axios
axios配置文件:
配置后端的Django服务器地址,我们顺便把Websockets也加上
# /src/config.js
const wsProtocol = location.protocol === 'http:' ? 'ws:' : 'wss:'
let baseUrl = location.origin
let wsUrl = `${wsProtocol}//${location.host}`

if (process.env.NODE_ENV === 'development') {
  baseUrl = 'http://localhost:8080'
  wsUrl = 'ws://localhost:8080'
}

export default {
  baseUrl,
  wsUrl
}
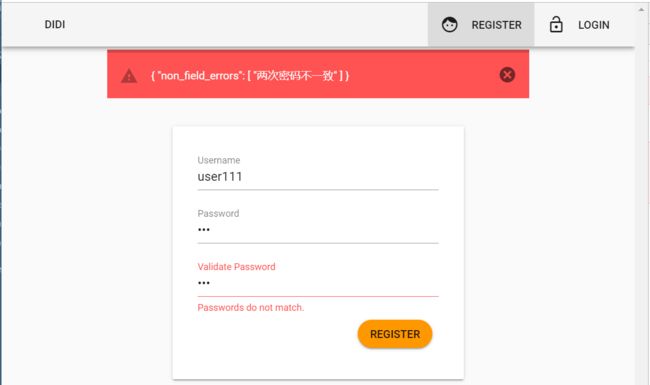
再次测试,如果有任何ajax出错,用户都能看到提示:
比如:
6. 登录路由
有了前面的铺垫,就很简单了
先创建view页面:
- 显示两条输入行:username, password
- 点击登录时,执行Vuex
signUserInaction
# /src/views/Sigin.vue
更新Vuex:
- ajax调用
messageService.signUserIn(payload) - 为了保存登录状态,我们使用
LocalStorage来保存。这样,用户登录过后,关闭浏览器,再打开浏览器,直接为已登录状态,直到Django session过期。
# /src/store/modules/message.js
const actions = {
  signUserIn ({ commit }, payload) {
    commit('setLoading', true, { root: true })
    messageService.signUserIn(payload)
      .then(messages => {
        commit('setAlert', { type: 'success', msg: 'Login success!' }, { root: true })
        commit('setUser', messages, { root: true })
        localStorage.setItem('user', JSON.stringify(messages))
        commit('setLoading', false, { root: true })
        router.push('/')
      })
  },
ajax交互 /src/services/messageService.js:
export default {
  signUserIn (payload) {
    return api.post(`log_in/`, payload)
      .then(response => response.data)
  },
登录后,会显示用户头像,叫车和退出按钮:
7. 注销登录
这个不需要创建新的vue页面文件。
更新Vuex:
- ajax调用
messageService.signUserOut() - 清除
LocalStorage里保存的登录状态
# /src/store/modules/message.js
const actions = {
  signUserOut ({ commit }) {
    commit('setLoading', true, { root: true })
    messageService.signUserOut()
      .then(messages => {
        commit('setAlert', { type: 'info', msg: 'Log-out success!' }, { root: true })
        commit('setUser', null, { root: true })
        localStorage.removeItem('user')
        commit('setLoading', false, { root: true })
      })
  },
ajax交互 /src/services/messageService.js:
export default {
  signUserOut () {
    return api.post(`log_out/`, '')
      .then(response => response.data)
  },
导航栏的退出按钮,添加方法:
# /src/App.vue
  computed: {
    ...mapState(['alert', 'user']),
    menuItems () {
      let items = [
        { icon: 'face', title: 'Register', route: '/sign_up' },
        { icon: 'lock_open', title: 'Login', route: '/log_in' }
      ]
      if (this.userIsAuthenticated) {
        items = [
          { icon: 'local_taxi', title: 'Call', route: '' },
          { icon: 'exit_to_app', title: 'Exit', route: '' }
        ]
      }
      return items
    },
    userIsAuthenticated () {
      return this.$store.getters.user !== null && this.$store.getters.user !== undefined
    }
  },
  methods: {
    ...mapActions(['clearAlert']),
    menu_click (title) {
      if (title === 'Exit') {
        this.$store.dispatch('messages/signUserOut')
      } else if (title === 'Call') {
        this.$store.dispatch('messages/callTaxi')
      }
    }
  }
总结
这套鉴权系统,非常通用,其它项目都可以借鉴使用。
下一篇,会进入到Django后台数据库设计。
带你进入异步Django+Vue的世界 - Didi打车实战(3)


