2016年03月03日更新
使用id A进入聊天,然后返回登陆界面使用id B进入聊天,然后对A发起会话会导致崩溃,原因是没有关闭A的客户端,会导致自己和自己发起会话。解决方法是在开启聊天客户端之前先关闭之前的客户端,即改写『登陆』的事件为下列代码
- (IBAction)loginBtnClicked:(id)sender {
[[CDChatManager manager]closeWithCallback:^(BOOL succeeded, NSError *error) {
[[CDChatManager manager]openWithClientId:_textField.text callback:^(BOOL succeeded, NSError *error) {
ChatListViewController * chatList = [[ChatListViewController alloc]init];
[self.navigationController pushViewController:chatList animated:YES];
 }];

}];
}
写在最前面
更新了最新版的LeanCloud的SDK
静态库的体积确实小了很多,但是有一些LeanCloud改了一小部分方法的名称
如果按照我的攻略发现代码有问题的,请把所有的Conv改为Conversation不管这个Conv是在开头还是结尾还是方法名中间
比如老版的是
  [[CDChatManager manager] fetchConvWithOtherId:_textField.text callback:^(AVIMConversation *conversation, NSError *error) {
    }];
现在就是
[[CDChatManager manager]fetchConversationWithOtherId:@"78" callback:^(AVIMConversation *conversation, NSError *error) {
    }];
其他方法同上,如有其它发现我都会写在这里
另外老版的CDUserModel协议已经更名为CDUserModelDelegate
- LeanCloud的程序员一定是强迫症晚期(╯‵□′)╯︵┻━┻
写在前面
首先附上之前文章的链接
[LeanCloud实时通信模块IOS端快速接入指南(一)]
废话少说,这一节我们来实现一个相对完整的聊天功能。
功能描述
还记得上一节说过的LeanCloud如何创建聊天吗?没错,你自己的id加上你要聊天的人的id就可以创建一个对话。
那么我们今天做这么一个东西,项目启动时输入一个自己的id,确认后弹出类似QQ的最近聊天界面,点击最近聊天的任意会话进行聊天或对任意指定id发起聊天。
正文
准备项目
新建一个项目,起一个你喜欢的名字

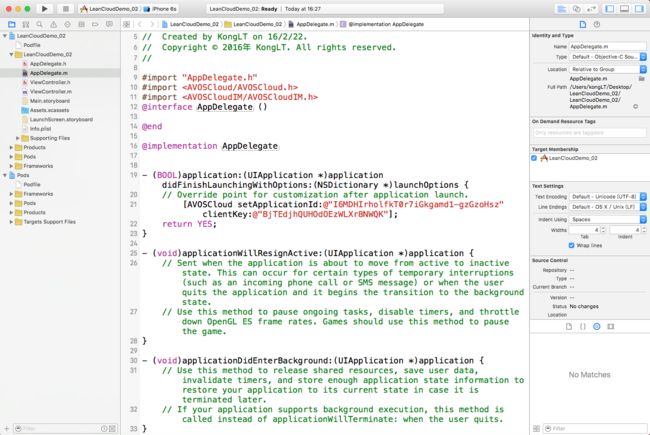
然后是导入SDK,在AppDelegate中注册,和前边一样
搭建页面结构
这里我们准备的项目在下一节还要继续用,所以我们使用StoryBoard搭建一个相对完整的项目
*为了尽量照顾大多数人,我这里把构建StoryBoard的过程也贴出来,已经熟练使用的请忽略
删除自带的ViewController和Main.storyboard中对应的控件
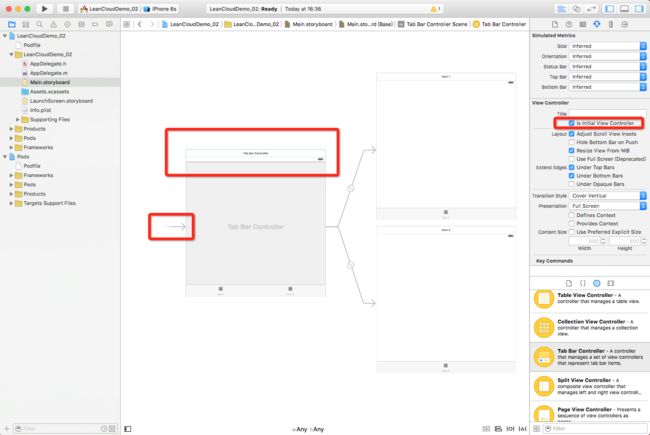
在Main.storyboard中添加一个标签栏控制器(TabBarViewController)并设置为根视图控制器(勾选Is Initial View Controller选项,被设置为根视图控制器的控件左边会有箭头)
去掉标签栏自带的两个视图控制器,更换成导航视图控制器(NavigationController)
按住鼠标左键不动从标签栏拖动到导航栏

松开鼠标后选择ViewControlers

另一个导航栏一样照做
运行项目,如下图所示

搭建登陆界面
前一篇说过,我们使用[CDChatManager manager] openWithClientId:@"Tom" callback:^(BOOL succeeded, NSError *error) {}];方法只需要一个自定义的ClientId就可以登陆一个聊天客户端
因此第一个界面我们就用来输入这个Id。
由于在StoryBoard中导航栏自带的根视图控制器默认是UITableVIewController,所以我们删掉它,换成普通的视图控制器
并给它一个标题--『登陆』

登陆界面很简单,如下所示

新建一个视图控制器并将其和StroyBoard中的登陆界面关联起来

实现聊天
给登陆按钮添加事件之前我们先创建接下来要跳转的界面--最近聊天列表ChatListViewController,继承于CDChatListVC

在LoginViewController中引入头文件
#import
#import"ChatListViewController.h"
按钮的点击事件这么写
- (IBAction)loginBtnClicked:(id)sender {
[[CDChatManager manager]openWithClientId:_textField.text callback:^(BOOL succeeded, NSError *error) {
ChatListViewController * chatList = [[ChatListViewController alloc]init];
[self.navigationController pushViewController:chatList animated:YES];
}];
}
- 这里解释一下这个CDChatListVC,和前一篇用到的CDChatRoomVC一样,这也是LeanChatLib中写好的一个类,继承于UITableVIewController,每个cell代表一个会话,第一次进入或者刷新会拉取最近的会话,获取到一个叫做conversations的数组,然后将conversation作为数据源读出每一个会话然后展示。点击会话则进入聊天。我们将在下一节详细讲解他的方法并按照我们的需求加以改造,所以这里我们只需要先知道它是干嘛的就够了。
刚才说了,这个ChatListViewController是一个UITableVIewController,所以我们对它稍加改造,给它的TableView加一个HeaderView。
在它的viewDidLoad中这么写
- (void)viewDidLoad {
[super viewDidLoad];
UIView * headerView = [[UIView alloc]initWithFrame:CGRectMake(0, 0, self.view.bounds.size.width, 60)];
self.tableView.tableHeaderView = headerView;

_textField = [[UITextField alloc]initWithFrame:CGRectMake(15, 5, self.view.bounds.size.width - 30, 25)];
_textField.layer.borderColor = [UIColor lightGrayColor].CGColor;
_textField.layer.borderWidth = 1;
[headerView addSubview:_textField];

UIButton * startChat = [UIButton buttonWithType:UIButtonTypeSystem];
startChat.frame = CGRectMake(60, 35, self.view.bounds.size.width - 120, 20);
[startChat setTitle:@"开始聊天" forState:UIControlStateNormal];
[headerView addSubview:startChat];
[startChat addTarget:self action:@selector(startChatClicked:) forControlEvents:UIControlEventTouchUpInside];

}
在添加按钮的点击事件之前我们要向之前一样,去创建一个继承于CDChatRoomVC的ChatRoomViewController。

把聊天室引入到聊天列表
#import "ChatRoomViewController.h"
然后是按钮的点击事件
- (void)startChatClicked:(UIButton *)btn
{
if(_textField.text.length > 0)
{
[[CDChatManager manager] fetchConvWithOtherId:_textField.text callback:^(AVIMConversation *conversation, NSError *error) {
ChatRoomViewController * chatRoom = [[ChatRoomViewController alloc]initWithConv:conversation];
[self.navigationController pushViewController:chatRoom animated:YES];
}];
}
}
因为标签栏会遮住聊天室下方的输入控件,所以我们这么做
在ChatListViewController中添加方法
- (void)viewWillAppear:(BOOL)animated
{
[super viewWillAppear:animated];
self.navigationController.tabBarController.tabBar.hidden = NO;
}
在ChatRoomViewController中添加方法
- (void)viewWillAppear:(BOOL)animated
{
[super viewWillAppear:animated];
self.navigationController.tabBarController.tabBar.hidden = YES;
}
到此为止我们已经实现了前面的需求,运行项目
在登录界面输入你的id

点击登陆后输入你想聊天的人的id,然后点击开始聊天

出现如下界面

点击返回

然后你会发现,卧槽?说好的最近聊天呢? 怎么一篇空白?别急,接下来我们就解决这个问题。
显示最近聊天
刚才点返回的时候,控制台会给你报一堆警告

前面说过,你第一次进入最近聊天页或者刷新最近聊天的时候会拉取到最近的会话,但是你拉取的是会话,和你聊天的对象的头像昵称等信息并没有包含在会话对象中,你需要从CDChatManager的代理中获取到这些信息。因此我们需要实现CDChatManager的CDUserDelegate。这个代理会返回一个遵循CDUserModel协议的对象。
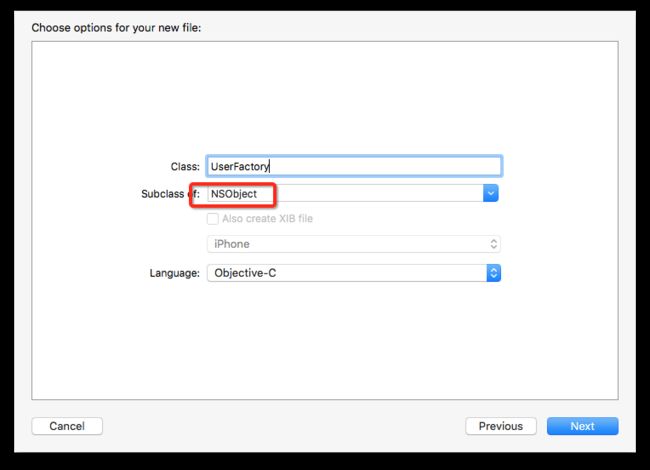
创建一个继承于NSObject的UserFactory类
引入头文件
#import
遵守协议
@interface UserFactory : NSObject

@end
在UserFactory.m中实现代理方法
为了方便我们把遵循CDUserModel协议的类也在这里声明
#import "CDUserFactory.h"

@interface CDUser : NSObject

@property (nonatomic, strong) NSString *userId;

@property (nonatomic, strong) NSString *username;

@property (nonatomic, strong) NSString *avatarUrl;

@end

@implementation CDUser

@end

@implementation UserFactory

#pragma mark - UserDelegate


- (void)cacheUserByIds:(NSSet *)userIds block:    (AVBooleanResultBlock)block {
block(YES, nil);
}

- (id  )getUserById:(NSString *)userId {
CDUser *user = [[CDUser alloc] init];
user.userId = userId;
//在cell中显示的聊天对象的名字
user.username = userId;
//聊天对象的头像
user.avatarUrl = @"http://tp2.sinaimg.cn/5088940253/180/5745995456/1";
return user;
}

@end
然后在Appdelegate.m中添加代理
- (BOOL)application:(UIApplication *)application didFinishLaunchingWithOptions:(NSDictionary *)launchOptions {
...
[CDChatManager manager].userDelegate = [[UserFactory alloc]init];
...
return YES;
}
然后再次运行项目,输入刚才的ID,这个时候我们的最近聊天列表就出现了

- 头像不显示的同学请检查是否打开了ATS。iOS 9 之后默认开启ATS,无法使用Http请求
关闭方法为在info.plist中添加字段
NSAppTransportSecurity
NSAllowsArbitraryLoads
接下来我们要做的是实现点击最近会话进入聊天
首先让ChatListViewController遵循协议
interface ChatListViewController ()
然后在viewDidLoad方法中添加加上一句
self.chatListDelegate = self;
然后实现代理方法
- (void)viewController:(UIViewController *)viewController didSelectConv:(AVIMConversation *)conv
{
ChatRoomViewController * chatRoom = [[ChatRoomViewController alloc]initWithConv:conv];
[self.navigationController pushViewController:chatRoom animated:YES];
}
再运行试试,点击最近的聊天也可以进入聊天了
总结
到此为止,我们就利用LeanCloud搭建了一个相对完整的聊天,你已经可以用这个东西跟你的小伙伴聊天了。
虽然我写了这么多乱七八糟的东西,其实总计一下我们只用了三个类就实现了这全部的东西。
这里我们回顾一下
三个类:
- CDChatRoomVC:LeanChatLib提供的聊天室。拥有带Conversation参数的构造方法,声明后直接跳转进来即可。
- CDChatListVC:LeanChatLib提供的聊天列表类,登陆聊天Client后直接跳转进入或者进入后再登陆Client都可以。
- CDChatManager:LeanChatLib的核心管理类,通过[CDChatManager manager]获取单例。它的两个重要方法:
//登陆一个聊天客户端 openWithClientId:_textField.text callback:^(BOOL succeeded, NSError *error) { };
//获取一个单聊会话 fetchConvWithOtherId:@"78" callback:^(AVIMConversation *conversation, NSError *error) { }
为了方便理解,这里再多嘴提一句,第一个方法,openClientId。既然有open,对应的也有一个close方法用来关闭聊天客户端。我们所开启的这个Client,不像我们学的Button,Label一样,依附于父视图,父视图销毁,它们也跟着销毁。Client除非你主动关闭或者直接关掉程序,执行open之后它会一直在后台处于开启状态。这也就意味着,只要你执行了openClient,你可以在程序的任意一个界面执行fetchConv获取到一个会话然后跳转到聊天,并不一定是在最近聊天列表才能这么做。这样就能很方便灵活的使用即时通讯模块。
这一节到此结束,下一节,我们来学习按照自己的需求改造我们的聊天功能。