这篇文章整理iOS10之前的推送通知(文中的推送通知,如不做特殊说明,默认是iOS10以前的推送通知)
iOS10以后的推送通知,请看这篇
-
本地推送通知:
本地推送通知是开发人员在APP内部发送,即使没有联网也能收到的推送.
应用场景是提醒某个时刻用户该干啥.
通知发出时,如果程序正在运行在前台,那么推送就不会被呈现(但仍然是收到的)
不管APP打开还是关闭,推送通知都会如期发出
二话不说,先发一个通知,然后再来介绍每个步骤:
- 首先申请推送权限(iOS8.0之后需要申请权限)
  let type = UIUserNotificationType.alert.rawValue | UIUserNotificationType.badge.rawValue | UIUserNotificationType.sound.rawValue
  let sets = UIUserNotificationSettings(types: UIUserNotificationType(rawValue : type), categories: nil)
  UIApplication.shared.registerUserNotificationSettings(sets)
- 创建一个通知:
  //创建一个通知
  let localNot = UILocalNotification()
  //设置通知的必选项
  localNot.alertBody = "我是通知"
  //通知的发送时间
  localNot.fireDate = NSDate(timeIntervalSinceNow: 2) as Date
- 发送这个通知:
  //1:立即发送 :
  UIApplication.shared.presentLocalNotificationNow(localNot)
  //2:按照规定时间发送:
  UIApplication.shared.scheduleLocalNotification(localNot)
经过三个步骤,本地通知就已经发送完毕
需要把APP退到后台,或者杀死才能看到通知
alertBody就是要显示的内容
-
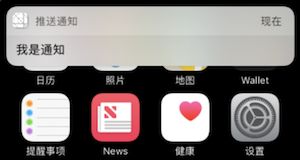
效果图:
另外本地推送通知还有一些额外设置:
  //重复发送的时间周期
  localNot.repeatInterval = NSCalendar.Unit.minute
  //设置锁屏滑动文字(显示效果为:滑动来回复)
  //如果不设置该属性,则显示:滑动来查看
  localNot.alertAction = "回复"
  //标题:iOS8.2以后才有
  if #available(iOS 8.2, *) {
        localNot.alertTitle = "斗地主"
  }
  // 设置通知的声音
  localNot.soundName = "win.aac"
  // 设置图标右上角的数字(0 代表不显示)
  localNot.applicationIconBadgeNumber = 10
当收到本地通知后,需要做推送的监听
APP的状态不同,监听方式不同:
- 当app关闭时
点击收到的通知进入app时launchOptions中UIApplicationLaunchOptionsKey.localNotification对应的值不为空:
    func application(_ application: UIApplication, didFinishLaunchingWithOptions launchOptions: [UIApplicationLaunchOptionsKey: Any]?) -> Bool {
        //launchOptions: 只要不是正常启动(点击图标启动),这个字典就部位空
        if launchOptions != nil {
            let local = launchOptions![UIApplicationLaunchOptionsKey.localNotification]
            if local != nil {
                //业务处理
            }
        }
        return true
    }
- 当app在前台或后台时
当app在前台时收到通知走这个方法(在前台时,虽然收到但是并不显示通知)
当app在后台收到通知,点击通知,走这个方法
    func application(_ application: UIApplication, didReceive notification: UILocalNotification) {
        let state = UIApplication.shared.applicationState
        if state == UIApplicationState.active {//如果在前台
            //业务处理
        }else if state == UIApplicationState.inactive{//如果在后台
            //业务处理
        }
    }
监听本地推送的额外操作
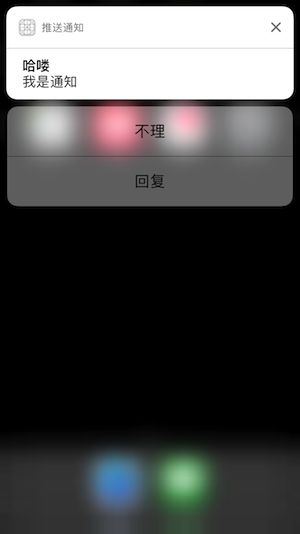
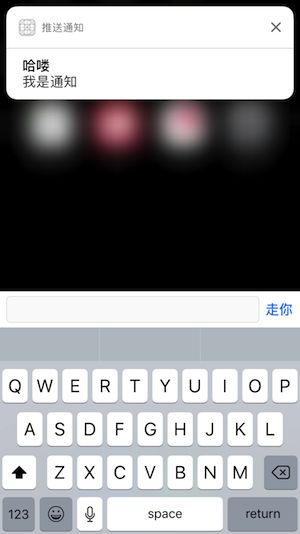
收到通知时,可以下拉通知,在不打开app的情况下,快捷回复
效果图:
- 额外操作按钮以组的形式存放在categories中,在申请通知权限的时候创建并添加
        //创建一组操作行为
        let category : UIMutableUserNotificationCategory = UIMutableUserNotificationCategory()
        //设置行为标识
        category.identifier = "select"
        //添加操作行为1
        let action1 = UIMutableUserNotificationAction()
        action1.identifier = "buli"
        action1.title = "不理"
        //在前台执行
        action1.activationMode = UIUserNotificationActivationMode.foreground
        //是否需要解锁
        action1.isAuthenticationRequired = true
        //添加操作行为2
        let action2 = UIMutableUserNotificationAction()
        action2.identifier = "huifu"
        action2.title = "回复"
        //显示输入框(支持iOS9.0以后)
        if #available(iOS 9.0, *) {
            action2.behavior = UIUserNotificationActionBehavior.textInput
            action2.parameters = [UIUserNotificationTextInputActionButtonTitleKey : "走你"]
        }
        action1.activationMode = UIUserNotificationActivationMode.background
        action1.isAuthenticationRequired = false

        let actions = [action1, action2]
        //default:默认两个action
        category.setActions(actions, for: UIUserNotificationActionContext.default)
        let categories : Set = [category]
        //在申请通知权限的时候,加入已经创建好的操作组
        let type = UIUserNotificationType.alert.rawValue | UIUserNotificationType.badge.rawValue | UIUserNotificationType.sound.rawValue
        let sets = UIUserNotificationSettings(types: UIUserNotificationType(rawValue : type), categories: categories)
        UIApplication.shared.registerUserNotificationSettings(sets)
- 然后在发送通知的时候,绑定category(category.identifier = "select" 是操作的唯一标识))
       let localNot = UILocalNotification()
       localNot.category = "select"
- 点击category中按钮的监听
    //iOS8.0
    func application(_ application: UIApplication, handleActionWithIdentifier identifier: String?, for notification: UILocalNotification, completionHandler: @escaping () -> Void) {
        print(identifier!)
        completionHandler()
    }
    //iOS9.0(可以拿到输入框中输入的内容)
    func application(_ application: UIApplication, handleActionWithIdentifier identifier: String?, for notification: UILocalNotification, withResponseInfo responseInfo: [AnyHashable : Any], completionHandler: @escaping () -> Void) {
        print(identifier!, responseInfo)
        completionHandler()
    }
-
远程通知
远程推送是我们的手机和苹果的服务器建立了长连接
在联网的状态下
能收到苹果服务器发送的推送消息
即使我们的APP是关闭的状态.
调试远程推送需要在真机进行测试
并且安装推送证书
服务端可以用PushMeBaby代替,附赠下载链接:
链接: https://pan.baidu.com/s/1i506gGd 密码: r2fe
下载证书(不再赘述)后开始敲代码:
注册通知:
-
首先打开这个开关:
- 然后是注册代码:
        //iOS8以后
        let type = UIUserNotificationType.alert.rawValue | UIUserNotificationType.badge.rawValue
        let set = UIUserNotificationSettings(types: UIUserNotificationType(rawValue : type), categories: nil)
        //注册通知
        UIApplication.shared.registerUserNotificationSettings(set)
        //注册远程通知获取deviceToken
        UIApplication.shared.registerForRemoteNotifications()
- 注册远程通知后,拿到deviceToken
    //获取成功
    func application(_ application: UIApplication, didRegisterForRemoteNotificationsWithDeviceToken deviceToken: Data) {
        print(deviceToken as NSData)
    }
    //获取失败(没联网,或者没有打开开关)
    func application(_ application: UIApplication, didFailToRegisterForRemoteNotificationsWithError error: Error) {
        print("注册失败")
    }
- deviceToken大概是这样:
-
把下载的证书拖到PushMeBaby中去改好名字如图:
-
运行PushMeBaby,把打印的deviceToken复制进去:
-
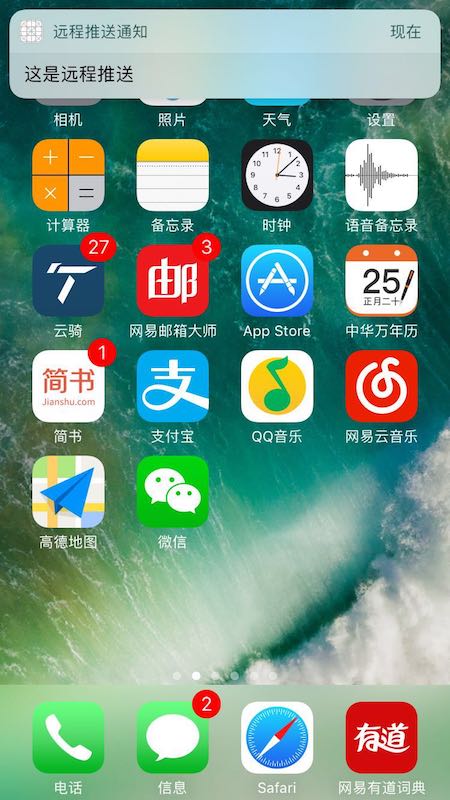
点击push,就能收到推送啦:
远程通知的监听
    //iOS3.0以后的方法,基本不用
    func application(_ application: UIApplication, didReceiveRemoteNotification userInfo: [AnyHashable : Any]) {
        print("收到推送")
    }

    //iOS7.0以后
    //以下情况 收到通知会走这个方法:
    //在前台
    //在后台
    //完全退出时
    func application(_ application: UIApplication, didReceiveRemoteNotification userInfo: [AnyHashable : Any], fetchCompletionHandler completionHandler: @escaping (UIBackgroundFetchResult) -> Void) {
        print("收到推送")
        //系统要求在最后需要调用,进行计时和更新缩略图等操作
        completionHandler(UIBackgroundFetchResult.newData)
    }
- 推送内容的格式
{
    "aps": {
        "alert": "这是远程推送",
        "badge": 1,
        "content-available": "xx"
    }
}
//content-available:如果加上这个字段,在收到通知的那一刻,就会执行这个方法,无论是否点击通知:
  func application(_ application: UIApplication, didReceiveRemoteNotification userInfo: [AnyHashable : Any], fetchCompletionHandler completionHandler: @escaping (UIBackgroundFetchResult) -> Void)
(没有这个字段的话,只有APP在前台的时候,收到通知才会走这个方法,在后台或者挂掉的时候收到通知,只有点击通知才会走这个方法)
对于远程通知添加Category额外操作,和本文前面写的本地通知的方式一样,不再赘述.
本文Demo:
本地通知
远程通知
写的匆忙,若有错误,还请指教
感谢阅读
你的支持是我写作的唯一动力
