参考:
1.appium
2.appium_lib
3.appium-xcuitest-driver
4.真机使用appium参考链接
5.WebDriverAgent
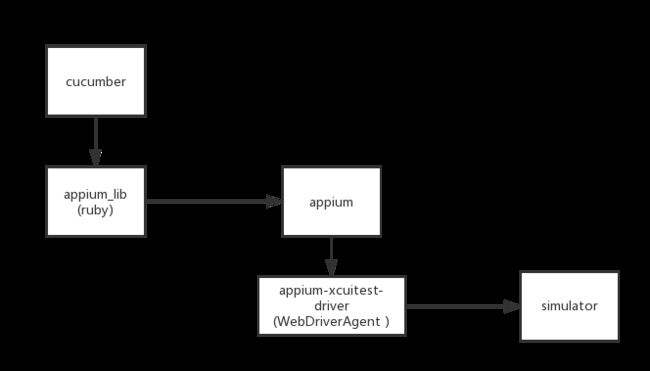
框架结构
1.初始化环境
在目录中添加init.sh(建议根据本身机器权限调整其中命令是否使用sudo执行)和Gemfile。
init.sh
#!/usr/bin/env bash
pwd
/bin/bash --login << EOF
rvm install ruby-2.4.0
rvm use 2.4.0
brew install node # get node.js
brew install carthage
brew install libimobiledevice --HEAD  # install from HEAD to get important updates
brew install ideviceinstaller         # only works for ios 9. for ios 10, see below
sudo npm install -g appium  # get appium
sudo npm install -g ios-deploy --allow-root --unsafe-perm=true #ideviceinstaller doesn't work with iOS 10 yet. So we need to install ios-deploy
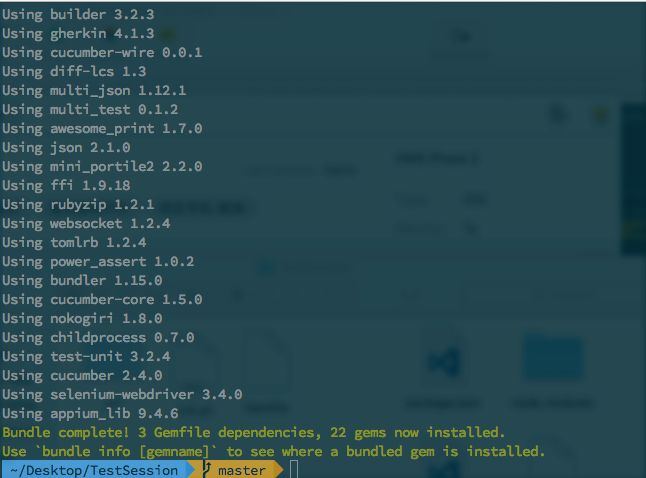
bundle install
mkdir screenshot
EOF
Gemfile
source 'https://gems.ruby-china.org/'
gem 'cucumber'
gem 'appium_lib'
gem 'test-unit'
执行安装环境脚本
bash init.sh
依赖的常用基础软件请自行搜索安装方法,如Homebrew、Ruby、Bundler等。
2.初始化Cucumber
| cucumber | 传统(E) | 传统(C) |
|---|---|---|
| Feature(功能) | test suite | 测试用例集 |
| Scenario(情景) | test case | 测试用例 |
| Given(给定) | setup | 创建测试所需环境 |
| When(当) | test | 触发被测事件 |
| Then(则) | assert | 断言,验证结果 |
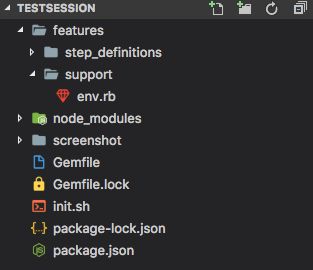
在工作空间中使用Cucumber初始化命令初始化
cucumber --init
在env.rb中配置Cucumber将使用到的库
require 'appium_lib'
require 'cucumber/ast'
require 'test/unit'
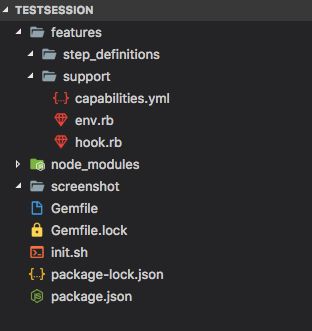
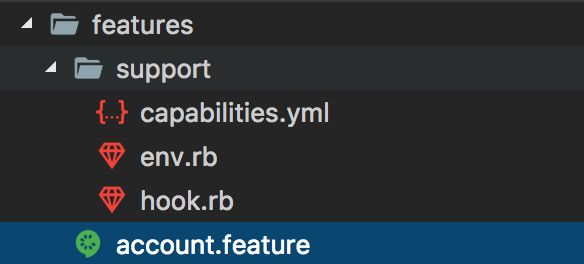
创建hook.rb文件和capabilities.yml文件
hook.rb会自动被Appium_lib调用,无需额外配置。hook.rb作用是使用Appium执行模拟器配置及启动,hook.rb从capabilities.yml文件中读取模拟器配置和需要测试的App的路径。(注意App路径和capabilities.yml中路径一致)
appium统一配置参数表 xcuitest框架特殊参数表
hook.rb
Before do
  initialise_appium
end

def load_config
  capabilities_file_path=File.dirname(__FILE__)+"/capabilities.yml"
  $APP_PATH=YAML.load_file(capabilities_file_path)[:app_path]
  $PLATFORMVERSION=YAML.load_file(capabilities_file_path)[:platform_version]
  $DEVICENAME=YAML.load_file(capabilities_file_path)[:device_name]
  $IMPLICITWAITTIME=YAML.load_file(capabilities_file_path)[:implicit_wait_time]
  $FULLRESET=YAML.load_file(capabilities_file_path)[:full_reset]
  $NORESET=YAML.load_file(capabilities_file_path)[:no_reset]
end

def load_caps
  $DESIRED_CAPS = {
      caps: {
          platformName: 'iOS',
          deviceName: $DEVICENAME,
          language: $LANGUAGE,
          locale: $LOCALE,
          app: $APP_PATH,
          platformVersion: $PLATFORMVERSION,
          fullReset: $FULLRESET,
          noReset: $NORESET
      },
      appium_lib: {
          sauce_username: nil,
          sauce_access_key: nil
      }
  }
end

def initialise_appium
  load_config
  load_caps
  @driver=Appium::Driver.new($DESIRED_CAPS)
  Appium.promote_appium_methods self.class
  @driver.start_driver.manage.timeouts.implicit_wait = $IMPLICITWAITTIME
end

def take_screenshot scenario
  screenshot_path = "./screenshot/#{scenario}.png"
  screenshot screenshot_path
end

After do |scenario|
  if scenario.failed?
    take_screenshot scenario.name
  end

  @driver.driver_quit

end
capabilities.yml
:app_path: './GossipGeek.app'
:platform_version: "10.3"
:device_name: 'iPhone 6'
:implicit_wait_time: 3 # seconds
:full_reset: false
#CI agent不能重置模拟器,所以会造成数据依赖
:no_reset: false
3.添加App并编写用例
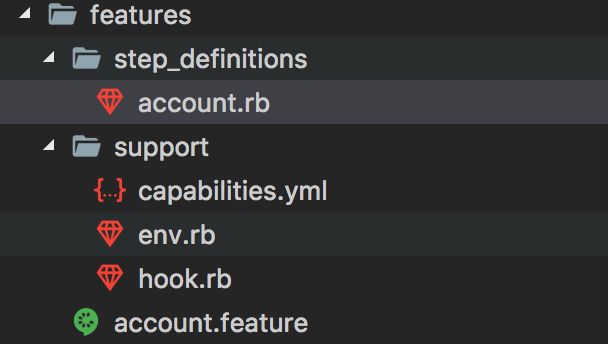
在features文件夹中新建account.feature,使用Cucumber语言去实现Case
# language: zh-CN
功能: 我在登录页面"登录"进行登录操作

    @e2e
    场景: 登录
        假如 我进入"登录"页面
        当 我输入邮箱"[email protected]"和密码"Aa1Aa11"
        并且 我点击"登录"
        并且 等待"2"秒
        那么 我应该看到"欢迎回来"
在step_definitions文件夹中新建account.rb并实现对feature文件中的cucumber语句解析
当(/^我进入"([^"]*)"页面$/) do |text|
end

当(/^我输入邮箱"([^"]*)"和密码"([^"]*)"$/) do |email , password|
end

当(/^我点击"([^"]*)"$/) do |element_id|
end

当(/^等待"([^"]*)"秒$/) do |text|
end

当(/^我应该看到"([^"]*)"$/) do |text|
end
在解析后的方法中,使用appium_lib和test/unit中的方法获取元素,操作元素,并对结果进行断言(appium_lib的使用方式和语句参考appium_lib_ios_docs)
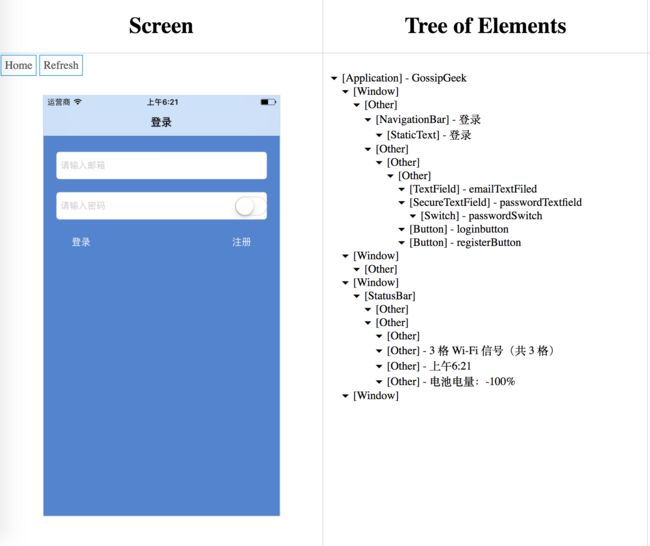
参考附录,如何使用WebDriverAgent查看accessibility_id从而定位元素
当(/^我进入"([^"]*)"页面$/) do |text|
    assert(driver.get_source.include?(text))
end

当(/^我输入邮箱"([^"]*)"和密码"([^"]*)"$/) do |email , password|
    element = find_element accessibility_id: "emailTextFiled"
    element.clear
    element.send_keys email

    element = find_element accessibility_id: "passwordTextfield"
    element.clear
    element.send_keys password
end

当(/^我点击"([^"]*)"$/) do |element_id|
    if element_id == "登录"
        element_id = "loginbutton"
    end
    element = find_element accessibility_id: element_id
    element.click
end

当(/^等待"([^"]*)"秒$/) do |text|
    sleep text.to_i
end

当(/^我应该看到"([^"]*)"$/) do |text|
    assert(driver.get_source.include?(text))
end
上边的实现重复并且可复用性很小,需要重构。我们新建pages文件夹,并在其中新建general_page.rb和constants.rb文件,general_page.rb是对我们实现逻辑的重构,constants.rb文件是对cucumber中的引号中的元素描述和 accessibility id进行对应的map。
general_page.rb
module GeneralPage
  include Test::Unit::Assertions

  def should_see text
    assert(driver.get_source.include?(text))
  end

  def load_element element_id
    Constants::ELEMENTS.include?(element_id) ? @element_id=Constants::ELEMENTS.fetch(element_id) : @element_id=element
    @element = find_element accessibility_id: @element_id
  end

  def fill_element element_id, text
    load_element element_id
    @element.clear
    @element.send_keys text
  end

  def click_element element_id
    load_element element_id
    @element.click
  end

  def wait_second text
    sleep text.to_i
  end
end
constants.rb
module Constants

  ELEMENTS={
      "注册" => "registerButton",
      "邮箱" => "emailTextFiled",
      "密码" => "passwordTextfield",
      "登录" => "loginbutton",
      "显示密码" => "passwordSwitch",
  }

end
由于我们新建的pages并不在cucumber的管理下,我们需要在evn.rb手动引用general_page.rb文件
require 'appium_lib'
require 'cucumber/ast'
require 'test/unit'

#require rb files
require File.dirname(__FILE__)+'/../pages/general_page.rb'

#include
include GeneralPage
更改account.rb中的实现,使其调用general_page.rb中重构后的方法
当(/^我进入"([^"]*)"页面$/) do |text|
    GeneralPage.should_see text
end

当(/^我输入邮箱"([^"]*)"和密码"([^"]*)"$/) do |email , password|
    GeneralPage.fill_element("邮箱",email)
    GeneralPage.fill_element("密码",password)
end

当(/^我点击"([^"]*)"$/) do |element_id|
    GeneralPage.click_element element_id
end

当(/^等待"([^"]*)"秒$/) do |text|
    GeneralPage.wait_second text
end

当(/^我应该看到"([^"]*)"$/) do |text|
    GeneralPage.should_see text
end
4.添加Appium启动和Case运行脚本
start_server.sh
appium & # start appium
run_test.sh
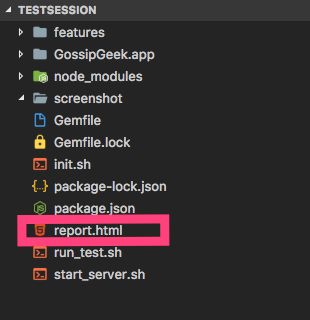
cucumber --tags=@e2e -f html -o report.html
5.执行Case,输出Report
先使用脚本运行Appium
bash start_server.sh
另起终端运行脚本,执行Case,并输出Report
bash run_test.sh
附:如何使用WebDriverAgent查看现有app的accessibility id
clone WebDriverAgent到本地
进入WebDriverAgent的目录后,运行编译构建WebDriverAgent
./Scripts/bootstrap.sh
使用xcodebuild运行WebDriverAgent(注意修改命令中WebDriverAgent的路径和模拟器的id)
xcodebuild build-for-testing test-without-building -project ~/Documents/Github_Projects/WebDriverAgent/WebDriverAgent.xcodeproj -scheme WebDriverAgentRunner -destination id=50CF4B72-EEA5-40F2-8693-168A1C481E25 -configuration Debug IPHONEOS_DEPLOYMENT_TARGET=10.3
打开网页http://localhost:8100/inspector
