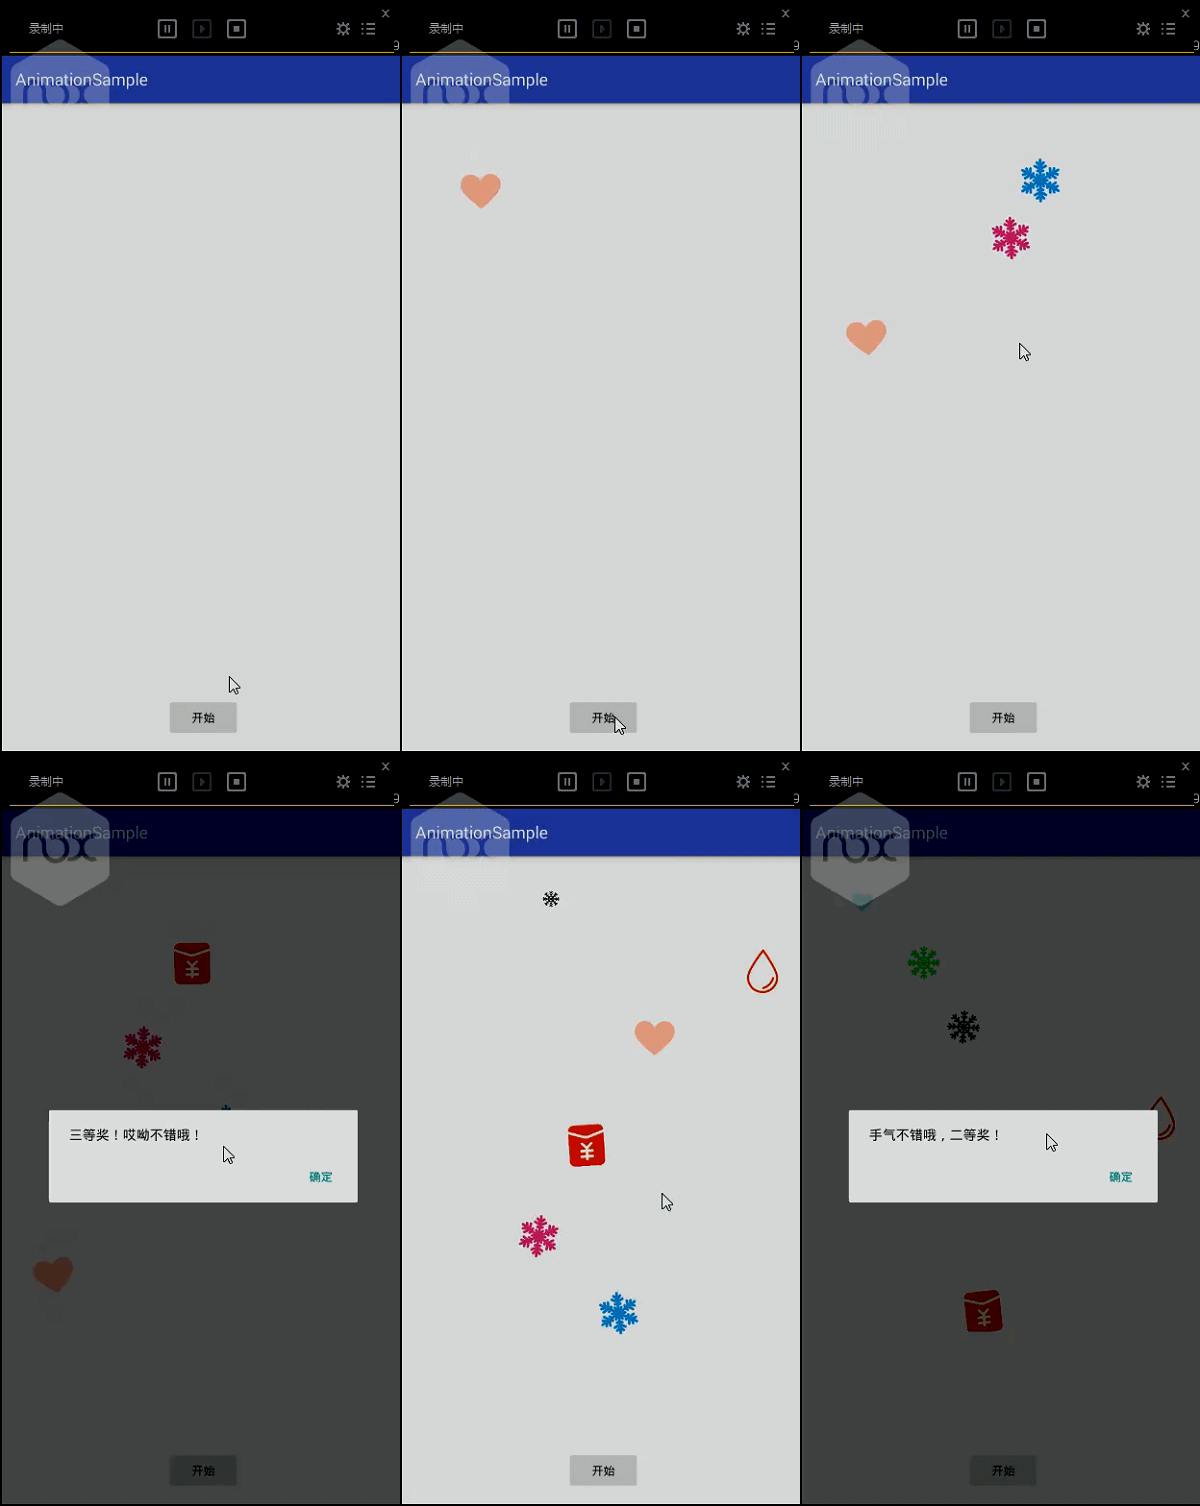
效果图如下:
这个简单动画的主要思路: 将多个 红包View 通过 属性动画 从屏幕顶端 飘落到 屏幕底部。只不过在飘落的动画过程中,加入了一些随机路线 Path。
主要涉及到的知识点:
1.Path 和 PathMeasure : 了解PathMeasure 绘制路线
2.Animation :执行动画
绘制路线代码: 通过 Path.cubicTo 方法
    public Path createPath(View parent,int factor ){
        //主要通过 Path.cubicTo 方法,生成一个贝塞尔曲线
        // cubicTo(float x1, float y1, float x2, float y2,float x3, float y3)
        // 我们需要三个坐标点
        int x = mRandom.nextInt(mConfig.initX);
        int x1 = mRandom.nextInt(mConfig.xRand);
        x1 = mRandom.nextBoolean() ? x1 + x : Math.abs(x - x1);
        int x2 = mRandom.nextInt(mConfig.xRand);
        x2 = mRandom.nextBoolean() ? x2 + x1 : Math.abs(x1 - x2);
        x1 = x1 + (mRandom.nextBoolean() ? 0 : mConfig.xPointFactor);
        x2 = x2 + ( mRandom.nextBoolean() ? mConfig.xPointFactor:0);
        int y = mConfig.initY;
        int y2 = mCounter.intValue() * 15 + mConfig.animLength * factor + mRandom.nextInt(mConfig.animLengthRand);
        factor = y2 / mConfig.bezierFactor;

        int y3 = parent.getHeight();
        y2 = y2/2;
        Path p = new Path();
        p.moveTo(x,y);
        //贝塞尔曲线
        p.cubicTo(x,y ,x1,y2 - factor , x1,y2);
        p.moveTo(x1,y2);
        p.cubicTo(x1,y2 + factor,x2,y3 - factor,x2,y3);
        return p;
    }
执行动画: 路径长度 PathMeasure.getLength() 与 坐标点 PathMeasure.getPosTan()
    static class FloatAnimation extends Animation{

        private PathMeasure mPm; //计算路径距离
        private View mChildView;
        private float mDistance;
        private float mRotation;

        public FloatAnimation(Path path, float rotation, View parent, View child){
            //路劲计算
            mPm = new PathMeasure(path,false);
            //获取漂移路径的长度
            mDistance = mPm.getLength();
            mChildView = child;
            mRotation = rotation;
            parent.setLayerType(View.LAYER_TYPE_HARDWARE,null);
        }

        @Override
        protected void applyTransformation(float interpolatedTime, Transformation t) {
//            第一种方式 View动画,不可点击
//            Matrix matrix = t.getMatrix();
//            mPm.getMatrix(mDistance * interpolatedTime,matrix,PathMeasure.POSITION_MATRIX_FLAG);

            // 第二种方式 ,属性动画,修改View的坐标,才能点击
            float[] pos = {0,0};
            float[] tan = {0,0};
            //通过getPosTan()方法,获得当前 mChildView 的坐标
            mPm.getPosTan(mDistance * interpolatedTime,pos,tan);
            Log.d("FallingPathAnimation","pos = ("+pos[0] +","+pos[1]+")");
             //通过改变 mChildView 的x,y坐标,才能点击
            mChildView.setX(pos[0]);
            mChildView.setY(pos[1]);

            mChildView.setRotation(mRotation * interpolatedTime);
            //缩放
            float scale = 1F;
            if (3000.0F * interpolatedTime < 200.0F) {
                scale = scale(interpolatedTime, 0.0D, 0.06666667014360428D, 0.20000000298023224D, 1.100000023841858D);
            } else if (3000.0F * interpolatedTime < 300.0F) {
                scale = scale(interpolatedTime, 0.06666667014360428D, 0.10000000149011612D, 1.100000023841858D, 1.0D);
            }
            mChildView.setScaleX(scale);
            mChildView.setScaleY(scale);
            //渐变
//            t.setAlpha(1.0F - interpolatedTime);
        }
    }
“红包雨”主要就是上面两个步骤,很简单,上面已经注释的很清楚了。主要还是对 Path 与 PathMeasure 类的 熟悉和使用。
源码在这里 : https://github.com/LuoboDcom/ApiDemo
欢迎大家留言和展示更多酷炫动画,我在这里做个抛砖引玉的作用,哈哈!
