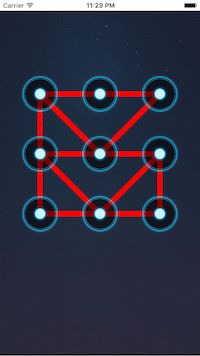
我们已经学习完了Quartz2D的一些基本的用法,在实际开发过程中,经常使用Quartz2D,可以帮助我们少使用苹果自带的控件,直接画图到上下文,对系统的性能是一个非常好的优化方式。Quartz2D的功能强大,绝逼不是画线,绘制图片那么easy,今天讲一下他在实际项目中的应用,顺便将思路理清楚,方便大家看涂鸦板demo,还有手势解锁
文章中的几个demo
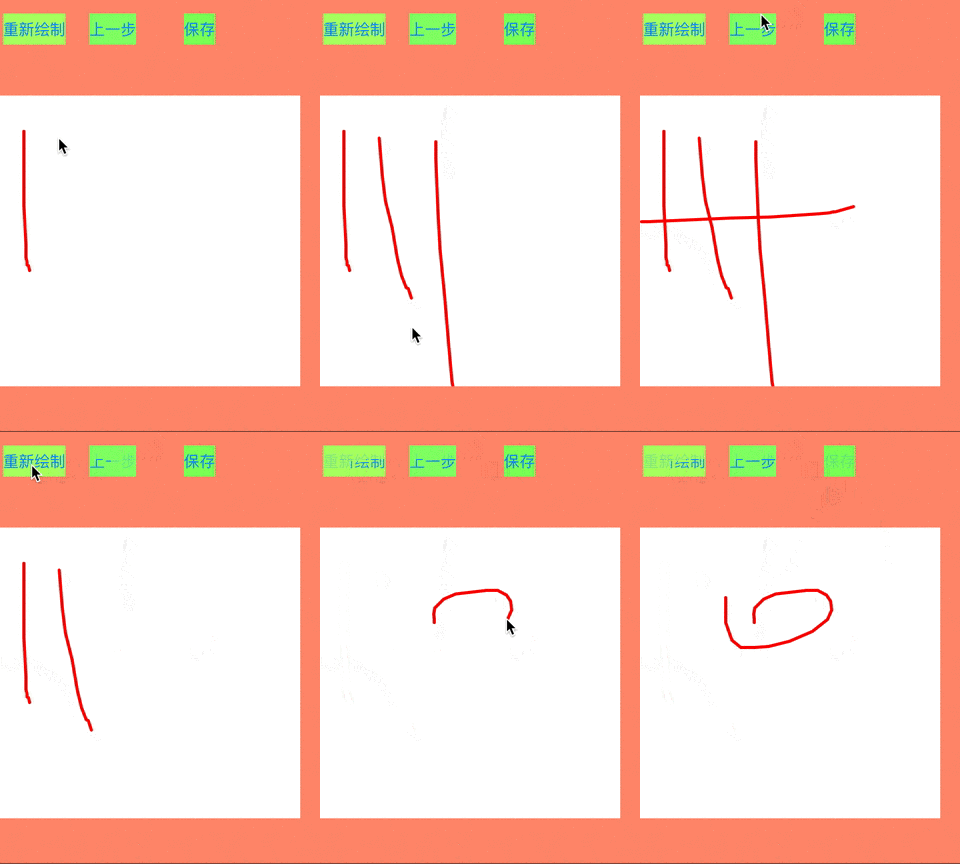
- 1.使用图形上下文制作涂鸦板
- 2.使用贝塞尔路径制作涂鸦板
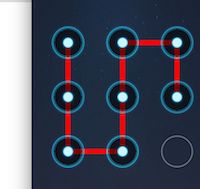
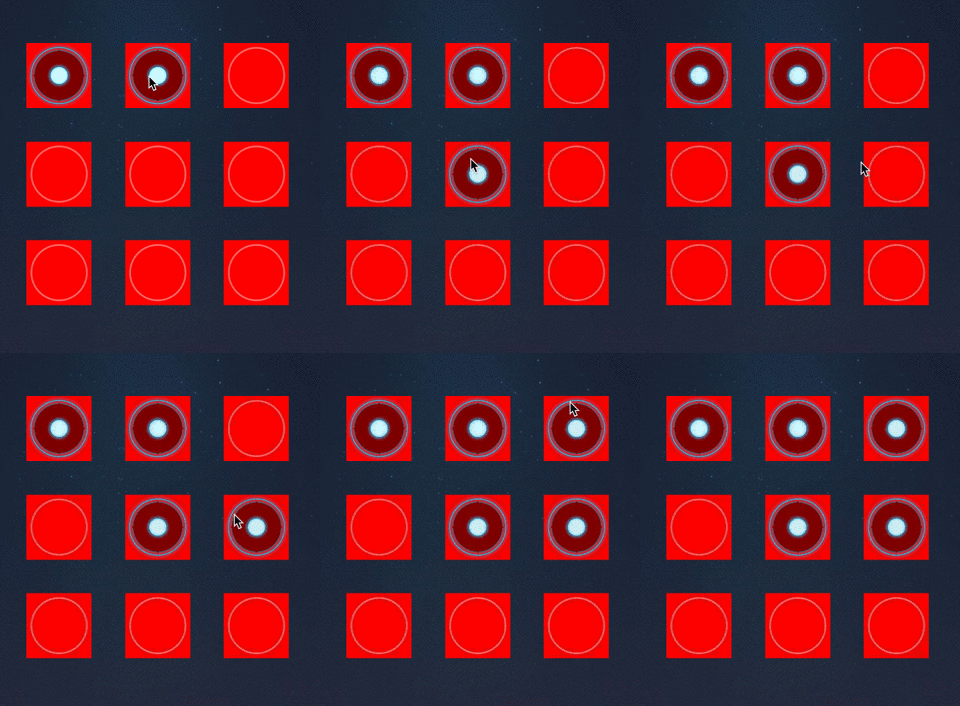
- 3.手势解锁
下面详细的介绍一下项目的思路
一.使用图形上下文制作涂鸦板
分析
1.涂鸦板实际上就是绘制很多的线条
2.保存线条,使用可变数组
3.使用上下文绘制图片,使用drawRect方法
4.和屏幕交互,应该使用touchesBegin方法
代码分析
1.自定义一个DBPainterView
2.在view中生成一个可变数组作为变量,懒加载处理,可以供程序使用
    //MARK: - 懒加载属性
    //用于盛放所有单个路径的数组
    private lazy var pointArr:NSMutableArray = {
        return NSMutableArray()
    }()
3.实现touchesBegin,touchesMoved,touchesEnd方法
    //MARK: - 重写touch三个方法
    //touchBegin
    override func touchesBegan(touches: Set, withEvent event: UIEvent?) {
        let touch = touches.first
        let startPoint = touch?.locationInView(touch?.view)
        let linePathArr = NSMutableArray()

        linePathArr.addObject(NSValue.init(CGPoint: startPoint!))
        pointArr.addObject(linePathArr)

        setNeedsDisplay()
    }

    //touchMoved
    override func touchesMoved(touches: Set, withEvent event: UIEvent?) {
        let touch = touches.first
        let startPoint = touch?.locationInView(touch?.view)
        let lastLineArr = pointArr.lastObject
        lastLineArr!.addObject(NSValue.init(CGPoint: startPoint!))
        setNeedsDisplay()
    }

    //touchEnd
    override func touchesEnded(touches: Set, withEvent event: UIEvent?) {
        let touch = touches.first
        let startPoint = touch?.locationInView(touch?.view)
        let lastLineArr = pointArr.lastObject
        lastLineArr!.addObject(NSValue.init(CGPoint: startPoint!))
        setNeedsDisplay()
    }
代码分析,
3.1.touchesBegin就是开始绘制,现在没有拿到路径的具体的点,所以我们应该给每一个路劲用一个小数组保存所有点的数组** linePathArr(保存每一根line的数组),每一次调用都应该是创建一个新的路径(新的linePathArr),然后加到保存所有路径的数组中( pointArr保存了所有line的数组),然后调用setNeedsDisplay方法,绘制路径
3.2.touchesMoved方法是手指在屏幕移动的时候调用的,频率最高,就是一直在添加point,说白了,就是给最新添加的那个路径添加点,所以应当找到数组中最后一个路径,然后给这个路径添加point,let lastLineArr = pointArr.lastObject,lastLineArr!.addObject(NSValue.init(CGPoint: startPoint!))
3.3.touchEnd方法和2**的事情是一样的,所以可以提炼一下代码,我就不写了
4.绘制图片 drawRect
    override func drawRect(rect: CGRect) {
        let ctx = UIGraphicsGetCurrentContext()
        for index in 0 ..< pointArr.count
        {
            //获取单根线
            let linePathArr = pointArr.objectAtIndex(index)
              for j in 0 ..< linePathArr.count
              {
                let point = linePathArr.objectAtIndex(j).CGPointValue()
                if j == 0 {
                    CGContextMoveToPoint(ctx, point.x, point.y)
                }else
                {
                    CGContextAddLineToPoint(ctx, point.x, point.y)
                }
            }
         }
        //设置上下文的属性
        CGContextSetLineWidth(ctx, 3)
        UIColor.redColor().set()
        CGContextSetLineCap(ctx, CGLineCap.Round)
        //渲染
        CGContextStrokePath(ctx)
    }

}
4.1 首先遍历大数组A,获取每一条线(所有点)的数组B,遍历B中所有的点,但是B中的第一个b[0]应该是调用CGContextMoveToPoint,b[其他]应当调用CGContextAddLineToPoint方法,
4.2.可以设置一下图形上下文的属性,最后渲染就好了.
4.3 可以设置好多种颜色,使用图形上下文栈就可以实现
5.DBPainterView 对外实现的“上一步”,"清空",“保存”功能
//删除
    func clear(){
       pointArr.removeAllObjects()
        setNeedsDisplay()
    }
    //上一步
    func preview()
    {
        pointArr.removeLastObject()
        setNeedsDisplay()
    }
    //保存到本地
    func saveToAbum() {
        //保存图片的事件
        UIGraphicsBeginImageContextWithOptions(self.frame.size, false, 0.0)
        let ctx = UIGraphicsGetCurrentContext()
       self.layer.renderInContext(ctx!)
        //获取图片
        let image = UIGraphicsGetImageFromCurrentImageContext()
        //结束位图上下文
        UIGraphicsEndImageContext()
        UIImageWriteToSavedPhotosAlbum(image, nil, nil, nil)
    }
代码太简单,就不解释了哈
二.使用贝塞尔路径制作涂鸦板
刚才使用了图形上下文绘制路径,感觉还行,但是可以简化,刚才说的将一个路径的所有点放到路径的数组中,然后根据点来绘制,可以理解,但是会很麻烦,因为底层就是通过CGContextPathRef绘制路径的,因为CGContextPathRef是C语言,大数组不能添加它,所以我们放弃,然后选择贝塞尔路径,他是oc中对象,非常适合制作涂鸦板
     //绘制一条路径的写法,非常的简单
        let path = UIBezierPath()
        path.moveToPoint(CGPoint.init(x: 9, y: 9))
        path.addLineToPoint(CGPoint.init(x: 40, y: 50))
        path.stroke()
使用贝塞尔路径制作涂鸦板的步骤(和图形上下文基本一致)
- 1.懒加载一个用来橙装所有路径的数组pathArr
- 2.touchesBegin的时候,生成一个路径,调用moveToPoint方法,添加起点,将path保存到数组中
- 3.更改线宽和更改线的颜色,要个自定义的view设置lineWidth,和lineColor这个属性,最后要去给path设置这两个属性
 override func touchesBegan(touches: Set, withEvent event: UIEvent?) {
        let touch = touches.first
        let startPoint = touch?.locationInView(touch?.view)
        //1.创建路径
        let path = UIBezierPath()
       //2.设置起点
        path.moveToPoint(startPoint!)
        //3.将path,添加到pathArr上
        pathArr.addObject(path)
        //4.绘图
        setNeedsDisplay()
    }
- 3.touchesMoved和touchesEnd方法功能一致,就合二为一了,就是获取大数组中最后一个路径,然后调用
addLineToPoint方法
    //touchMoved
    override func touchesMoved(touches: Set, withEvent event: UIEvent?) {
        addPointToPath(touches)
    }

    //touchEnd
    override func touchesEnded(touches: Set, withEvent event: UIEvent?) {
        addPointToPath(touches)
    }

    //touchMoved和touchEnd统一的代码
    private func addPointToPath(touches: Set){
        let touch = touches.first
        let movePoint = touch?.locationInView(touch?.view)
        //获取最后一个path
        let path = pathArr.lastObject as! UIBezierPath;
        path.addLineToPoint(movePoint!)
        setNeedsDisplay()
    }
4.绘制路径
    override func drawRect(rect: CGRect) {
     //绘制线条
        for index in 0 ..< pathArr.count
        {
            let path = pathArr[index] as! UIBezierPath
             path.stroke()
        }
    }
5.添加线宽和线颜色的属性
  //设置一个变量,用来存储线宽
    var lineWidth:CGFloat = 2;
    //设置一个变脸,用来存储线颜色
    var lineColor:UIColor = UIColor.blackColor();
5.1 我们要将颜色和宽的的属性使用到以后的线上,不能影响到过去的,所以,应该在生成一个path的时候,直接设置他的这两个属性,因为path中没有lineColor这个属性,所以自定义一个DBBezierPath
class DBBezierPath: UIBezierPath {
    var lineColor:UIColor?
}
5.2 重新修改一下touchesBegin方法
//touchBegin
    override func touchesBegan(touches: Set, withEvent event: UIEvent?) {
        let touch = touches.first
        let startPoint = touch?.locationInView(touch?.view)
        //1.创建路径
        let path = DBBezierPath()
        path.lineWidth = lineWidth
        //2.设置线条的颜色
        path.lineColor = lineColor
       //2.设置起点
        path.moveToPoint(startPoint!)
        //3.将path,添加到pathArr上
        pathArr.addObject(path)
        //4.绘图
        setNeedsDisplay()
    }
5.3 在渲染的时候,我们要将自定义的lineColor取出来,渲染
  override func drawRect(rect: CGRect) {
     //绘制线条
        for index in 0 ..< pathArr.count
        {
            let path = pathArr[index] as! DBBezierPath
             path.lineColor!.set()
             path.stroke()
        }
    }
5.4 这样就可以制作出彩色的画板了,而且其他保存,上一步等功能都可以正常使用
使用了贝塞尔路径,远离了两个数组,运行和理解起来超级简单?
三.手势解锁
思路和注意点
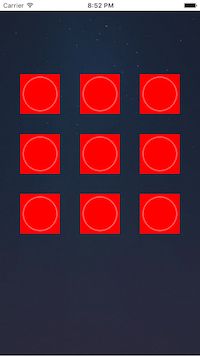
- 1.创建基本的九宫格样式UI
- 2.抽取方法类和自定义一个button(注意
btn.userInteractionEnabled = false)- 3.提出工具方法
3.1 获取当前的触摸点
3.2 判断当前点是不是在btn中- 4.保存选中的所有按钮
- 5.通过选中的按钮连线
5.1 防止数组中多次添加同一个button- 6.使用touchesEnd方法清空数组
6.1 给drawRect方法添加判空的条件
6.2 重新绘制状态
6.3 使用makeObjectsSelect方法让所有的button的选中状态为NO- 7.绘制最后一个按钮和手指移动的地点的连线
7.1 在touchesMoved方法中保存手指的所在的point
7.2 在drawRect方法中链接最后一个按钮和point
7.3 设置bezierPath的基本属性
7.4 解决刚刚点击第一个按钮,但是连线到CGPointZore的bug(在TouchBegin中清空,在drawRect判断)- 8.减小触摸button的响应范围
- 9.拼接用户的触摸路径
- 10.添加代理方法,让外界知道用户的触摸路径(给代理添加IBOut)
- 11.修改连线的具体颜色
代码讲解分析
1.创建基本的九宫格样式UI
- 1.1 自定义一个GULockView,然后使用经典九宫格算法实现
 //设置初始化函数,创建9个按钮
    required init?(coder aDecoder: NSCoder) {
        super.init(coder: aDecoder)
        setUpBsicUI()
    }

    //初始化函数
    private func setUpBsicUI()
    {
        //创建九个按钮
        for index in 0 ..< 9
        {
            let btn = GUButton.init(type: UIButtonType.Custom);
            addSubview(btn)
            btn.tag = index
            btn.addTarget(self, action: "btnClick:", forControlEvents: UIControlEvents.TouchUpInside)
        }
    }
- 1.2 布局UI
    //设置九个按钮的位置
    override func layoutSubviews() {
        super.layoutSubviews()
        //经典的九宫格算法
        let totalColume = 3
        let bWidth:CGFloat = 74
        let bHeight:CGFloat = bWidth
        let margin = (self.frame.width - bWidth * CGFloat(totalColume))/CGFloat(totalColume+1)
        //自己的高度是bHeight*3

        for index in 0 ..< self.subviews.count
        {
        let currentRow = index/totalColume
        let currentColumn = index%totalColume
        let bX = margin + (CGFloat(currentColumn) * (bWidth+margin))
        let bY = CGFloat(currentRow) * (bHeight+margin)
        let btn = self.subviews[index]
        btn.frame = CGRectMake(bX, bY, bWidth, bHeight)

        }
    }
2.抽取方法类和自定义一个button
- 2.1 自定义一个GUButton,设置内部的图片等样式,
        setImage(UIImage.init(named: "gesture_node_normal"), forState: UIControlState.Normal)
        setImage(UIImage.init(named: "gesture_node_highlighted"), forState: UIControlState.Selected)
        setImage(UIImage.init(named: "gesture_node_disable"), forState: UIControlState.Disabled)
        contentMode = UIViewContentMode.Center
        userInteractionEnabled = false
- 2.2
btn.userInteractionEnabled = false一定要写
这个涉及到了时间传递,我们马上要去实现触摸的三个方法,如果手势路过btn,恰巧userInteractionEnabled = ture,那么手势直接让btn截获,那么GULockView获取不到手势,造成了问题,所以一定要设置为no,(如果就是不想设置为no,其实也可以在自定义的CGButton中实现touches三个方法,调用super.touches三个方法往上传递,不推荐)
3.提出工具方法,设置btn被选中的条件
3.1 获取当前的触摸点
    /**
     获取是否当前触摸点的坐标
     :returns: 所在的点的坐标
     */
    private func pointWithTouches(touches: Set) -> CGPoint?
    {
        let touch = touches.first
        let locPoint = touch?.locationInView(touch?.view)
        return locPoint
    }
3.2 判断当前点是不是在btn中
    /**
     判断是否选中的点的依据
     :param: point 当前点
     :returns: 所在的按钮,可能没有
     */
    private func buttonWithPoint(point:CGPoint) -> UIButton?
    {
        //遍历数组,看看是不是在9个按钮的里面
        for index in 0 ..< self.subviews.count
        {
            let b = self.subviews[index] as! UIButton
           let isIn = CGRectContainsPoint(b.frame, point)
            if isIn {
                return b
            }
        }
        return nil
    }
3.2 设置btn被选中的状态
   //touchesMoved 和 touchesBegin此刻的内容都是这个
    override func touchesMoved(touches: Set,
                               withEvent event: UIEvent?) {
        let point = pointWithTouches(touches)
        let locBtn = buttonWithPoint(point!)
        if (locBtn != nil)  {
            locBtn?.selected = true
        }

        setNeedsDisplay()
    }
4.保存选中的所有按钮
可以通过一个数组来保存所有的按钮
    //MARK: - 懒加载数组
    private lazy var btns:NSMutableArray = NSMutableArray()
在touchesBegan和touchesMoved方法中添加所选择的按钮
   if (locBtn != nil) {
            locBtn?.selected = true
            //添加到数组中
           btns.addObject(locBtn!)
        }
5.通过选中的按钮连线
5.1 防止数组中多次添加同一个button
解决方法
//在判断的时候,添加一个条件,是否selected == false
  if (locBtn != nil && locBtn?.selected == false) {
            locBtn?.selected = true
            //添加到数组中
           btns.addObject(locBtn!)
        }
6.使用touchesEnd方法清空数组
   //手势释放时,要做的事情
   //1.应当清空数组,
   //2.应当将所选中的按钮全部设置为selected == false
   //3.重新绘制

           //遍历所有的数组,是他的select == false
        for index in 0 ..< btns.count
        {
           let btn = btns[index] as! UIButton
            btn.selected = false
        }
        btns.removeAllObjects()
        setNeedsDisplay()
6.1 给drawRect方法添加判空的条件
//算是优化吧,已经入drawRect方法,首先去判断一下是不是空的
        if btns.count == 0 {
            return
        }
6.2 重新绘制状态
    override func drawRect(rect: CGRect) {

        if btns.count == 0 {
            return
        }
        //使用UIBezierPath绘制路径
        let bezierPath = UIBezierPath()
       for index in 0 ..< btns.count
       {
                //获取每一个点
                let btn = btns[index]
                if index == 0 {
                    bezierPath.moveToPoint(btn.center)
                }else{
                   bezierPath.addLineToPoint(btn.center)
                }
        }
        bezierPath.lineWidth = 10
        bezierPath.lineJoinStyle = CGLineJoin.Round
        UIColor.blueColor().set()
        bezierPath.stroke()
    }
7.绘制最后一个按钮和手指移动的地点的连线
7.1 在touchesMoved方法中保存手指的所在的point
        /// 当前触摸点,默认是零
    private var currentPoint:CGPoint = CGPointZero
7.2 在drawRect方法中链接最后一个按钮和point
//drawRect方法中,可以这样实现
          bezierPath.addLineToPoint(currentPoint)
7.3 设置bezierPath的基本属性
        bezierPath.lineWidth = 10
        bezierPath.lineJoinStyle = CGLineJoin.Round
        UIColor.blueColor().set()
7.4 解决刚刚点击第一个按钮,但是连线到CGPointZore的bug(在TouchBegin中清空,在drawRect判断)
//添加最后一个线的和最后一个
        if (CGPointEqualToPoint(CGPointZero,currentPoint) == false) {
            bezierPath.addLineToPoint(currentPoint)
        }
8.减小触摸button的响应范围
现在的项目,你的鼠标刚刚到一个btn的边缘,就已经链接了线,这样的体验不好,我们想去设定当手势到了btn的圆心才连线(减小链接线的响应范围)
    /**
     判断是否选中的点的依据
     :param: point 当前点
     :returns: 所在的按钮,可能没有
     */
    private func buttonWithPoint(point:CGPoint) -> UIButton?
    {
        //遍历数组,看看是不是在9个按钮的里面
        for index in 0 ..< self.subviews.count
        {
            let b = self.subviews[index] as! UIButton
            let wh:CGFloat = 24
            let frameX = b.center.x - wh * 0.5
            let frameY = b.center.y - wh * 0.5

            let isIn = CGRectContainsPoint(CGRectMake(frameX, frameY, wh, wh), point)
//            let isIn = CGRectContainsPoint(b.frame, point)
            if isIn {
                return b
            }
        }
        return nil
    }
9.拼接用户的触摸路径
    //拼接字符串,保存用户的触摸路径
    private func appendCode()
    {

        let code = NSMutableString()
        for var btn in btns {
            code.appendString("\(btn.tag)")
        }
        print(code)
    }
10.添加代理方法,让外界知道用户的触摸路径(给代理添加IBOut)
protocol GULockViewDelegate: NSObjectProtocol{
  //获取用户的手势密码
  func lockViewWithUserCode(lockView:GULockView,code:String)
}
添加属性
    //代理
    weak var  delegate:GULockViewDelegate?
11.修改连线的具体颜色
你随意吧~
