手把手教你做之Linux上安装Oracle11g
这是我第一次安装时的过程,及遇到问题的解决办法,在此记录,有不妥之处,多多交流。
因为高稳定性及高定制低系统消耗等原因,我们希望在Linux上安装Oracle数据库,本文旨在能让任何人看完之后都能在linux上安装Oracle。
安装前准备
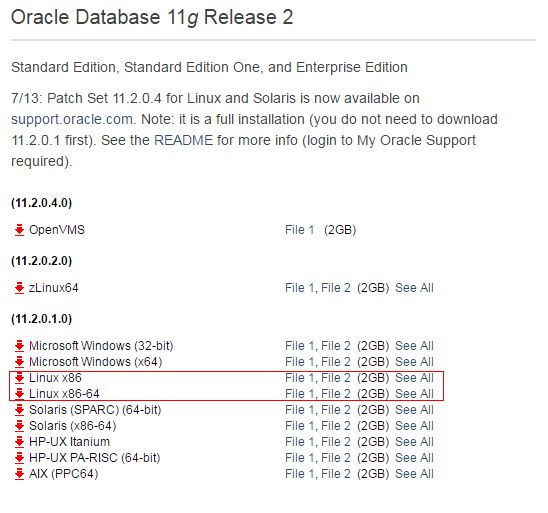
Oracle下载地址
oracle下载地址
根据需求下载对应的安装包版本。X86是32位操作系统用的安装包,x86-64是64位操作系统用的安装包。
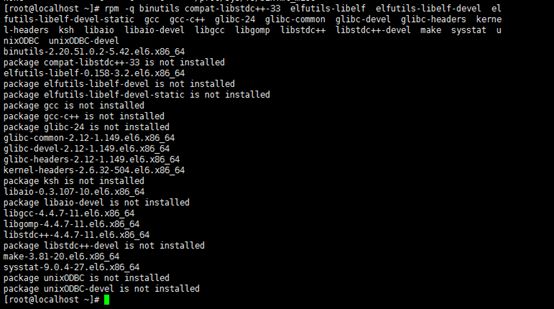
在系统上检查软件依赖的安装
rpm -q binutils compat-libstdc++-33 elfutils-libelf elfutils-libelf-devel elfutils-libelf-devel-static gcc gcc-c++ glibc glibc-common glibc-devel glibc-headers kernel-headers ksh libaio libaio-devel libgcc libgomp libstdc++ libstdc++-devel make sysstat unixODBC unixODBC-devel
提示 is not installed 的用yum安装
例如:
yum -y install compat-libstdc++-33 yum -y install elfutils-libelf-devel
提示:要提前配置好yum源。
创建oracle用户
密码为oracle,密码输入两次。
/usr/sbin/groupadd oinstall /usr/sbin/groupadd dba /usr/sbin/useradd -g oinstall -G dba oracle passwd oracle
系统提示:
Changing password for user oracle.
New password:
BAD PASSWORD: it is based on a dictionary word
BAD PASSWORD: is too simple
Retype new password:
passwd: all authentication tokens updated successfully.
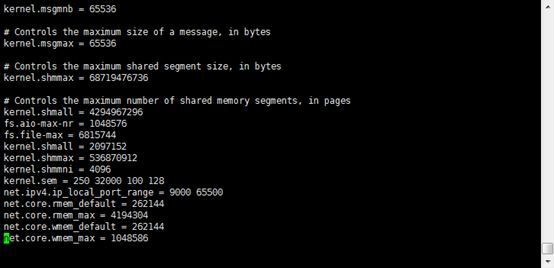
修改内核参数
vi /etc/sysctl.conf
文本末尾加入以下内容:
fs.aio-max-nr = 1048576
fs.file-max = 6815744
kernel.shmall = 2097152
kernel.shmmax = 536870912
kernel.shmmni = 4096
kernel.sem = 250 32000 100 128
net.ipv4.ip_local_port_range = 9000 65500
net.core.rmem_default = 262144
net.core.rmem_max = 4194304
net.core.wmem_default = 262144
net.core.wmem_max = 1048586
vi中编辑的方法
按i进入输入模式,esc退出 :wq退出编辑
为使上述配置生效而不重启系统,执行如下命令
/sbin/sysctl –p
修改用户限制
vi /etc/security/limits.conf
文本末尾加入以下内容:
oracle soft nproc 2047
oracle hard nproc 16384
oracle soft nofile 1024
oracle hard nofile 65536
修改用户验证选项
vi /etc/pam.d/login
文本末尾加入以下内容:
session required pam_limits.so
修改用户配置文件
vi /etc/profile
文本末尾加入以下内容:
if [ $USER = "oracle" ]; then
if [ $SHELL = "/bin/ksh" ]; then
ulimit -p 16384
ulimit -n 65536
else
ulimit -u 16384 -n 65536
fi
fi
安装目录配置
切换到root 用户,执行以下命令。
mkdir -p oraInventory chown -R oracle:oinstall oraInventory chmod -R 775 oraInventory
配置oracle用户的环境变量
切换到oracle用户
然后直接输入
vi .bash_profile
文本末尾加入以下内容:
export ORACLE_BASE=/u01
export ORACLE_HOME=$ORACLE_BASE/oracle
export ORACLE_SID=oracleSid
export PATH=$ORACLE_HOME/bin:$PATH:$HOME/bin
之后执行
source .bash_profile
Oracle安装
先将安装包利用ftp传到目录下,一定要用oracle用户传!
然后进入目录解压文件
unzip linux.x64_11gR2_database_1of2.zip unzip linux.x64_11gR2_database_2of2.zip
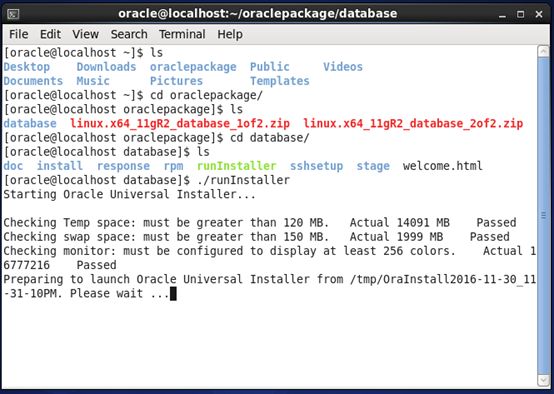
因为oracle11g的安装有图形界面,而我暂时没法用远程命令显示图形。
所以在虚拟机本机上运行如下命令
[oracle@localhost oraclepackage]$ cd database/ [oracle@localhost database]$ ./runInstaller
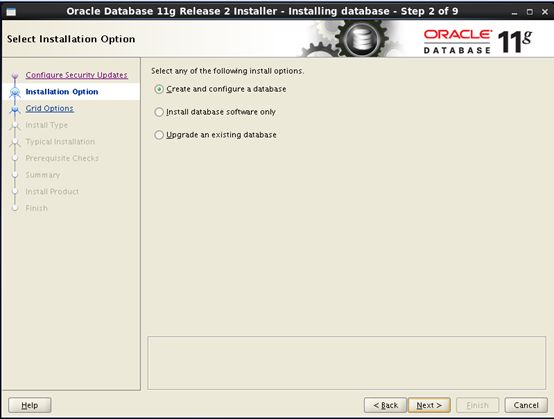
因为之前我们检查了软件安装的依赖,这些错误都是版本的问题,不影响安装,所以我们选择忽略。
之后的安装就跟在windows图形化界面的安装一样了。
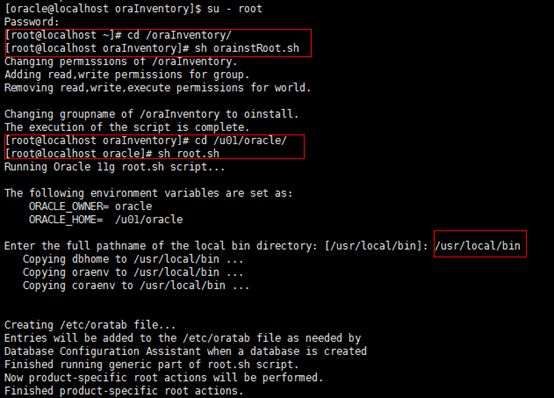
安装完成后,系统会提示你需要用root权限执行2个shell脚本。按照其提示的路径,找到其所在的位置, 新开启一个终端,输入命令:
[root@localhost oraInventory]# cd /u01/oracle/ [root@localhost oracle]# sh root.sh [root@localhost ~]# cd /oraInventory/ [root@localhost oraInventory]# sh orainstRoot.sh
安装后的问题解决
启动监听
[oracle@localhost ~]$ lsnrctl start
连接数据库
[oracle@localhost ~]$ sqlplus / as sysdba
启动数据库实例
SQL> startup
ORA-01078: failure in processing system parameters
LRM-00109: could not open parameter file '/u01/oracle/dbs/initoracleSid.ora'
提示文件未找到,解决办法如下,将/u01/admin/orcl/pfile下类似于init.ora.的文件复制到/u01/oracle/dbs路径下,并重命名为未找到的文件名。
[oracle@localhost ~]$ cd /u01/admin/orcl/pfile [oracle@localhost pfile]$ ls
init.ora.10302016235216
[oracle@localhost pfile]$ cp init.ora.10302016235216 /u01/oracle/dbs [oracle@localhost pfile]$ cd /u01/oracle/dbs [oracle@localhost dbs]$ mv init.ora.10302016235216 initoracleSid.ora SQL> startup
提示存储不足。
ORA-00845: MEMORY_TARGET not supported on this system
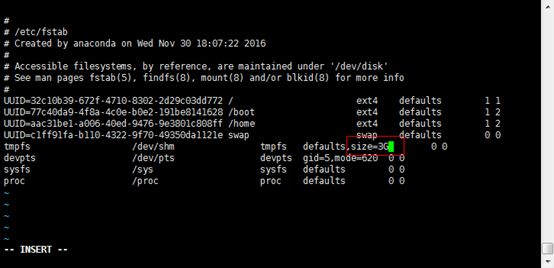
用root用户编辑/etc/fstab
[root@localhost etc]# vi fstab
在tmpfs 后面加入,size=3G
修改完成后重启挂载,遇到在使用的情况,故加上参数-k,之后重启挂载。
[root@localhost ~]# umount /dev/shm
umount: /dev/shm: device is busy.
(In some cases useful info about processes that use
the device is found by lsof(8) or fuser(1))
[root@localhost ~]# fuser -mvk /dev/shm [root@localhost ~]# umount /dev/shm [root@localhost ~]# mount /dev/shm
关闭防火墙
sudo service iptables stop
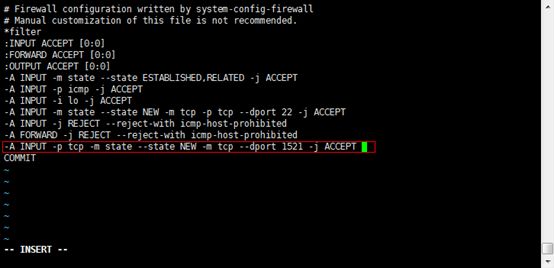
防火墙文件中加入下面一行,然后启动防火墙。
sudo vi /etc/sysconfig/iptables
-A INPUT -p tcp -m state --state NEW -m tcp --dport 1521 -j ACCEPT
修改密码文件
可以在本地用sysdba登陆,但plsql不能访问。
- 查询oracle实例名。
select instance_name from v$instance;
将dbs目录下orapw实例名的文件修改成对应的。或者使用一下命令重新生成。
orapwd file=orapworacleSid password=123456 entries=10
重启数据库,plsql就可以访问了。
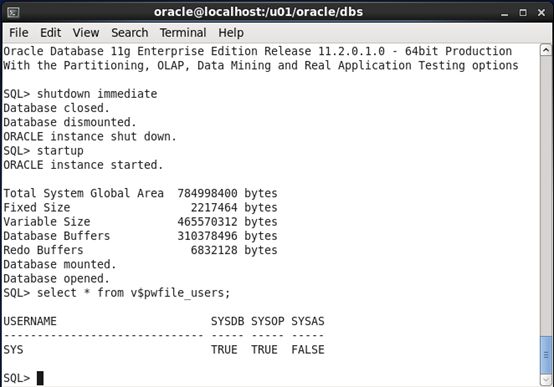
SQL> shutdown immediate SQL>startup
当使用如下命令可以查出结果时,就可以远程连接数据库了。
select * from v$pwfile_users;
至此oracle11g在Linux上的基本安装就完成了。
