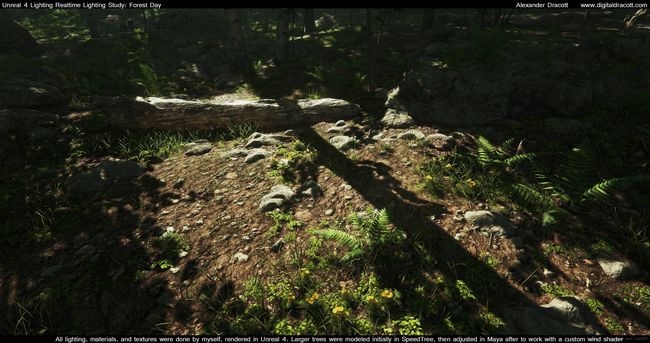
手把手教你架构3D引擎高级篇系列一
最近一段时间事情比较多,从本篇博客开始,我手把手教大家如何开发一款类似商业引擎Unity的开发,我们在这里要阅读学习一些编写引擎的知识,编写引擎之前,我们需要安装Visual Studio VS2017,Windows操作系统是64位的,编程语言是C++,我们的引擎会使用比如Lua,C#作为引擎的脚本,这也是方便后期引擎逻辑的扩展。我们在架构一款引擎之前要查阅一些技术相关的资料,其实我们开发游戏也是一样的,比如做一些算法,我们也要查阅相关的资料。在这里也是教大家遇到问题如何解决问题。学习查阅资料也是因人而异的,下面我会根据自己的体会跟大家交流写高级引擎的一些方法或者说心得。
引擎编程必备知识
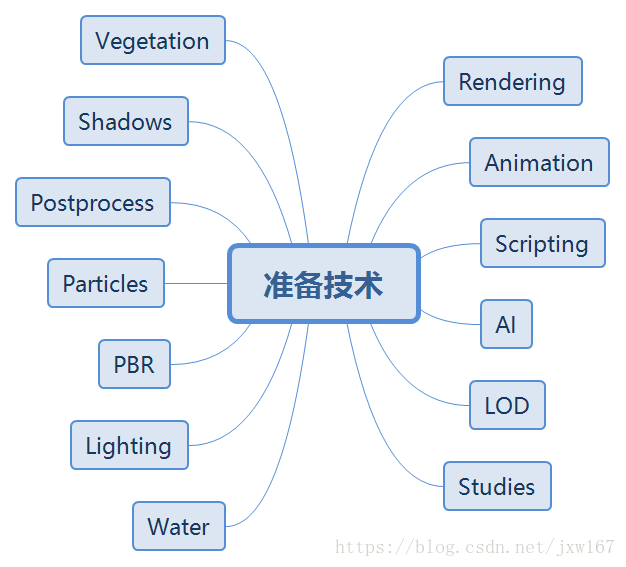
学习引擎和编写引擎是完全不一样的,学习引擎只要会用就可以,不需要关心整个引擎是如何是实现的,比如我们使用Unity引擎,不需要掌握引擎的所有模块,我们只关心我们项目中写逻辑用到的模块就可以;还有优化,也是在引擎已有的基础上修修补补;而编写引擎需要去架构引擎以及引擎的各个模块编写,使用哪些图形库?内存管理要如何做?渲染要实现哪些算法?脚本选用什么语言等等,换句话说引擎的方方面面我们都要认真考虑,工作量还是相当大的。编写引擎需要具备哪些知识?在编写引擎之前,希望读者已经掌握了线性代数,数据结构,高等数学,常用图形学算法比如Bezier,BSpine等等。另外,在架构设计方面,常用的设计模式也是需要掌握的,OpenGL或者DirectX API图形库等。如果上面列举的知识点,读者还有缺失的,利用业余时间补一下,以上列举的都是最基础的,在编写引擎之前我们也需要查阅一些资料丰富我们的知识库,查阅哪些资料呢?这个是根据我自己的需要列的提纲,这个也是因人而异,自己感觉在哪方面比较缺失就可以查阅哪方面的资料,这个也是告诉读者一个学习的方法,本篇博客围绕着以下几个方面去查阅相关的技术点。
Rendering
引擎最重要的是渲染,引擎渲染是评价引擎的一个重要指标,渲染离不开Shader编程,关于Shader编程的学习,读者如果基础比较薄弱,在这里给读者推荐一本Shader编程基础书籍《CG教程——可编程实时图形权威指南》这本书讲述的都是Shader基础编程,掌握了Shader基础编程后,需要深入学习者可以看《GPU编程精粹》系列书籍,现在很多大公司都有图形学高级工程师这个职位,学好了Shader编程也可以作为谋生的手段。。。。。
学习引擎离不开OpenGL和DirectX API图形库,这个是3D引擎底层架构的基础,每个引擎都有自己的坐标系是左手还是右手 与OpenGL或者DirectX相关的,OpenGL是跨平台的图形API,而DirectX是针对Windows操作系统的,我的博客中就有关于OpenGL和D3D12的介绍,D3D12正在写一个系列文章,感兴趣的读者可以学习,下面我们就要查阅学习一些资料了。
在Shder编程中,我们会涉及到一些Shader代码的优化,我以前博客中也介绍过,在这里建议大家学习这篇文档:http://www.humus.name/Articles/Persson_LowLevelThinking.pdf
如下图所示:

一个简单算式的不同写法,效率也是不一样的,通过Shader程序的优化,我们可以看到编写引擎不是那么容易的事情。
我们再看看后处理渲染,看一个引擎是否强大,后处理渲染占很大的比重,我们在开发引擎时也要参考后处理实现技术,我在翻阅时看到了国外一篇介绍后处理渲染的,链接地址:
http://www.geforce.com/whats-new/guides/rise-of-the-tomb-raider-graphics-and-performance-guide
看看老外实现的效果:
非常强大,我们也要朝着这个目标去努力。
游戏天空盒云层的渲染在引擎中也是非常重要的,尤其在军事仿真项目里面,比如我们说的飞行模拟,关于云层的渲染,Unity提供了很多的插件,如果我们需要在自己的引擎中实现,网上也有这方面的介绍,因为我们使用的是C++编程,所以查找资料还是需要与C++相关的,云层的渲染,从效率角度出发,同样可以使用多线程,云渲染效果如下所示:
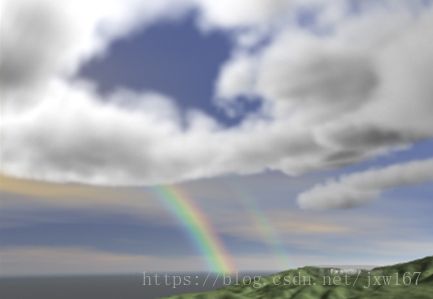
是不是很绚丽?参考网址:
https://software.intel.com/en-us/articles/dynamic-volumetric-cloud-rendering-for-games-on-multi-core-platforms
文章的末尾还提供了源代码,可以直接移植到引擎中。。。。。
另外,我还发现过一个在2002年实现的云层渲染,其实我们引擎的开发技术很多都是以前的经典算法现在还是适用的,这个是在2002年发表的《Real-Time Cloud Rendering for Games 》论文实现的云层渲染:

参考网址:http://vterrain.org/Atmosphere/Clouds/index.html
对应的Demo实现代码都有,可以参考。。。。。。。下面再介绍渲染中的裁剪实现方式。
关于裁剪的渲染,在此也查阅了相关的文档,我们采用如下的裁剪系统:
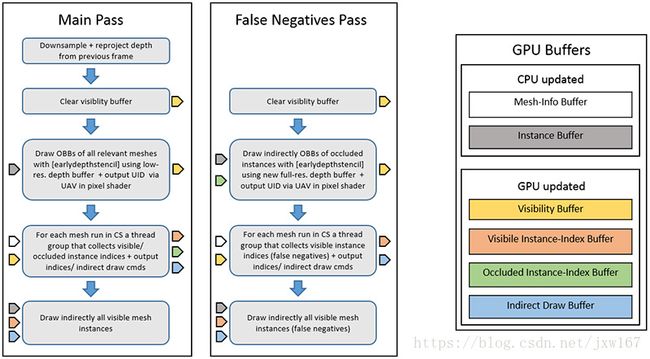
每个剔除步骤左侧的箭头表示输入数据,右侧的箭头输出数据,颜色与相应GPU缓冲区的颜色匹配。使用该种方案,平均剔除率高2.3倍,帧时间快1.6倍。
接下来再看看我们的渲染系统,如下图所示:

参考网址:https://eidosmontreal.com/en/news/deferred-next-gen-culling-and-rendering-for-dawn-engine
Mipmap这个大家都听说过,那我们如何处理带有Alpha通道的材质的MipMap呢?这个问题估计大家都没想过,属于引擎细节问题,如果我们不进行带有Alpha通道的MipMap处理会出现下面的情况发生:

以上三幅图是从近到远,显然这个不是我们想要的,远处就看不到树的叶子了,我们需要的是远近都是一样的,否则这种效果很难看的,我们需要的效果是远处的应该是下图所示的:
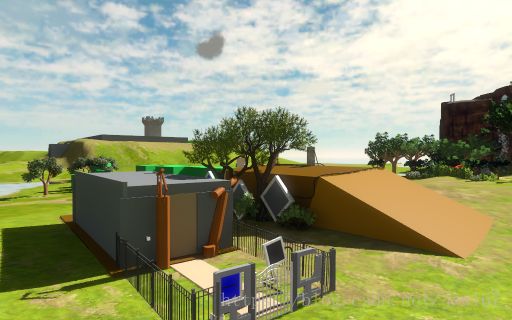
解决方案可以采用下面处理Alpha Mipmaps的代码,如下所示:
// Output first mipmap.
context.compress(image, compressionOptions, outputOptions);

// Estimate original coverage.
const float coverage = image.alphaTestCoverage(A_r);

// Build mipmaps and scale alpha to preserve original coverage.
while (image.buildNextMipmap(nvtt::MipmapFilter_Kaiser))
{
    image.scaleAlphaToCoverage(coverage, A_r);
    context.compress(tmpImage, compressionOptions, outputOptions);
}
参考网址:http://the-witness.net/news/2010/09/computing-alpha-mipmaps/
另外还有一篇文章介绍相关技术,参考网址:https://cdn.steamstatic.com.8686c.com/apps/valve/2007/SIGGRAPH2007_AlphaTestedMagnification.pdf
大地形的渲染是做任何引擎都无法回避的,我们可以参考网上相关的论文:
http://www.humus.name/Articles/Persson_CreatingVastGameWorlds.pdf
另外我在博客中也提到了大地形相关的技术,感兴趣的可以看看我以前写的博客。上面是关于渲染的资料查阅,下面再看看LOD的。
LOD
LOD 这个是最常用的技术了,网上很多资料介绍的,前几天我写了一篇文章介绍大密度建筑场景加载的解决方案,里面提到了AutoLod自动制作LOD模型的博文。当然它是作为Unity的插件实现的,而我们需要用C++实现,思路是可以借鉴的,关于LOD,我查阅了一篇文章在这方面写的挺好的,推荐给大家。

利用该方法实现的LOD对三角形的简化,该插件是对UE4的,也是用C++实现的,可以参考:
https://shaderbits.com/blog/octahedral-impostors/
LOD算法网上也有很多,这里就不啰嗦了。。。。。。
Water
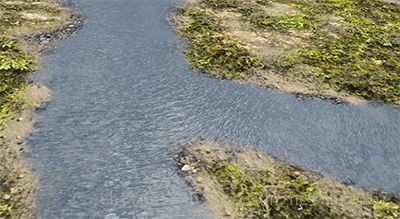
评价引擎是否牛逼的另一个指标是水的渲染,每个引擎也是必备的,网上很多介绍水,实话实说渲染的都不真实,看看我给读者推荐的渲染水的实现效果:
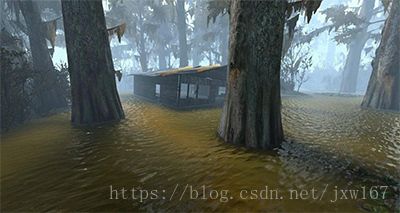
通过上面这两幅是不是给你一种以假乱真的效果,实现水渲染离不开Shader的编写,Shader最基本的组成就是顶点着色器和可编程着色器。下面把顶点着色器代码和片段着色器代码给读者展示一下:
先看顶点着色器代码:
varying vec3  Normal;
varying vec3  EyeDir;


varying vec2 texNormal0Coord;
varying vec2 texColorCoord;
varying vec2 texFlowCoord;

uniform float osg_FrameTime;
uniform mat4 osg_ViewMatrixInverse;
varying float myTime;
void main(void)
{

    gl_Position    = ftransform();
    Normal         = normalize(gl_NormalMatrix * gl_Normal);

    vec4 pos       = gl_ModelViewMatrix * gl_Vertex;
    EyeDir         = vec3(osg_ViewMatrixInverse*vec4(pos.xyz,0));;

    texNormal0Coord   = gl_MultiTexCoord1.xy;
    texColorCoord = gl_MultiTexCoord3.xy;
    texFlowCoord = gl_MultiTexCoord2.xy;

    myTime = 0.01 * osg_FrameTime;
}
片段着色器代码比较复杂,涉及到多张贴图:
uniform sampler2D normalMap;

uniform sampler2D colorMap;
uniform sampler2D flowMap;
uniform samplerCube cubeMap;

varying vec3  Normal;
varying vec3  EyeDir;

varying vec2 texNormal0Coord;
varying vec2 texColorCoord;
varying vec2 texFlowCoord;

varying float myTime;

void main (void)
{

        // texScale determines the amount of tiles generated.
    float texScale = 35.0;
    // texScale2 determines the repeat of the water texture (the normalmap) itself
    float texScale2 = 10.0;
    float myangle;
    float transp;
    vec3 myNormal;

    vec2 mytexFlowCoord = texFlowCoord * texScale;
    // ff is the factor that blends the tiles.
      vec2 ff =  abs(2*(frac(mytexFlowCoord)) - 1) -0.5;
    // take a third power, to make the area with more or less equal contribution
    // of more tile bigger
      ff = 0.5-4*ff*ff*ff;
      // ffscale is a scaling factor that compensates for the effect that
      // adding normal vectors together tends to get them closer to the average normal
      // which is a visible effect. For more or less random waves, this factor
      // compensates for it
      vec2 ffscale = sqrt(ff*ff + (1-ff)*(1-ff));
    vec2 Tcoord = texNormal0Coord  * texScale2;

    // offset makes the water move
        vec2 offset = vec2(myTime,0);

    // I scale the texFlowCoord and floor the value to create the tiling
    // This could have be replace by an extremely lo-res texture lookup
    // using NEAREST pixel.
    vec3 sample = texture2D( flowMap, floor(mytexFlowCoord)/ texScale).rgb;

    // flowdir is supposed to go from -1 to 1 and the line below
    // used to be sample.xy * 2.0 - 1.0, but saves a multiply by
    // moving this factor two to the sample.b
    vec2 flowdir = sample.xy -0.5;

    // sample.b is used for the inverse length of the wave
    // could be premultiplied in sample.xy, but this is easier for editing flowtexture
    flowdir *= sample.b;

    // build the rotation matrix that scales and rotates the complete tile
    mat2 rotmat = mat2(flowdir.x, -flowdir.y, flowdir.y ,flowdir.x);

    // this is the normal for tile A
    vec2 NormalT0 = texture2D(normalMap, rotmat * Tcoord - offset).rg;

    // for the next tile (B) I shift by half the tile size in the x-direction
    sample = texture2D( flowMap, floor((mytexFlowCoord + vec2(0.5,0)))/ texScale ).rgb;
    flowdir = sample.b * (sample.xy - 0.5);
    rotmat = mat2(flowdir.x, -flowdir.y, flowdir.y ,flowdir.x);
      // and the normal for tile B...
      // multiply the offset by some number close to 1 to give it a different speed
      // The result is that after blending the water starts to animate and look
      // realistic, instead of just sliding in some direction.
      // This is also why I took the third power of ff above, so the area where the
      // water animates is as big as possible
      // adding a small arbitrary constant isn't really needed, but helps to show
      // a bit less tiling in the beginning of the program. After a few seconds, the
      // tiling cannot be seen anymore so this constant could be removed.
      // For the quick demo I leave them in. In a simulation that keeps running for
      // some time, you could just as well remove these small constant offsets
      vec2 NormalT1 = texture2D(normalMap, rotmat * Tcoord - offset*1.06+0.62).rg ;

      // blend them together using the ff factor
      // use ff.x because this tile is shifted in the x-direction
      vec2 NormalTAB = ff.x * NormalT0 + (1-ff.x) * NormalT1;

    // the scaling of NormalTab and NormalTCD is moved to a single scale of
    // NormalT later in the program, which is mathematically identical to
      // NormalTAB = (NormalTAB - 0.5) / ffscale.x + 0.5;

      // tile C is shifted in the y-direction
    sample = texture2D( flowMap, floor((mytexFlowCoord + vec2(0.0,0.5)))/ texScale ).rgb;
    flowdir = sample.b * (sample.xy - 0.5);
    rotmat = mat2(flowdir.x, -flowdir.y, flowdir.y ,flowdir.x);
    NormalT0 = texture2D(normalMap, rotmat * Tcoord - offset*1.33+0.27).rg;

      // tile D is shifted in both x- and y-direction
      sample = texture2D( flowMap, floor((mytexFlowCoord + vec2(0.5,0.5)))/ texScale ).rgb;
    flowdir = sample.b * (sample.xy - 0.5);
    rotmat = mat2(flowdir.x, -flowdir.y, flowdir.y ,flowdir.x);
      NormalT1 = texture2D(normalMap, rotmat * Tcoord - offset*1.24).rg ;

      vec2 NormalTCD = ff.x * NormalT0 + (1-ff.x) * NormalT1;
      // NormalTCD = (NormalTCD - 0.5) / ffscale.x + 0.5;

    // now blend the two values together
      vec2 NormalT = ff.y * NormalTAB + (1-ff.y) * NormalTCD;

      // this line below used to be here for scaling the result
      //NormalT = (NormalT - 0.5) / ffscale.y + 0.5;

      // below the new, direct scaling of NormalT
    NormalT = (NormalT - 0.5) / (ffscale.y * ffscale.x);
    // scaling by 0.3 is arbritrary, and could be done by just
    // changing the values in the normal map
    // without this factor, the waves look very strong
    NormalT *= 0.3;
     // to make the water more transparent
    transp = texture2D( flowMap, texFlowCoord ).a;
    // and scale the normals with the transparency
    NormalT *= transp*transp;

    // assume normal of plane is 0,0,1 and produce the normalized sum of adding NormalT to it
    myNormal = vec3(NormalT,sqrt(1-NormalT.x*NormalT.x - NormalT.y*NormalT.y));

    vec3 reflectDir = reflect(EyeDir, myNormal);
    vec3 envColor = vec3 (textureCube(cubeMap, -reflectDir));

    // very ugly version of fresnel effect
    // but it gives a nice transparent water, but not too transparent
    myangle = dot(myNormal,normalize(EyeDir));
    myangle = 0.95-0.6*myangle*myangle;

    // blend in the color of the plane below the water

    // add in a little distortion of the colormap for the effect of a refracted
    // view of the image below the surface.
    // (this isn't really tested, just a last minute addition
    // and perhaps should be coded differently

    // the correct way, would be to use the refract routine, use the alpha channel for depth of
    // the water (and make the water disappear when depth = 0), add some watercolor to the colormap
    // depending on the depth, and use the calculated refractdir and the depth to find the right
    // pixel in the colormap.... who knows, something for the next version
    vec3 base = texture2D(colorMap,texColorCoord + myNormal/texScale2*0.03*transp).rgb;
    gl_FragColor = vec4 (mix(base,envColor,myangle*transp),1.0 );

        // note that smaller waves appear to move slower than bigger waves
        // one could use the tiles and give each tile a different speed if that
        // is what you want
}
详情查看:https://www.rug.nl/society-business/centre-for-information-technology/research/hpcv/publications/watershader/
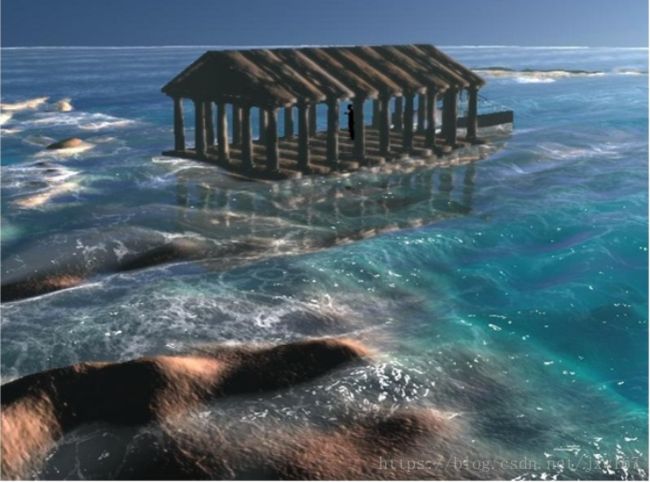
其实上面的水渲染实现,已经满足了大部分水面渲染的要求,但是我们还要不满足,继续看看有没有其他水的渲染方式,比如我们说的海战水渲染,或者说虚拟仿真渲染,实现这样的水怎么实现的呢?图片的展示是最好的方式,下面再给读者展示几幅:
详情查看水渲染:https://cgzoo.files.wordpress.com/2012/04/water-technology-of-uncharted-gdc-2012.pdf
详情查看网址:https://www.gamedev.net/articles/programming/graphics/rendering-water-as-a-post-process-effect-r2642
关于水渲染资料就给读者介绍到这里,我这里还有一些,都是国外的,正常是无法访问的,大家懂的。这里就不给大家列举了,以上关于水渲染的参考足够了,我们能把这些技术掌握就很牛了。下面再去查阅另一个引擎中比较重要的模块——灯光。
Lighting
关于灯光的渲染,这里也不多赘述了,我这里查阅了两篇相关的文档,供学习参考:

每个引擎关于灯光的实现很多,两篇相关的文章:
https://eheitzresearch.wordpress.com/415-2/
https://seblagarde.wordpress.com/2012/09/29/image-based-lighting-approaches-and-parallax-corrected-cubemap/#more-444
PBR
PBR是近几年比较流行的渲染技术,一方面是因为移动端硬件提升了,PBR算法可以在移动端运行了,我查阅了一下相关的资料,网上很多的,下面的供参考:

网址:http://www.makinggames.biz/news/building-your-own-engine-part-2-into-the-guts-of-the-rendering-engine,6313.html
Particle
网上有个开源的Particle Universe,针对Ogre开源的,我以前写的博客中有介绍,读者可以去查阅一下。

另外,我查阅了两篇文章关于Particle的介绍:
https://www.gdcvault.com/play/1020176/Scripting-Particles-Getting-Native-Speed
http://www.simppa.fi/blog/the-new-particle/
Postprocess
Postprocess中文名字是后处理渲染,针对的是整个场景的渲染,我们先看一下DOF介绍:
http://encelo.netsons.org/2008/04/15/depth-of-field-reloaded/
对应的博客都有源代码可供下载学习:
http://encelo.netsons.org/programming/opengl/
另外SSAO大家也要关注一下,文档地址:http://aras-p.info/blog/2009/09/17/strided-blur-and-other-tips-for-ssao/
再看看Gaussian blur的介绍文档:http://rastergrid.com/blog/2010/09/efficient-gaussian-blur-with-linear-sampling/
还有一篇是Neural Network Ambient Occlusion的介绍:http://theorangeduck.com/page/neural-network-ambient-occlusion
我这里并没有把后处理的所有算法都查阅一遍,如果你对其他的比如Bloom,Blur等不了解可以自行查阅,我是按照自己在写引擎前查阅的相关资料,每个人的情况是不同的,这里是给大家提供了一种查阅文献的方法供参考。
Shadow
阴影包括实时阴影和LightMap静态的,说到阴影我建议还是需要学习一下图像处理,我也查阅了相关文献:http://www.gamasutra.com/blogs/JoshKlint/20160518/272888/Banding_and_Dithering.php
关于阴影算法有PSSM,SDSM,CSM等,其中PSSM,CSM在我以前的博客中有介绍,这里就不多说了,可以看看SDSM的渲染
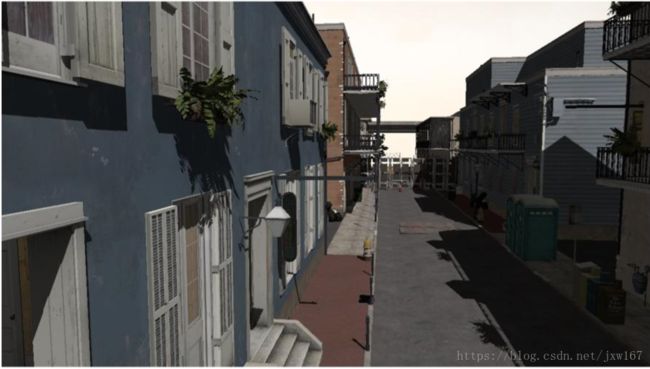
参考文档:https://software.intel.com/sites/default/files/m/d/4/1/d/8/sampleDistributionShadowMaps_SIGGRAPH2010_notes.pdf
为了深入探讨Shadow的实现,在这里给读者推荐几篇好的文献:
http://publications.lib.chalmers.se/records/fulltext/198979/198979.pdf
http://www.cse.chalmers.se/~uffe/Fast%20Precomputed%20Ambient%20Occlusion%20for%20Proximity%20Shadows-jgt.pdf
https://docs.microsoft.com/zh-cn/windows/desktop/DxTechArts/common-techniques-to-improve-shadow-depth-maps
Vegetation
参考文档:https://polycount.com/discussion/comment/2258343#Comment_2258343
Animation
角色的骨骼动画我们选择的是FBX文件,但是一些基础知识我们还是需要掌握的,IK反向动力学,参考网址:
http://theorangeduck.com/page/simple-two-joint
Scripting
Lua编程,除了官方提供的基础文档,我这里再给读者推荐一份学习的文档资料:
https://eliasdaler.wordpress.com/2016/01/07/using-lua-with-c-in-practice-part4/
这个系列文档还是不错的,学习起来比较容易
AI
AI是与行为树相关的,我查阅了一下文档:http://www.gamasutra.com/blogs/ChrisSimpson/20140717/221339/Behavior_trees_for_AI_How_they_work.php
除了以上列出的技术点,我还研究了一下国外游戏渲染的效果。
Studies
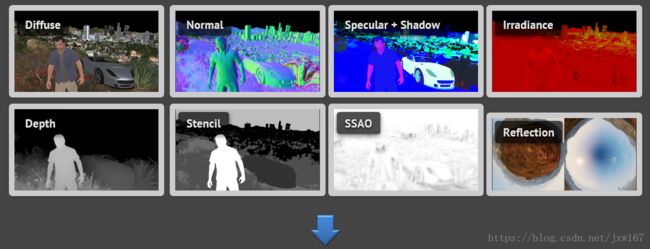
除了浏览上面的技术外,我还重点研究了一下关于图形学,游戏中的每张画面都是每帧游戏运行的图像,看看下面这幅图:
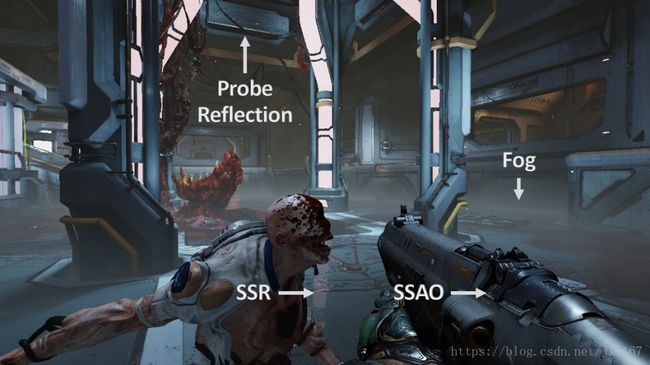
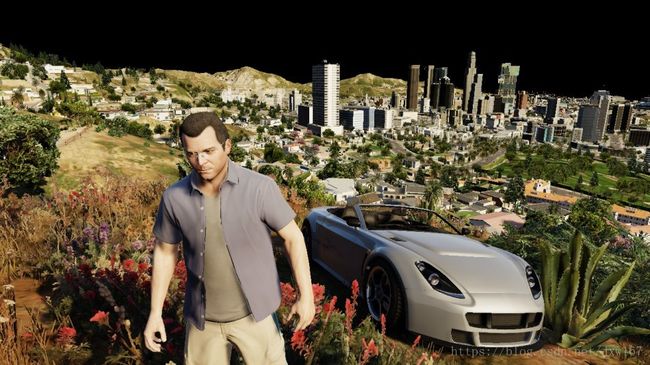
对游戏中画面我们进行分析看出,其实一个好的游戏画面是由多种元素组成的,比如上图所示的,有Probe,这个在Unity引擎中也有,Fog,SSAO,再加上Diffuse,Specular, Normal等贴图就可以把上面的场景复原出来,我们以前做游戏时,看到某个游戏场景吸引人,主程跟主美一起分析它是如何实现的。再分析一张游戏图片:
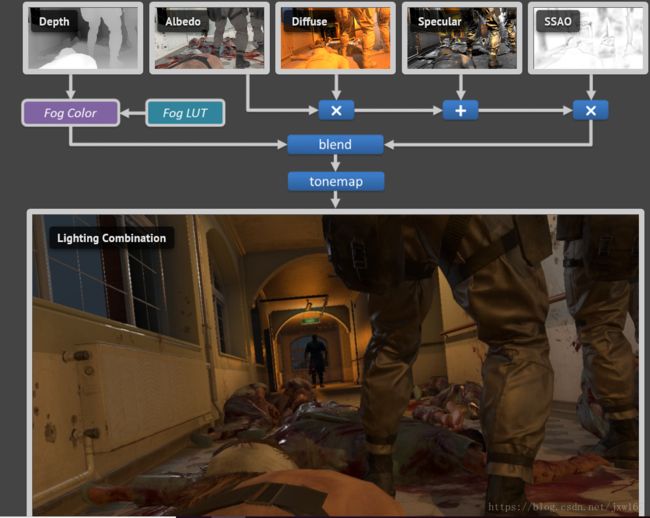
上面这副图像我们对它做了进一步细致详细的分析。是不是很有意思?
在此给读者推荐几个相关的技术网站:
http://www.adriancourreges.com/blog/2016/09/09/doom-2016-graphics-study/
http://www.adriancourreges.com/blog/2017/12/15/mgs-v-graphics-study/
http://www.adriancourreges.com/blog/2015/11/02/gta-v-graphics-study/
http://www.adriancourreges.com/blog/2015/06/23/supreme-commander-graphics-study/
http://www.adriancourreges.com/blog/2015/03/10/deus-ex-human-revolution-graphics-study/
学习老外的东西,可以做到取长补短。。。。。。。
总结
以上,是我在架构高级引擎之前查阅的相关资料,我查阅的这些资料都是老外写的,这里再补充一点,英语阅读,想写引擎的读者英语水平也不能太差,毕竟现在市面上流行的引擎都是国外编写的,包括注释在内都是英文,当然,相关技术国内也有人网上介绍,国内的大家自行查看就好了。如果没有一定的基础这些文献掌握起来还是有一定难度的,资料的阅读一方面帮我们拓展算法思路,另一方面也帮助我们完善引擎的技术。当然,除了我上面给大家列举的,我们还要阅读一些相关的书籍,这个要根据个人情况而定。

