使用Tensorflow制作球鞋识别模型(一)——数据预处理
经过MNIST手写识别和CIFAR-10图像识别等几个入门实战项目后,已经对图像识别有所了解。由于本人是个球鞋爱好者,于是萌生了制作一个球鞋识别的想法,把所学的知识结合到自己的兴趣爱好里。
图片数据的准备和处理往往是训练模型最繁杂的工作,不像MINST和CIFAR-10那样图片的数据集都是提前打包准备好的,本文将介绍TFRecord以及如何制作自己的图片数据集。
文章目录
- TFRecord介绍
- 数据准备
- 制作TFRecord
- 读取和保存TFRecord
- 项目代码
- 参考资料
TFRecord介绍
TFRecord是Tensorflow官方推荐的数据读取标准格式,它允许将任意的的数据转化为Tensorflow所支持的格式,能更好的利用内存,在Tensorflow中快速地复制、移动、读取、存储等。TFRecord文件包含tf.train.Example协议缓存区(protocol buffer),协议缓冲区包含了特征(Features)。在图像识别中,TFRecord文件格式可以将图像数据和标签数据存储在同一个二进制文件中。
tf.train.Example定义如下:
message Example {
 Features features = 1;
};

message Features{
 map featrue = 1;
};

message Feature{
    oneof kind{
        BytesList bytes_list = 1;
        FloatList float_list = 2;
        Int64List int64_list = 3;
    }
};
由上面代码可以看出tf.train.Example中包含了一个从属性名到取值的字典,属性取值可以为字符串(BytesList)、实数列表(FloatList)和整数列表(Int64List)。
数据准备
首先从网上下载原始图片数据,本次实验笔者从网上随机下载了AJ鞋子的四种类别:AJ1、AJ4、AJ11、AJ12,每个类别的图片各20张,共80张图片,并将图片分类放在文件夹下。

制作TFRecord
原始图片数据准备好之后就开始制作tfrecord,运行下面程序后,文件夹中将会生成一个后缀为 .tfrecords的文件,这就是我们需要的TFRecord。
import os
import tensorflow as tf
from PIL import Image

# 图片路径
cwd = 'D:/PyCharm/PycharmProjects/AJ_Recognition/data_prepare/pic/'

classes = {'AJ1', 'AJ4', 'AJ11', 'AJ12'}

# 创建一个tfrecords文件用来写入
writer = tf.python_io.TFRecordWriter("AJ_train.tfrecords")

for index, name in enumerate(classes):
    class_path = cwd+name+'/'
    for img_name in os.listdir(class_path):

        # 每一个图片的地址
        img_path = class_path+img_name
        img = Image.open(img_path)

        # 设置图片需要转化成的大小
        img = img.resize((64, 64))

        # 将图片转化为二进制格式
        img_raw = img.tobytes()

        # 将图像数据(像素值和标签)写入协议缓存区
        example = tf.train.Example(features=tf.train.Features(feature={
            "label": tf.train.Feature(int64_list=tf.train.Int64List(value=[index])),
            'img_raw': tf.train.Feature(bytes_list=tf.train.BytesList(value=[img_raw]))
        }))
        # 序列化为字符串
        writer.write(example.SerializeToString())
读取和保存TFRecord
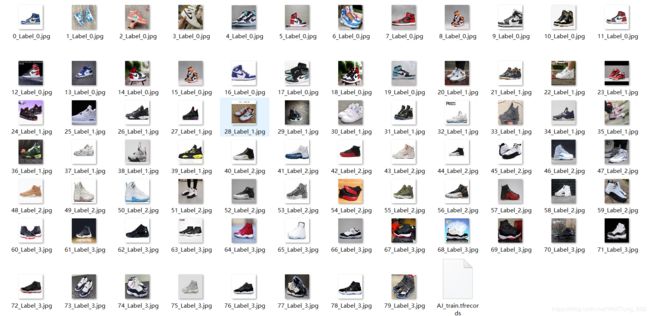
tfrecord文件制作好后,我们将读取tfrecord文件并将处理后的图片数据保存。运行下面程序后,文件夹中生成了80张大小为64*64图片,图片的名字第一个数字代表顺序,第二个数字代表所属类别,例如:AJ1是Label0、AJ4是Label1。
import tensorflow as tf
from PIL import Image

# 存放图片的路径
cwd = 'D:/PyCharm/PycharmProjects/AJ_Recognition/data_prepare/pic/inputdata/'

# 读入AJ_train.tfrecords
def read_and_decode(filename):

    # 生成一个queue队列
    filename_queue = tf.train.string_input_producer([filename])
    reader = tf.TFRecordReader()

    # 返回文件名和文件
    _, serialized_example = reader.read(filename_queue)
    features = tf.parse_single_example(serialized_example,
                                       # 将image数据和label取出来
                                       features={
                                           'label': tf.FixedLenFeature([], tf.int64),
                                           'img_raw': tf.FixedLenFeature([], tf.string),
                                       })

    img = tf.decode_raw(features['img_raw'], tf.uint8)

    # reshape为64*64的3通道图片
    img = tf.reshape(img, [64, 64, 3])

    # 在流中抛出label张量
    label = tf.cast(features['label'], tf.int32)
    return img, label

# 使用函数读入流中
image, label = read_and_decode("AJ_train.tfrecords")

# 开始一个会话
with tf.Session() as sess:
    init_op = tf.global_variables_initializer()
    sess.run(init_op)
    coord=tf.train.Coordinator()
    threads= tf.train.start_queue_runners(coord=coord)
    for i in range(80):
        # 在会话中取出image和label
        example, l = sess.run([image, label])
        img = Image.fromarray(example, 'RGB')
        # 存下图片
        img.save(cwd+str(i)+'_''Label_'+str(l)+'.jpg')
        print('----------------------------')
        print(example, l)
    coord.request_stop()
    coord.join(threads)
处理后的图片如下图:
最后将处理后的图片按Label的类别分别放入4个文件夹中作为后续模型训练的输入,图片数据的预处理就到此为止。
项目代码
GitHub地址:https://github.com/WellTung666/Tensorflow/tree/master/AJ_Recognition
参考资料
https://blog.csdn.net/ywx1832990/article/details/78609323


