tensorflow之lenet训练手写字及应用
我的目标是用tensorflow实现视频质量诊断,但是馒头还是需要一个一个吃,先从工程应用的角度实现用python训练手写字,并在C#中调用识别自己写的手写字。
思路如下:
使用lenet网络训练完数据后,保存为pb,再通过tensorflowsharp调用pb实现对数字的识别。
通过一天的尝试终于可以把手写字保存为pb,并成功调用pb实现数字识别。
""" Convolutional Neural Network.

Build and train a convolutional neural network with TensorFlow.
This example is using the MNIST database of handwritten digits
(http://yann.lecun.com/exdb/mnist/)

Author: Aymeric Damien
Project: https://github.com/aymericdamien/TensorFlow-Examples/
"""

from __future__ import division, print_function, absolute_import

import tensorflow as tf
import cv2 as cv
import numpy as np
# Import MNIST data
from tensorflow.examples.tutorials.mnist import input_data
mnist = input_data.read_data_sets("/tmp/data/", one_hot=True)

# Training Parameters
learning_rate = 0.001
num_steps =200 #200
batch_size = 128
display_step = 10

# Network Parameters
num_input = 784 # MNIST data input (img shape: 28*28)
num_classes = 10 # MNIST total classes (0-9 digits)
dropout = 0.75 # Dropout, probability to keep units

# tf Graph input
X = tf.placeholder(tf.float32, [None, num_input],name="pic")
Y = tf.placeholder(tf.float32, [None, num_classes],name='lable')
keep_prob = tf.placeholder(tf.float32,name='prob') # dropout (keep probability)


# Create some wrappers for simplicity
def conv2d(x, W, b, strides=1):
    # Conv2D wrapper, with bias and relu activation
    x = tf.nn.conv2d(x, W, strides=[1, strides, strides, 1], padding='SAME')
    x = tf.nn.bias_add(x, b)
    return tf.nn.relu(x)


def maxpool2d(x, k=2):
    # MaxPool2D wrapper
    return tf.nn.max_pool(x, ksize=[1, k, k, 1], strides=[1, k, k, 1],
                          padding='SAME')


# Create model
def conv_net(x, weights, biases, dropout):
    # MNIST data input is a 1-D vector of 784 features (28*28 pixels)
    # Reshape to match picture format [Height x Width x Channel]
    # Tensor input become 4-D: [Batch Size, Height, Width, Channel]
    x = tf.reshape(x, shape=[-1, 28, 28, 1])

    # Convolution Layer
    conv1 = conv2d(x, weights['wc1'], biases['bc1'])
    # Max Pooling (down-sampling)
    conv1 = maxpool2d(conv1, k=2)

    # Convolution Layer
    conv2 = conv2d(conv1, weights['wc2'], biases['bc2'])
    # Max Pooling (down-sampling)
    conv2 = maxpool2d(conv2, k=2)

    # Fully connected layer
    # Reshape conv2 output to fit fully connected layer input
    fc1 = tf.reshape(conv2, [-1, weights['wd1'].get_shape().as_list()[0]])
    fc1 = tf.add(tf.matmul(fc1, weights['wd1']), biases['bd1'])
    fc1 = tf.nn.relu(fc1)
    # Apply Dropout
    fc1 = tf.nn.dropout(fc1, dropout)

    # Output, class prediction
    out = tf.add(tf.matmul(fc1, weights['out']), biases['out'])
    return out

# Store layers weight & bias
weights = {
    # 5x5 conv, 1 input, 32 outputs
    'wc1': tf.Variable(tf.random_normal([5, 5, 1, 32])),
    # 5x5 conv, 32 inputs, 64 outputs
    'wc2': tf.Variable(tf.random_normal([5, 5, 32, 64])),
    # fully connected, 7*7*64 inputs, 1024 outputs
    'wd1': tf.Variable(tf.random_normal([7*7*64, 1024])),
    # 1024 inputs, 10 outputs (class prediction)
    'out': tf.Variable(tf.random_normal([1024, num_classes]))
}

biases = {
    'bc1': tf.Variable(tf.random_normal([32])),
    'bc2': tf.Variable(tf.random_normal([64])),
    'bd1': tf.Variable(tf.random_normal([1024])),
    'out': tf.Variable(tf.random_normal([num_classes]))
}

# Construct model
logits = conv_net(X, weights, biases, keep_prob)
prediction = tf.nn.softmax(logits,name="op_to_store")

# Define loss and optimizer
loss_op = tf.reduce_mean(tf.nn.softmax_cross_entropy_with_logits(
    logits=logits, labels=Y))
optimizer = tf.train.AdamOptimizer(learning_rate=learning_rate)
train_op = optimizer.minimize(loss_op)


# Evaluate model
correct_pred = tf.equal(tf.argmax(prediction, 1), tf.argmax(Y, 1))
accuracy = tf.reduce_mean(tf.cast(correct_pred, tf.float32))

# Initialize the variables (i.e. assign their default value)
init = tf.global_variables_initializer()

# Start training
with tf.Session() as sess:

    # Run the initializer
    sess.run(init)
    for step in range(1, num_steps+1):
        batch_x, batch_y = mnist.train.next_batch(batch_size)
        # Run optimization op (backprop)
        sess.run(train_op, feed_dict={X: batch_x, Y: batch_y, keep_prob: 0.8})
        if step % display_step == 0 or step == 1:
            # Calculate batch loss and accuracy
            loss, acc = sess.run([loss_op, accuracy], feed_dict={X: batch_x,
                                                                 Y: batch_y,
                                                                 keep_prob: 1.0})
            print("Step " + str(step) + ", Minibatch Loss= " + \
                  "{:.4f}".format(loss) + ", Training Accuracy= " + \
                  "{:.3f}".format(acc))

    print("Optimization Finished!")

    constant_graph = tf.graph_util.convert_variables_to_constants(sess, sess.graph_def, ['op_to_store'])
    with tf.gfile.FastGFile('modellenet.pb', mode='wb') as f:
        f.write(constant_graph.SerializeToString())
    #Calculate accuracy for 256 MNIST test images
    print("Testing Accuracy:", sess.run(accuracy, feed_dict={X: mnist.test.images[:256],Y: mnist.test.labels[:256],keep_prob: 1.0}))
    #print(sess.run(prediction,feed_dict={X: mnist.test.images[:1],keep_prob: 1.0}))

    picpath = 'C:/Users/shenwei/Desktop/test/tt/3.jpg'
    image = cv.imread(picpath,0)
#cvimag = np.zeros(image.shape, dtype=np.float32)
    data1 = np.asarray(image,dtype=np.float32)
    data2 = np.reshape(data1,newshape =(1,-1))
    data3 = np.where(data2>0,data2,0)
    data3 =data3/255
    print(sess.run(prediction,feed_dict={X: data3,keep_prob: 1.0}))
训练出的pb文件如下:
再写了一个python调用pb的demo
# -*-coding:utf-8 -*-
import tensorflow as tf
import os
import numpy as np
import sys
import io
import cv2 as cv
os.environ['TF_CPP_MIN_LOG_LEVEL'] = '2'


sys.stdout=io.TextIOWrapper(sys.stdout.buffer,encoding='utf8')


#coding=utf-8


#-*- coding:utf-8 -*-

import tensorflow as tf


picpath = 'C:/Users/shenwei/Desktop/test/tt/3.jpg'
image = cv.imread(picpath,0)
#cvimag = np.zeros(image.shape, dtype=np.float32)
data1 = np.asarray(image,dtype=np.float32)
data2 = np.reshape(data1,newshape =(1,-1))
data3 = np.where(data2>0,data2,0)
data3 =data3/255
sess = tf.Session()

with tf.gfile.FastGFile('modellenet.pb', 'rb') as f:
    graph_def = tf.GraphDef()
    graph_def.ParseFromString(f.read())
    sess.graph.as_default()
    tf.import_graph_def(graph_def, name='') # 导入计算图
# 需要有一个初始化的过程
sess.run(tf.global_variables_initializer())
input_x = sess.graph.get_tensor_by_name('pic:0')
prob = sess.graph.get_tensor_by_name('prob:0')
op = sess.graph.get_tensor_by_name('op_to_store:0')
ret = sess.run(op,  feed_dict={input_x: data3,prob:1})
print(ret)
print(sess.run(tf.argmax(ret,1)))
# 输出 3
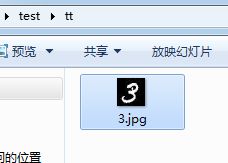
输出结果果然是3
图片长这样
**********************************由于本人开发环境是C#环境,还需要写一个C#的demo进行测试************
C#调用opencv太过痛苦,暂时不再进行,下面我想尝试一下新的挑战
现在我们的图片都是28*28的灰度图,我想修改为训练使用28*28的图片,然后保存为pb之后,可以对任意的图片进行识别。
目标:识别任何分辨率的图片
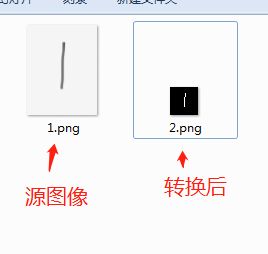
尝试了一下把训练模型修改为任意分辨率,但是最后失败了。感觉难度很大,目前还是没有思路。但是我决定换一个思路来解决问题,通过opencv把任意分辨率的图片转换成何训练模型一样的图片,再进行识别,尽管识别率有所降低,但是还是可以识别的。
对于分辨率的修改,参考我的这一篇文章。
https://blog.csdn.net/g0415shenw/article/details/87356832
看一下效果:
识别出来的结果:
成功识别出结果为1
至此,手写字的识别从训练到应用基本上落一段路。下面开始更加有难度的挑战,对图像进行分类。


