Windows中Python与OpenCV C++之间Mat传递
1 VS2017中创建DLL项目
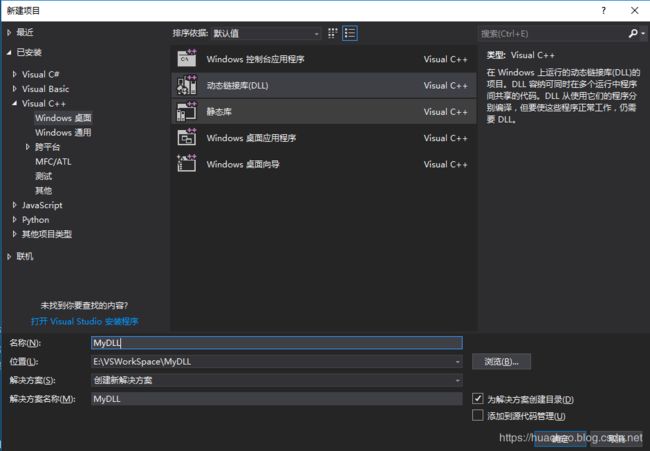
1.1 创建DLL项目
1.2 删除自动创建的文件
将stdafx.h、targetver.h、dllmain.cpp、MyDLL.cpp、stdafxc.pp删除。

删除后,记得要在C/C++》预编译头 中取消使用预编译头

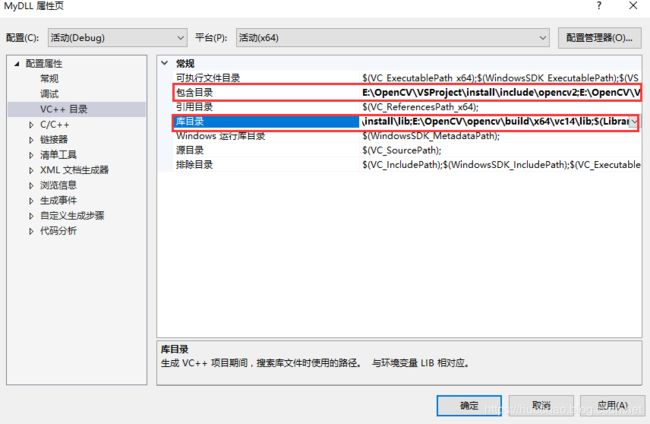
1.3 配置OpenCV环境
这一步可参靠我的另一篇文章《OpenCV 3.2.0 + opencv_contrib+VS2017》。需要修改地方如下。
2 编写调用OpenCV的C代码
创建MyDLL.cpp文件,输入如下代码:
#include 上代码简单调用了OpenCV的Canny函数,使用指针传递数据。值得注意的是,自定义的宏DLLEXPORT用于指定暴露的函数,只有加了这个宏的函数在外面才能调用。
注意: 由于cpp_canny函数中申请了内存空间,需要释放,因此加了函数release,用于在python端释放内存。
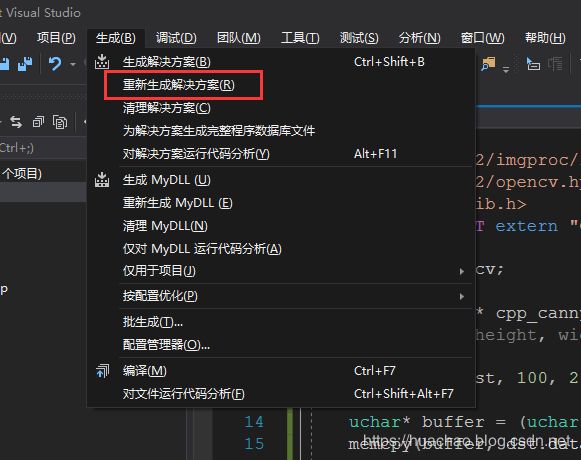
3 编译生成DLL
4 编写Python代码
创建Python文件,输入如下代码:
import cv2
from numpy.ctypeslib import ndpointer
import ctypes
import numpy as np

dll=ctypes.WinDLL('MyDLL.dll')

def cpp_canny(input):
    if len(img.shape)>=3 and img.shape[-1]>1:
        gray=cv2.cvtColor(img,cv2.COLOR_BGR2GRAY)

    h,w=gray.shape[0],gray.shape[1]

    # 获取numpy对象的数据指针
    frame_data = np.asarray(gray, dtype=np.uint8)
    frame_data = frame_data.ctypes.data_as(ctypes.c_char_p)

    # 设置输出数据类型为uint8的指针
    dll.cpp_canny.restype = ctypes.POINTER(ctypes.c_uint8)

    # 调用dll里的cpp_canny函数
    pointer = dll.cpp_canny(h,w,frame_data)

    # 从指针指向的地址中读取数据,并转为numpy array
    np_canny =  np.array(np.fromiter(pointer, dtype=np.uint8, count=h*w))

    return pointer,np_canny.reshape((h,w))

img=cv2.imread('input.png')
ptr,canny=cpp_canny(img)
cv2.imshow('canny',canny)
cv2.waitKey(2000)
#将内存释放
dll.release(ptr)


