mxnet-model-server部署的坑总结
本文主要给自己备忘用的,语无伦次,见谅!
首先,官网MXNet Model Server,点击learn more,找到advanced installation,选择源码安装。有人问为啥源码安装??因为要采坑啊!!!print走起,否则不知道怎么死的。。。。
修改源码要频繁用到:
pip install -e . pip install -U -e .
安装好后,按样例
mxnet-model-server --models xxx=yyy.model zzzz.py
其中,xxx是后面client要POST的网址名的一部分,yyy.model是本地model的文件名字,zzzz.py是data(本处为图片)的预先和后处理,这个zzz可不是瞎编的要继承mms\model_service里的类,最好直接改example里的sdd的。sdd的代码如下:
def _preprocess(self, data):
"""
Input image buffer from data is read into NDArray. Then, resized to
expected shape. Swaps axes to convert image from BGR format to RGB.
Returns the preprocessed NDArray as a list for next step, Inference.
"""
# Read input
input_image = image.read(data[0])
# Save original input image shape.
# This is required for preparing the bounding box of the detected object relative to
# original input
self.input_height = input_image.shape[0]
self.input_width = input_image.shape[1]
# Transform input image - resize, BGR to RGB.
# Reuse MXNetVisionService _preprocess to achieve above transformations.
return super(SSDService, self)._preprocess(data)
因为最后一句return重载了MXNetVisionService.py里的_preprocess(data),而改_preprocess(data)里含有img.resize。所以,此处对输入的图片不要再resize了。。。。
最重要的坑是:这里没去RGB均值,我参考MXNetVisionService,编了一个,如下:
self.input_height = input_image.shape[0]
self.input_width = input_image.shape[1]
img_list = []
for idx, img in enumerate(data):
input_shape = self.signature['inputs'][idx]['data_shape']
# We are assuming input shape is NCHW
[h, w] = input_shape[2:]
img_arr = image.read(img)
img_arr = image.resize(img_arr, w, h)
img_arr = image.transform_shape(img_arr).astype('float32')
bias=mx.nd.array([123.0, 117.0, 104.0]).reshape((3,1,1))
img_arr[0,:,:,:]-=bias
img_list.append(img_arr)
return img_list
记住最后return的不是super(SSDService, self)._preprocess(data)了。切记,切记!!!!
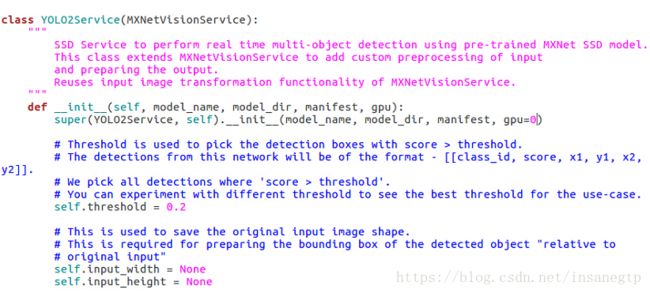
官网也没说部署后怎么用GPU运行!!!我自己摸索出来的,献给各位:
在__init__里,输入参数gpu=0就是用0号GPU,以此类推!!!
