xxl-job基本使用
前文
首先要知道它的官网
http://www.xuxueli.com/xxl-job/#/
首页几个大字介绍的简单明了:
轻量级分布式任务调度平台
开发迅速、学习简单、轻量级、易扩展
然后是详细的官方文档位置,全中文喔~
http://www.xuxueli.com/xxl-job/#/?id=%e3%80%8a%e5%88%86%e5%b8%83%e5%bc%8f%e4%bb%bb%e5%8a%a1%e8%b0%83%e5%ba%a6%e5%b9%b3%e5%8f%b0xxl-job%e3%80%8b
开始正题:
github下载它的内容

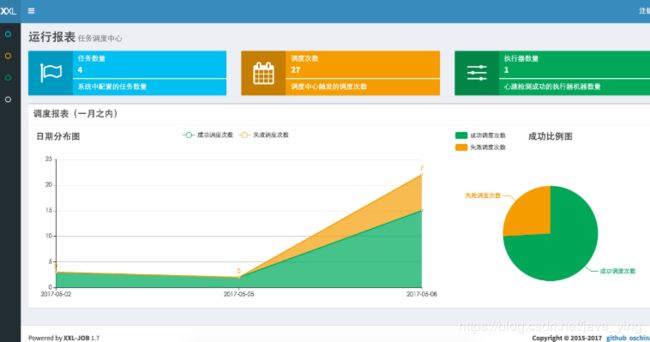
其中xxl-job-admin 是调度中心,这是一个spring|springboot 项目
配置文件在application.properties 配置说明
###调度中心JDBC链接:
spring.datasource.url=jdbc:mysql://127.0.0.1:3306/xxl_job?Unicode=true&characterEncoding=UTF-8
spring.datasource.username=root
spring.datasource.password=root_pwd
spring.datasource.driver-class-name=com.mysql.jdbc.Driver
###报警邮箱
spring.mail.host=smtp.qq.com
spring.mail.port=25
[email protected]
spring.mail.password=xxx
spring.mail.properties.mail.smtp.auth=true
spring.mail.properties.mail.smtp.starttls.enable=true
spring.mail.properties.mail.smtp.starttls.required=true
spring.mail.properties.mail.smtp.socketFactory.class=javax.net.ssl.SSLSocketFactory
###xxl-job, access token
xxl.job.accessToken=
###xxl-job, i18n (default empty as chinese, “en” as english)
xxl.job.i18n=
其中数据库需要提前创建好 在doc目录下 有一个
需要提前运行sql 初始化数据库
启动成功之后 调度中心访问地址:http://localhost:8080/xxl-job-admin (该地址执行器将会使用到,作为回调地址)
默认用户名密码admin / 123456

不同版本会略有不同。
然后是第二个![]()
这个是核心包。首次下载 需要运行maven命令 让本地仓库生成jar包 maven clean install
重点来了!!!调度中心和执行器项目(也就是第三个) maven依赖的core 版本尽量保持一致,否则会出现 注册任务不成功的问题。
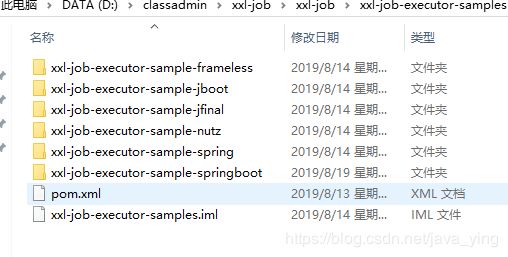
第三个
![]()
这个是执行器项目 里面有多个版本 选择你需要的即可
执行器配置,配置内容说明:
###调度中心部署跟地址 [选填]:如调度中心集群部署存在多个地址则用逗号分隔。执行器将会使用该地址进行"执行器心跳注册"和"任务结果回调";为空则关闭自动注册;
xxl.job.admin.addresses=http://127.0.0.1:8080/xxl-job-admin
###执行器AppName [选填]:执行器心跳注册分组依据;为空则关闭自动注册
xxl.job.executor.appname=xxl-job-executor-sample
###执行器IP [选填]:默认为空表示自动获取IP,多网卡时可手动设置指定IP,该IP不会绑定Host仅作为通讯实用;地址信息用于 “执行器注册” 和 “调度中心请求并触发任务”;
xxl.job.executor.ip=
###执行器端口号 [选填]:小于等于0则自动获取;默认端口为9999,单机部署多个执行器时,注意要配置不同执行器端口;
xxl.job.executor.port=9999
###执行器通讯TOKEN [选填]:非空时启用;
xxl.job.accessToken=
###执行器运行日志文件存储磁盘路径 [选填] :需要对该路径拥有读写权限;为空则使用默认路径;
xxl.job.executor.logpath=/data/applogs/xxl-job/jobhandler
###执行器日志保存天数 [选填] :值大于3时生效,启用执行器Log文件定期清理功能,否则不生效;
xxl.job.executor.logretentiondays=-1
项目中有个配置类用来读取配置文件的相关配置
XxlJobConfig.java
@Bean(initMethod = “start”, destroyMethod = “destroy”)
public XxlJobSpringExecutor xxlJobExecutor() {
logger.info(">>>>>>>>>>> xxl-job config init.");
XxlJobSpringExecutor xxlJobSpringExecutor = new XxlJobSpringExecutor();
xxlJobSpringExecutor.setAdminAddresses(adminAddresses);
xxlJobSpringExecutor.setAppName(appName);
xxlJobSpringExecutor.setIp(ip);
xxlJobSpringExecutor.setPort(port);
xxlJobSpringExecutor.setAccessToken(accessToken);
xxlJobSpringExecutor.setLogPath(logPath);
xxlJobSpringExecutor.setLogRetentionDays(logRetentionDays);
return xxlJobSpringExecutor;
}
配置任务类
package com.xxl.job.executor.service.jobhandler;
import com.xxl.job.core.biz.model.ReturnT;
import com.xxl.job.core.handler.IJobHandler;
import com.xxl.job.core.handler.annotation.JobHandler;
import com.xxl.job.core.log.XxlJobLogger;
import org.springframework.stereotype.Component;
import java.util.concurrent.TimeUnit;
/**
-
任务Handler示例(Bean模式)
-
开发步骤:
-
1、继承"IJobHandler":“com.xxl.job.core.handler.IJobHandler”;
-
2、注册到Spring容器:添加“@Component”注解,被Spring容器扫描为Bean实例;
-
3、注册到执行器工厂:添加“@JobHandler(value=“自定义jobhandler名称”)”注解,注解value值对应的是调度中心新建任务的JobHandler属性的值。
-
4、执行日志:需要通过 “XxlJobLogger.log” 打印执行日志;
*/
@JobHandler(value=“demoJobHandler”)
@Component
public class DemoJobHandler extends IJobHandler {@Override
public ReturnT execute(String param) throws Exception {
XxlJobLogger.log(“XXL-JOB, Hello World.”);for (int i = 0; i < 5; i++) { XxlJobLogger.log("beat at:" + i); TimeUnit.SECONDS.sleep(2); } return SUCCESS;}
}
启动项目:如果显示xxl-job 注册成功 说明基本配置已成功
其余手动创建任务并且使用的就不想说了 很简单 注意一两个配置即可
用API调用 雪里大神也提到过 在调度中心项目中 有一个AdminBizTest 这里大概有api调用的方式。