VMware下Oracle 11g RAC环境搭建
主机操作系统:windows 10
虚拟机VMware12:两台Oracle Linux R6 U3 x86_64
Oracle Database software: Oracle11gR2
Cluster software: Oracle grid infrastructure 11gR2
共享存储:ASM
[root@qht131 home]#  lsb_release -a
LSB Version:    :core-4.0-amd64:core-4.0-noarch:graphics-4.0-amd64:graphics-4.0-noarch:printing-4.0-amd64:printing-4.0-noarch
Distributor ID: RedHatEnterpriseServer
Description:    Red Hat Enterprise Linux Server release 6.3 (Santiago)
Release:        6.3
Codename:       Santiago
[root@qht131 home]# uname -r
2.6.32-279.el6.x86_64
一、硬件准备:
1.安装Oracle Linux时,注意分配两个网卡,一个网卡为Host Only方式,用于两台虚拟机节点的通讯,另一个网卡为Nat方式,用于连接外网,后面再手动分配静态IP。
IP规划:
| Identity | Home Node | Host Node | Given Name | Type | Address |
|---|---|---|---|---|---|
| RAC1 Public | RAC1 | RAC1 | rac1 | Public | 172.17.61.131 |
| RAC1 VIP | RAC1 | RAC1 | rac1-vip | Public | 172.17.61.231 |
| RAC1 Private | RAC1 | RAC1 | rac1-priv | Private | 10.10.10.1 |
| RAC2 | RAC2 | RAC2 | rac2 | Public | 172.17.61.132 |
| RAC2 VIP | RAC2 | RAC2 | rac2-vip | Public | 172.17.61.232 |
| RAC2 Private | RAC2 | RAC2 | rac2-priv | Private | 10.10.10.2 |
| SCAN IP | none | Selected by Oracle Clusterware | scan-ip | virtual | 172.17.61.133 |
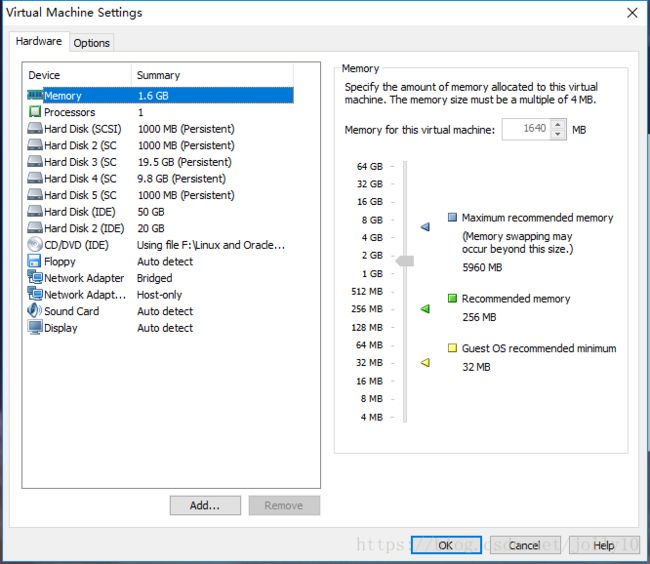
由于内存有限,每台主机的内存为1.6G,swap规划为2.5G。最好是内存和swap规划为2.5G.
两台Oracle Linux主机名为rac1、rac2
注意这里安装的两个操作系统最好在不同的硬盘中,我只有一块硬盘就凑合上了。
2.由于采用的是共享存储ASM,而且搭建集群需要共享空间作注册盘(OCR)和投票盘(votingdisk)。VMware创建共享存储方式:
进入VMware安装目录,cmd命令下:
d:\Program Files\vmware>vmware-vdiskmanager.exe -c -s 1000Mb -a lsilogic -t 2 "F:\Virtual Machines\RHEL6.3oracle11GRAC\Sharedisk"\ocr.vmdk

d:\Program Files\vmware>vmware-vdiskmanager.exe -c -s 1000Mb -a lsilogic -t 2 "F:\Virtual Machines\RHEL6.3oracle11GRAC\Sharedisk"\ocr2.vmdk

d:\Program Files\vmware>vmware-vdiskmanager.exe -c -s 1000Mb -a lsilogic -t 2 "F:\Virtual Machines\RHEL6.3oracle11GRAC\Sharedisk"\votingdisk.vmdk

d:\Program Files\vmware>vmware-vdiskmanager.exe -c -s 20000Mb -a lsilogic -t 2 "F:\Virtual Machines\RHEL6.3oracle11GRAC\Sharedisk"\data.vmdk

d:\Program Files\vmware>vmware-vdiskmanager.exe -c -s 10000Mb -a lsilogic -t 2 "F:\Virtual Machines\RHEL6.3oracle11GRAC\Sharedisk"\backup.vmdk
修改RAC1,RAC2虚拟机目录下的vmx配置文件,增加以下内容:
scsi1.present = "TRUE"
scsi1.virtualDev = "lsilogic"
scsi1.sharedBus = "virtual"
scsi1:1.present = "TRUE"
scsi1:1.mode = "independent-persistent"
scsi1:1.filename = "F:\Virtual Machines\RHEL6.3oracle11GRAC\Sharedisk\ocr.vmdk"
scsi1:1.deviceType = "disk"
scsi1:2.present = "TRUE"
scsi1:2.mode = "independent-persistent"
scsi1:2.filename = "F:\Virtual Machines\RHEL6.3oracle11GRAC\Sharedisk\ocr2.vmdk"
scsi1:2.deviceType = "disk"
scsi1:3.present = "TRUE"
scsi1:3.mode = "independent-persistent"
scsi1:3.filename = "F:\Virtual Machines\RHEL6.3oracle11GRAC\Sharedisk\votingdisk.vmdk"
scsi1:3.deviceType = "disk"
scsi1:4.present = "TRUE"
scsi1:4.mode = "independent-persistent"
scsi1:4.filename = "F:\Virtual Machines\RHEL6.3oracle11GRAC\Sharedisk\data.vmdk"
scsi1:4.deviceType = "disk"
scsi1:5.present = "TRUE"
scsi1:5.mode = "independent-persistent"
scsi1:5.filename = "F:\Virtual Machines\RHEL6.3oracle11GRAC\Sharedisk\backup.vmdk"
scsi1:5.deviceType = "disk"
disk.locking = "false"
diskLib.dataCacheMaxSize = "0"
diskLib.dataCacheMaxReadAheadSize = "0"
diskLib.DataCacheMinReadAheadSize = "0"
diskLib.dataCachePageSize = "4096"
diskLib.maxUnsyncedWrites = "0"
gui.lastPoweredViewMode = "fullscreen"
usb:0.present = "TRUE"
usb:0.deviceType = "hid"
usb:0.port = "0"
usb:0.parent = "-1"
二、环境配置:(所有节点都执行)
1.关闭防火墙及selinux
[root@rac1 ~]# setenforce 0
setenforce: SELinux is disabled
[root@rac1 ~]# vi /etc/sysconfig/selinux
SELINUX=disabled
[root@rac1 ~]# service iptables stop
[root@rac1 ~]# chkconfig iptables off
2.创建必要的用户、组和目录,并授权
[root@rac1 home]# groupadd -g 1000 oinstall
[root@rac1 home]# groupadd -g 1020 asmadmin
[root@rac1 home]# groupadd -g 1021 asmdba
[root@rac1 home]# groupadd -g 1022 asmoper
[root@rac1 home]# groupadd -g 1031 dba
[root@rac1 home]# groupadd -g 1032 oper
[root@rac1 home]# useradd -u 1100 -g oinstall -G asmadmin,asmdba,asmoper,oper,dba grid
[root@rac1 home]# useradd -u 1101 -g oinstall -G dba,asmdba,oper oracle
mkdir -p /u01/app/11.2.0/grid
mkdir -p /u01/app/grid
mkdir /u01/app/oracle
chown -R grid:oinstall /u01
chown oracle:oinstall /u01/app/oracle
chmod -R 775 /u01/
参照官方文档,采用GI与DB分开安装和权限的策略,对于多实例管理有利。
三.配置文件参数 (所有节点都执行)
[root@rac1 ~]# vi /etc/sysctl.conf
kernel.msgmnb = 65536
kernel.msgmax = 65536
kernel.shmmax = 68719476736
kernel.shmall = 4294967296
fs.aio-max-nr = 1048576
fs.file-max = 6815744
kernel.shmall = 2097152
kernel.shmmax = 1306910720
kernel.shmmni = 4096
kernel.sem = 250 32000 100 128
net.ipv4.ip_local_port_range = 9000 65500
net.core.rmem_default = 262144
net.core.rmem_max = 4194304
net.core.wmem_default = 262144
net.core.wmem_max = 1048586
net.ipv4.tcp_wmem = 262144 262144 262144
net.ipv4.tcp_rmem = 4194304 4194304 4194304
加上以上的内容,确认修改内核使之失效:
[root@rac1 ~]# sysctl -p
配置oracle、grid用户的shell限制 :
[root@rac1 ~]# vi /etc/security/limits.conf
grid soft nproc 2047
grid hard nproc 16384
grid soft nofile 1024
grid hard nofile 65536
oracle soft nproc 2047
oracle hard nproc 16384
oracle soft nofile 1024
oracle hard nofile 65536
使之失效需要重新login一次。
四.安装所需要的包(所有节点都执行)
binutils-2.20.51.0.2-5.11.el6 (x86_64)
compat-libcap1-1.10-1 (x86_64)
compat-libstdc++-33-3.2.3-69.el6 (x86_64)
compat-libstdc++-33-3.2.3-69.el6.i686
gcc-4.4.4-13.el6 (x86_64)
gcc-c++-4.4.4-13.el6 (x86_64)
glibc-2.12-1.7.el6 (i686)
glibc-2.12-1.7.el6 (x86_64)
glibc-devel-2.12-1.7.el6 (x86_64)
glibc-devel-2.12-1.7.el6.i686
ksh
libgcc-4.4.4-13.el6 (i686)
libgcc-4.4.4-13.el6 (x86_64)
libstdc++-4.4.4-13.el6 (x86_64)
libstdc++-4.4.4-13.el6.i686
libstdc++-devel-4.4.4-13.el6 (x86_64)
libstdc++-devel-4.4.4-13.el6.i686
libaio-0.3.107-10.el6 (x86_64)
libaio-0.3.107-10.el6.i686
libaio-devel-0.3.107-10.el6 (x86_64)
libaio-devel-0.3.107-10.el6.i686
make-3.81-19.el6
sysstat-9.0.4-11.el6 (x86_64)
这里使用的是配置本地源的方式,自己先进行配置:
[root@rac1 ~]# mount /dev/cdrom /mnt/cdrom/
[root@rac1 ~]# vi /etc/yum.repos.d/dvd.repo
[dvd]
name=dvd
baseurl=file:///mnt/cdrom
gpgcheck=0
enabled=1
[root@rac1 ~]# yum clean all
[root@rac1 ~]# yum makecache
[root@rac1 ~]# yum install gcc gcc-c++ glibc* glibc-devel* ksh libgcc* libstdc++* libstdc++-devel* make sysstat
五.配置IP和hosts、hostname(所有节点都执行)
增加网卡需要注意两个节点的网卡名称要一致,比如两个都是eth0,eth1,不能rac1是eth0,eht1,rac2是eth1,eth2。
通过 ip addr查看当前的网卡名称,如果不一致的话,最好是重新添加网卡,以下是操作步骤:
5.1 将vmware的所有网卡都删除掉,删除 /etc/sysconfig/network-scripts/ifcfg-eth*
5.2清空70-persistent-net.rules的内容,将这个文件备份一下,将所有内容都清空或者注释掉。
[root@rac1 ~]# cd /etc/udev/rules.d/
[root@rac1 rules.d]# cat 70-persistent-net.rules
# This file was automatically generated by the /lib/udev/write_net_rules
# program, run by the persistent-net-generator.rules rules file.
#
# You can modify it, as long as you keep each rule on a single
# line, and change only the value of the NAME= key.

# PCI device 0x8086:0x100f (e1000)
SUBSYSTEM=="net", ACTION=="add", DRIVERS=="?*", ATTR{address}=="00:0c:29:5c:63:e                                              0", ATTR{type}=="1", KERNEL=="eth*", NAME="eth0"

# PCI device 0x8086:0x100f (e1000)
SUBSYSTEM=="net", ACTION=="add", DRIVERS=="?*", ATTR{address}=="00:0c:29:a3:ec:c                                              3", ATTR{type}=="1", KERNEL=="eth*", NAME="eth1"

# PCI device 0x8086:0x100f (e1000)
SUBSYSTEM=="net", ACTION=="add", DRIVERS=="?*", ATTR{address}=="00:0c:29:1b:6f:c                                              4", ATTR{type}=="1", KERNEL=="eth*", NAME="eth2"

# PCI device 0x8086:0x100f (e1000)
SUBSYSTEM=="net", ACTION=="add", DRIVERS=="?*", ATTR{address}=="00:0c:29:95:aa:4                                              9", ATTR{type}=="1", KERNEL=="eth*", NAME="eth3"

# PCI device 0x8086:0x100f (e1000)
SUBSYSTEM=="net", ACTION=="add", DRIVERS=="?*", ATTR{address}=="00:0c:29:95:aa:5                                              3", ATTR{type}=="1", KERNEL=="eth*", NAME="eth4"

# PCI device 0x8086:0x100f (e1000) (custom name provided by external tool)
SUBSYSTEM=="net", ACTION=="add", DRIVERS=="?*", ATTR{address}=="00:0c:29:95:aa:5                                              3", ATTR{type}=="1", KERNEL=="eth*", NAME="eth5"
5.2 删除网卡
5.3添加第一个网卡,属性是bridged,添加完后会发现eth0,不在是eth3,或者其它的了,重新计数了。
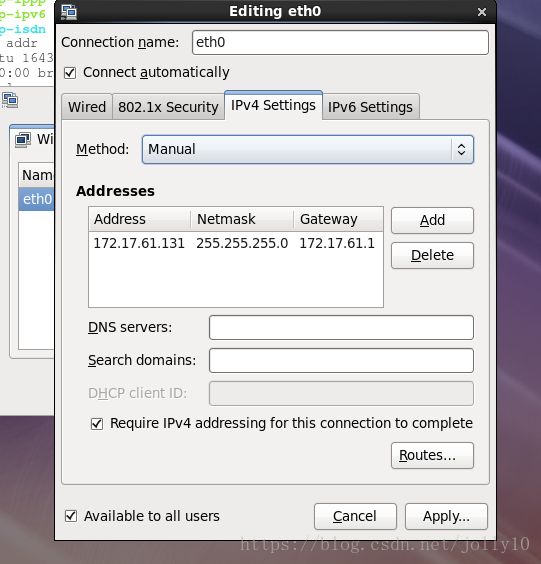
5.4修改第一个网卡的ip,通过network connection修改,connection name为eth0,系统会生成ifcfg-eht0的文件。
5.5查看第一块网卡的信息
[root@rac1 ~]# ip addr
1: lo:  mtu 16436 qdisc noqueue state UNKNOWN
    link/loopback 00:00:00:00:00:00 brd 00:00:00:00:00:00
    inet 127.0.0.1/8 scope host lo
    inet6 ::1/128 scope host
       valid_lft forever preferred_lft forever
6: eth0:  mtu 1500 qdisc pfifo_fast state UP qlen 1000
    link/ether 00:0c:29:95:aa:49 brd ff:ff:ff:ff:ff:ff
    inet 172.17.61.131/24 brd 172.17.61.255 scope global eth0
    inet6 fe80::20c:29ff:fe95:aa49/64 scope link
       valid_lft forever preferred_lft forever
5.6 添加第二块网卡,属性为host only
5.7.通过ifconfig查看eth1网卡的HWADDR
[root@rac1 ~]# ifconfig -a
eth0      Link encap:Ethernet  HWaddr 00:0C:29:95:AA:49
          inet addr:172.17.61.131  Bcast:172.17.61.255  Mask:255.255.255.0
          inet6 addr: fe80::20c:29ff:fe95:aa49/64 Scope:Link
          UP BROADCAST RUNNING MULTICAST  MTU:1500  Metric:1
          RX packets:1374 errors:0 dropped:0 overruns:0 frame:0
          TX packets:188 errors:0 dropped:0 overruns:0 carrier:0
          collisions:0 txqueuelen:1000
          RX bytes:156382 (152.7 KiB)  TX bytes:33655 (32.8 KiB)

eth1      Link encap:Ethernet  HWaddr 00:0C:29:95:AA:53
          inet addr:172.17.61.131  Bcast:172.17.61.255  Mask:255.255.255.0
          inet6 addr: fe80::20c:29ff:fe95:aa53/64 Scope:Link
          UP BROADCAST RUNNING MULTICAST  MTU:1500  Metric:1
          RX packets:1 errors:0 dropped:0 overruns:0 frame:0
          TX packets:133 errors:0 dropped:0 overruns:0 carrier:0
          collisions:0 txqueuelen:1000
          RX bytes:243 (243.0 b)  TX bytes:9010 (8.7 KiB)
5.8编辑ifcfg-eht1,必须指定HWADDR的值为上面的值,修改IPADDR,gateway,uuid都注释掉,由于这个是priv-ip所以netmask也注释掉。
[root@rac1 network-scripts]# cat ifcfg-eth1
TYPE=Ethernet
BOOTPROTO=none
IPADDR=10.10.10.1
PREFIX=24
#GATEWAY=172.17.61.1
DEFROUTE=yes
IPV4_FAILURE_FATAL=yes
IPV6INIT=no
NAME=eth0
#UUID=c2862641-f2c5-4cc7-b38c-33a7f6f4a021
ONBOOT=yes
HWADDR=00:0C:29:95:AA:53
5.7.重启网络后两个网卡都能正常工作了:
[root@rac1 ~]# ip addr
1: lo:  mtu 16436 qdisc noqueue state UNKNOWN
    link/loopback 00:00:00:00:00:00 brd 00:00:00:00:00:00
    inet 127.0.0.1/8 scope host lo
    inet6 ::1/128 scope host
       valid_lft forever preferred_lft forever
6: eth0:  mtu 1500 qdisc pfifo_fast state UP qlen 1000
    link/ether 00:0c:29:95:aa:49 brd ff:ff:ff:ff:ff:ff
    inet 172.17.61.131/24 brd 172.17.61.255 scope global eth0
    inet6 fe80::20c:29ff:fe95:aa49/64 scope link
       valid_lft forever preferred_lft forever
7: eth1:  mtu 1500 qdisc pfifo_fast state UP qlen 1000
    link/ether 00:0c:29:95:aa:53 brd ff:ff:ff:ff:ff:ff
    inet 10.10.10.1/24 brd 10.10.10.255 scope global eth1
    inet6 fe80::20c:29ff:fe95:aa53/64 scope link
       valid_lft forever preferred_lft forever
5.8 根据以上步骤设置rac2的网卡
5.9 /etc/hosts设置,2台主机设置一样
[grid@rac1 ~]$ cat /etc/hosts
127.0.0.1   localhost localhost.localdomain localhost4 localhost4.localdomain4
::1         localhost localhost.localdomain localhost6 localhost6.localdomain6
172.17.61.132   rac2
10.10.10.2      rac2-priv
172.17.61.232   rac2-vip

172.17.61.131   rac1
10.10.10.1      rac1-priv
172.17.61.231   rac1-vip
172.17.61.133   scan-ip
六.配置grid和oracle用户环境变量
Oracle_sid需要根据节点不同进行修改
[root@rac1 ~]# su - grid
[grid@rac1 ~]$ vi .bash_profile
export TMP=/tmp
export TMPDIR=$TMP
export ORACLE_SID=+ASM1  # RAC1
export ORACLE_SID=+ASM2  # RAC2
export ORACLE_BASE=/u01/app/grid
export ORACLE_HOME=/u01/app/11.2.0/grid
export PATH=/usr/sbin:$PATH
export PATH=$ORACLE_HOME/bin:$PATH
export LD_LIBRARY_PATH=$ORACLE_HOME/lib:/lib:/usr/lib
export CLASSPATH=$ORACLE_HOME/JRE:$ORACLE_HOME/jlib:$ORACLE_HOME/rdbms/jlib
umask 022需要注意的是ORACLE_UNQNAME是数据库名,创建数据库时指定多个节点是会创建多个实例,ORACLE_SID指的是数据库实例名
[root@rac1 ~]# su - oracle
[oracle@rac1 ~]$ vi .bash_profile
export TMP=/tmp
export TMPDIR=$TMP
export ORACLE_SID=orcl1  # RAC1
export ORACLE_SID=orcl2  # RAC2
export ORACLE_UNQNAME=orcl
export ORACLE_BASE=/u01/app/oracle
export ORACLE_HOME=$ORACLE_BASE/product/11.2.0/db_1
export TNS_ADMIN=$ORACLE_HOME/network/admin
export PATH=/usr/sbin:$PATH
export PATH=$ORACLE_HOME/bin:$PATH
export LD_LIBRARY_PATH=$ORACLE_HOME/lib:/lib:/usr/lib
$ source .bash_profile使配置文件生效
七.配置grid和oracle用户互信
这是很关键的一步,虽然官方文档中声称安装GI和RAC的时候OUI会自动配置SSH,但为了在安装之前使用CVU检查各项配置,还是手动配置互信更优。
[root@rac1 ~]# su - oracle
[oracle@rac1 ~]$ssh-keygen -t rsa
[oracle@rac1 ~]$ssh-keygen -t dsa

[oracle@rac1 ~]$cat ~/.ssh/id_rsa.pub >> authorized_keys
[oracle@rac1 ~]$ cat ~/.ssh/id_rsa.pub >> authorized_keys

[oracle@rac1 ~]$ cd .ssh
[oracle@rac1 .ssh]$ scp authorized_keys rac2:~/.ssh/
[oracle@rac1 .ssh]$ chmod 600 authorized_keys

[oracle@rac1 .ssh]$ssh rac1 date
[oracle@rac1 .ssh]$ssh rac2 date
[oracle@rac1 .ssh]$ssh rac1-priv date
[oracle@rac1 .ssh]$ssh rac2-priv date

测试是否通过,包括私有IP以及ssh自已。
需要注意的是生成密钥时不设置密码,授权文件权限为600,同时需要两个节点互相ssh通过一次。
这里仅为oracle用户为便,grid用户也一起配置一下。
八.配置裸设备 (分区一个节点,挂载需要在两个节点进行)
8.1将之前手动添加的5个硬件进行分区
fdisk /dev/sdc
Command (m for help): n
Command action
   e   extended
   p   primary partition (1-4)
p
Partition number (1-4): 1
最后 w 命令保存更改
将/dev/sdc ,/dev/sdd,/dev/sde,/dev/sdf,/dev/sdg都分区
通过修改60-raw.rules的方式添加裸设备
[root@rac1 ~]# cat /etc/udev/rules.d/60-raw.rules
# Enter raw device bindings here.
#
# An example would be:
#   ACTION=="add", KERNEL=="sda", RUN+="/bin/raw /dev/raw/raw1 %N"
# to bind /dev/raw/raw1 to /dev/sda, or
#   ACTION=="add", ENV{MAJOR}=="8", ENV{MINOR}=="1", RUN+="/bin/raw /dev/raw/raw2 %M %m"
# to bind /dev/raw/raw2 to the device with major 8, minor 1.
ACTION=="add",KERNEL=="/dev/sdc1",RUN+='/bin/raw /dev/raw/raw1 %N"
ACTION=="add",ENV{MAJOR}=="8",ENV{MINOR}=="17",RUN+="/bin/raw /dev/raw/raw1 %M %m"
ACTION=="add",KERNEL=="/dev/sdd1",RUN+='/bin/raw /dev/raw/raw2 %N"
ACTION=="add",ENV{MAJOR}=="8",ENV{MINOR}=="33",RUN+="/bin/raw /dev/raw/raw2 %M %m"
ACTION=="add",KERNEL=="/dev/sde1",RUN+='/bin/raw /dev/raw/raw3 %N"
ACTION=="add",ENV{MAJOR}=="8",ENV{MINOR}=="49",RUN+="/bin/raw /dev/raw/raw3 %M %m"
ACTION=="add",KERNEL=="/dev/sdf1",RUN+='/bin/raw /dev/raw/raw4 %N"
ACTION=="add",ENV{MAJOR}=="8",ENV{MINOR}=="65",RUN+="/bin/raw /dev/raw/raw4 %M %m"
ACTION=="add",KERNEL=="/dev/sdg1",RUN+='/bin/raw /dev/raw/raw5 %N"
ACTION=="add",ENV{MAJOR}=="8",ENV{MINOR}=="81",RUN+="/bin/raw /dev/raw/raw5 %M %m"

KERNEL=="raw[1-5]",OWNER="grid",GROUP="asmadmin",MODE="660"
这里有个问题需要注意,由于我的虚拟机已有两个磁盘/dev/sda和/dev/sdb,/dev/sda是系统盘,/dev/sda是/u01的挂载盘。/dev/sdc~/dev/sdg为5个祼设备,按照上面的配置/dev/sdc1对应的ENV{MINOR}=="17"在后面的安装中会出现找不到/dev/raw1的问题,所以要将ENV{MINOR}=="17"都向后推,改成ENV{MINOR}=="33",(如果裸设备是从/dev/sdb开始的话,则从ENV{MINOR}=="17开始),后面每个磁盘以每16位递增,改成如下:
[root@rac1 ~]# cat  /etc/udev/rules.d/60-raw.rules
# Enter raw device bindings here.
#
# An example would be:
#   ACTION=="add", KERNEL=="sda", RUN+="/bin/raw /dev/raw/raw1 %N"
# to bind /dev/raw/raw1 to /dev/sda, or
#   ACTION=="add", ENV{MAJOR}=="8", ENV{MINOR}=="1", RUN+="/bin/raw /dev/raw/raw2 %M %m"
# to bind /dev/raw/raw2 to the device with major 8, minor 1.

ACTION=="add",KERNEL=="/dev/sdc1",RUN+='/bin/raw /dev/raw/raw1 %N"
ACTION=="add",ENV{MAJOR}=="8",ENV{MINOR}=="33",RUN+="/bin/raw /dev/raw/raw1 %M %m"
ACTION=="add",KERNEL=="/dev/sdd1",RUN+='/bin/raw /dev/raw/raw2 %N"
ACTION=="add",ENV{MAJOR}=="8",ENV{MINOR}=="49",RUN+="/bin/raw /dev/raw/raw2 %M %m"
ACTION=="add",KERNEL=="/dev/sde1",RUN+='/bin/raw /dev/raw/raw3 %N"
ACTION=="add",ENV{MAJOR}=="8",ENV{MINOR}=="65",RUN+="/bin/raw /dev/raw/raw3 %M %m"
ACTION=="add",KERNEL=="/dev/sdf1",RUN+='/bin/raw /dev/raw/raw4 %N"
ACTION=="add",ENV{MAJOR}=="8",ENV{MINOR}=="81",RUN+="/bin/raw /dev/raw/raw4 %M %m"
ACTION=="add",KERNEL=="/dev/sdg1",RUN+='/bin/raw /dev/raw/raw5 %N"
ACTION=="add",ENV{MAJOR}=="8",ENV{MINOR}=="97",RUN+="/bin/raw /dev/raw/raw5 %M %m"

KERNEL=="raw[1-5]",OWNER="grid",GROUP="asmadmin",MODE="660"
[root@rac1 ~]# start_udev
Starting udev:                                             [  OK  ]

[root@rac1 ~]# ll /dev/raw/
total 0
crw-rw---- 1 grid asmadmin 162, 1 Aug  9 20:57 raw1
crw-rw---- 1 grid asmadmin 162, 2 Aug  9 20:57 raw2
crw-rw---- 1 grid asmadmin 162, 3 Aug  9 20:57 raw3
crw-rw---- 1 grid asmadmin 162, 4 Aug  9 20:57 raw4
crw-rw---- 1 grid asmadmin 162, 5 Aug  9 20:57 raw5
crw-rw---- 1 root disk     162, 0 Aug  9 20:57 rawctl
九.挂载源文件,源文件在windows下(所有节点都执行)
先要将源文件夹设为共享,再挂载到linux下
[root@rac1 ~]# mkdir -p /u01/resource
[root@rac1 ~]# mount -t cifs -o username=l5m,passworkd=ericlu306 //172.17.61.181/oracle\ 11g /u01/resource
十.安装用于Linux的cvuqdisk(所有节点都执行)
在Oracle RAC两个节点上安装cvuqdisk,否则,集群验证使用程序就无法发现共享磁盘,当运行(手动运行或在Oracle Grid Infrastructure安装结束时自动运行)集群验证使用程序,会报错“Package cvuqdisk not installed”
注意使用适用于硬件体系结构(x86_64或i386)的cvuqdisk RPM。
cvuqdisk RPM在grid的安装介质上的rpm目录中。
[root@rac1 rpm]# rpm -ivh cvuqdisk-1.0.9-1.rpm
Preparing...                ########################################### [100%]
Using default group oinstall to install package
   1:cvuqdisk               ########################################### [100%]
十一.手动运行cvu使用验证程序验证Oracle集群件要求(所有节点都执行)
[root@rac1 u01]# su - grid
[grid@rac1 ~]$ cd /u01/resource/
[grid@rac1 resource]$ cd grid/
[grid@rac1 grid]$  ./runcluvfy.sh stage -pre crsinst -n rac1,rac2 -fixup -verbose 2>&1 | tee /u01/rac1.log
检查/u01/rac1.log中所有failed的问题。
我的检查中有以下几个问题:
问题1:
Check: User equivalence for user "grid"
  Node Name                             Status
  ------------------------------------  ------------------------
  rac2                                  passed
  rac1                                  failed
Result: PRVF-4007 : User equivalence check failed for user "grid"
这个是两台机器grid互信的问题,要确保rac1和rac2能连接rac2,rac2-priv,rac1,rac1-priv。我的问题就是rac1没有连接rac1,rac1-priv,rac2没有连接rac2-priv,rac2,就是说自己连自己也需要测试一下。
[grid@rac1 ~]$ ssh rac2 date
[grid@rac1 ~]$ ssh rac2-priv date
[grid@rac1 ~]$ ssh rac1-priv date
[grid@rac1 ~]$ ssh rac1 date
[grid@rac2 ~]$ ssh rac2 date
[grid@rac2 ~]$ ssh rac2-priv date
[grid@rac2 ~]$ ssh rac1-priv date
[grid@rac2 ~]$ ssh rac1 date
问题2:
缺少包:
Check: Package existence for "elfutils-libelf-devel"
  Node Name     Available                 Required                  Status
  ------------  ------------------------  ------------------------  ----------
  rac2          missing                   elfutils-libelf-devel-0.97  failed
Result: Package existence check failed for "elfutils-libelf-devel"

Check: Package existence for "libaio-devel(x86_64)"
  Node Name     Available                 Required                  Status
  ------------  ------------------------  ------------------------  ----------
  rac2          missing                   libaio-devel(x86_64)-0.3.105  failed
Result: Package existence check failed for "libaio-devel(x86_64)"

Check: Package existence for "pdksh"
  Node Name     Available                 Required                  Status
  ------------  ------------------------  ------------------------  ----------
  rac2          missing                   pdksh-5.2.14              failed
Result: Package existence check failed for "pdksh"
elfutils-libelf-devel-0.97和libaio-devel(x86_64)-0.3.105通过dvd的rpm包能够正常安装。
pdksh-5.2.14这个问题google查了一下:
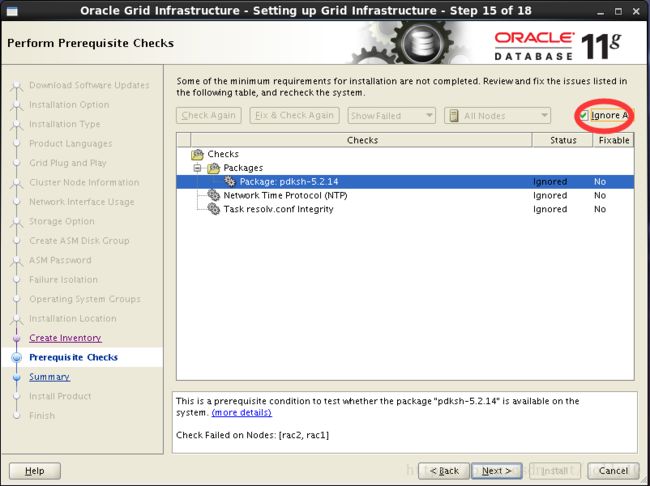
新的oracle都使用ksh包了,但是oracle的check机制里面并没有把这个check去掉,所以在执行界面安装oracle的时候,还会有告警信息,我们可以忽略掉它,然后看看ksh有没有安装,如果没有安装就安装ksh,用ksh就可以。
[root@rac1 ~]# rpm -aq | grep ksh
ksh-20100621-16.el6.x86_64
问题3:
ntp没有开启
No NTP Daemons or Services were found to be running
PRVF-5507 : NTP daemon or service is not running on any node but NTP configuration file exists on the following node(s):
rac2
Result: Clock synchronization check using Network Time Protocol(NTP) failed
可以配置ntpd服务,更简单的方法就是建立crontab,定时更新时间
[root@rac1 ~]# cat /etc/ntp.conf
server 127.127.1.0
fudge 127.127.1.0 stratum 11
driftfile /var/lib/ntp/drift
broadcastdelay 0.008

[root@rac1 ~]#  chkconfig ntpd on


[root@rac2 ~]#  chkconfig ntpd off
[root@rac2 rpm]# crontab -l
*/15 * * * * ntpdate 172.17.61.131
设置rac2每15分钟与rac1同步一次时间
问题4:
Checking DNS response time for an unreachable node
  Node Name                             Status
  ------------------------------------  ------------------------
  rac2                                  failed
PRVF-5636 : The DNS response time for an unreachable node exceeded "15000" ms on following nodes: rac2

File "/etc/resolv.conf" is not consistent across nodes
这个错误是因为没有配置DNS,但不影响安装,后面也会提示resolv.conf错误,我们用静态的scan-ip,所以可以忽略。
十二.安装Grid Infrastructure
[root@rac1 ~]# xhost +
[root@rac1 ~]# su - grid
[grid@rac1 ~]$ cd /u01/resource/grid
[grid@rac1 grid]$ ./runInstaller
遇到的问题:
[grid@rac1 grid]$ ./runInstaller
Starting Oracle Universal Installer...

Checking Temp space: must be greater than 120 MB.   Actual 11773 MB    Passed
Checking swap space: must be greater than 150 MB.   Actual 2547 MB    Passed
Checking monitor: must be configured to display at least 256 colors
    >>> Could not execute auto check for display colors using command /usr/bin/xdpyinfo. Check if the DISPLAY variable is set.    Failed <<<<

Some requirement checks failed. You must fulfill these requirements before

continuing with the installation,

Continue? (y/n) [n] y


>>> Ignoring required pre-requisite failures. Continuing...
Preparing to launch Oracle Universal Installer from /tmp/OraInstall2018-08-10_08-56-15PM. Please wait ...[grid@rac1 grid]$ Exception in thread "main" java.lang.NoClassDefFoundError
        at java.lang.Class.forName0(Native Method)
        at java.lang.Class.forName(Class.java:164)
        at java.awt.Toolkit$2.run(Toolkit.java:821)
        at java.security.AccessController.doPrivileged(Native Method)
        at java.awt.Toolkit.getDefaultToolkit(Toolkit.java:804)
        at com.jgoodies.looks.LookUtils.isLowResolution(LookUtils.java:484)
        at com.jgoodies.looks.LookUtils.(LookUtils.java:249)
        at com.jgoodies.looks.plastic.PlasticLookAndFeel.(PlasticLookAndFeel.java:135)
        at java.lang.Class.forName0(Native Method)
        at java.lang.Class.forName(Class.java:242)
        at javax.swing.SwingUtilities.loadSystemClass(SwingUtilities.java:1779)
        at javax.swing.UIManager.setLookAndFeel(UIManager.java:453)
        at oracle.install.commons.util.Application.startup(Application.java:780)
        at oracle.install.commons.flow.FlowApplication.startup(FlowApplication.java:165)
        at oracle.install.commons.flow.FlowApplication.startup(FlowApplication.java:182)
        at oracle.install.commons.base.driver.common.Installer.startup(Installer.java:348)
        at oracle.install.ivw.crs.driver.CRSInstaller.startup(CRSInstaller.java:98)
        at oracle.install.ivw.crs.driver.CRSInstaller.main(CRSInstaller.java:105)
由于不是远程登录的,不存在设置DISPLAY的问题,解决问题的办法就是在root帐户下设置xhost + ,使ip上的用户能够访问Xserver.
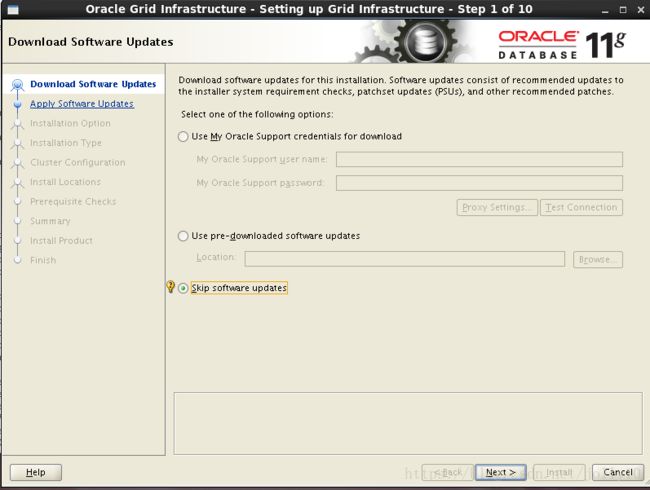
跳过更新:
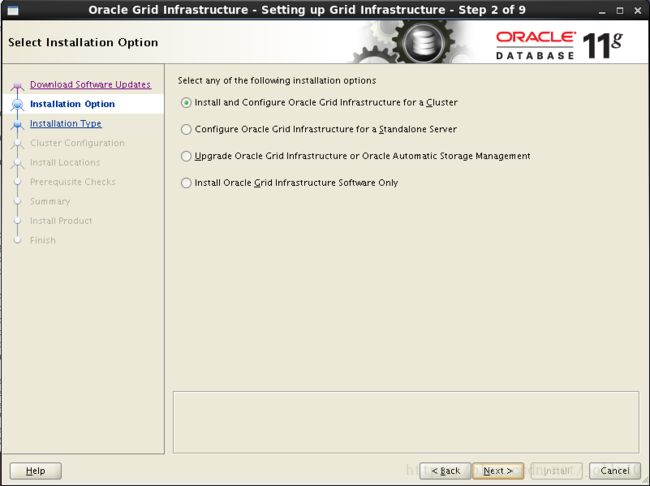
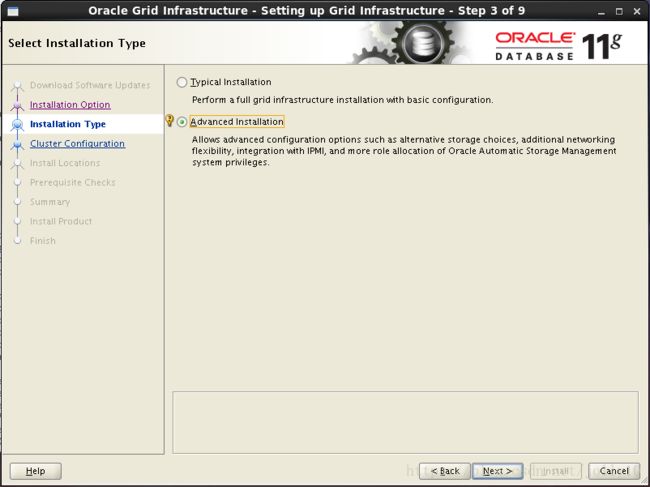
选择安装集群:
选择自定义安装:
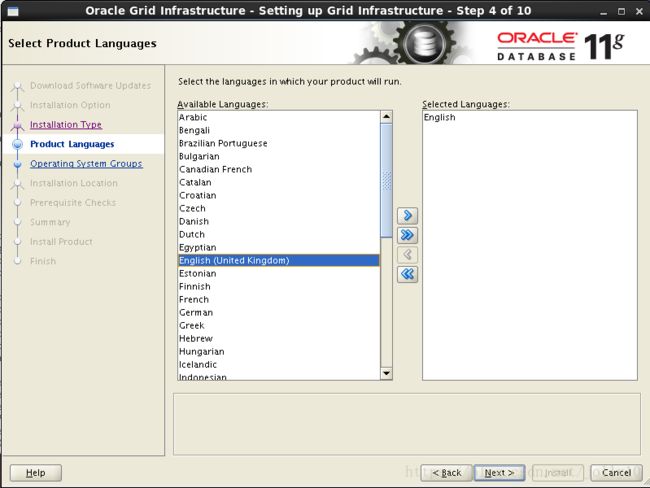
选择语言:
定义集群名字,SCAN Name 为hosts中定义的scan-ip,取消GNS
节点信息,界面只有第一个节点rac1,点击“Add”把第二个节点rac2加上
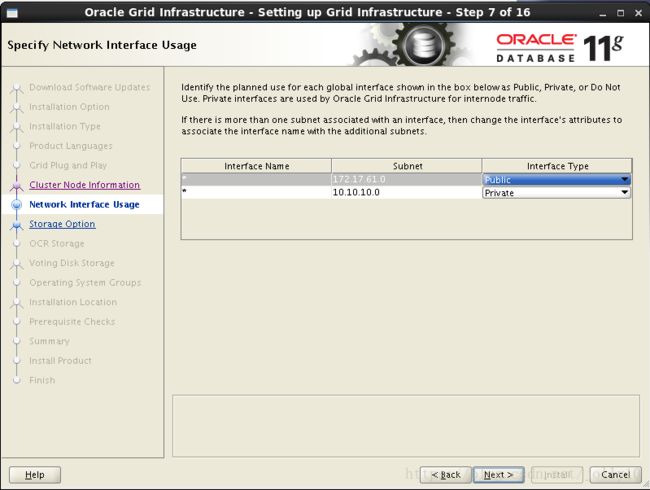
网卡设置,默认就可以,检查一下一个为public,一个为private
配置ASM,这里选择前面配置的裸盘raw1,raw2,raw3,冗余方式为External即不冗余。因为是不用于,所以也可以只选一个设备。这里的设备是用来做OCR注册盘和votingdisk投票盘的。
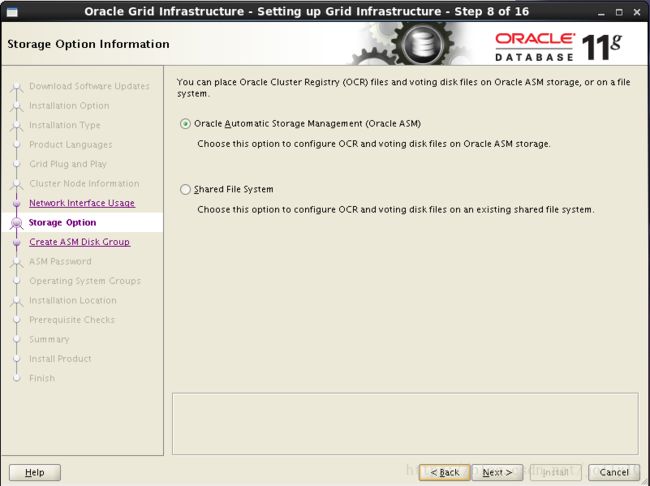
选择使用ASM:
配置ASM,这里选择前面配置的裸盘raw1,raw2,raw3,size为1g的三个设备,冗余方式为External即不冗余。这里的设备是用来做OCR注册盘和votingdisk投票盘的,将Disk Group Name 改为OCR.
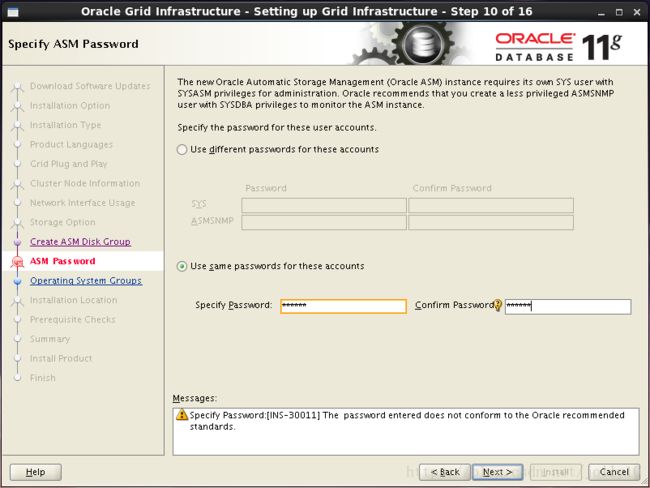
配置ASM实例需要为具有sysasm权限的sys用户,具有sysdba权限的asmsnmp用户设置密码,这里设置统一密码为oracle,会提示密码不符合标准,点击YES即可
不选择智能管理
检查ASM实例权限分组情况
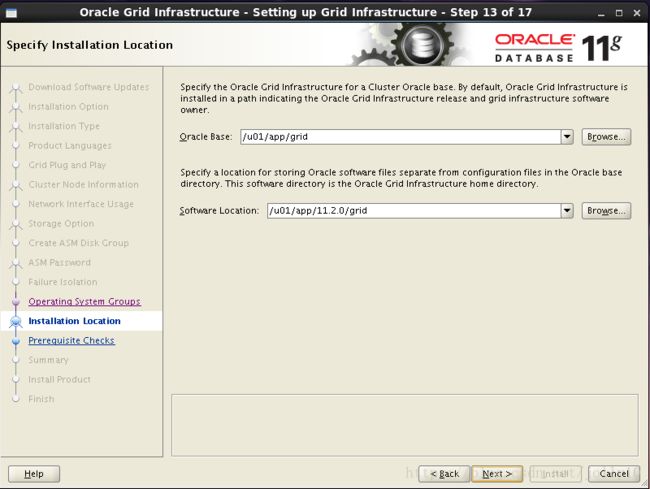
选择grid软件安装路径和base目录
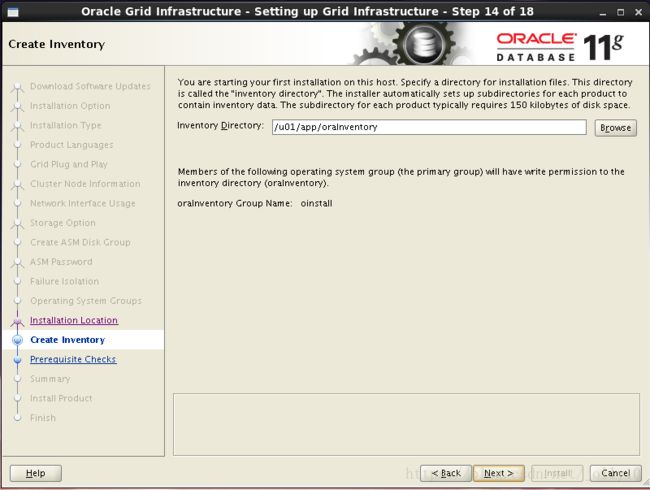
选择grid安装清单目录
环境检测出现三个错误,这三个错误在之前都有说明过了,可以忽略 ,勾选ignore all,进行下一步
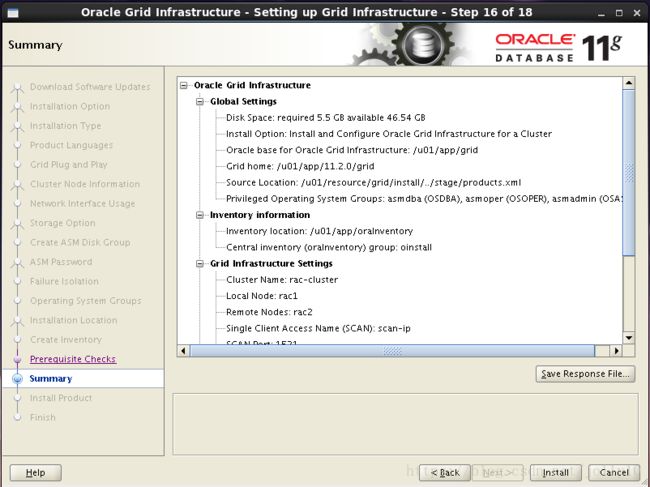
安装grid概要
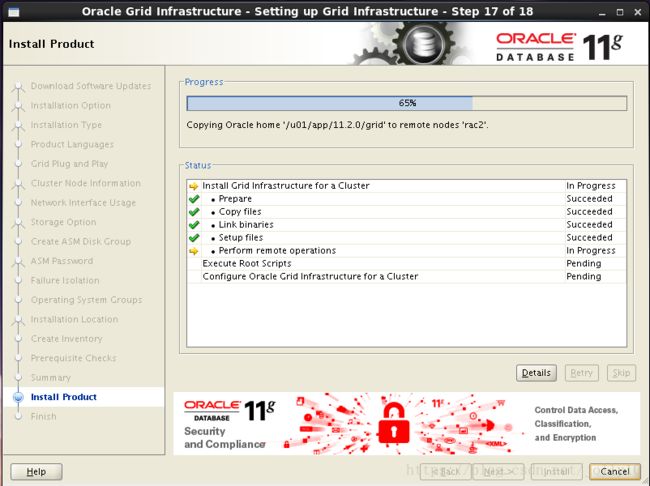
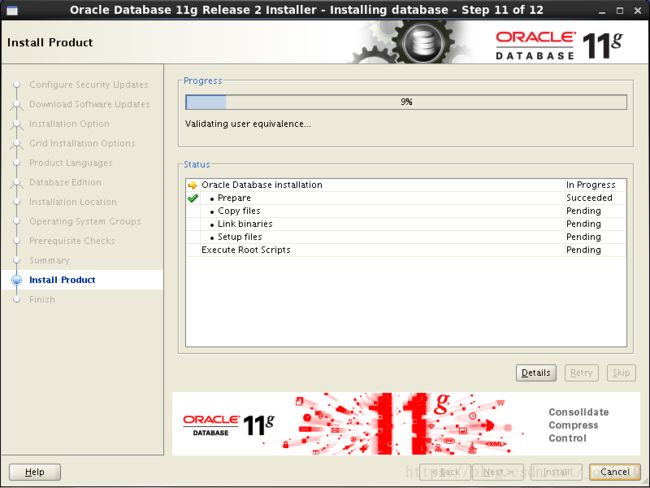
开始安装
复制安装到其他节点
安装grid完成,提示需要root用户依次执行脚本orainstRoot.sh ,root.sh (一定要先在rac1执行完脚本后,才能在其他节点执行)
rac1执行过程:
[root@rac1 ~]# sh /u01/app/oraInventory/orainstRoot.sh
Changing permissions of /u01/app/oraInventory.
Adding read,write permissions for group.
Removing read,write,execute permissions for world.

Changing groupname of /u01/app/oraInventory to oinstall.
The execution of the script is complete.

[root@rac1 ~]# sh /u01/app/11.2.0/grid/root.sh
Performing root user operation for Oracle 11g

The following environment variables are set as:
    ORACLE_OWNER= grid
    ORACLE_HOME=  /u01/app/11.2.0/grid

Enter the full pathname of the local bin directory: [/usr/local/bin]:
   Copying dbhome to /usr/local/bin ...
   Copying oraenv to /usr/local/bin ...
   Copying coraenv to /usr/local/bin ...


Creating /etc/oratab file...
Entries will be added to the /etc/oratab file as needed by
Database Configuration Assistant when a database is created
Finished running generic part of root script.
Now product-specific root actions will be performed.
Using configuration parameter file: /u01/app/11.2.0/grid/crs/install/crsconfig_params
Creating trace directory
User ignored Prerequisites during installation
OLR initialization - successful
  root wallet
  root wallet cert
  root cert export
  peer wallet
  profile reader wallet
  pa wallet
  peer wallet keys
  pa wallet keys
  peer cert request
  pa cert request
  peer cert
  pa cert
  peer root cert TP
  profile reader root cert TP
  pa root cert TP
  peer pa cert TP
  pa peer cert TP
  profile reader pa cert TP
  profile reader peer cert TP
  peer user cert
  pa user cert
Adding Clusterware entries to upstart
CRS-2672: Attempting to start 'ora.mdnsd' on 'rac1'
CRS-2676: Start of 'ora.mdnsd' on 'rac1' succeeded
CRS-2672: Attempting to start 'ora.gpnpd' on 'rac1'
CRS-2676: Start of 'ora.gpnpd' on 'rac1' succeeded
CRS-2672: Attempting to start 'ora.cssdmonitor' on 'rac1'
CRS-2672: Attempting to start 'ora.gipcd' on 'rac1'
CRS-2676: Start of 'ora.cssdmonitor' on 'rac1' succeeded
CRS-2676: Start of 'ora.gipcd' on 'rac1' succeeded
CRS-2672: Attempting to start 'ora.cssd' on 'rac1'
CRS-2672: Attempting to start 'ora.diskmon' on 'rac1'
CRS-2676: Start of 'ora.diskmon' on 'rac1' succeeded
CRS-2676: Start of 'ora.cssd' on 'rac1' succeeded

ASM created and started successfully.

Disk Group OCR created successfully.

clscfg: -install mode specified
Successfully accumulated necessary OCR keys.
Creating OCR keys for user 'root', privgrp 'root'..
Operation successful.
CRS-4256: Updating the profile
Successful addition of voting disk 637a7cca14224f23bfc659b9f6f8d911.
Successfully replaced voting disk group with +OCR.
CRS-4256: Updating the profile
CRS-4266: Voting file(s) successfully replaced
##  STATE    File Universal Id                File Name Disk group
--  -----    -----------------                --------- ---------
 1. ONLINE   637a7cca14224f23bfc659b9f6f8d911 (/dev/raw/raw1) [OCR]
Located 1 voting disk(s).
CRS-2672: Attempting to start 'ora.asm' on 'rac1'
CRS-2676: Start of 'ora.asm' on 'rac1' succeeded
CRS-2672: Attempting to start 'ora.OCR.dg' on 'rac1'
CRS-2676: Start of 'ora.OCR.dg' on 'rac1' succeeded
Configure Oracle Grid Infrastructure for a Cluster ... succeeded
rac2执行过程:
[root@rac2 ~]#  sh /u01/app/oraInventory/orainstRoot.sh
Changing permissions of /u01/app/oraInventory.
Adding read,write permissions for group.
Removing read,write,execute permissions for world.

Changing groupname of /u01/app/oraInventory to oinstall.
The execution of the script is complete.
[root@rac2 ~]# sh /u01/app/11.2.0/grid/root.sh
Performing root user operation for Oracle 11g

The following environment variables are set as:
    ORACLE_OWNER= grid
    ORACLE_HOME=  /u01/app/11.2.0/grid

Enter the full pathname of the local bin directory: [/usr/local/bin]:
   Copying dbhome to /usr/local/bin ...
   Copying oraenv to /usr/local/bin ...
   Copying coraenv to /usr/local/bin ...


Creating /etc/oratab file...
Entries will be added to the /etc/oratab file as needed by
Database Configuration Assistant when a database is created
Finished running generic part of root script.
Now product-specific root actions will be performed.
Using configuration parameter file: /u01/app/11.2.0/grid/crs/install/crsconfig_params
Creating trace directory
User ignored Prerequisites during installation
OLR initialization - successful
Adding Clusterware entries to upstart
CRS-4402: The CSS daemon was started in exclusive mode but found an active CSS daemon on node rac1, number 1, and is terminating
An active cluster was found during exclusive startup, restarting to join the cluster
Configure Oracle Grid Infrastructure for a Cluster ... succeeded
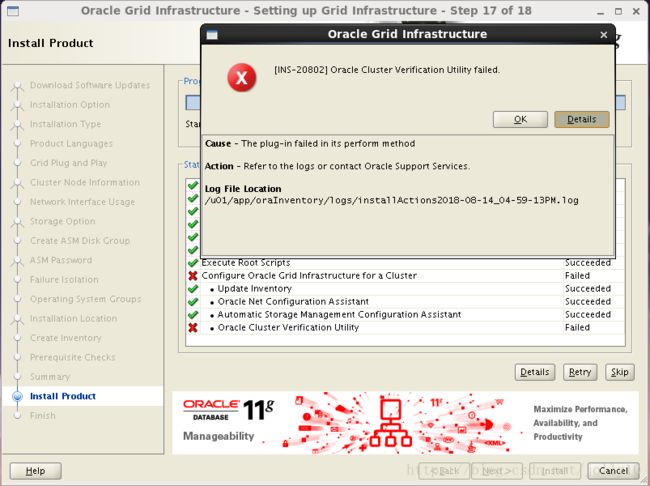
完成脚本后,点击OK,Next,下一步 ,这里出现了一个错误:
从日志信息来看,是因为没有配置resolv
INFO: Checking name resolution setup for "scan-ip"...
INFO: ERROR:
INFO: PRVG-1101 : SCAN name "scan-ip" failed to resolve
INFO: ERROR:
INFO: PRVF-4657 : Name resolution setup check for "scan-ip" (IP address: 172.17.61.133) failed
INFO: ERROR:
INFO: PRVF-4664 : Found inconsistent name resolution entries for SCAN name "scan-ip"
INFO: Verification of SCAN VIP and Listener setup failed
直接Next跳过,grid集群软件安装完成。
13.安装grid后的检查:
检查crs状态
[grid@rac1 ~]$ crsctl check crs
CRS-4638: Oracle High Availability Services is online
CRS-4537: Cluster Ready Services is online
CRS-4529: Cluster Synchronization Services is online
CRS-4533: Event Manager is online
检查Clusterware资源
[grid@rac1 ~]$ crs_stat -t -v
Name           Type           R/RA   F/FT   Target    State     Host
----------------------------------------------------------------------
ora....ER.lsnr ora....er.type 0/5    0/     ONLINE    ONLINE    rac1
ora....N1.lsnr ora....er.type 0/5    0/0    ONLINE    ONLINE    rac1
ora.OCR.dg     ora....up.type 0/5    0/     ONLINE    ONLINE    rac1
ora.asm        ora.asm.type   0/5    0/     ONLINE    ONLINE    rac1
ora.cvu        ora.cvu.type   0/5    0/0    ONLINE    ONLINE    rac1
ora.gsd        ora.gsd.type   0/5    0/     OFFLINE   OFFLINE
ora....network ora....rk.type 0/5    0/     ONLINE    ONLINE    rac1
ora.oc4j       ora.oc4j.type  0/1    0/2    ONLINE    ONLINE    rac1
ora.ons        ora.ons.type   0/3    0/     ONLINE    ONLINE    rac1
ora....SM1.asm application    0/5    0/0    ONLINE    ONLINE    rac1
ora....C1.lsnr application    0/5    0/0    ONLINE    ONLINE    rac1
ora.rac1.gsd   application    0/5    0/0    OFFLINE   OFFLINE
ora.rac1.ons   application    0/3    0/0    ONLINE    ONLINE    rac1
ora.rac1.vip   ora....t1.type 0/0    0/0    ONLINE    ONLINE    rac1
ora....SM2.asm application    0/5    0/0    ONLINE    ONLINE    rac2
ora....C2.lsnr application    0/5    0/0    ONLINE    ONLINE    rac2
ora.rac2.gsd   application    0/5    0/0    OFFLINE   OFFLINE
ora.rac2.ons   application    0/3    0/0    ONLINE    ONLINE    rac2
ora.rac2.vip   ora....t1.type 0/0    0/0    ONLINE    ONLINE    rac2
ora.scan1.vip  ora....ip.type 0/0    0/0    ONLINE    ONLINE    rac1
检查集群节点
[grid@rac1 ~]$ olsnodes -n
rac1    1
rac2    2
检查两个节点上的Oracle TNS监听器进程
[grid@rac1 ~]$  ps -ef|grep lsnr|grep -v 'grep'|grep -v 'ocfs'|awk '{print$9}'
LISTENER_SCAN1
LISTENER
确认针对Oracle Clusterware文件的Oracle ASM功能:
如果在 Oracle ASM 上安装过了OCR和表决磁盘文件,则以Grid Infrastructure 安装所有者的身份,使用给下面的命令语法来确认当前正在运行已安装的Oracle ASM:
[grid@rac1 ~]$ srvctl status asm -a
ASM is running on rac2,rac1
ASM is enabled.
十三.为数据和快速恢复区创建ASM组
只在节点rac1执行即可
进入grid用户下
[root@rac1 ~]# su - grid
利用asmca
[grid@rac1 ~]$ asmca
这里看到安装grid时配置的OCR盘已存在
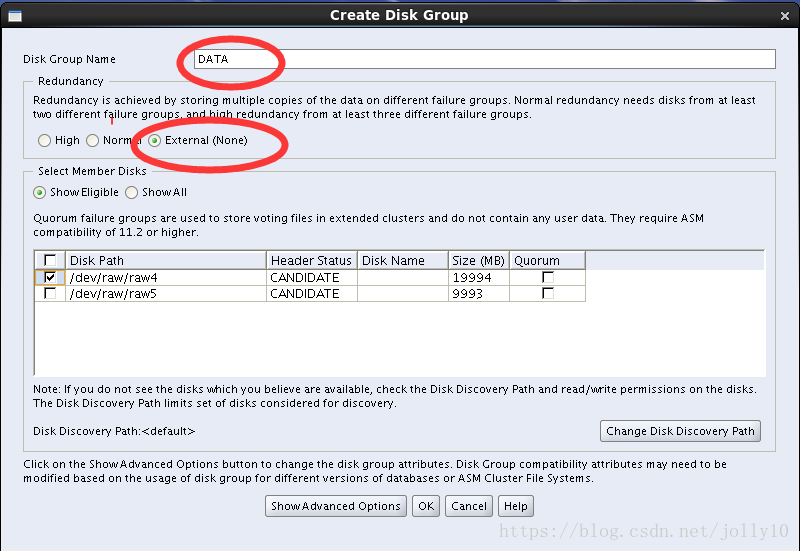
添加DATA盘,点击create,使用裸盘raw4 ,确认OK
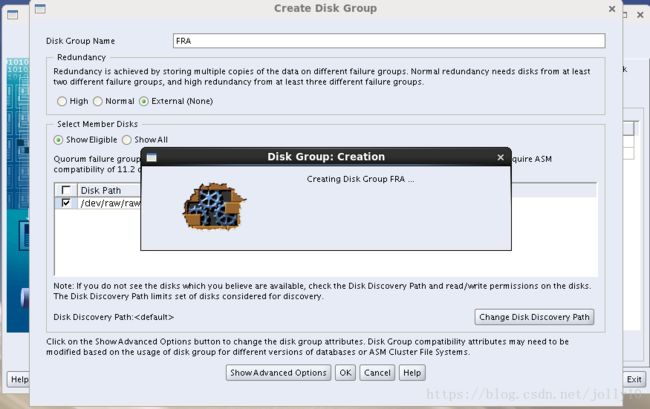
同样创建FRA盘,使用裸盘raw5
ASM磁盘组情况
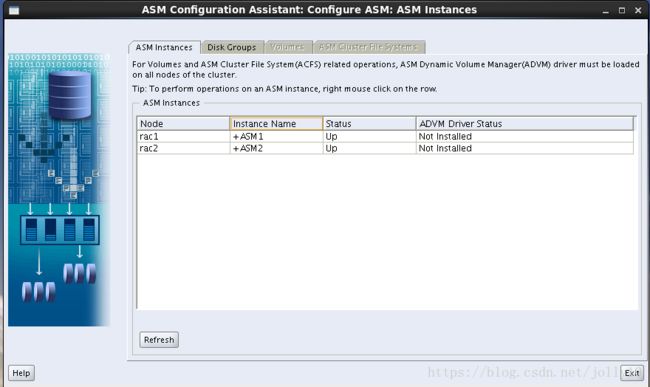
ASM实例情况:
十四.安装databasel软件
[root@rac1 ~]# su - oracle
[oracle@rac1 ~]$ cd /u01/resource/database
[oracle@rac1 database]$ ./runInstaller
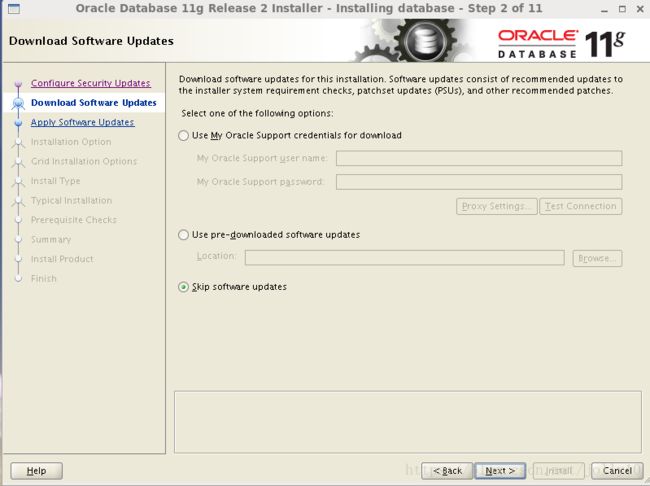
进入图形化界面,跳过更新
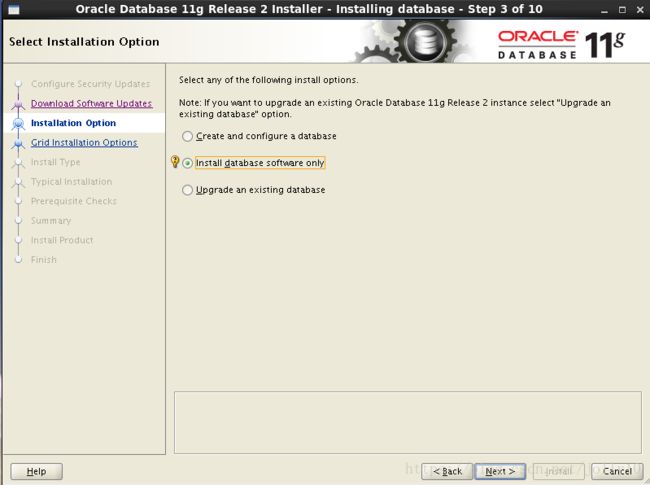
选择只安装数据库软件
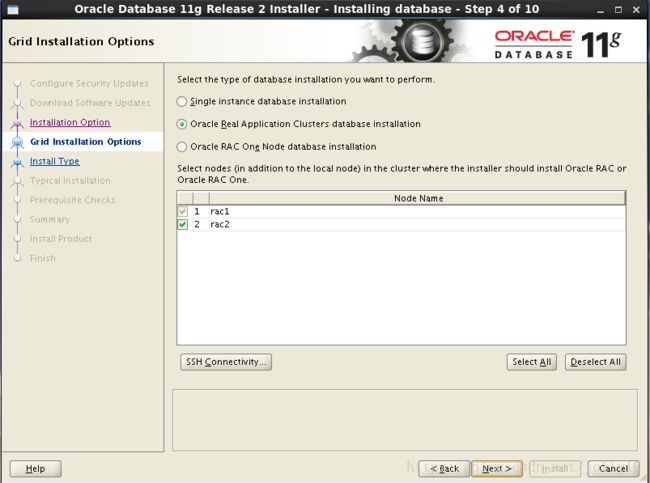
选择Oracel Real Application Clusters database installation按钮(默认),确保勾选所有的节点
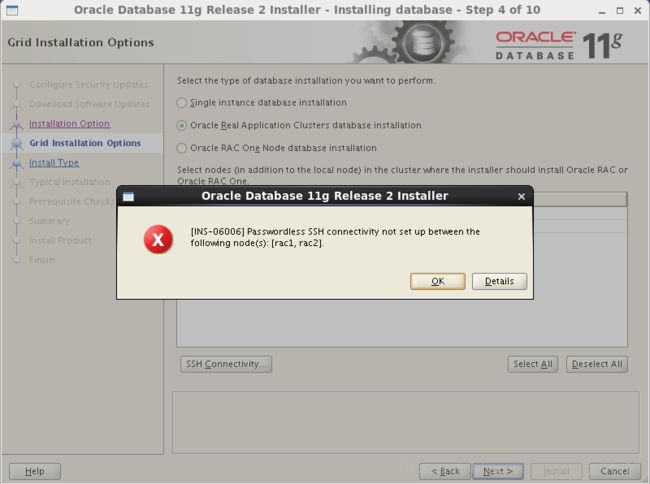
下一步会检查ssh互信是否正常,如果不正常会出现下同的提示,如果有问题检查一下ssh互信
选择语言English
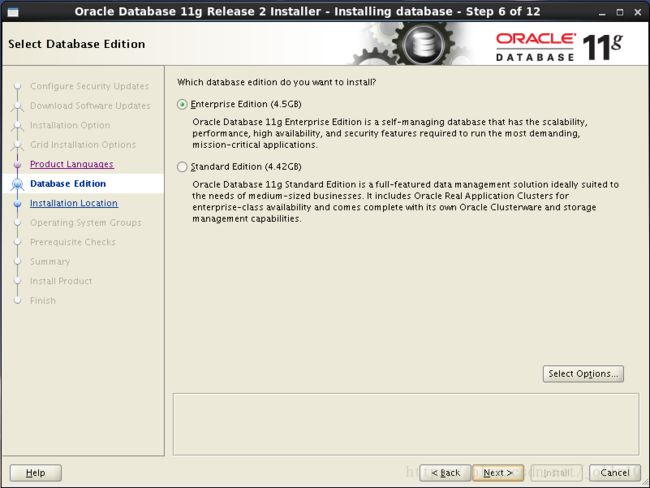
选择安装企业版软件
选择安装Oracle软件路径,其中ORACLE_BASE,ORACLE_HOME均选择之前配置好的
oracle权限授予用户组
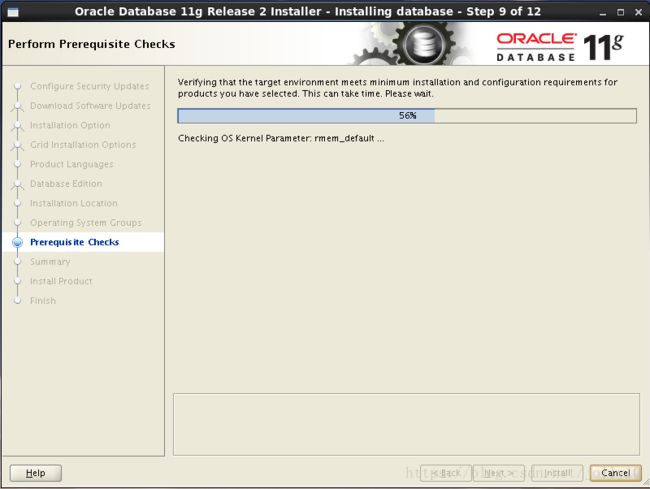
安装前的预检查
还是之前的几个错误,忽略
安装RAC的概要信息
开始安装
会自动复制到其他节点
安装完,在每个节点用root用户执行脚本
[root@rac1 ~]# sh /u01/app/oracle/product/11.2.0/db_1/root.sh
Performing root user operation for Oracle 11g

The following environment variables are set as:
    ORACLE_OWNER= oracle
    ORACLE_HOME=  /u01/app/oracle/product/11.2.0/db_1

Enter the full pathname of the local bin directory: [/usr/local/bin]:
The contents of "dbhome" have not changed. No need to overwrite.
The contents of "oraenv" have not changed. No need to overwrite.
The contents of "coraenv" have not changed. No need to overwrite.

Entries will be added to the /etc/oratab file as needed by
Database Configuration Assistant when a database is created
Finished running generic part of root script.
Now product-specific root actions will be performed.
Finished product-specific root actions.


[root@rac2 ~]# sh /u01/app/oracle/product/11.2.0/db_1/root.sh
Performing root user operation for Oracle 11g

The following environment variables are set as:
    ORACLE_OWNER= oracle
    ORACLE_HOME=  /u01/app/oracle/product/11.2.0/db_1

Enter the full pathname of the local bin directory: [/usr/local/bin]:
The contents of "dbhome" have not changed. No need to overwrite.
The contents of "oraenv" have not changed. No need to overwrite.
The contents of "coraenv" have not changed. No need to overwrite.

Entries will be added to the /etc/oratab file as needed by
Database Configuration Assistant when a database is created
Finished running generic part of root script.
Now product-specific root actions will be performed.
Finished product-specific root actions.
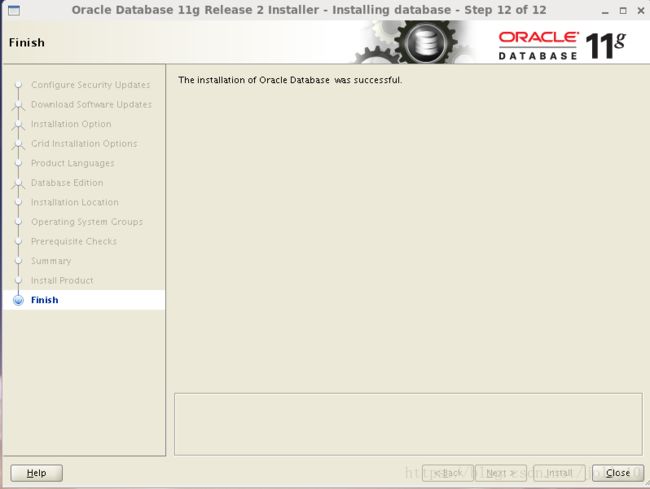
安装完成,close
十五.安装集群数据库
在节点rac1上用oracle用户执行dbca创建RAC数据库
[root@rac1 ~]# su - oracle
[oracle@rac1 ~]$ dbca
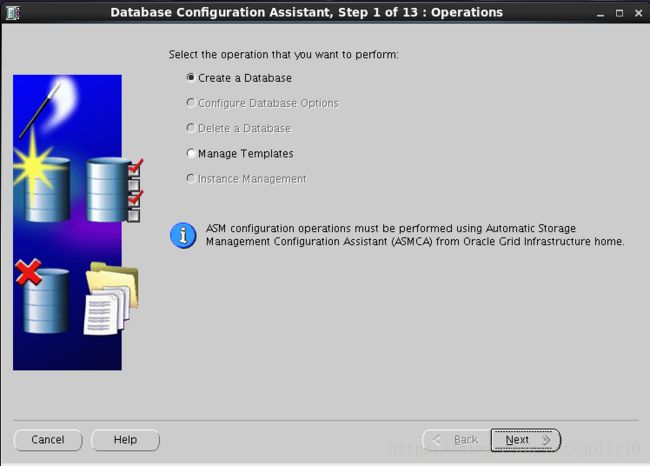
选择创建数据库
根据需要选择,可以选通用,也可以自定义数据库
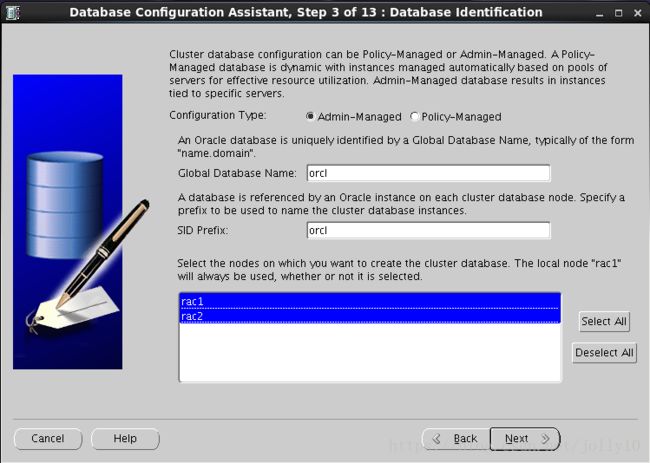
配置类型选择Admin-Managed,输入全局数据库名orcl,每个节点实例SID前缀为orcl,选择双节点
选择默认,配置OEM,启用数据库自动维护任务
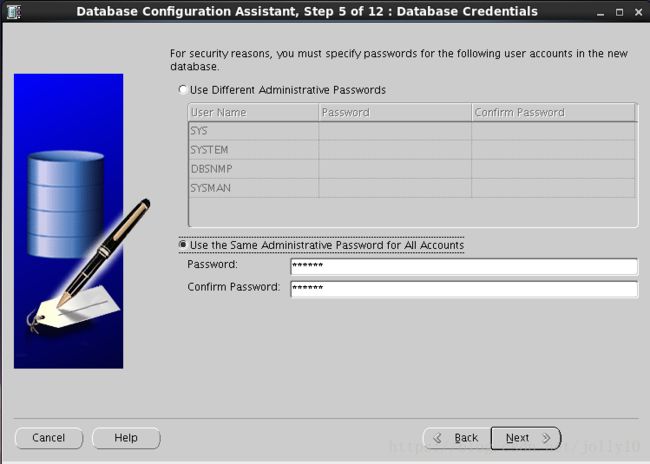
统一设置sys,system,dbsnmp,sysman用户的密码为oracle
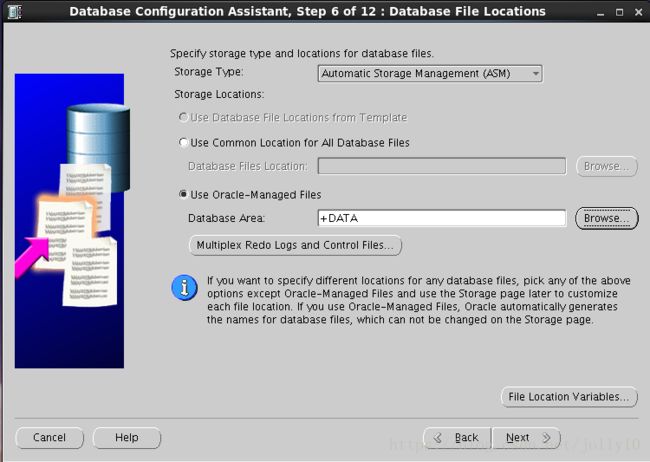
使用ASM存储,使用OMF(oracle的自动管理文件),数据区选择之前创建的DATA磁盘组
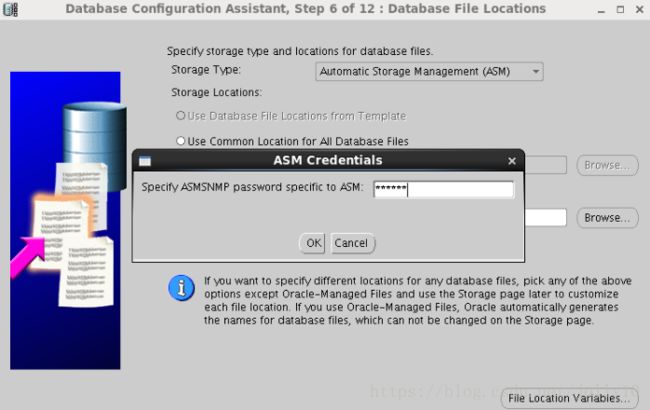
设置ASM密码为oracle
指定数据闪回区,选择之前创建好的FRA磁盘组,不开归档
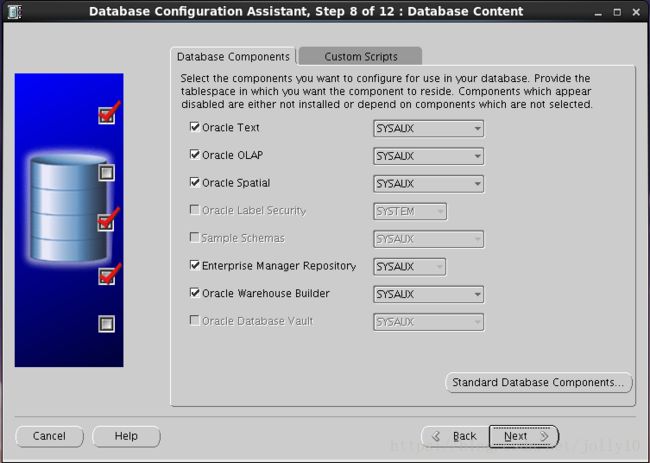
组建选择
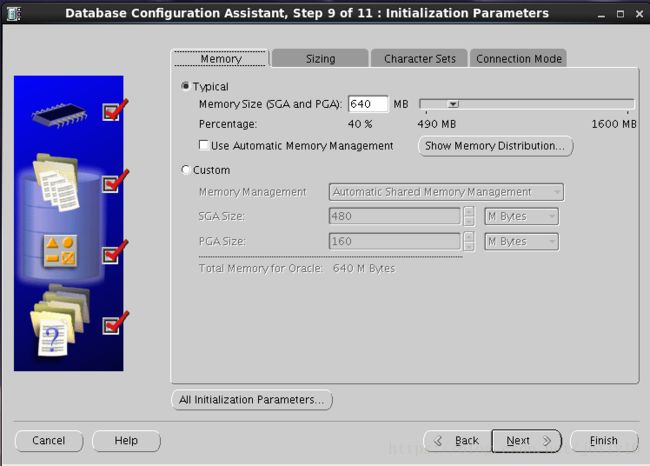
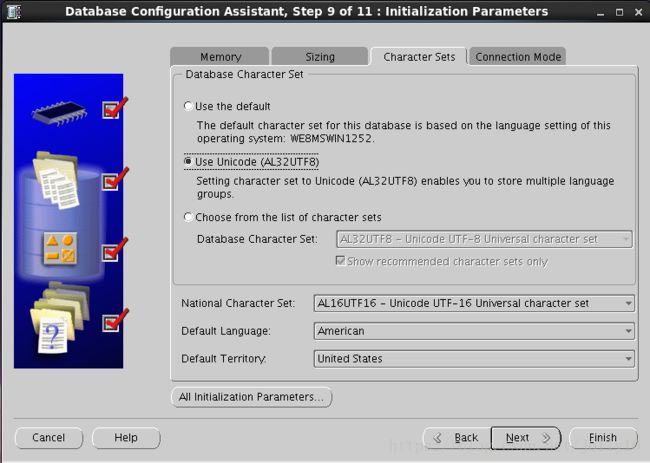
sga,block size,processes,字符集以及连接模式设置:
选择字符集AL32UTF8
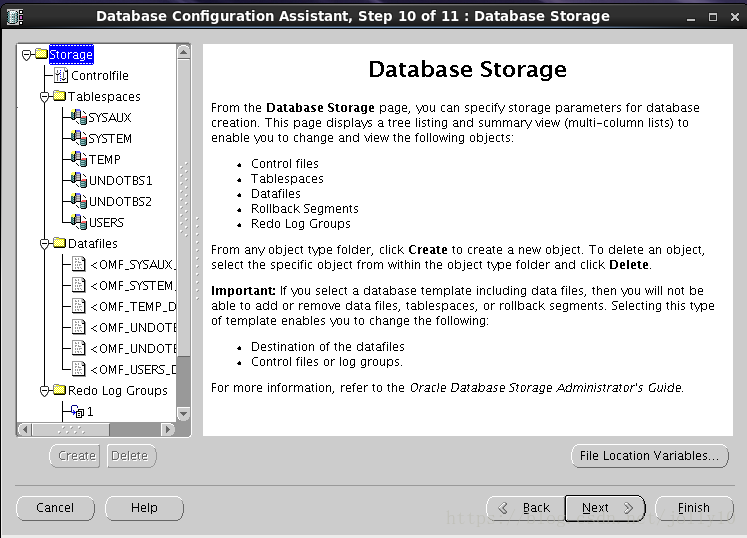
选择默认的数据存储信息
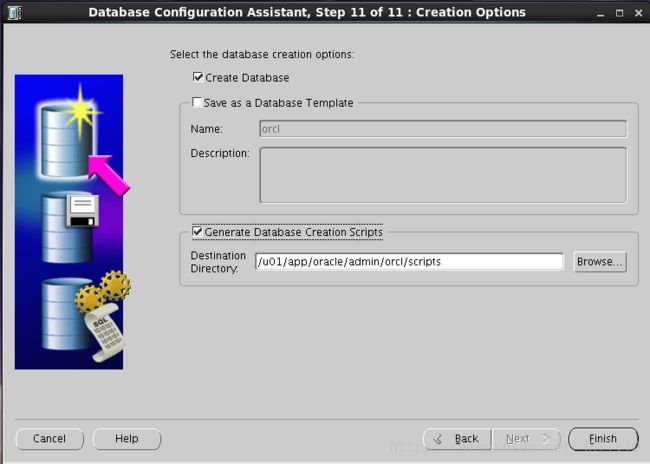
开始创建数据库,勾选生成数据库的脚本
数据库的概要信息
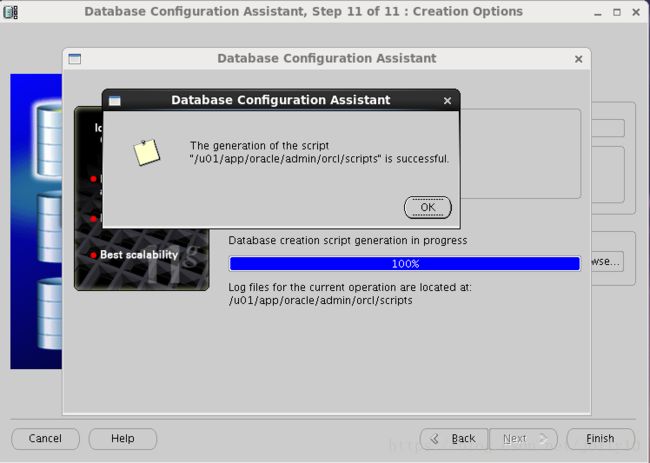
提示生成的脚本文件已生成
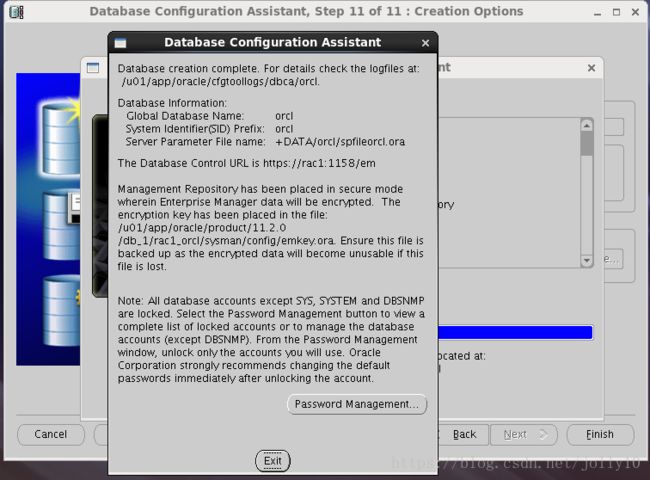
开始安装组建
快要结束时居然出现错误:
查看日志信息及trace log,提示的是cgs运行速度太慢,估计是我虚拟机的硬盘有问题,安装过程中磁盘IO全程几乎100%忙。
kjxgmpoll: CGS is running too slowly and in the middle of reconfiguration
kjxgmpoll: aborts the instance
kjxggpoll: change db group poll time to 50 ms
Error: Cluster Group Service aborts the instance
LMON caught an error 29702 in the main loop
dbca重新安装一次,这次成功了!
至此,数据库安装完成!
十六.RAC维护:
[grid@rac1 ~]$ crs_stat -t
Name           Type           Target    State     Host
------------------------------------------------------------
ora.DATA.dg    ora....up.type ONLINE    ONLINE    rac1
ora.FRA.dg     ora....up.type ONLINE    ONLINE    rac1
ora....ER.lsnr ora....er.type ONLINE    ONLINE    rac1
ora....N1.lsnr ora....er.type ONLINE    ONLINE    rac2
ora.OCR.dg     ora....up.type ONLINE    ONLINE    rac1
ora.asm        ora.asm.type   ONLINE    ONLINE    rac1
ora.cvu        ora.cvu.type   ONLINE    ONLINE    rac2
ora.gsd        ora.gsd.type   OFFLINE   OFFLINE
ora....network ora....rk.type ONLINE    ONLINE    rac1
ora.oc4j       ora.oc4j.type  ONLINE    ONLINE    rac2
ora.ons        ora.ons.type   ONLINE    ONLINE    rac1
ora.orcl.db    ora....se.type ONLINE    ONLINE    rac1
ora....SM1.asm application    ONLINE    ONLINE    rac1
ora....C1.lsnr application    ONLINE    ONLINE    rac1
ora.rac1.gsd   application    OFFLINE   OFFLINE
ora.rac1.ons   application    ONLINE    ONLINE    rac1
ora.rac1.vip   ora....t1.type ONLINE    ONLINE    rac1
ora....SM2.asm application    ONLINE    ONLINE    rac2
ora....C2.lsnr application    ONLINE    ONLINE    rac2
ora.rac2.gsd   application    OFFLINE   OFFLINE
ora.rac2.ons   application    ONLINE    ONLINE    rac2
ora.rac2.vip   ora....t1.type ONLINE    ONLINE    rac2
ora.scan1.vip  ora....ip.type ONLINE    ONLINE    rac2

不过crs_stat这个命令会逐渐被废费了,通过help查看就知道了。
[root@rac1 bin]# ./crs_stat -h
This command is deprecated and has been replaced by 'crsctl status resource'
This command remains for backward compatibility only

Usage:  crs_stat [resource_name [...]] [-v] [-l] [-q] [-c cluster_member]
        crs_stat [resource_name [...]] -t [-v] [-q] [-c cluster_member]
        crs_stat -p [resource_name [...]] [-q]
        crs_stat [-a] application -g
        crs_stat [-a] application -r [-c cluster_member]
        crs_stat -f [resource_name [...]] [-q] [-c cluster_member]
        crs_stat -ls [resource_name [...]] [-q]


用crsctl status查看crs的状态

[grid@rac1 ~]$  crsctl status resource -t
--------------------------------------------------------------------------------
NAME           TARGET  STATE        SERVER                   STATE_DETAILS
--------------------------------------------------------------------------------
Local Resources
--------------------------------------------------------------------------------
ora.DATA.dg
               ONLINE  ONLINE       rac1
               ONLINE  ONLINE       rac2
ora.FRA.dg
               ONLINE  ONLINE       rac1
               ONLINE  ONLINE       rac2
ora.LISTENER.lsnr
               ONLINE  ONLINE       rac1
               ONLINE  ONLINE       rac2
ora.OCR.dg
               ONLINE  ONLINE       rac1
               ONLINE  ONLINE       rac2
ora.asm
               ONLINE  ONLINE       rac1                     Started
               ONLINE  ONLINE       rac2                     Started
ora.gsd
               OFFLINE OFFLINE      rac1
               OFFLINE OFFLINE      rac2
ora.net1.network
               ONLINE  ONLINE       rac1
               ONLINE  ONLINE       rac2
ora.ons
               ONLINE  ONLINE       rac1
               ONLINE  ONLINE       rac2
--------------------------------------------------------------------------------
Cluster Resources
--------------------------------------------------------------------------------
ora.LISTENER_SCAN1.lsnr
      1        ONLINE  ONLINE       rac1
ora.cvu
      1        ONLINE  ONLINE       rac1
ora.oc4j
      1        ONLINE  ONLINE       rac1
ora.orcl.db
      1        ONLINE  ONLINE       rac1                     Open
      2        ONLINE  ONLINE       rac2                     Open
ora.rac1.vip
      1        ONLINE  ONLINE       rac1
ora.rac2.vip
      1        ONLINE  ONLINE       rac2
ora.scan1.vip
      1        ONLINE  ONLINE       rac1
检查集群运行状态
[grid@rac1 ~]$  srvctl status database -d orcl
Instance orcl1 is running on node rac1
Instance orcl2 is running on node rac2
检查CRS状态
[grid@rac1 ~]$ crsctl check crs
CRS-4638: Oracle High Availability Services is online
CRS-4537: Cluster Ready Services is online
CRS-4529: Cluster Synchronization Services is online
CRS-4533: Event Manager is online
检查集群的CRS状态
[grid@rac1 ~]$ crsctl check cluster
CRS-4537: Cluster Ready Services is online
CRS-4529: Cluster Synchronization Services is online
CRS-4533: Event Manager is online
查看集群中节点配置信息
[grid@rac1 ~]$ olsnodes
rac1
rac2

[grid@rac1 ~]$ olsnodes -n
rac1    1
rac2    2

[grid@rac1 ~]$ olsnodes -n -i -s -t
rac1    1       rac1-vip        Active  Unpinned
rac2    2       rac2-vip        Active  Unpinned
查看集群件的表决磁盘信息
[grid@rac1 ~]$ crsctl query css votedisk
##  STATE    File Universal Id                File Name Disk group
--  -----    -----------------                --------- ---------
 1. ONLINE   0cfad448b2f94f08bf76c028306ab659 (/dev/raw/raw1) [OCR]
Located 1 voting disk(s).
查看集群SCAN VIP信息
[grid@rac1 ~]$ srvctl config scan
SCAN name: scan-ip, Network: 1/172.17.61.0/255.255.255.0/eth0
SCAN VIP name: scan1, IP: /scan-ip/172.17.61.133
查看集群SCAN Listener信息
[grid@rac1 ~]$ srvctl config scan_listener
SCAN Listener LISTENER_SCAN1 exists. Port: TCP:1521
十七.oracle 11G rac的启动和关闭顺序
oracle 11G rac的启动和关闭顺序
参考:
https://www.linuxidc.com/Linux/2017-03/141543p8.htm
