tensorflow训练好的模型转caffe模型---2019cvpr的人脸关键点PFLD模型为例
0.前言
各个框架之间模型的转换非常重要,特别是对于模型部署来说。最近需要pfld的caffe模型来做人脸关键点检测,目前网上只有tensorflow的训练模型,我自己写出了caffe模型的prototxt文件,但是这个模型需要改写loss函数,caffe来搞这个很麻烦,因此我直接用目前的tensorflow模型来训练(我对tf网络模型和loss稍做修改,不过不改也可以),得到最终的tf模型及其参数,效果还是不错的。然后开始转caffe模型,期间查了很多资料,最主要是参考这个系列,这些资料对我帮助非常大。这个过程也走了些弯路,希望这个博客能稍微的帮助大家少走弯路。下面以转化2019cvpr的PFLD模型为例,记录我的这个半手工半自动的暴力tensorflow模型转caffe模型的过程。
转模型的主要套路如下:
1.训练好TensorFlow模型
2.读取TensorFlow模型的每一层的参数(若干的prototxt文件),并记录每一层名字的顺序(一个txt文件)。
3.写caffe模型的文件,prototxt,按照自己理解的网络模型来写。
4.将caffe模型在该写参数的地方,打断,做成一个一个的小prototxt,然后和参数们拼回一起,变成一个大的prototxt。
5.从上一步的大prototxt文件中,读出参数来,形成caffemodel文件。
6.测试caffe模型。
1.训练TensorFlow模型
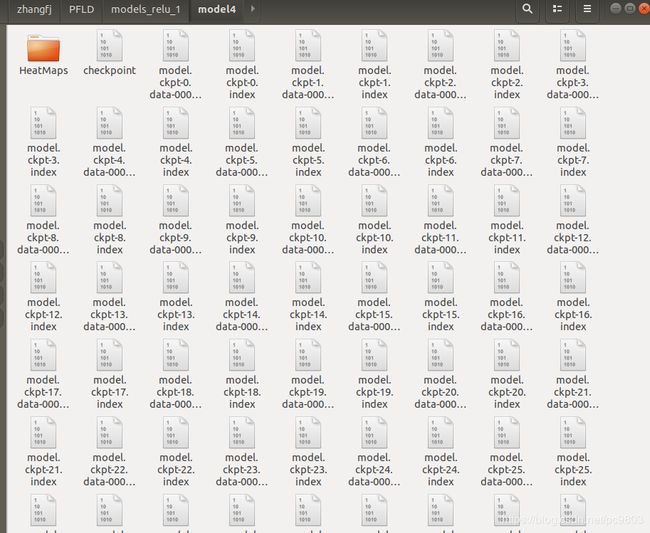
训练tensorflow模型得到的文件如下:
这里很多文件,是因为训练的时候,每一个epoch都保存一次参数文件,就很多了文件了。实际上,对于TensorFlow来说,运行一个模型,是包括4个文件,如下:
1.checkpoint:训练结果的索引,里面记录在训练不同阶段保存的模型。
2.meta文件,个记录Graph的文件,Graph记录了所有数据的流向,就是模型结构图。
3.data-00000-of-00001结构的文件,就是模型训练出来的参数图。
4.index文件,这个文件记录了数据的index,就是需要提取参数的时候,在meta文件中找到了参数名,然后通过这个index,再从训练数据文件中提取数据具体的值。
这个模型,就是从GitHub上面下载这个压缩包,然后根据GitHub上面的指导来进行训练。需要注意的是,我们的目标是转为caffe模型,因此需要对caffe层有一点点了解,不然会走弯路。caffe里面是没有relu6这个激活函数的,而pfld的主体网络mobilenetV2是用了relu6,因此我的方法是在caffe中用relu代替relu6,同时在TensorFlow模型中把relu6都改为relu,然后再训练参数(我试过没有改的,转到caffe之后,就是输出都为几千几万的值,这么大的原因大家都应该可以猜到吧)。另外,tf的BN层和caffe的BN层是不同的,tf的bn就是一个函数,及其函数的一些设置(具体可以查源码)。tf转出来的参数有三个:beta、moving_mean,moving_variance,因为我没设置bn的scale,因此默认为false,就没有gamma参数,这个是缩放的比例,对于本网络来说,可有可无吧,我后续用1来代替gamma,不缩放就是1 。caffe测试模型的bn层分为两个函数:bn和scale,在网络中各种需要的参数为:
bn[0]:mean: batch*1维;
bn[1]:variance: batch*1维;
bn[2]:decay:1*1维 ,这个就是训练时候的衰减,才测试时候没有用,但是需要有;
scale[0]:gamma: batch*1维,缩放,可全部置1,可在rf中训练出来;
scale[1]:beta: batch*1维; 平移,tf本来就训练出来了;
另外,对mobilenet的深度可分离卷积,在tf和caffe中的转换关系,和一般卷积是不同的,可以是因为比较具体看后续代码。主要tf和cf的差异就上面三个,前面两个让我走了些弯路,需要注意一下,最后一个我比较早的察觉到,没造成太大的影响。
2.读取TensorFlow模型的每一层的参数
这个是通过tf自带的函数,读出每一层的参数,并记录在一个个prototxt中,另外按顺序print出每一层的名字,然后自己copy成一个记录的index.txt文件,名字和顺序都很重要。读取的代码如下,注释和一些细节都写在里面了,主体是网上复制来的,再加上修改和注释。
#coding=utf-8
import tensorflow as tf
import numpy as np
CKPT_MODEL_SAVE_PATH = '../models_relu/model4/'
with tf.Session() as sess:
    new_saver = tf.train.import_meta_graph(CKPT_MODEL_SAVE_PATH + "model.meta")
    new_saver.restore(sess, tf.train.latest_checkpoint(CKPT_MODEL_SAVE_PATH))
	#new_saver.restore(tf.get_default_session(), "./model.ckpt-21")#这个读取方式,没上面的方式好
    for var in tf.trainable_variables():  # get the param names
	    print (var.name)#看看tf原始记录的名字是什么
    all_vars = tf.trainable_variables()
    for v in all_vars:
        name = v.name
        fname = name + '.prototxt'
        fname = fname.replace('/', '_')
        fname = fname.replace(':0', '')
        fname = './relu_layer/' + fname
        gamma_name = name + 'gamma.prototxt'
        gamma_name = gamma_name.replace('/', '_')
        gamma_name = gamma_name.replace(':0', '')
        gamma_name = './relu_layer/' + gamma_name
        print (fname)#顺序打印出每一层对应的prototxt文件的名字
        v_4d = np.array(sess.run(v))
            # 维度为4的是卷积层权重
        if v_4d.ndim == 4:
                # v_4d.shape [ H, W, I, O ]
                # 将TensorFlow的维度顺序变换 因为两个框架之间对卷积的处理顺序不一致
                # 使用numpy的swapaxes函数进行顺序变换
            v_4d = np.swapaxes(v_4d, 0, 2)  # swap H, I
            v_4d = np.swapaxes(v_4d, 1, 3)  # swap W, O
            if 'depthwise' not in fname:
                v_4d = np.swapaxes(v_4d, 0, 1)  # swap I, O #深度可分离卷积的话,不转这个,这个网上资料很可能会忽略这个
                # v_4d.shape [ O, I, H, W ]
            f = open(fname, 'w')
            vshape = v_4d.shape[:]
            v_1d = v_4d.reshape(v_4d.shape[0] * v_4d.shape[1] * v_4d.shape[2] * v_4d.shape[3])
            f.write('  blobs {\n')
            for vv in v_1d:
                f.write('    data: %8f' % vv)
                f.write('\n')
            f.write('    shape {\n')
            for s in vshape:
                f.write('      dim: ' + str(s))
                f.write('\n')
            f.write('    }\n')
            f.write('  }\n')
            # 维度为1的是偏置项(包含卷积与全连接层)
        elif v_4d.ndim == 1:
            f = open(fname, 'w')
                # conv/fc 这个参数可以自行更改 根据TensorFlow训练代码的name更改
                # 这里加个if的目的是区分卷积层与全连接层
                # 如果是卷积层 就加上caffe的模板格式
            if 'conv' in fname:
                f.write('  blobs {\n')
                for vv in v_4d:
                    f.write('    data: %.8f' % vv)
                    f.write('\n')
                f.write('    shape {\n')
                f.write('      dim: ' + str(v_4d.shape[0]))  # print dims
                f.write('\n')
                f.write('    }\n')
                f.write('  }\n')
                # 如果是全连接层就直接写入权重文件(反正就是个矩阵)#这个是远作者的,不经过这一步
            elif 'fc' in fname:
                f.write('  blobs {\n')
                for vv in v_4d:
                    f.write('    data: %.8f\n' % vv)
                f.write('    shape {\n')
                f.write('      dim: ' + str(v_4d.shape[0]))  # print dims
                f.write('\n')
                f.write('    }\n')
                f.write('  }')
            if 'BatchNorm_moving_variance' in fname:
                print (gamma_name)#如果是bn层的话,就多数值是1的gamma参数,并打印名字
                f1 = open(gamma_name, 'w')
                f1.write('  blobs {\n')
                for vv in v_4d:
                    f1.write('    data: 1')
                    f1.write('\n')
                f1.write('    shape {\n')
                f1.write('      dim: ' + str(v_4d.shape[0]))  # print dims
                f1.write('\n')
                f1.write('    }\n')
                f1.write('  }')
                f1.close()
            # 维度为2的是全连接层的权重
        elif v_4d.ndim == 2:
            f = open(fname, 'w')
            vshape = v_4d.shape[:]
            v_4d = np.swapaxes(v_4d, 0, 1)  # swap I, O ,tf和cf不同之处
            v_1d = v_4d.reshape(v_4d.shape[0] * v_4d.shape[1])
            f.write('  blobs {\n')
            for vv in v_1d:
                f.write('    data: %8f\n' % vv)
            f.write('    shape {\n')
            f.write('      dim: ' + str(v_4d.shape[0]))  # print dims
            f.write('\n')
            f.write('      dim: ' + str(v_4d.shape[1]))  # print dims
            f.write('\n')
            f.write('    }\n')
            f.write('  }')
        else:
            print (v_4d.ndim)#打印一下,防止有些层忽略了
        f.close()
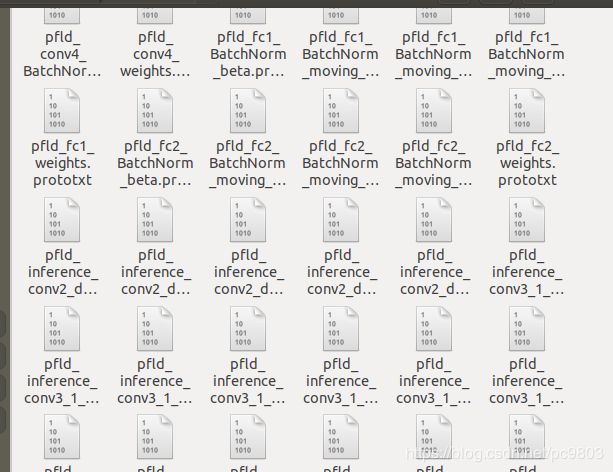
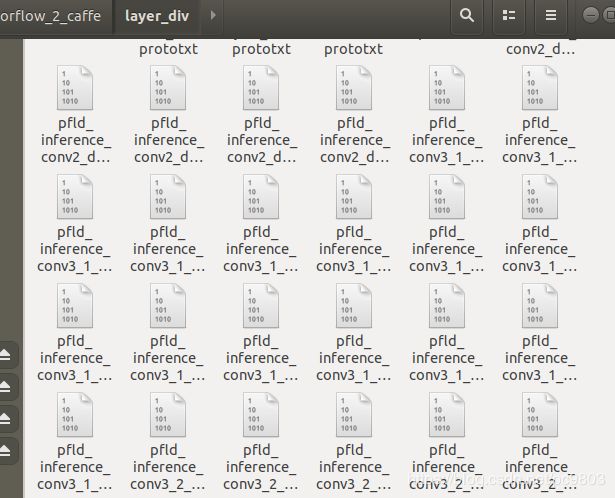
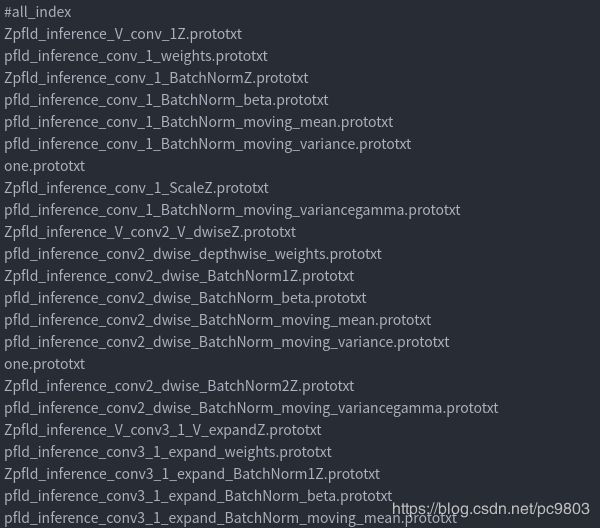
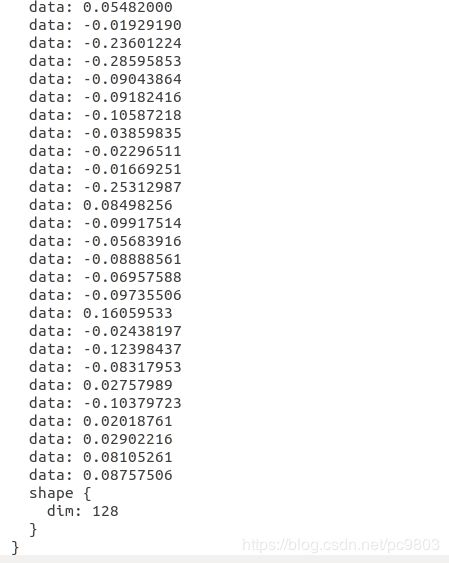
下面是成的index.txt和部分小prototxt文件的截图,每一个小prototxt文件,就包含一个layer的参数,也就是一个blobs:
3.写caffe模型的文件,prototxt
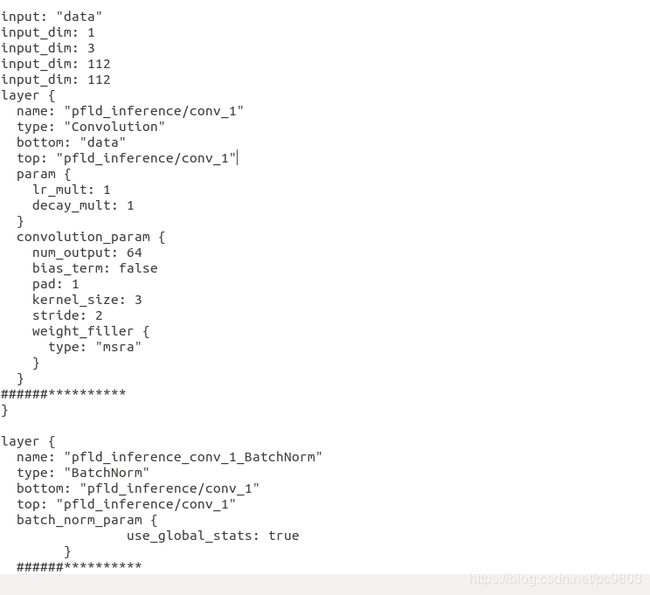
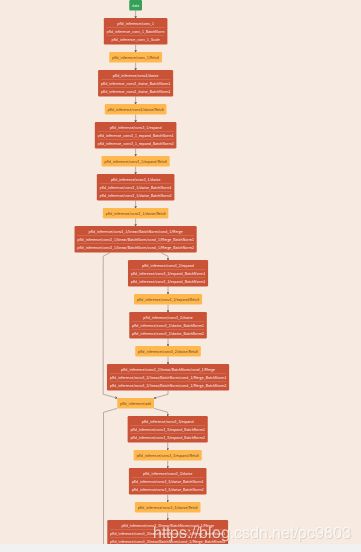
这个我还没想到什么捷径,目前就是手动的写这个网络,没什么完美脚本之类的。这一步较为耗时,但并不算很难,通过看论文和tf模型,理解了模型就好,我以前从来没搞过caffe,也能摸索从来。下面是这个写出来的文件的截图和可视化的截图。
4.模型和参数,拼接成一个大的prototxt文件
现在我们的目标是,做一个包含模型也包含参数的prototxt文件,就是在上面的模型prototxt文件中的######**********注释位置处加入该层layer的blobs参数,参数量很大,成千上万的,这里就不贴截图了。做这个大prototxt最原始暴力的方法就是直接手动将每一个blobs复制进模型的prototxt,不过对于大网络来说,这个方法不可取,太累太耗时了。
所以我用的方式是先拆开模型prototxt(拆之前保存一份,后面还要用),然后和参数小prototxt按合理的顺序拼接起来。具体来说,在上面模型prototxt文件中,在想插入blobs的位置,插入一个记录的打断位置参考,我写的就是:######**********这一串;然后写下面的拆开模型的代码,代码就是在每个参考位置,打断模型,并保存成一个小的模型prototxt;也记录这些小模型的名字,并按顺序读取上面的index.txt文件中的参数名字,和这些模型名字写成一个总的文件,我成长为all_index.txt,具体来说就当读取到模型prototxt某一块例如是conv层,那就在后面接一个参数prototxt,如果是fc层的话,就接两个这样子。还有,在合适的位置加入bn层的gamma和decay参数。下面是具体实现代码,仔细看看,并不难理解的。
# -*- coding: UTF-8 -*-

import tensorflow as tf
import numpy as np

fname = './model_var_bn.prototxt'
part_prototxt_file = './'
all_index_ = './all_index.txt'#新建一个文件夹
var_txt_ = 'index.txt'
part_name = part_prototxt_file +'ccc.prototxt'
part_typer = 'the_typer'
var_txt = open(var_txt_,'r')
all_prototxt = open(fname,'r')
all_index = open(all_index_, 'w')
part_prototxt = []
while True:
    lines = all_prototxt.readline() # 整行读取数据
    if not lines:
        f = open(part_prototxt_file+'end.prototxt', 'w')
        for i in range(len(part_prototxt)):
            f.write(str(part_prototxt[i]))
        f.close()
        part_prototxt = []
        all_index.write('end.prototxt'+'\n')
        break
    find_name = lines.strip()
    if find_name[:4] == 'name':
        part_name = str(find_name[5:]).replace('/', '_V_').strip()
        part_name = part_name.replace('"','Z')
        #part_name = part_name.rstrip('"').lstrip('"')
        part_name = part_name+'.prototxt'
    if find_name[:4] == 'type':
        part_typer = find_name[5:]
        part_typer = part_typer.strip()
        part_typer = part_typer.replace('"','')
    if find_name == "######**********":
        print(part_typer)
        print(part_name)
        f = open(part_prototxt_file+part_name, 'w')
        for i in range(len(part_prototxt)):
            f.write(str(part_prototxt[i]))
        f.close()
        part_prototxt = []
        all_index.write(part_name +'\n')
        if part_typer == 'Convolution' or  part_typer == 'msra':#part_typer == 'Scale'or
            verline = var_txt.readline() # 整行读取数据
            all_index.write(verline)
        if part_typer == 'InnerProduct'or part_typer == 'constant':
            verline = var_txt.readline() # 整行读取数据
            all_index.write(verline)
            verline = var_txt.readline() # 整行读取数据
            all_index.write(verline)
        if part_typer == 'BatchNorm':
            verline = var_txt.readline() # 整行读取数据
            all_index.write(verline)
            verline = var_txt.readline() # 整行读取数据
            all_index.write(verline)
            verline = var_txt.readline() # 整行读取数据
            all_index.write(verline)
            all_index.write('one.prototxt\n')
        if part_typer == 'Scale':
            verline = var_txt.readline() # 整行读取数据
            all_index.write(verline)
           # all_index.write('one.prototxt\n')
    else:
        part_prototxt.append(lines)
all_index.close()
var_txt.close()
all_prototxt.close()
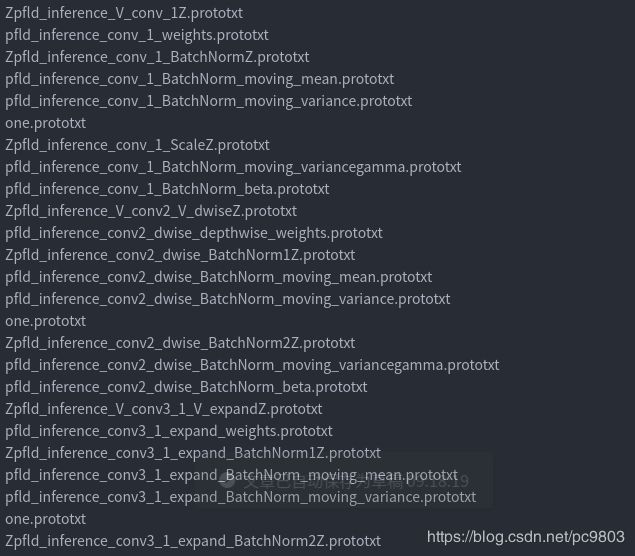
下面左图就是拆分出来的小模型prototxt,右边是结合了参数和模型名字的总的all_index文件,包括了tf转出来的参数和刚才拆开的模型,还有一两个tf没有,但caffe需要的参数(decay对应的one.prototxt等,这个文件自己写),原则上按照这个顺序拼接这些小的prototxt文件就行了。下一行的,分别是:weights、mean、one、gamma。
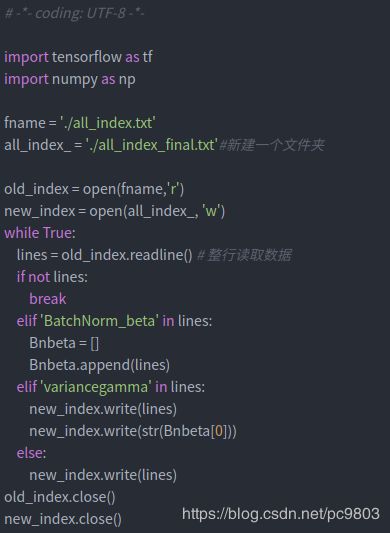
但是,就像一开始说的,tf的bn层是一个函数搞定的,cf的是两个,这里tf读取出的bn层的beta实际上应该放在caffe的gamma后面,因此需要进一步的调整一下子。原始的方法还是把这一行复制到对的位置,但能自动实现的当然就是用代码来实现,下面左图是调整位置的py文件,右图是调整之后的文件all_index_final.txt。
得到最终的合理的排列顺序all_index_final.txt之后,就是直接拼接了,运行下面脚本,就可以得到一个大的文件model_and_var.prototxt,我的例子中的这个文件体积是23.3M。
#!/bin/bash

cat all_index_final.txt |while read line
do
cat $line >>model_and_var.prototxt
done
5.从大prototxt中读取caffemodel文件
得到了上面的大的包括模型和参数的prototxt文件之后,下一步就用caffe的函数,将参数读出来,做成一个caffemodel,相应的c++代码和cmake如下,实际上这一步难点是在于配置环境和写cmake。执行代码后产生了.caffemodel我参数文件,这个就是caffe的参数文件。
#include
#include
#include
#include
#include
#include
#include
#include
#include
#include
#include
#include "caffe/common.hpp"
#include "caffe/proto/caffe.pb.h"
#include "caffe/util/io.hpp"

using namespace caffe;
using namespace std;
using google::protobuf::io::FileInputStream;
using google::protobuf::io::FileOutputStream;
using google::protobuf::io::ZeroCopyInputStream;
using google::protobuf::io::CodedInputStream;
using google::protobuf::io::ZeroCopyOutputStream;
using google::protobuf::io::CodedOutputStream;
using google::protobuf::Message;

int main()
{
	NetParameter proto;   //caffe读写函数
	ReadProtoFromTextFile("./model_and_var.prototxt", &proto);
	WriteProtoToBinaryFile(proto, "./model0826.caffemodel");

	return 0;
}
cmake_minimum_required(VERSION 3.5)
project(write_model)

set(CMAKE_CXX_FLAGS "-std=c++11 -O3 -msse3 -funroll-loops -fopenmp")
#set(CMAKE_CXX_STANDARD 14)
set(CAFFE_ROOT /home/peiwd/work/p0609/V2236H_tsa/caffe)

set(TS_SRC
		${TS_SRC}
		nms_kernel.cu
		)
set(ANACONDA_ROOT /home/infinova/anaconda2)

include_directories(${CAFFE_ROOT}/include
						${CAFFE_ROOT}/build/src
						${ANACONDA_ROOT}/include
						)
link_directories(${CAFFE_ROOT}/build/lib
					${ANACONDA_ROOT}/lib
					/usr/lib64
					)

set(LINKER_EXT_LIBS_1 ${LINKER_EXT_LIBS}
						${CAFFE_ROOT}/build/lib/libcaffe.so
						/usr/lib64/libprotobuf.so
						/usr/lib64/libglog.so
						/usr/local/lib/libboost_system.so
						)

include_directories ( /usr/local/include
    /usr/local/cuda/include
    /usr/include )

add_executable(write_model write_model.cpp)
target_link_libraries(write_model ${LINKER_EXT_LIBS_1} )
6.测试caffe模型
上面成功产生了参数文件.caffemodel,结合第3步自己手动制作的模型prototxt文件,就可以测试caffe的pfld模型了。仿照网上的很多Python测试caffe的代码写一个测试模型,看看是否成功转出caffe模型了,我用的测试图片是github上面的tensorflow版pfld模型对应的处理过的测试图片。需要注意的是,不是随便拿一张图片去测试就可以得到好的结果的,因为实际上对于一般的原始图,是需要先经过人脸检测网络,按一定的比例把人脸部分扣出来,这个比例理论的最佳值是多少,这个说不清楚,具体可以看看github文件中的camera.py,这个测试就是针对一般图片的了。下面是两张效果图,左边的是训练出来的tf模型测试效果图,右边的是转出来的caffe模型测试效果图,可以看出来,效果还是有一定程度的打折的,具体原因和解决方法,我最近真在想和查资料。
下面是对于处理过后的测试集的图进行预测的代码,也就是上图对应的代码:
import caffe
import cv2
import numpy as np
path_prototxt="/home/zhangfj/Desktop/test_pfld/model_var_bn.prototxt"
path_caffemodel="/home/zhangfj/Desktop/test_pfld/model0826.caffemodel"
gpu_id = -1
img_path = '/home/zhangfj/Desktop/test_pfld/'
img_name = '13_31_Waiter_Waitress_Waiter_Waitress_31_36_0.png'
img_save = 'save.png'

net = caffe.Net(path_prototxt, path_caffemodel, caffe.TEST)
image = caffe.io.load_image(img_path+img_name)
transformer = caffe.io.Transformer({'data': net.blobs['data'].data.shape})
transformer.set_transpose('data', (2, 0, 1))
transformer.set_raw_scale('data', 1)
transformer.set_channel_swap('data', (2, 1, 0))
transformed_image = transformer.preprocess('data', image)
net.blobs['data'].data[...] = transformed_image
print(image.shape)
print(image)
detections = net.forward()['pfld_inference/landmarks']
print(detections)
image1 = cv2.imread(img_path+img_name)
h, w, _ = image1.shape
print(h)
print(w)
pre_landmark = detections.reshape(-1, 2) * [h, w]
print(pre_landmark)
for (x, y) in pre_landmark.astype(np.int32):
    cv2.circle(image1, (x, y), 1, (0, 0, 255))
cv2.imwrite(img_path+img_save, image1)
对于原始的没有处理过的图,参考github作者的camera.py中截取人脸部分,和上述代码,即可写出人脸关键点检测的代码。利用这些关键点,还可以集合opencv的pnp算法,进行人脸欧拉角等的计算。
后记:
模型之间的转化,迟早会有一个很好用的各个模型之间的一键转换工具的,只是现在还不是特别够用,例如我上述的tf转cf,所以目前还是需要一下半自动半手动的方法来转,这算是目前的情况下的一种“权宜之计”,迟早会被取代的。目前的mmdnn就是一个很牛逼的多框架模型转换工具了,正在一步步扩展其“业务范围”,有望很快可以完美覆盖绝大部分框架。
另外在博客的开头,我称这个过程为半手工半自动的暴力tensorflow模型转caffe模型过程,手工是指自己写caffe模型的prototxt文件和手动标记打断点等,自动是用一些上述的脚本来操作,暴力是指强行通过看论文和tf代码来写出caffe模型。可以看出,这个过程最大的可改进的地方,就是可以自动且优雅的写出对应的caffe模型,这个也是正在思考和查资料。
参考资料:
https://github.com/guoqiangqi/PFLDgithub链接
https://blog.csdn.net/jiongnima/article/details/78435500
https://www.cnblogs.com/Peyton-Li/p/10797002.html
