Unity实战篇:使用图片制作自己的艺术字
本篇博客我将和大家一起从零开始根据图片制作自己的艺术字(不包括汉字)
准备工作:
- BMFront http://www.angelcode.com/products/bmfont/
- 编写艺术字体生成工具
//------------------------------------------------------------
// Author: 烟雨迷离半世殇
// Mail: [email protected]
// Data: 2019年4月23日 21:24:10
//------------------------------------------------------------

using UnityEngine;
using UnityEditor;
using System.Collections.Generic;
using System.IO;
using Path = PF.Path;

namespace ETEditor
{
    public class BMFontEditor: EditorWindow
    {
        public TextAsset fontPosTbl;
        public Texture fontTexture;
        public Vector2 scrollPos;

        struct ChrRect
        {
            public int id;
            public int x;
            public int y;
            public int w;
            public int h;
            public int xofs;
            public int yofs;

            public int index;
            public float uvX;
            public float uvY;
            public float uvW;
            public float uvH;
            public float vertX;
            public float vertY;
            public float vertW;
            public float vertH;
            public float width;
        }

        // add menu
        [MenuItem("Tools/自定义字体生成工具")]
        static void Init()
        {
            EditorWindow.GetWindow(typeof (BMFontEditor));
        }

        // layout window
        void OnGUI()
        {
            EditorGUILayout.BeginVertical();
            EditorGUILayout.LabelField("图集导出文件部分(如果字体相关资源已经准备完毕,请忽略这一部分)", EditorStyles.label);
            if (GUILayout.Button("在Project视图选中要导出文件的图集,然后点击此按钮"))
            {
                this.ProcessToSprite();
            }
            EditorGUILayout.Space();
            EditorGUILayout.Space();
            EditorGUILayout.Space();
            EditorGUILayout.LabelField("正式生成艺术字部分", EditorStyles.label);

            fontTexture = (Texture) EditorGUILayout.ObjectField("选择BMFont生成的png文件", fontTexture, typeof (Texture), false);

            EditorGUILayout.Space();

            EditorGUILayout.LabelField("选择BMFont生成的fnt文件", EditorStyles.label);

            fontPosTbl = (TextAsset) EditorGUILayout.ObjectField("    ", fontPosTbl, typeof (TextAsset), false);
            if (GUILayout.Button("开始生成字体"))
            {
                if (fontTexture == null) this.ShowNotification(new GUIContent("No Font Texture selected"));
                else if (fontPosTbl == null) this.ShowNotification(new GUIContent("No Font Position Table file selected"));
                else
                {
                    CalcChrRect(fontPosTbl, fontTexture);
                }
            }

            EditorGUILayout.EndVertical();
        }

        private void ProcessToSprite()
        {
            Texture2D image = Selection.activeObject as Texture2D;//获取选择的对象

            string rootPath = System.IO.Path.GetDirectoryName(AssetDatabase.GetAssetPath(image));//获取路径名称

            string path = rootPath + "/" + image.name + ".PNG";//图片路径名称

            TextureImporter texImp = AssetImporter.GetAtPath(path) as TextureImporter;//获取图片入口


            AssetDatabase.CreateFolder(rootPath, image.name);//创建文件夹


            foreach (SpriteMetaData metaData in texImp.spritesheet)//遍历小图集
            {
                Texture2D myimage = new Texture2D((int)metaData.rect.width, (int)metaData.rect.height);

                for (int y = (int)metaData.rect.y; y < metaData.rect.y + metaData.rect.height; y++)//Y轴像素
                {
                    for (int x = (int)metaData.rect.x; x < metaData.rect.x + metaData.rect.width; x++)
                        myimage.SetPixel(x - (int)metaData.rect.x, y - (int)metaData.rect.y, image.GetPixel(x, y));
                }


                if(myimage.format != TextureFormat.ARGB32 && myimage.format != TextureFormat.RGB24){
                    Texture2D newTexture = new Texture2D(myimage.width, myimage.height);
                    newTexture.SetPixels(myimage.GetPixels(0),0);
                    myimage = newTexture;
                }
                var pngData = myimage.EncodeToPNG();

                File.WriteAllBytes(rootPath + "/" + image.name + "/" + metaData.name + ".PNG", pngData);
                // 刷新资源窗口界面
                AssetDatabase.Refresh();
            }
        }

        void OnInspectorUpdate()
        {
            this.Repaint();
        }

        void CalcChrRect(TextAsset posTbl, Texture tex)
        {
            string fileName = AssetDatabase.GetAssetPath(fontPosTbl);
            string texName = AssetDatabase.GetAssetPath(tex);
            string fontName = System.IO.Path.GetFileNameWithoutExtension(fileName);
            string fontPath = fileName.Replace(".fnt", ".fontsettings");
            string matPath = fileName.Replace(".fnt", ".mat");
            float imgw = tex.width;
            float imgh = tex.height;
            string txt = posTbl.text;

            List tblList = new List();
            foreach (string line in txt.Split('\n'))
            {
                if (line.IndexOf("char id=") == 0)
                {
                    ChrRect d = GetChrRect(line, imgw, imgh);
                    tblList.Add(d);
                }
            }

            if (tblList.Count == 0)
            {
                new GUIContent("Failed");
                return;
            }

            ChrRect[] tbls = tblList.ToArray();
            Font font = new Font();
            font.name = fontName;
            SetCharacterInfo(tbls, font);

            Material mat = new Material(Shader.Find("UI/Default"));
            mat.mainTexture = tex;
            mat.name = fontName;
            font.material = mat;

            Debug.Log(System.IO.Path.GetFileNameWithoutExtension(fileName));
            Debug.Log(fileName);

            AssetDatabase.CreateAsset(mat, matPath);
            AssetDatabase.CreateAsset(font, fontPath);
            AssetDatabase.SaveAssets();
            this.ShowNotification(new GUIContent("Complete"));
            AssetDatabase.Refresh(ImportAssetOptions.ForceUpdate);
        }

        // over write custom font by new CharacterInfo
        void SetCharacterInfo(ChrRect[] tbls, Font fontObj)
        {
            CharacterInfo[] nci = new CharacterInfo[tbls.Length];
            for (int i = 0; i < tbls.Length; i++)
            {
                nci[i].index = tbls[i].index;
                nci[i].advance = (int) tbls[i].width;
                nci[i].uv.x = tbls[i].uvX;
                nci[i].uv.y = tbls[i].uvY;
                nci[i].uv.width = tbls[i].uvW;
                nci[i].uv.height = tbls[i].uvH;
                nci[i].vert.x = tbls[i].vertX;
                nci[i].vert.y = tbls[i].vertY;
                nci[i].vert.width = tbls[i].vertW;
                nci[i].vert.height = tbls[i].vertH;
            }

            fontObj.characterInfo = nci;
        }

        // get font table one line. 重点在这
        ChrRect GetChrRect(string line, float imgw, float imgh)
        {
            ChrRect d = new ChrRect();

            foreach (string s in line.Split(' '))
            {
                if (s.IndexOf("id=") >= 0) d.id = GetParamInt(s, "id=");
                else if (s.IndexOf("x=") >= 0) d.x = GetParamInt(s, "x=");
                else if (s.IndexOf("y=") >= 0) d.y = GetParamInt(s, "y=");
                else if (s.IndexOf("width=") >= 0) d.w = GetParamInt(s, "width=");
                else if (s.IndexOf("height=") >= 0) d.h = GetParamInt(s, "height=");
                else if (s.IndexOf("xoffset=") >= 0) d.xofs = GetParamInt(s, "xoffset=");
                else if (s.IndexOf("yoffset=") >= 0) d.yofs = GetParamInt(s, "yoffset=");
                else if (s.IndexOf("xadvance=") >= 0) d.width = GetParamInt(s, "xadvance=");
            }

            d.index = d.id;
            d.uvX = d.x / imgw;
            d.uvY = (imgh - (d.y)) / imgh;
            d.uvW = d.w / imgw;
            d.uvH = -d.h / imgh;
            d.uvH = d.h / imgh;

            d.vertX = d.xofs;
            d.vertY = -d.yofs;
            d.vertW = d.w;
            d.vertH = d.h;

            return d;
        }

        int GetParamInt(string s, string wd)
        {
            if (s.IndexOf(wd) >= 0)
            {
                int v;
                if (int.TryParse(s.Substring(wd.Length), out v)) return v;
            }

            return int.MaxValue;
        }
    }
}
正式开始
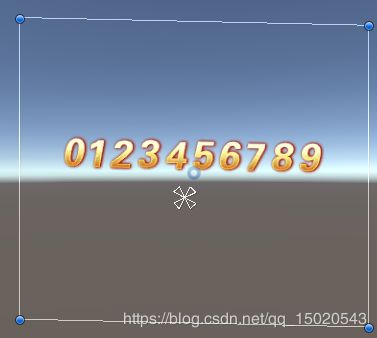
选择要制作字体的图片,并分割好sprites


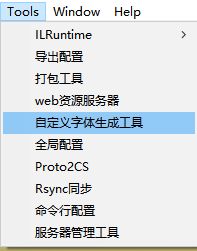
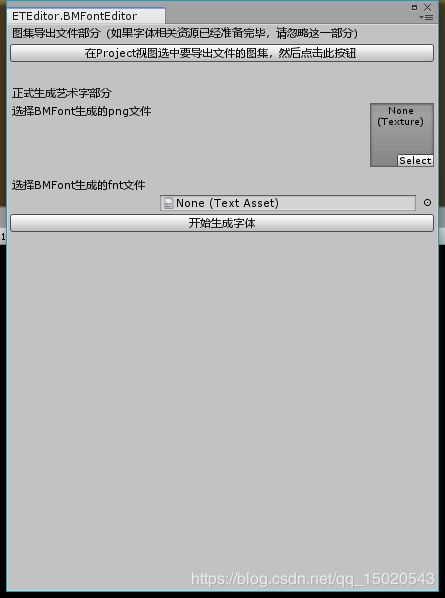
打开自定义字体生成工具,根据说明生成图集文件
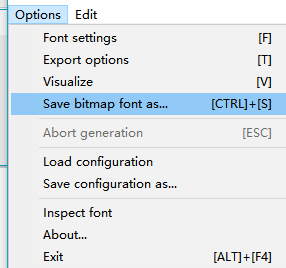
打开BMFront工具


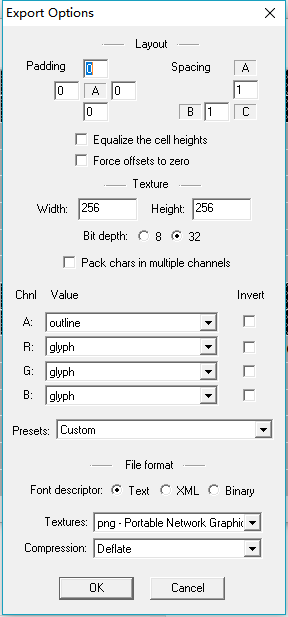


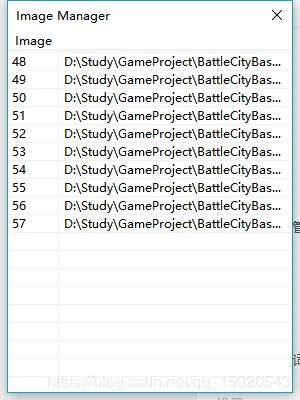
注意填写图片对应的Ascall码,0-48,1-49.。。。以此类推,不知道的可以百度,按照表对着填


全部填写完毕
打开Unity

这时候我们要修改一下BMFront生成的位图文件
如下(不要问我为什么,因为我也不知道)

因为我们使用了镜像模式,所以y轴的值需要翻转,修改翻转y轴的值(原本是37,这里要改成-37)

再打开自定义字体生成工具,根据说明添加png和fnt文件
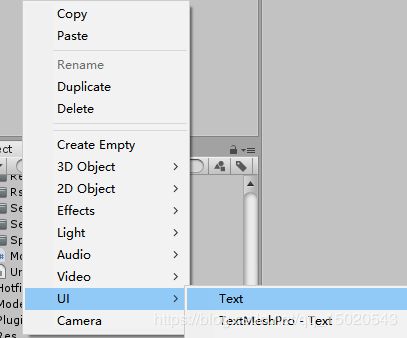
在场景新建Text
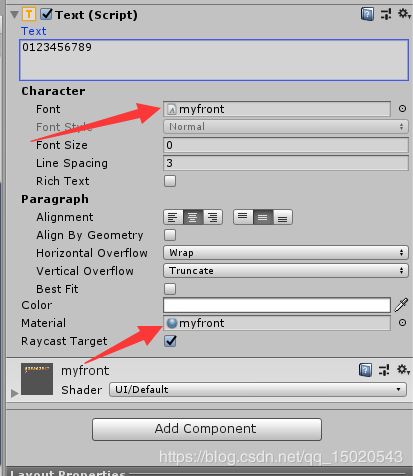
OK